Overview
There must be various room types for every owner. And to add room types is the first step to manage the reservations. We need to learn to add/delete room types. If there are some changes in the room assignment, we can also make it.
Add A Room Type:
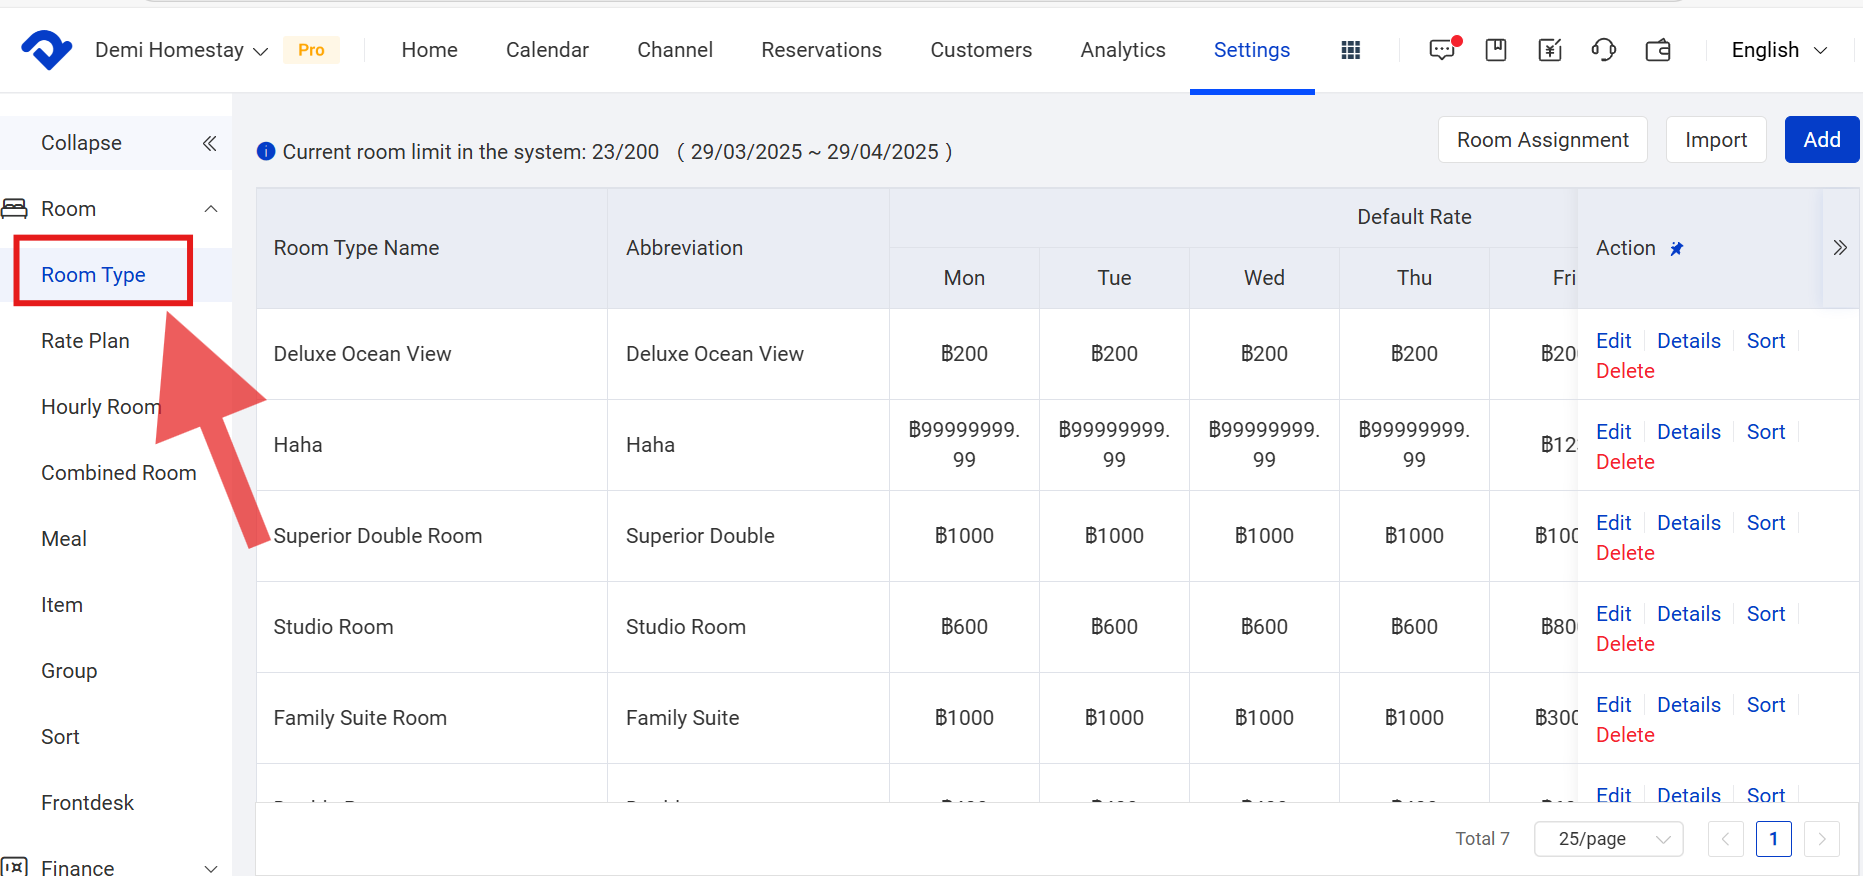
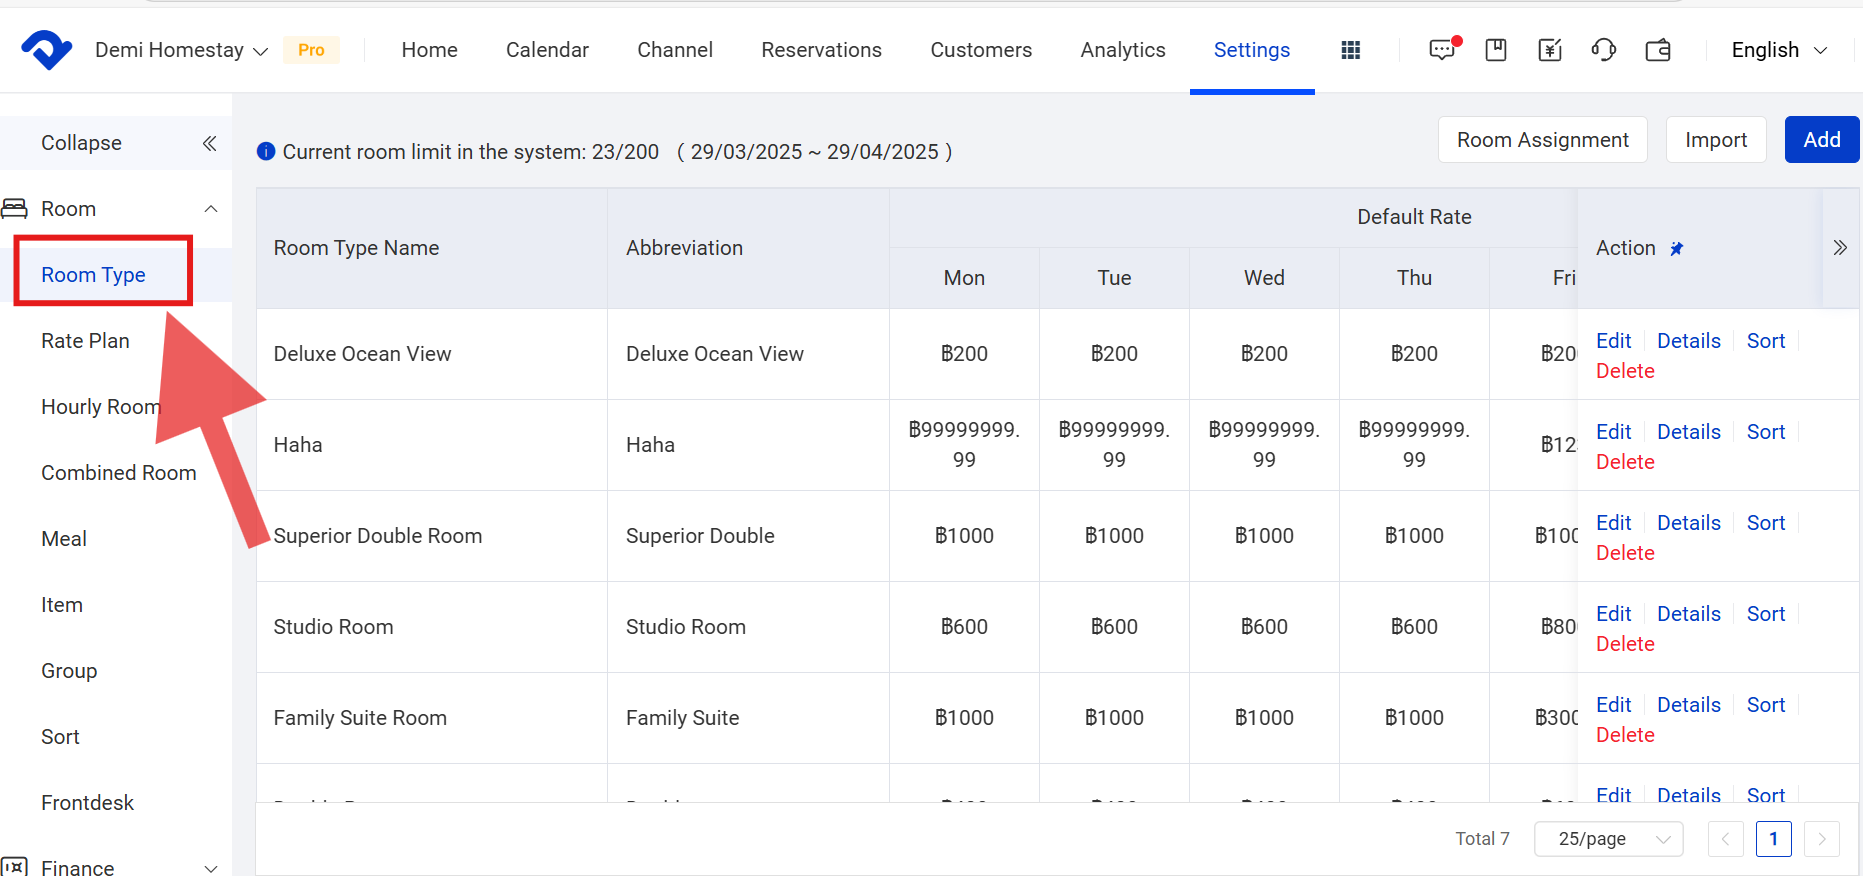
Step1: Go to the Settings page and select the Room Type under the Room drop-down list.
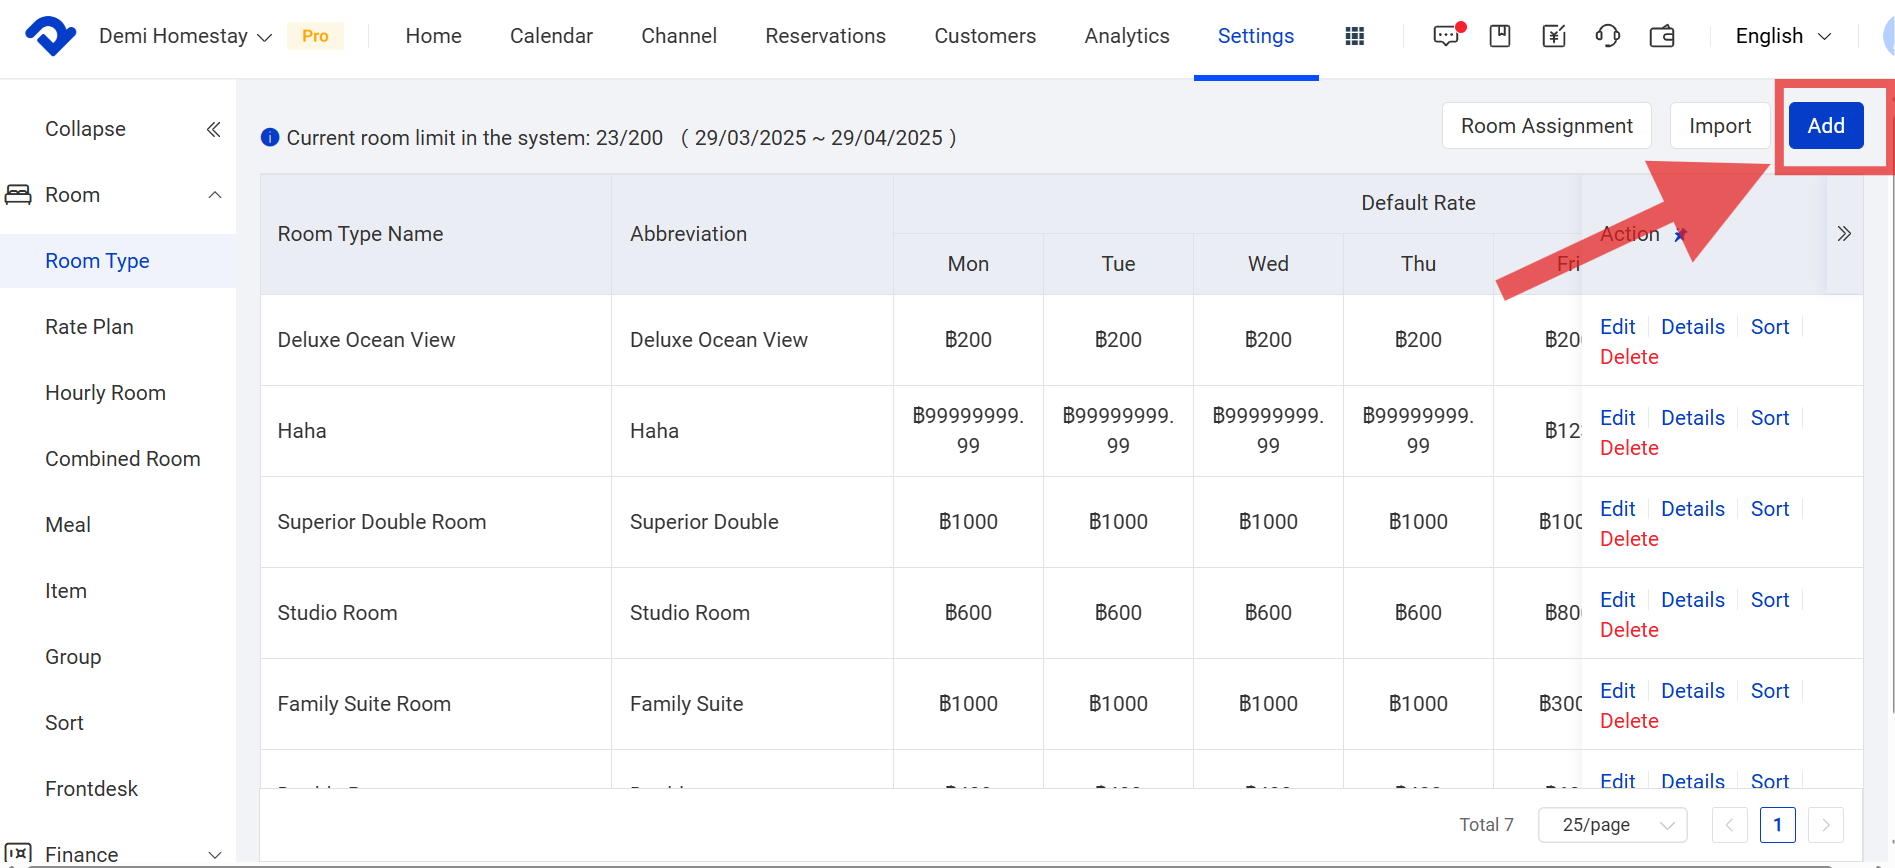
Step2: Select Add in the top-right corner of the page.
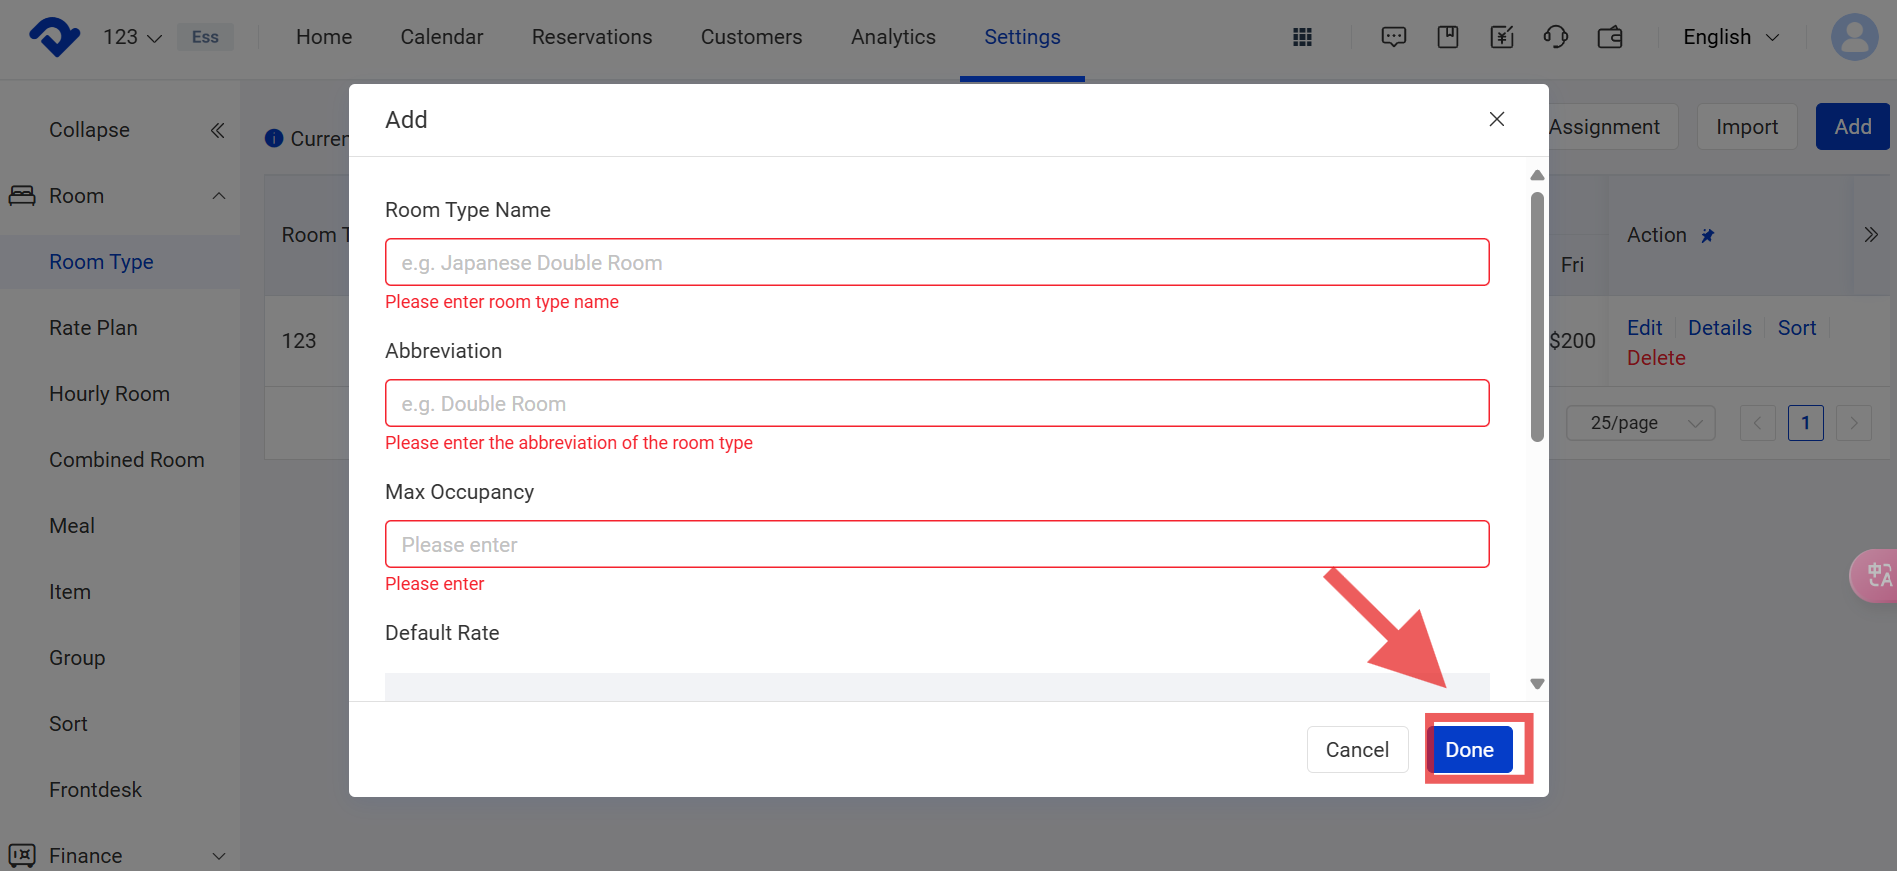
Step3: Fill in the Room Type Name, Abbreviation, Max Occupancy, Default Rate and Room Number. Click Done.

Note1:
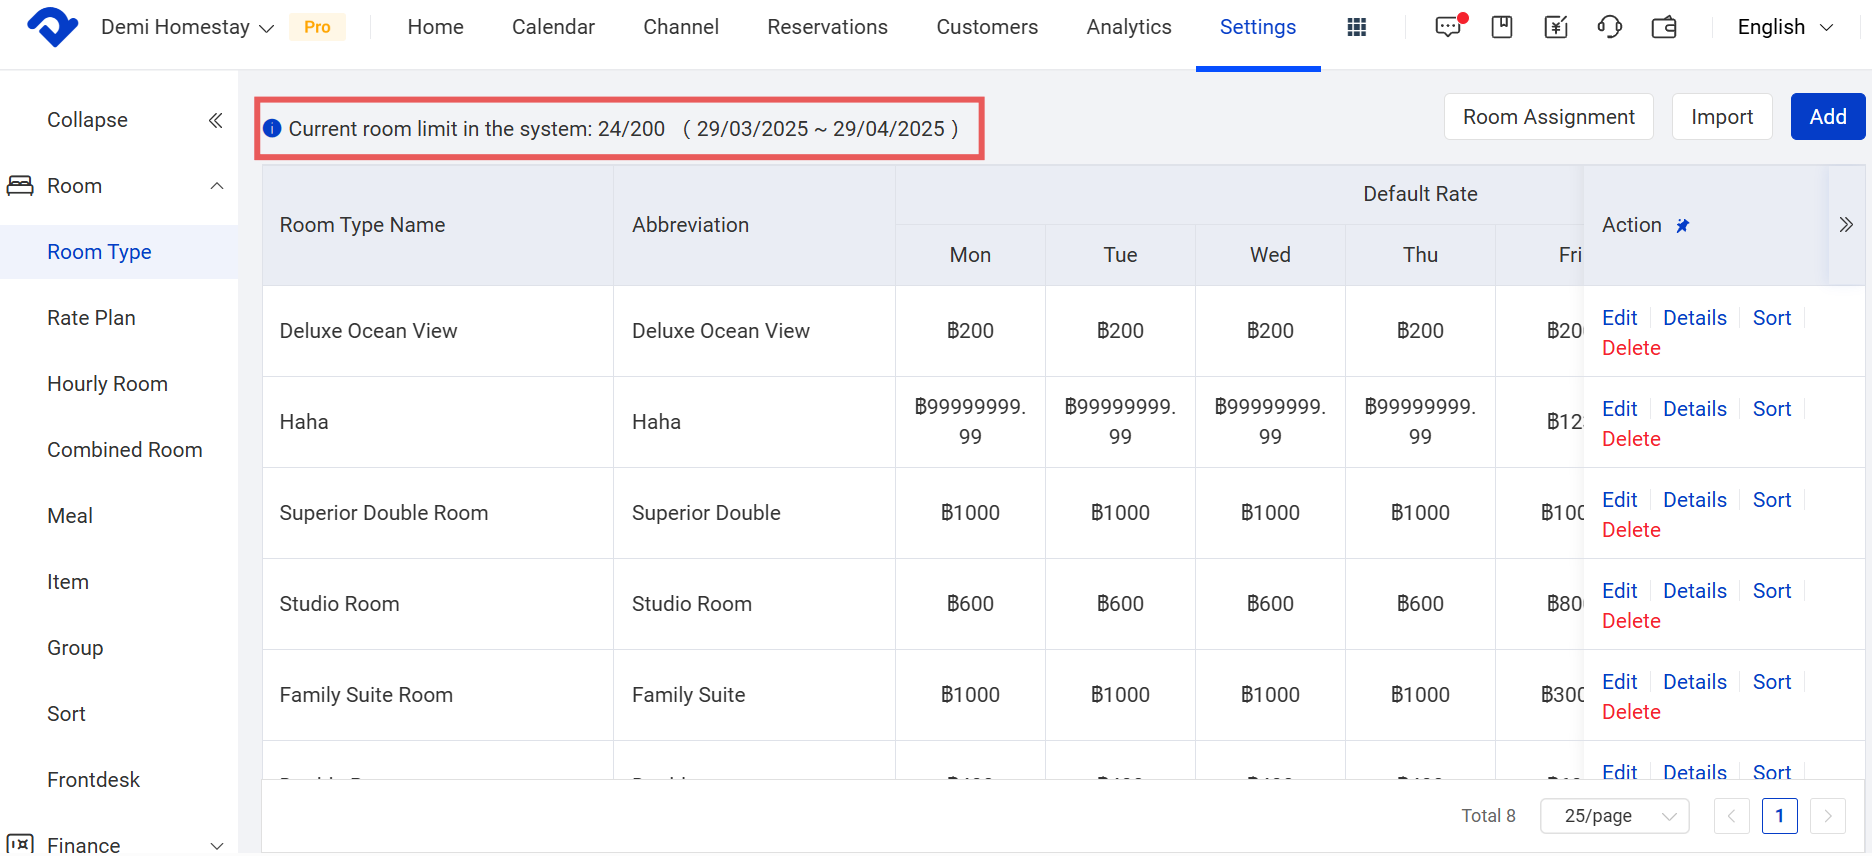
If the quantity meets the room limit, you need to contact the support to increase the room limit.
Delete A Room Type:
Step1: Go to the Settings page and select the Room Type under the Room drop-down list.
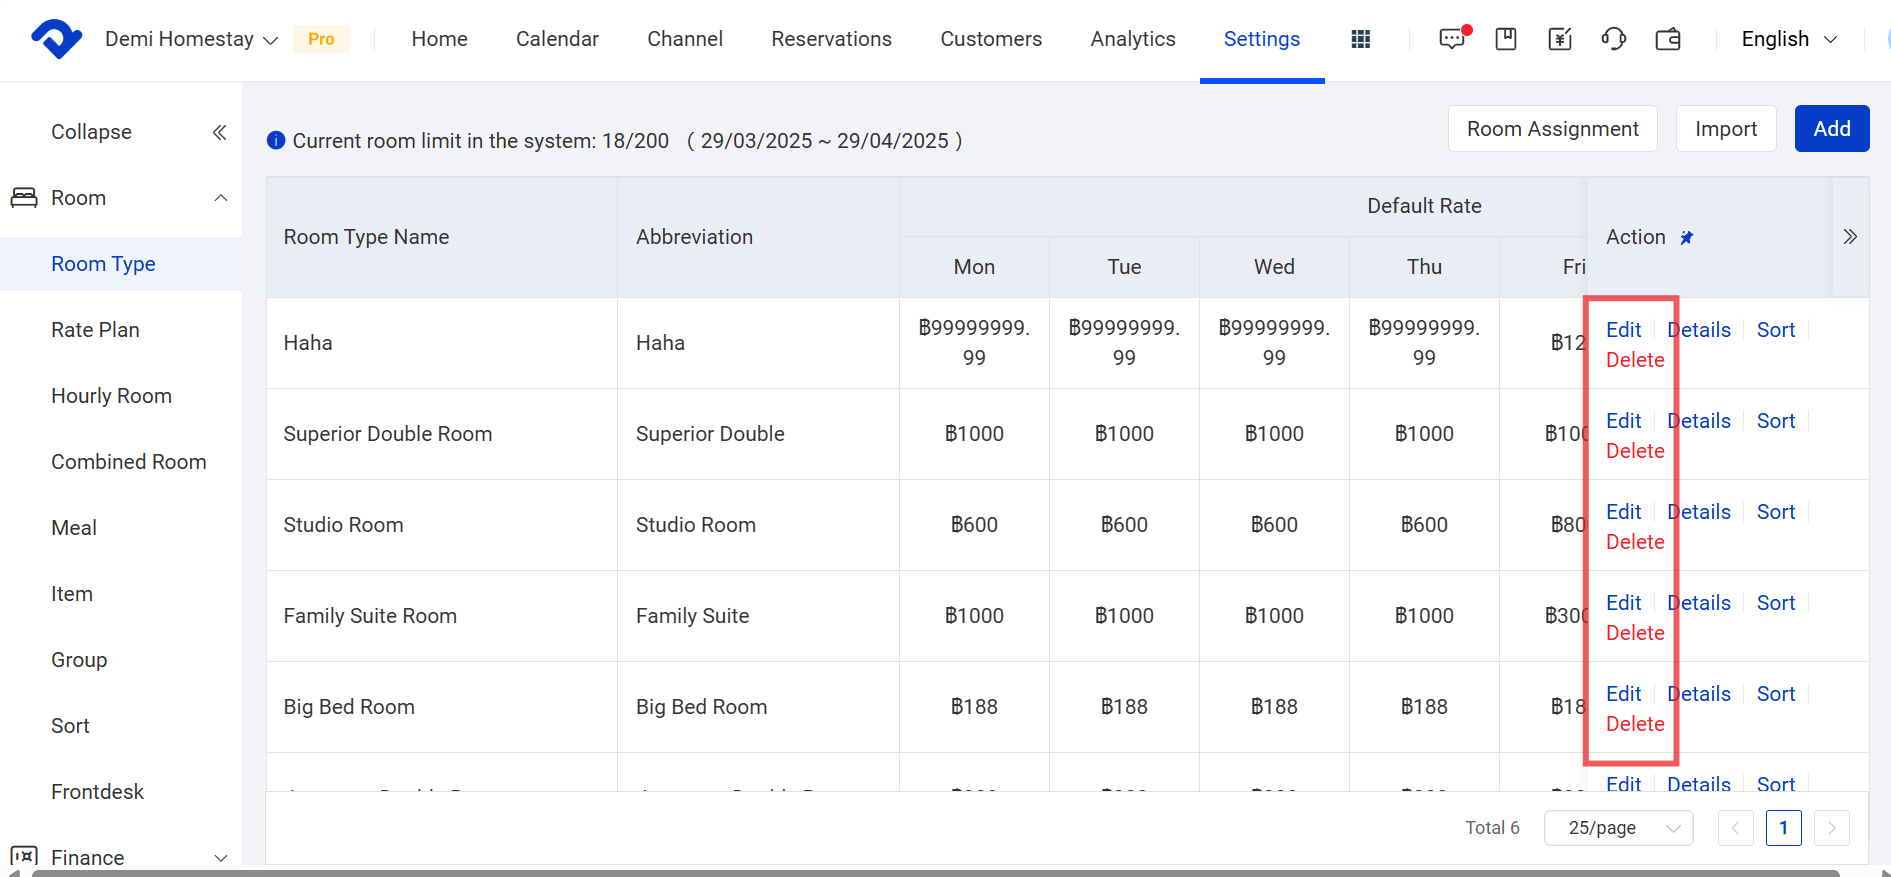
Step2: Choose the room type you want to delete and click Delete from the Action button.
Delete A Room:
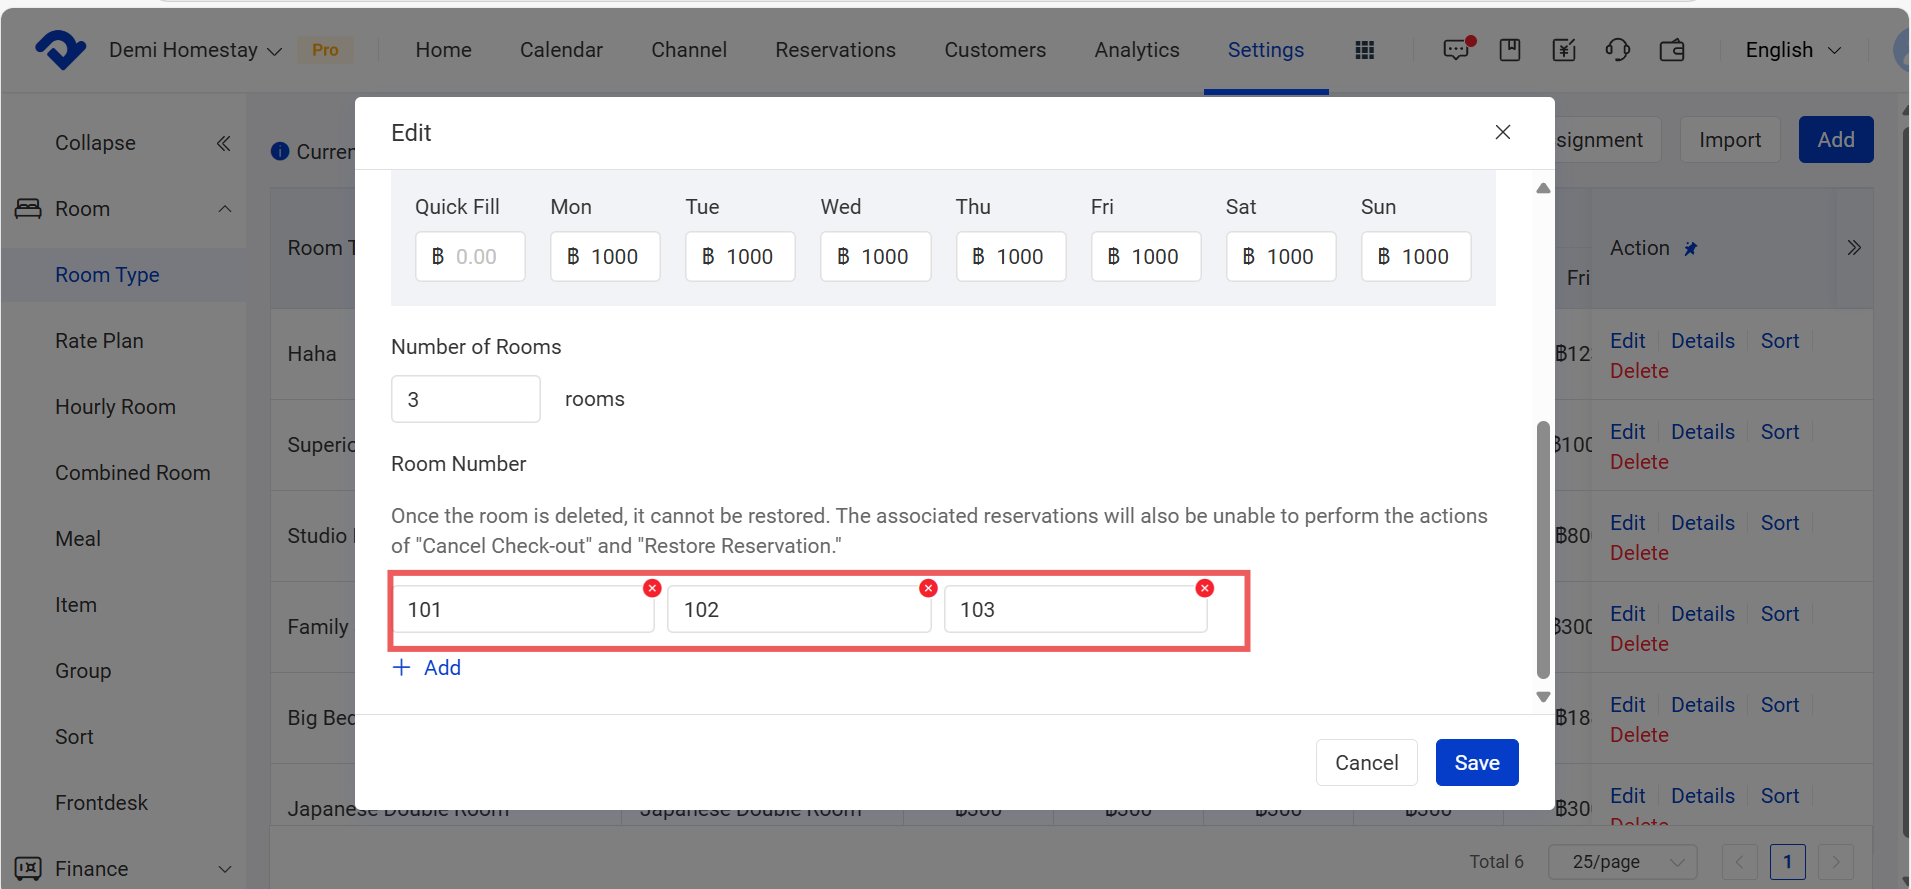
Step1: Find the room type and click Edit. Slide the drop-down list and you will find the rooms. Here you can delete the rooms.
Note2:
The requirements and steps to delete the room type are as follows:
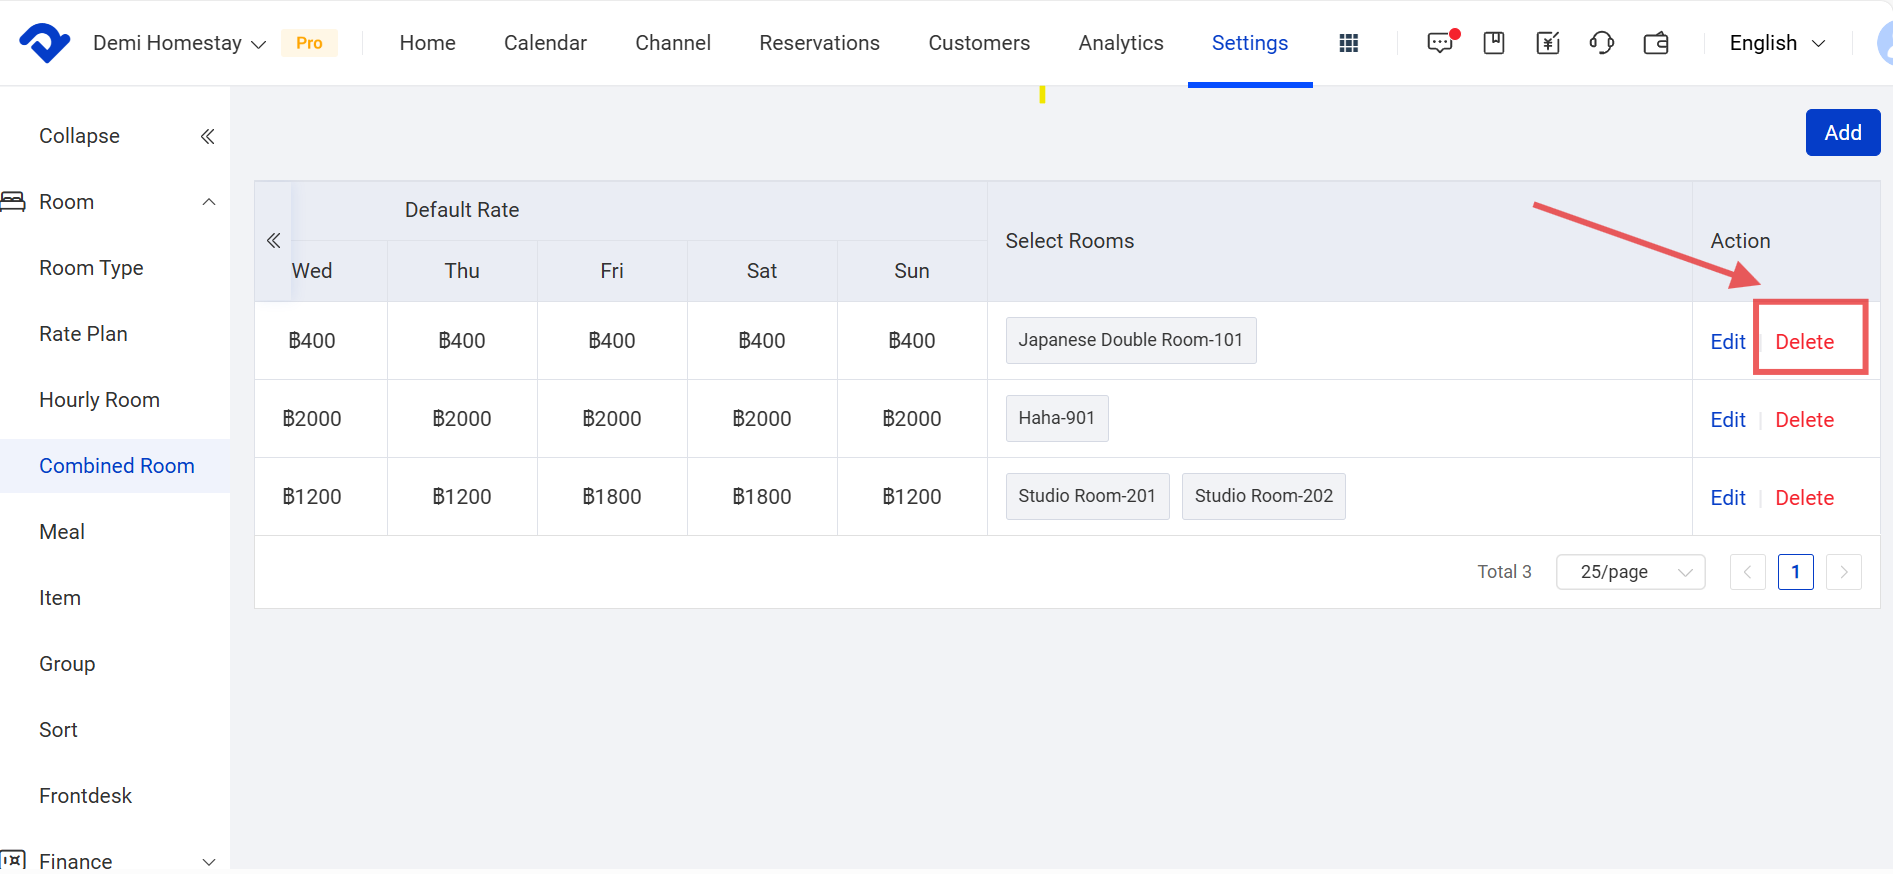
- The room type can not be a combined room. You need to go to the Settings and select Combined Room under the Room drop-down list. Click the expansion symbol to find the room type you want to delete under the Select Rooms. And click Delete.
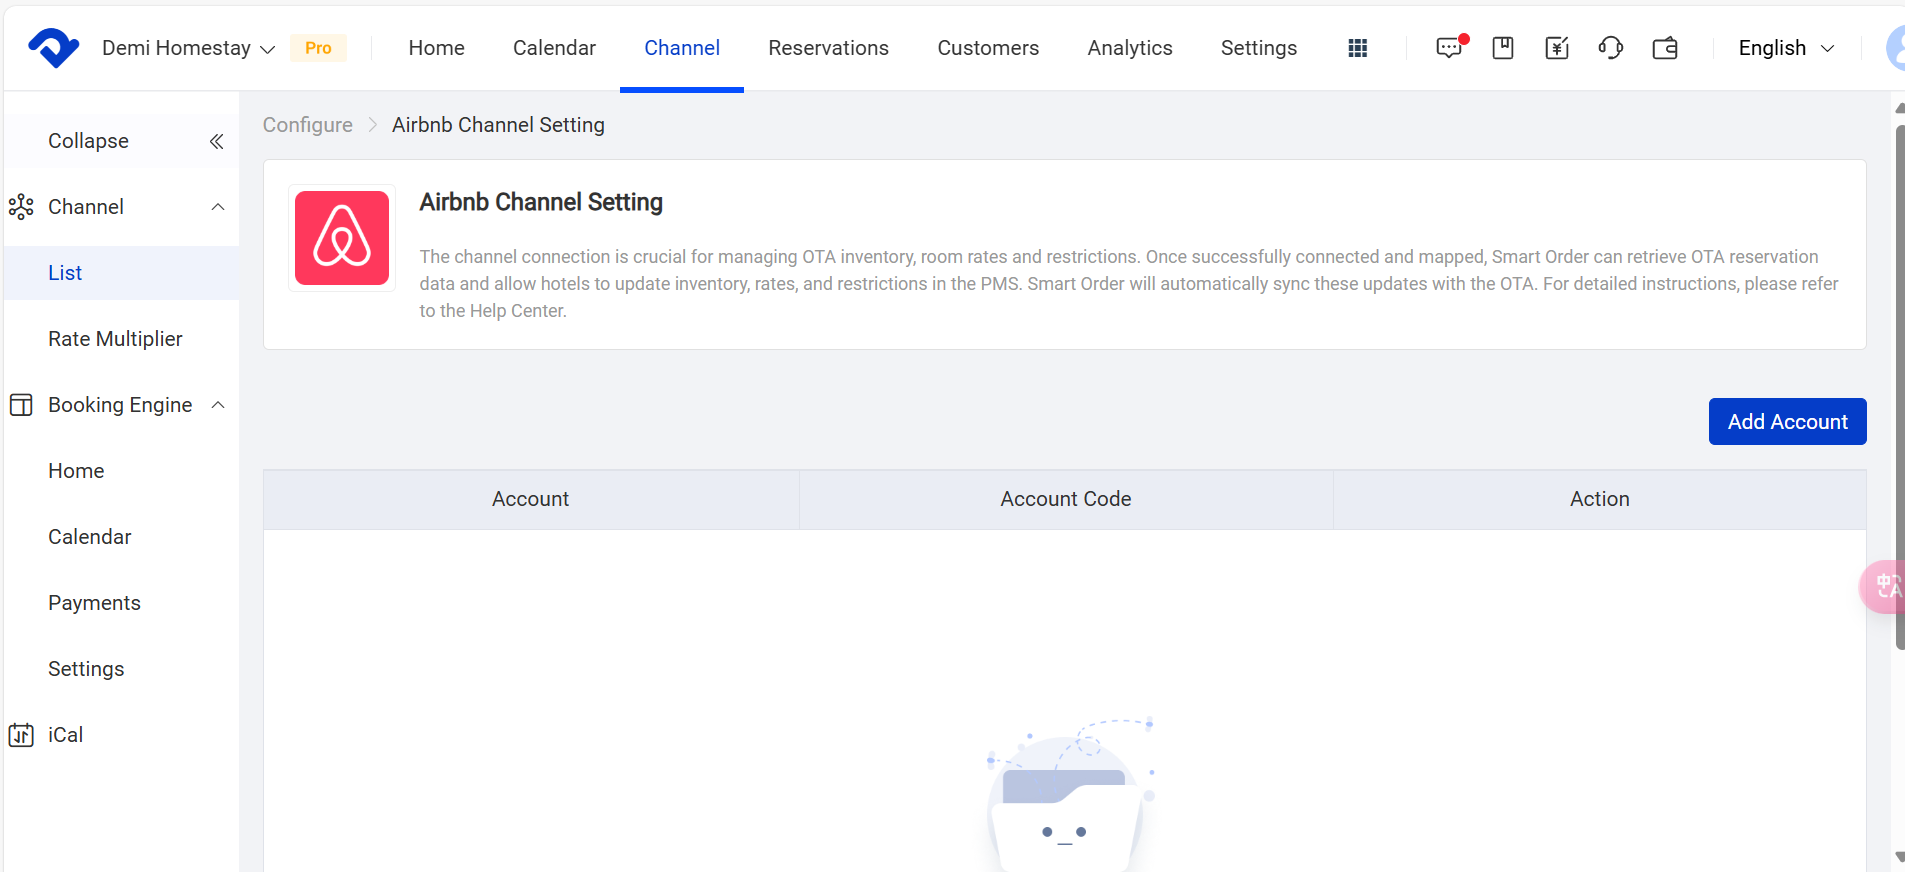
- If the room type has been connected to a channel, it can not be deleted. You need to go to the Channel page and select List under the Channel drop-down list. And disconnect the room type under the channel.

Change the Room Assignment:
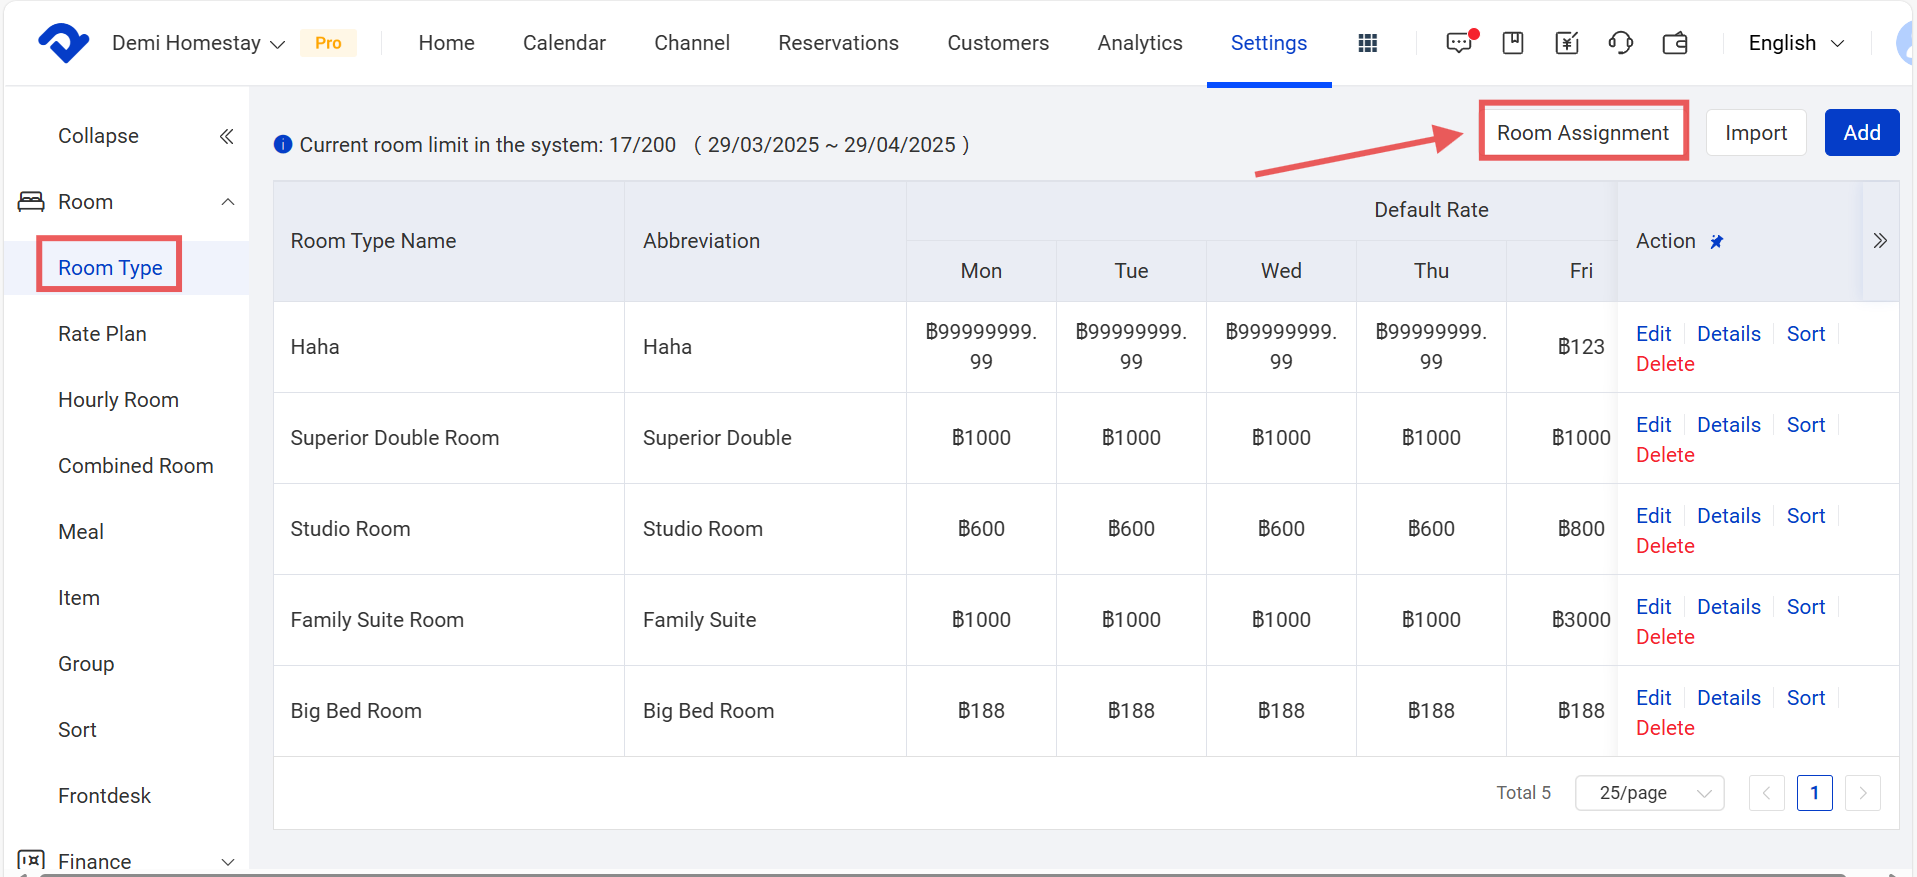
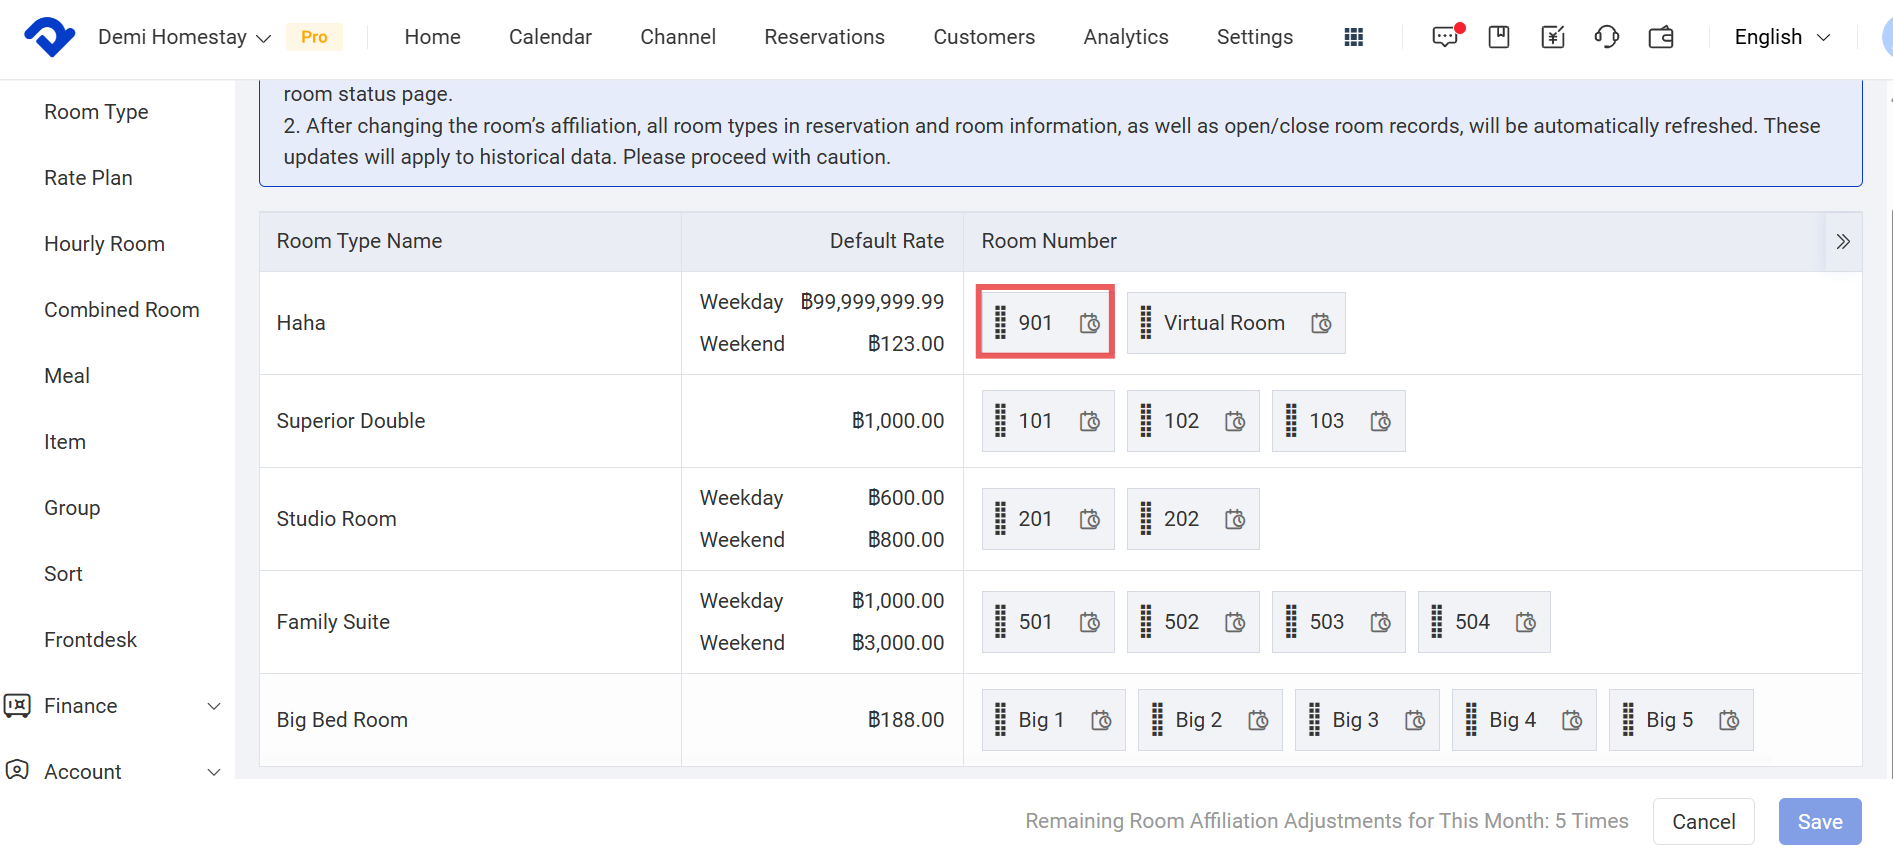
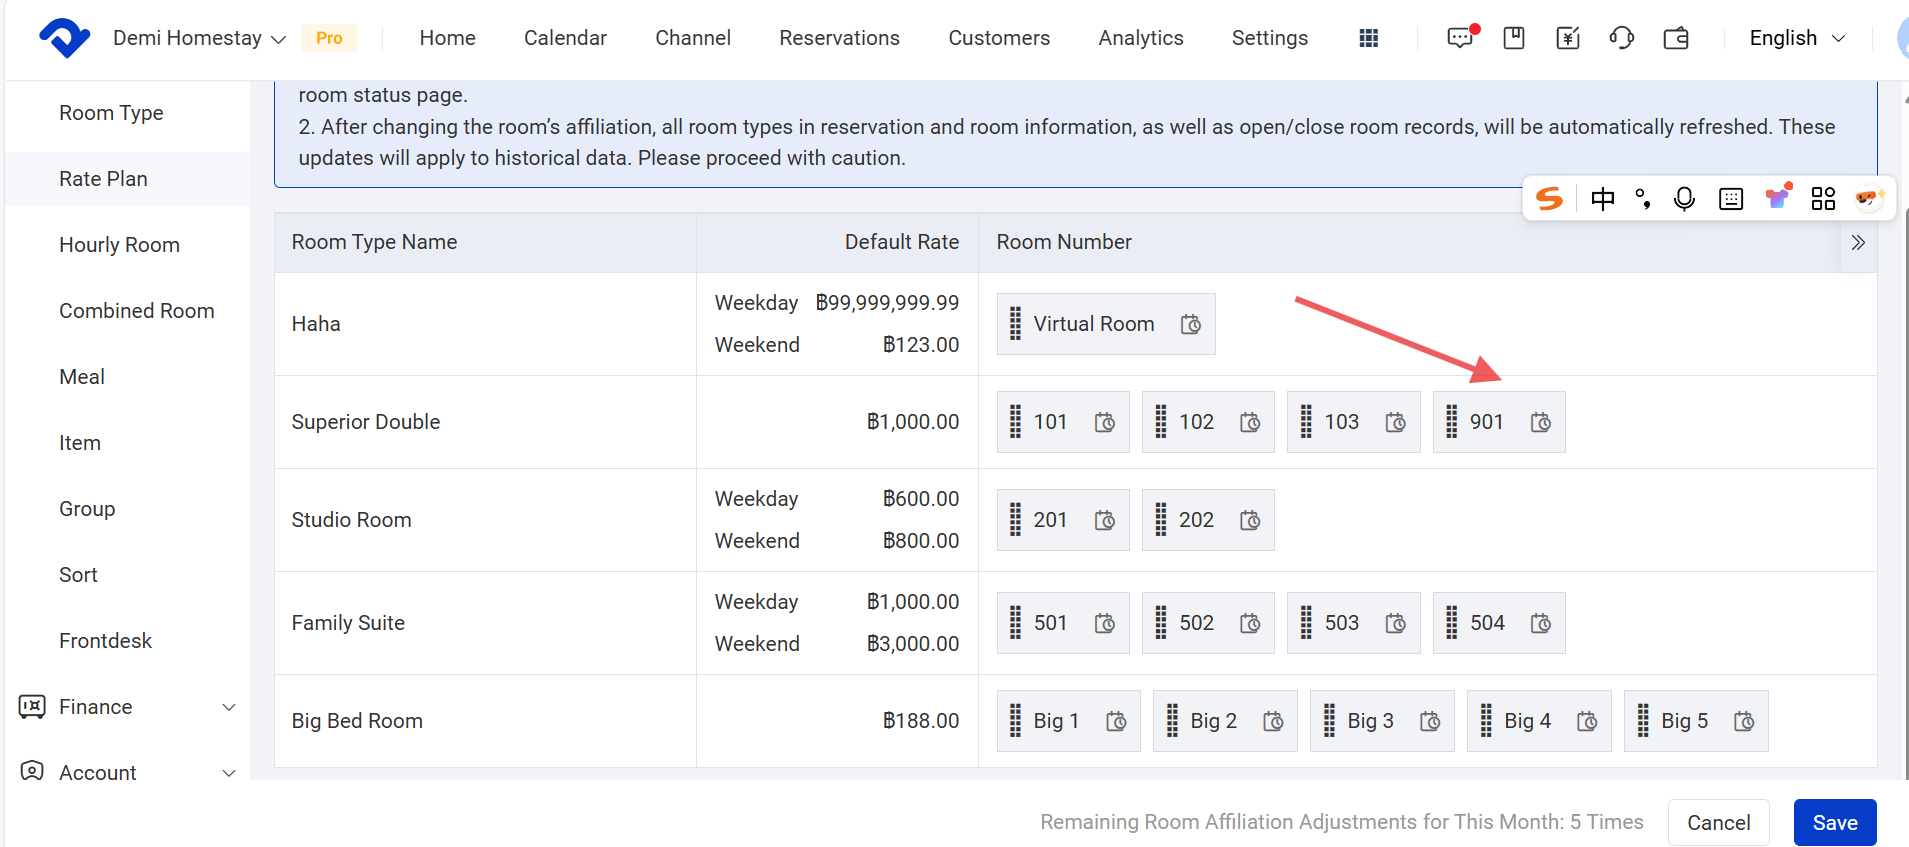
step1: Go to the Settings page. Select Room Type from the Room drop-down list. Click Room Assignment.
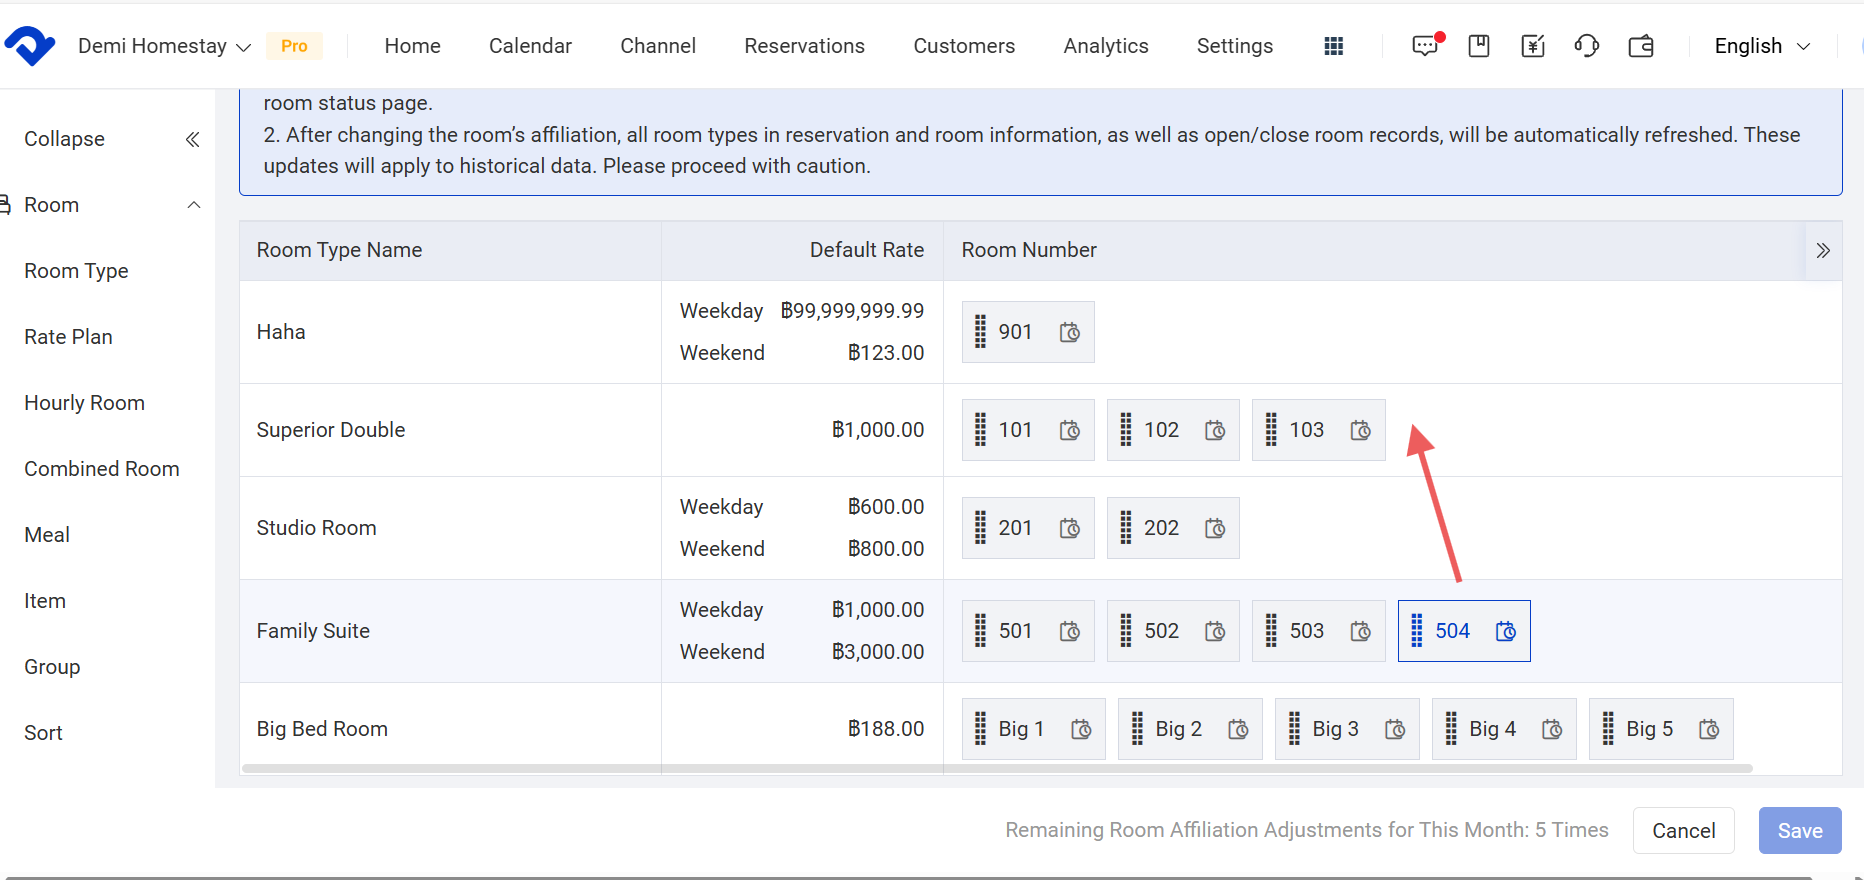
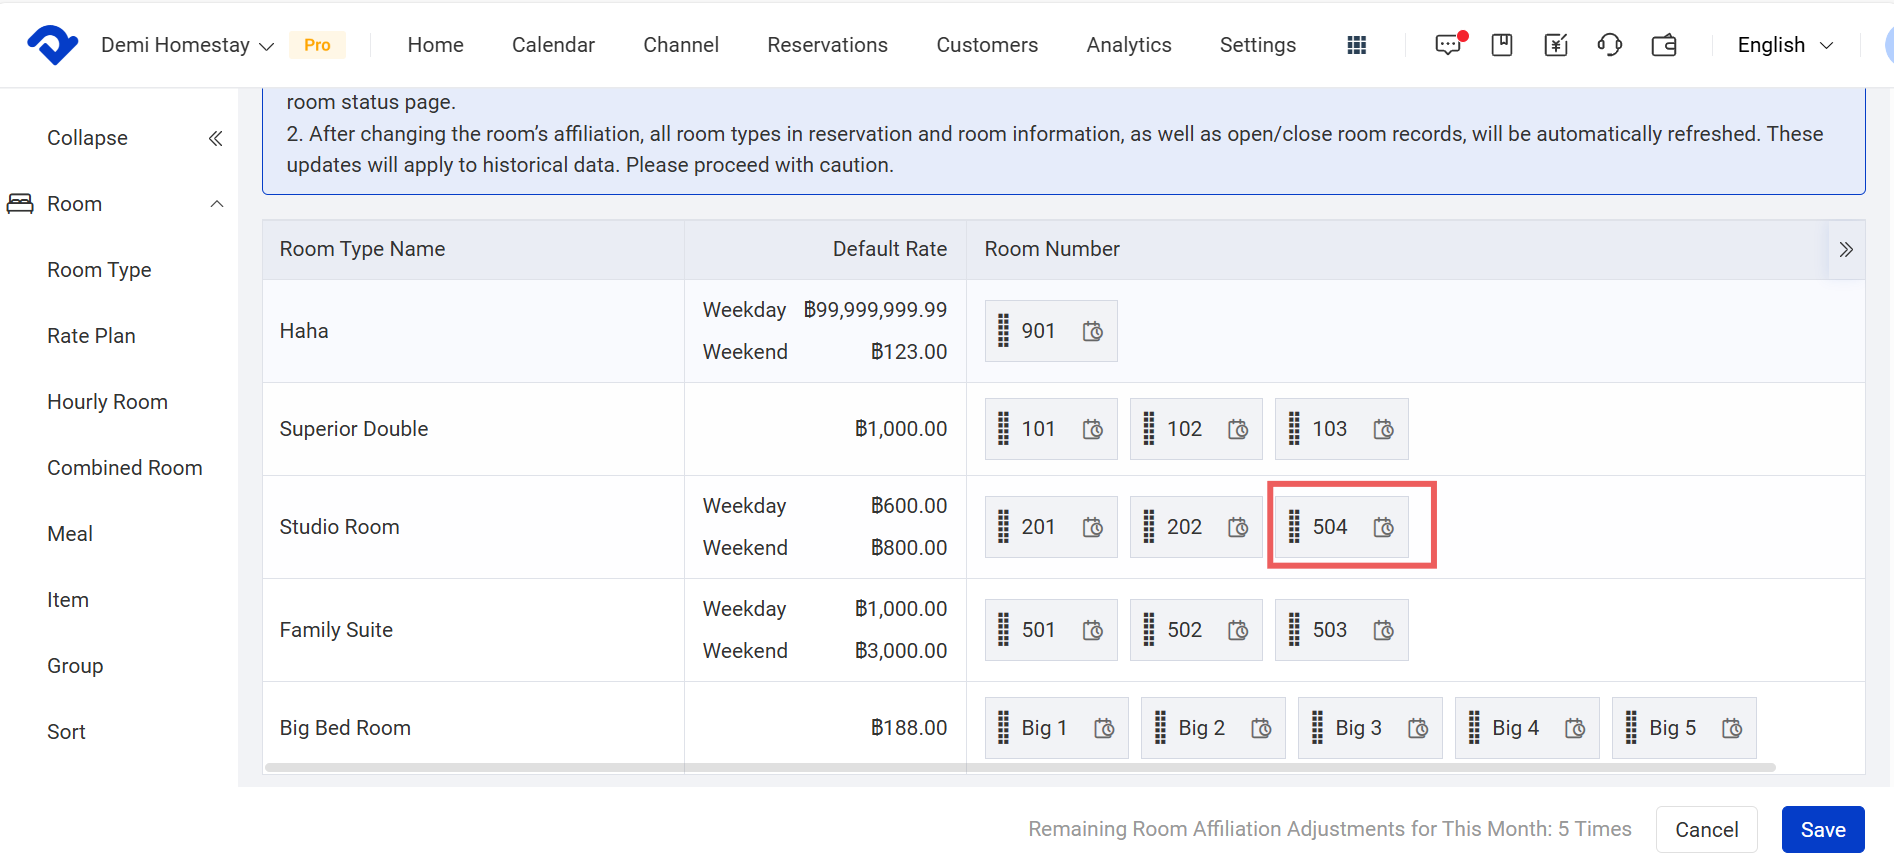
You can move the room to another room type. And save it after you succeed in changing the room assignment.
Note3:
- The room assignment function can be changed five times monthly. Every time you change the room assignment, the change will be recorded. After five times, you may not change during the month. However, this frequency won't be kept for the next month.
- There must be at least one room under a room type. If you need to change a room assignment, you need to add a new room under this room type. Otherwise, this room type will be deleted.
- If there is a notice saying that this room type has been connected to an OTA channel, you need to disconnect the channel first. And then you can continue with the room assignment. After you finish changing the room assignment, you need to reconnect the room type with the channel so that the OTA orders won't be overbooked or logged off.