Traveloka Connection Guide

Step 1 - Set up room type and rate plan in the PMS

Please follow the steps in Initial Set Up, to set up the Room Type and Rate Plan, and import history reservations into Smart Order PMS first.

Step 2 - Select Smart Order to be the connectivity provider

Step 3 - Start mapping in the Smart Order PMS

1. Log in to the PMS system and start authorization.

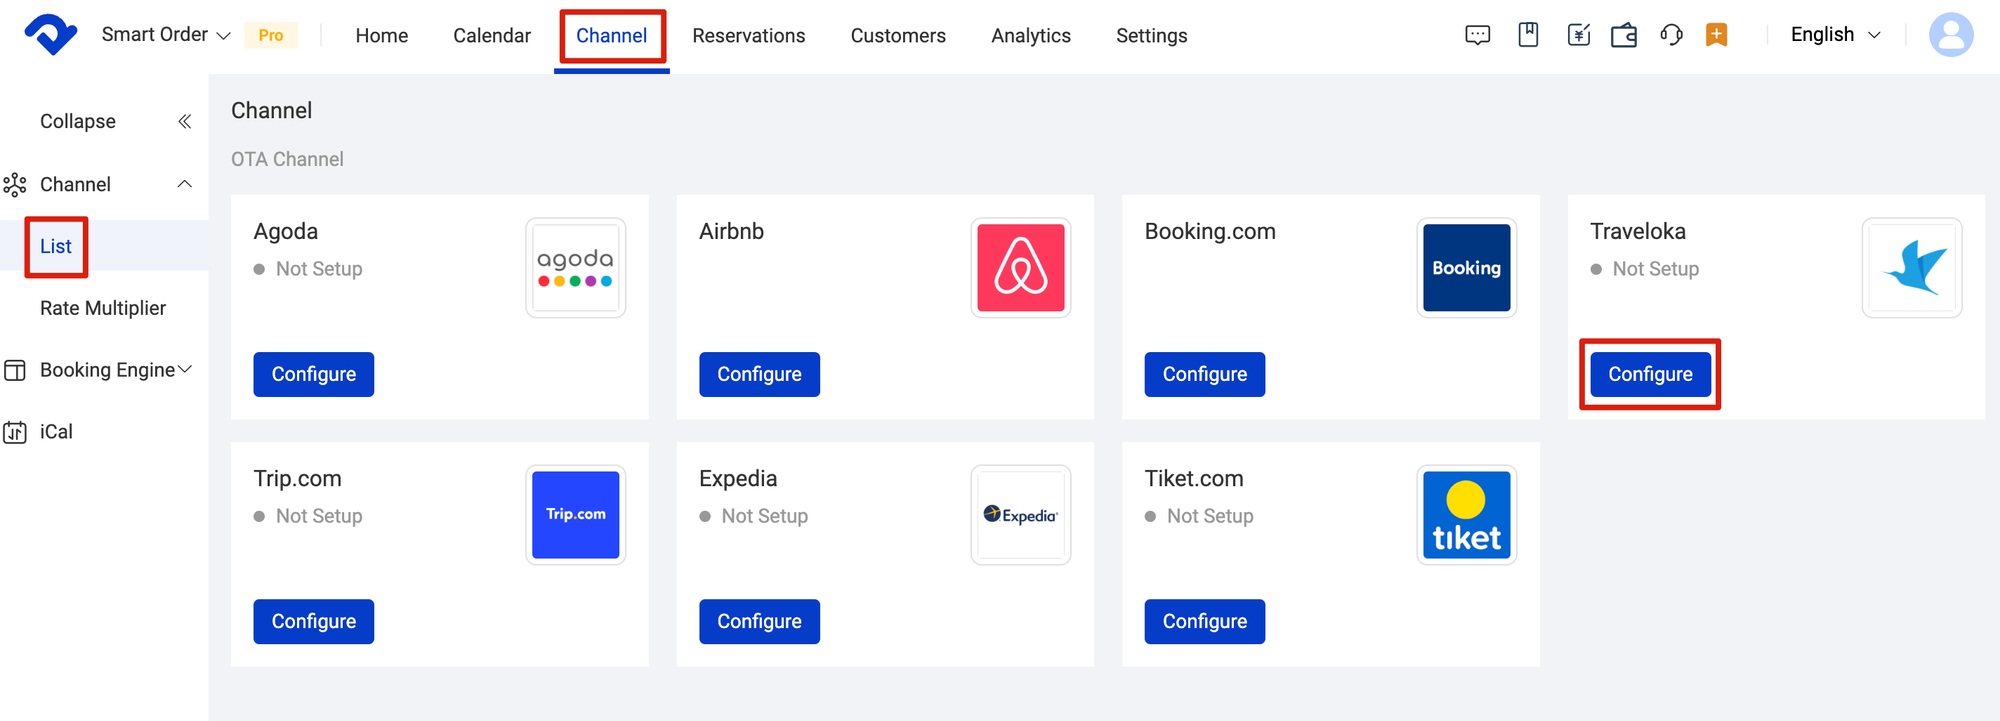
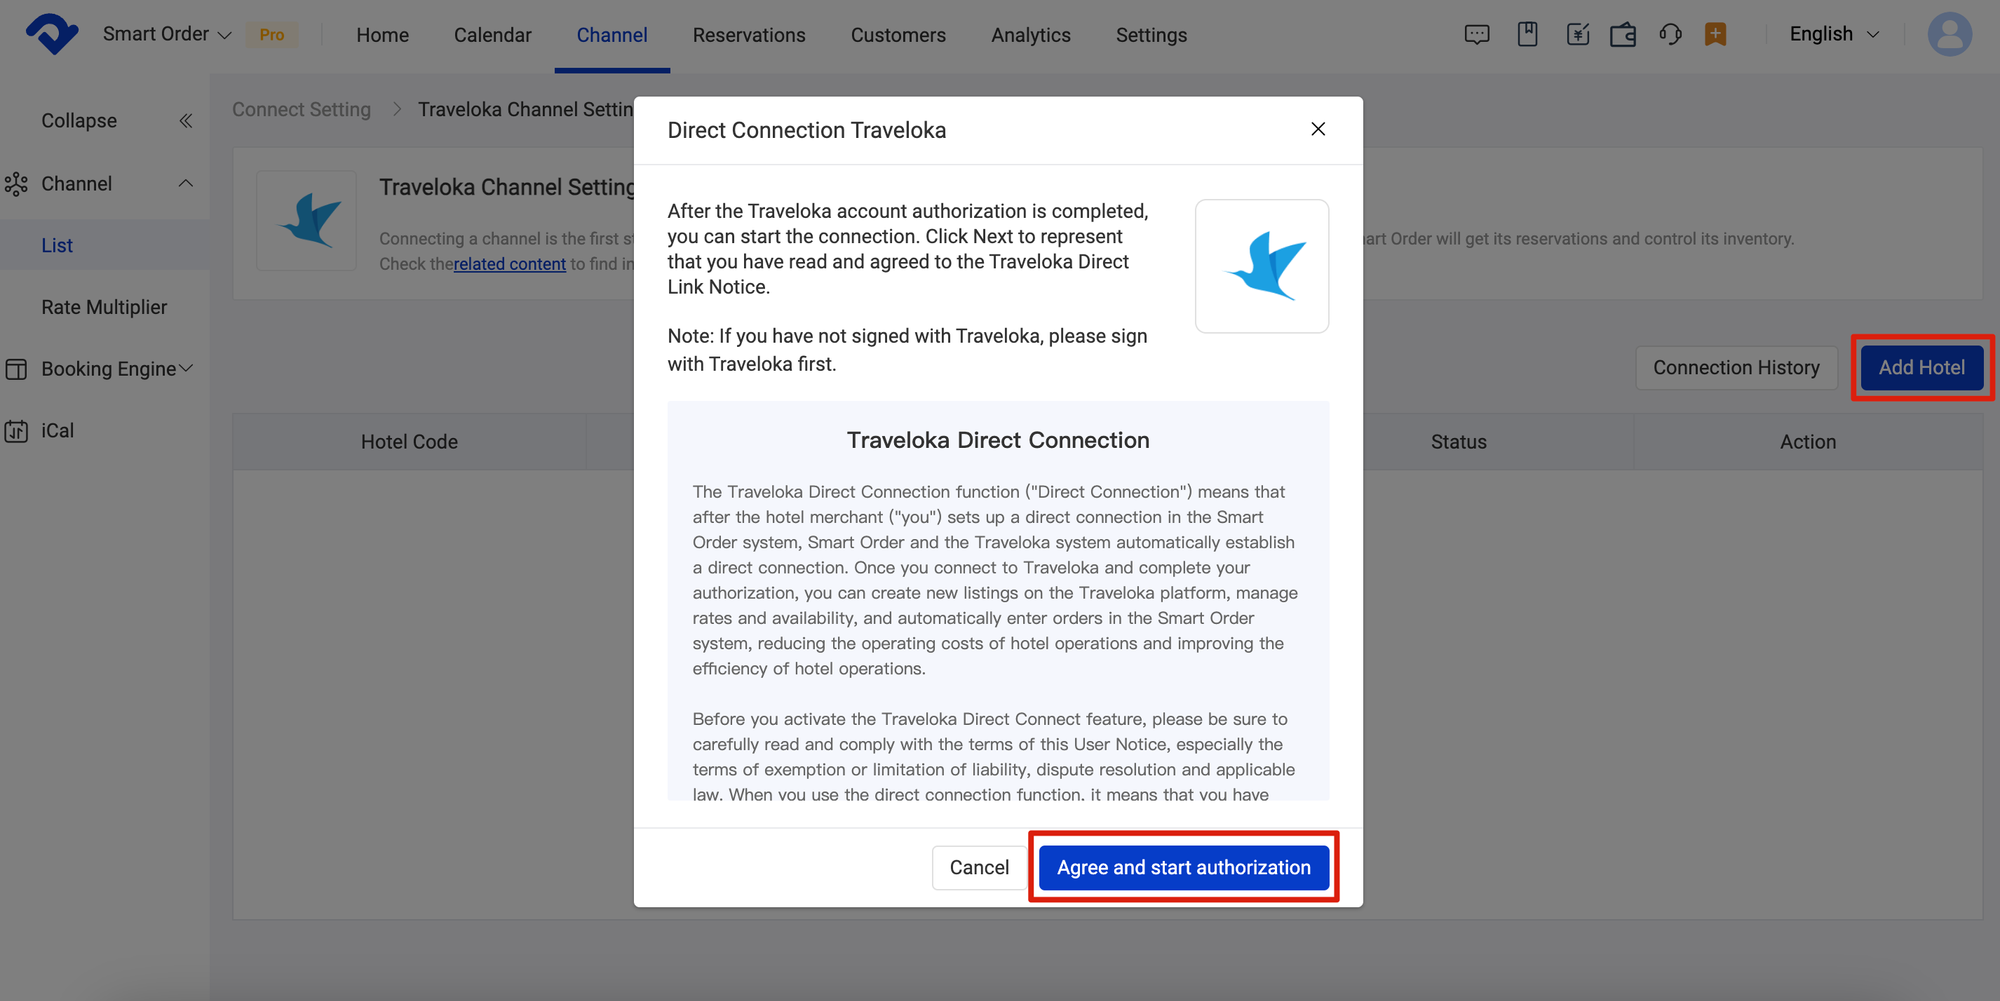
Go to Channel > List > Configure > Click on Add Hotel > Click Agree and start authorization
log in to the PMS, and go to channel - list - configure
Click Agree and start authorization

2. Fill in the basic info to connect.

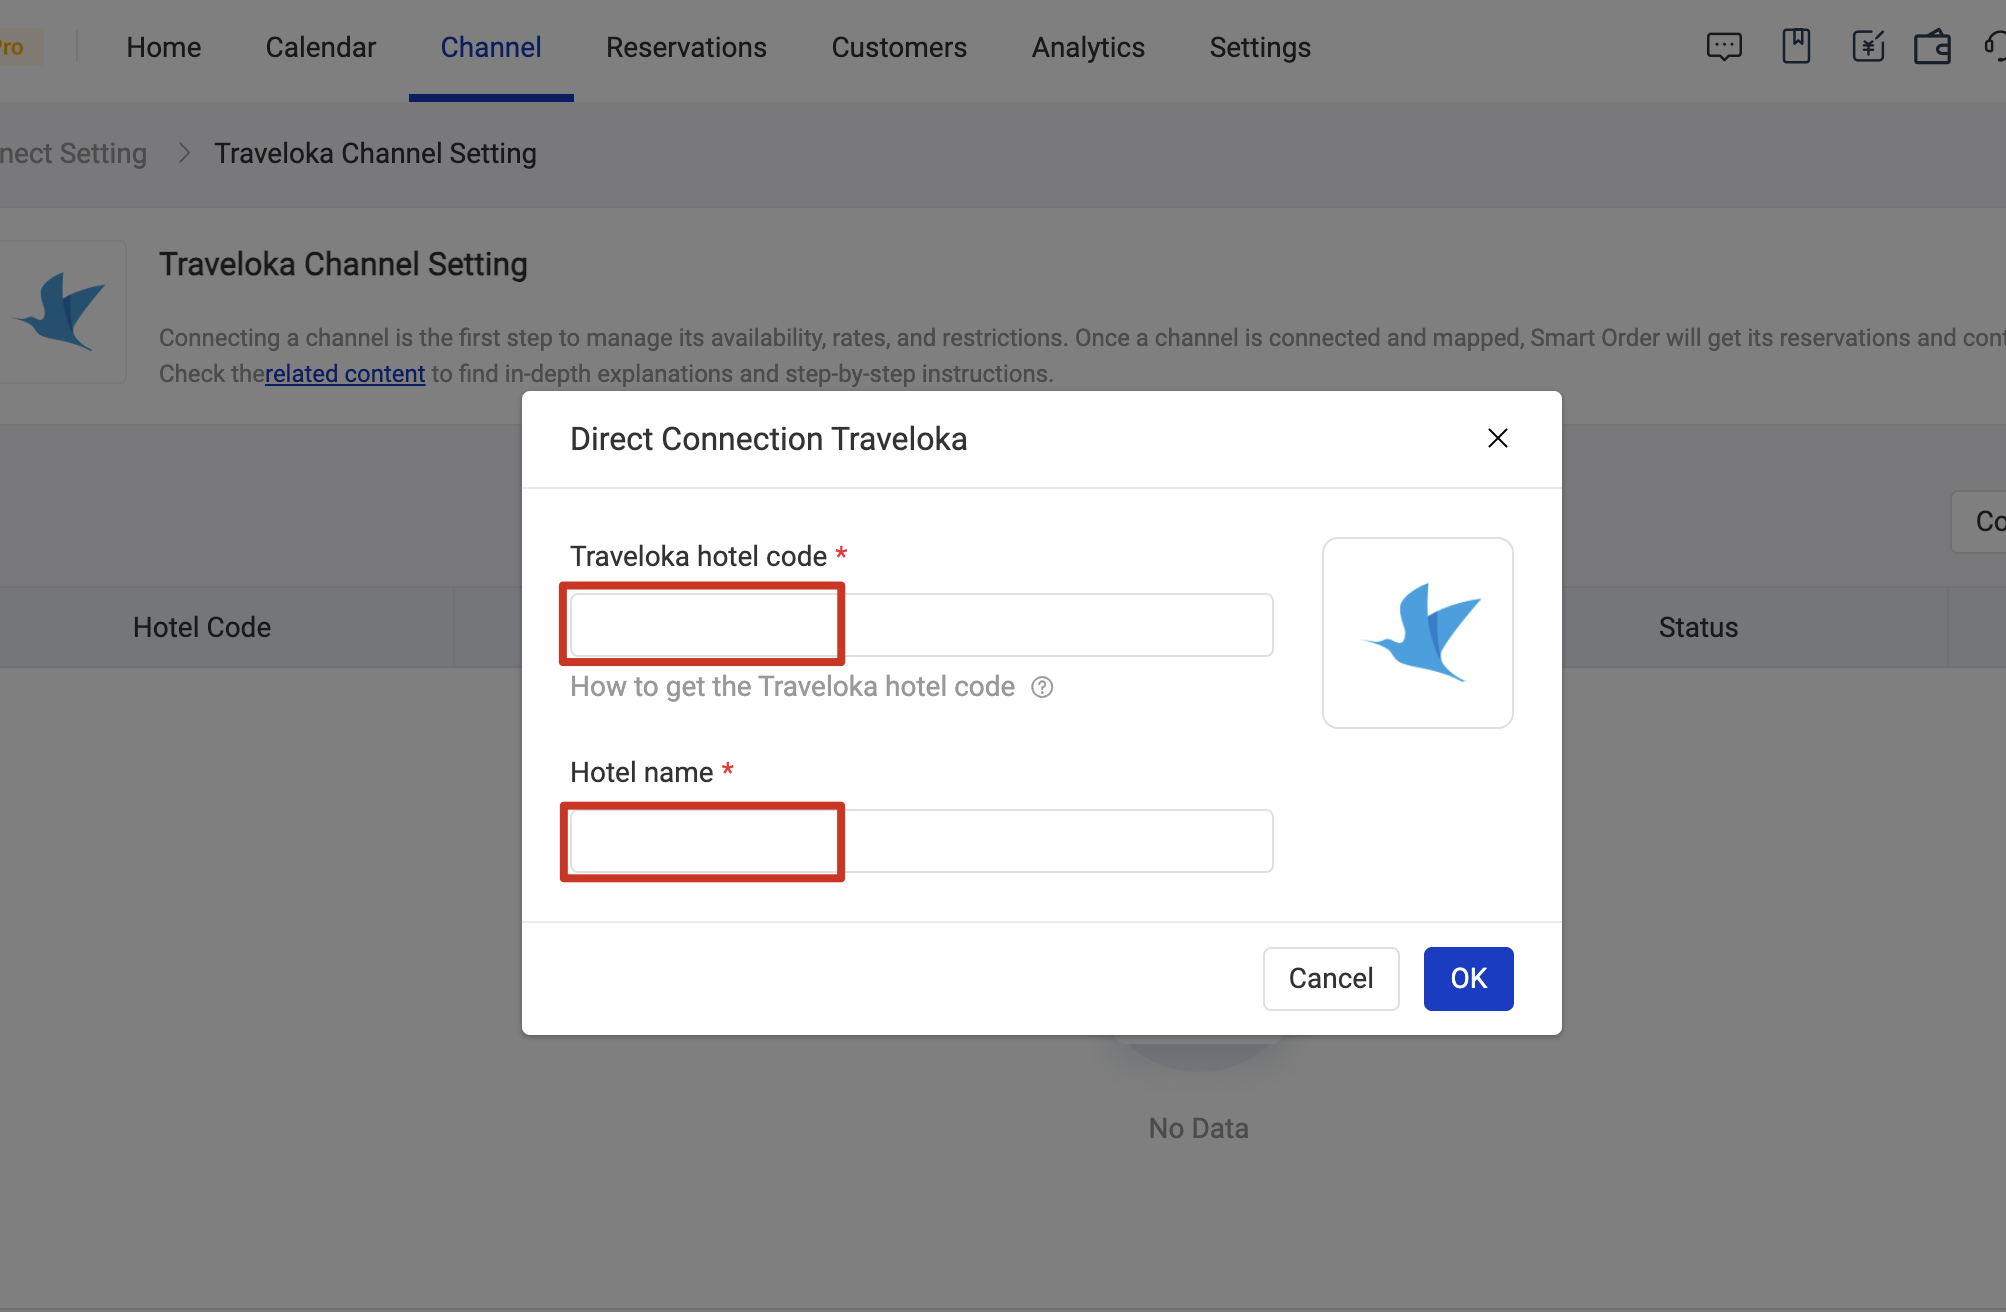
Fill in Traveloka hotel code > Fill in Hotel name
Fill in Traveloka hotel code and Fill in Hotel name
check Connection History
💡
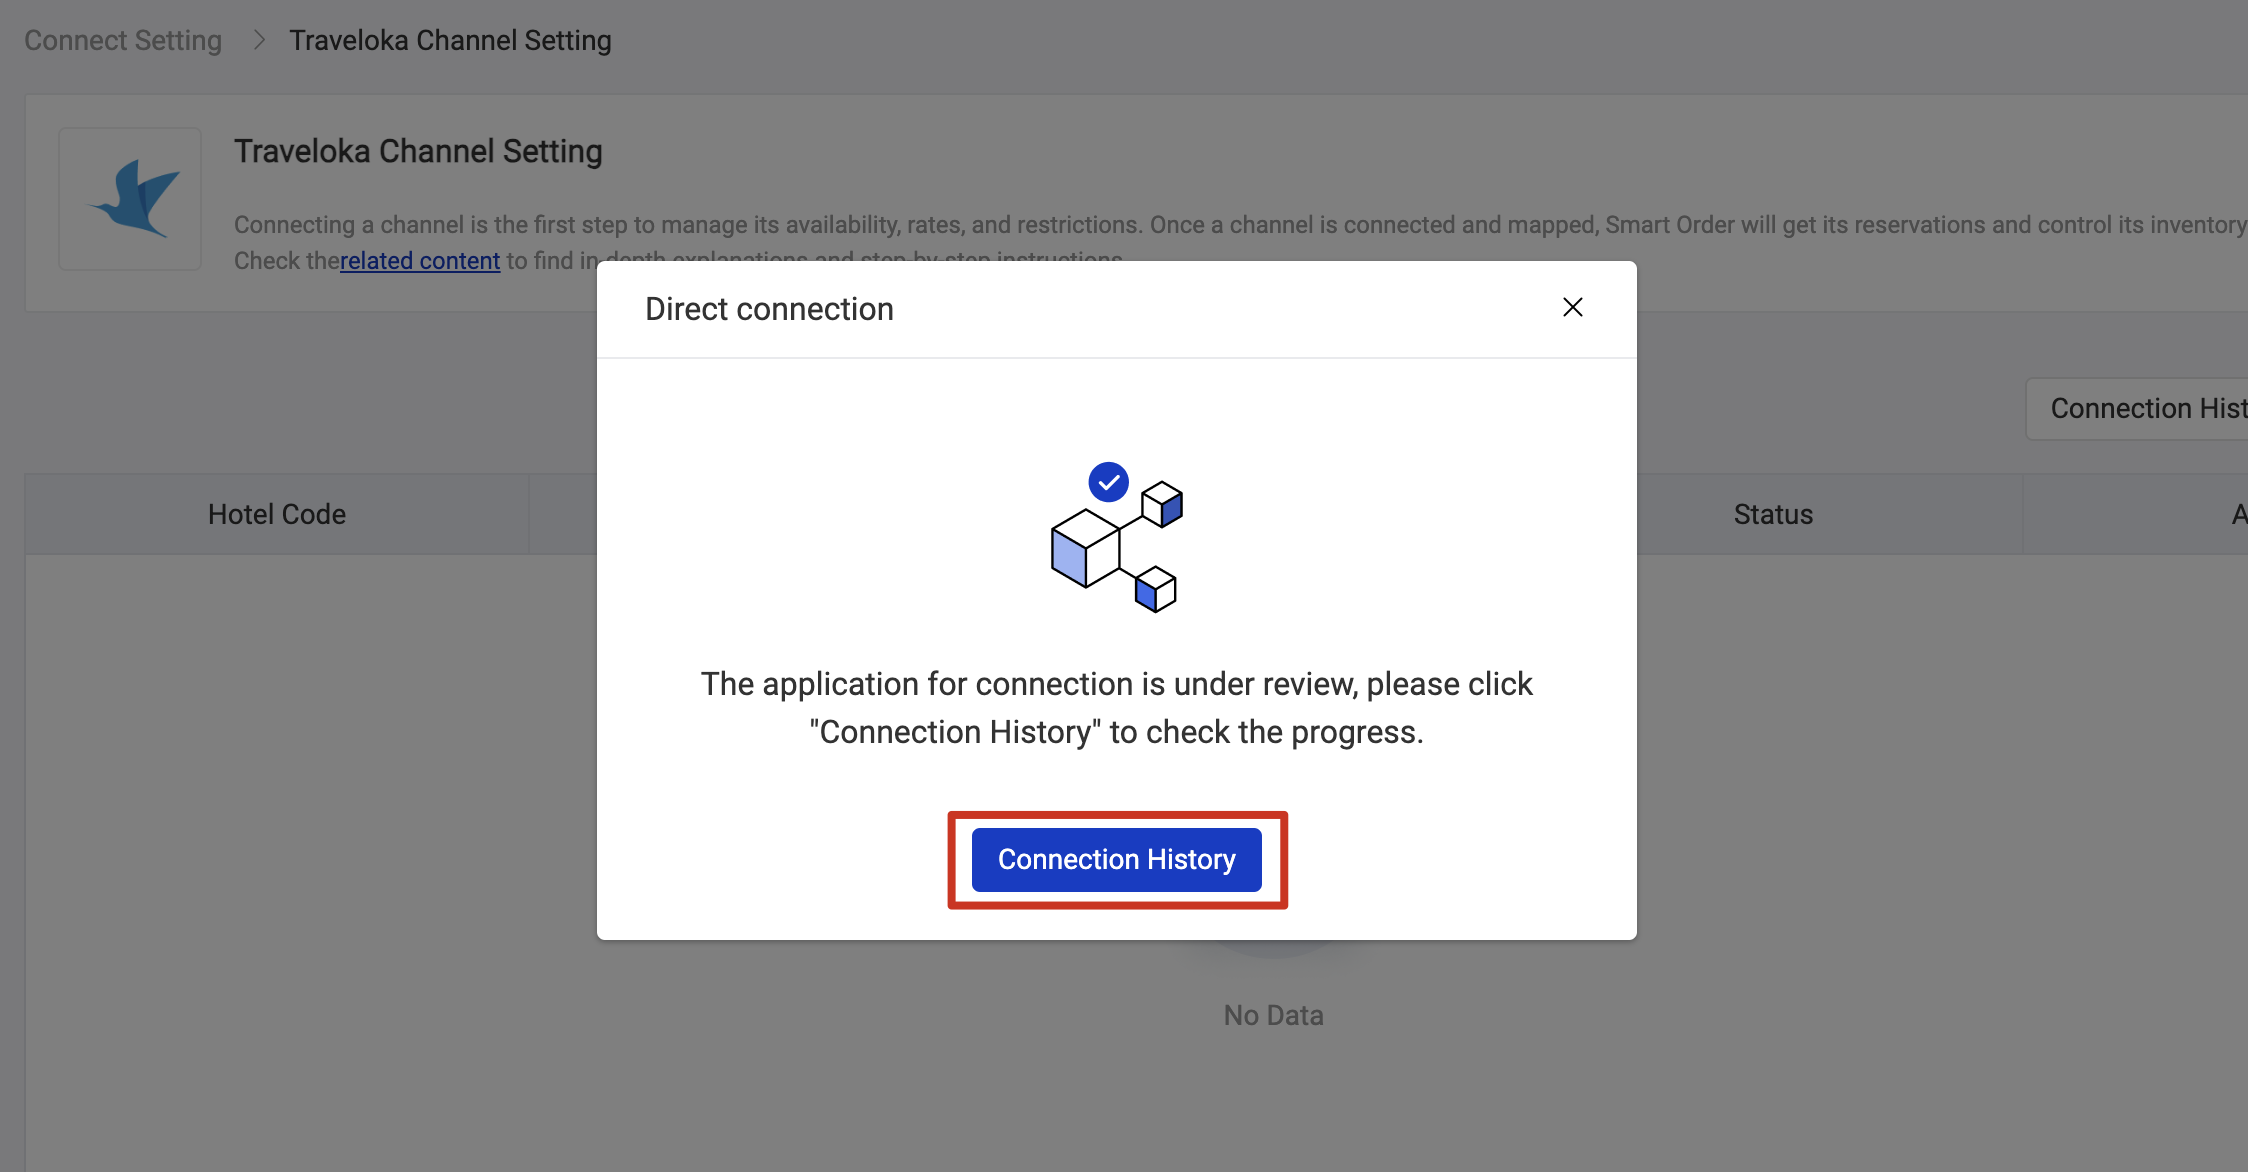
Please then contact us for approval.

3. Start mapping.

Related Articles

Pre-Connection Checklist – PMS Initial Setup

Before mapping Smart Order channel manager to any channel(OTA), please complete the following settings in PMS. This ensures your room inventory and rates are accurate and synchronized from the first day of connection. I. Add Room Types and Rooms (A) What to do: Create room types and individual rooms

Frequent Questions

Derived rate plan Derived rates plans inherit their pricing and restrictions from their parent rate plan on OTA extranet, which means our platform does not send any inventory updates to OTA for these rates; the channel blocks the values being sent. You need to change the price as set up

Channel multi-mapping

What is multi-mapping? The channel manager’s room mapping functionality allows multiple channel rates to be mapped to, and managed by, a single channel manager room rate. This is known as multi-mapping and it provides flexible mapping options to help you simplify your setup. When to use multi-mapping? Multi-mapping is

Perform a bulk update

You can use Bulk Update to quickly and easily perform extensive updates to rates and restrictions across your room type and channels for one or more date ranges and specific days of the week. Navigation overview The inventory grid is where you manage the day-to-day pricing, and restrictions for your

How to set up the extra person rate

Follow the steps below to set up extra person rate. Operating Steps 1. Go to Settings: Next to the menu at the top, click "Settings." 2. Choose Rate Plan: Tap "Rate Plan" in the "Settings" section. 3. Select Occupancy Rate: Click on "Occupancy

Add and edit rate plan

Step 1 - Create a rate plan Create the rate plan first. Click on Settings > Rate Plan > Click Add New Rate Plan > Type in the Rate Plan Name > Set Default Minimum Stay > Set Default Maximum Stay > Choose Manual/Derived > Select Room Types >