Booking.com Connection Guide

Follow the steps in this guide and connect to Booking.com.

Step 1 - Set up room type and rate plan in the PMS

Please follow the guide Initial Set Up, to set up the Room Type and Rate Plan.

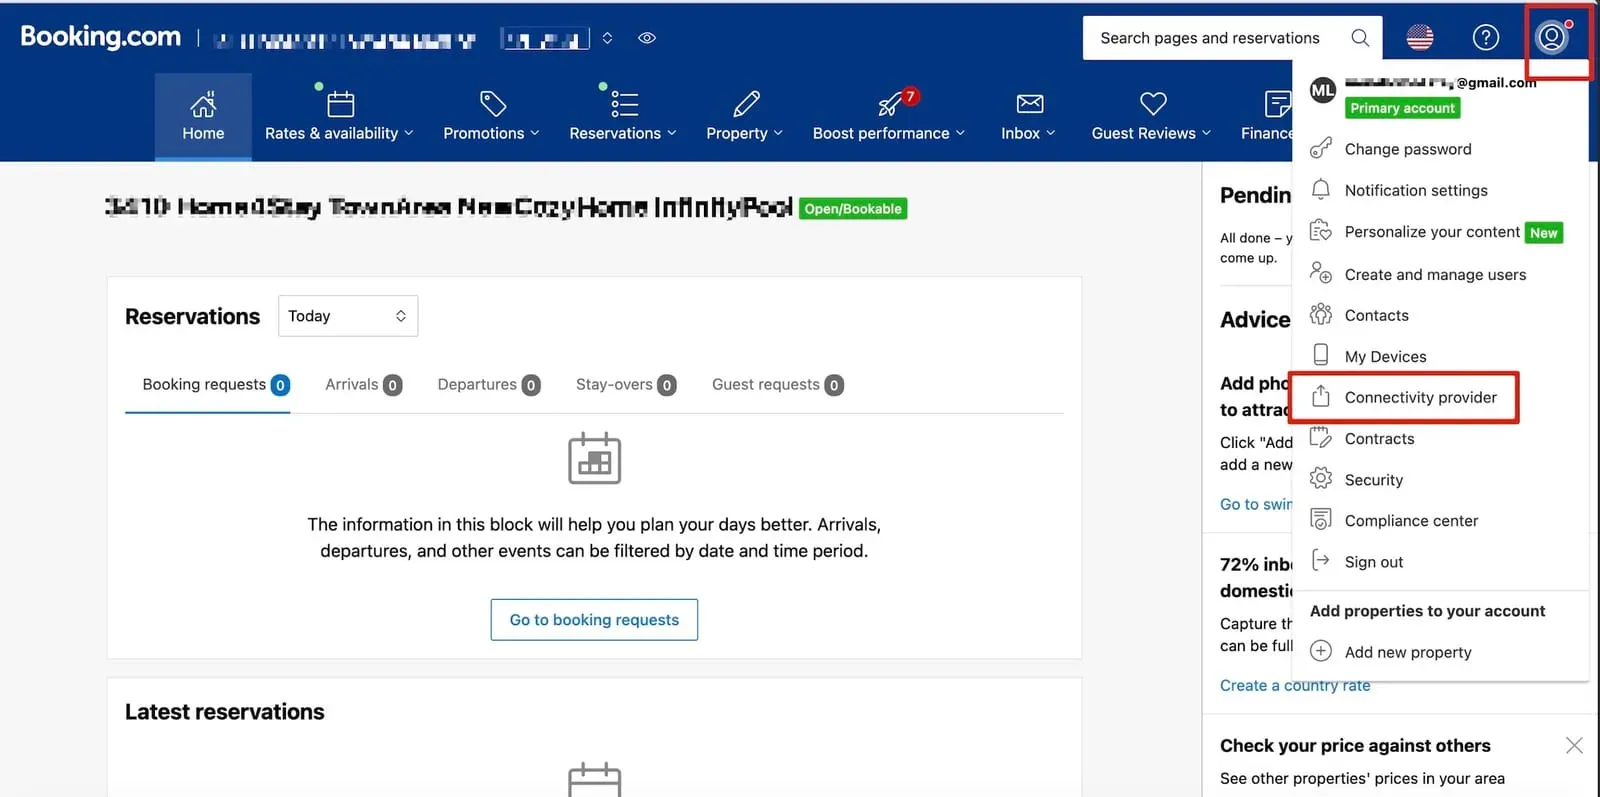
Step 2 - Select Smart Order to be the connectivity provider

  1. Login to Booking.com https://account.booking.com/sign-in. If there's an existing connection, you need to remove it first.
Click on Account > Connectivity provider > Switch providers.
Booking.com connection guide with Smart Order PMS, switch connectivity provider

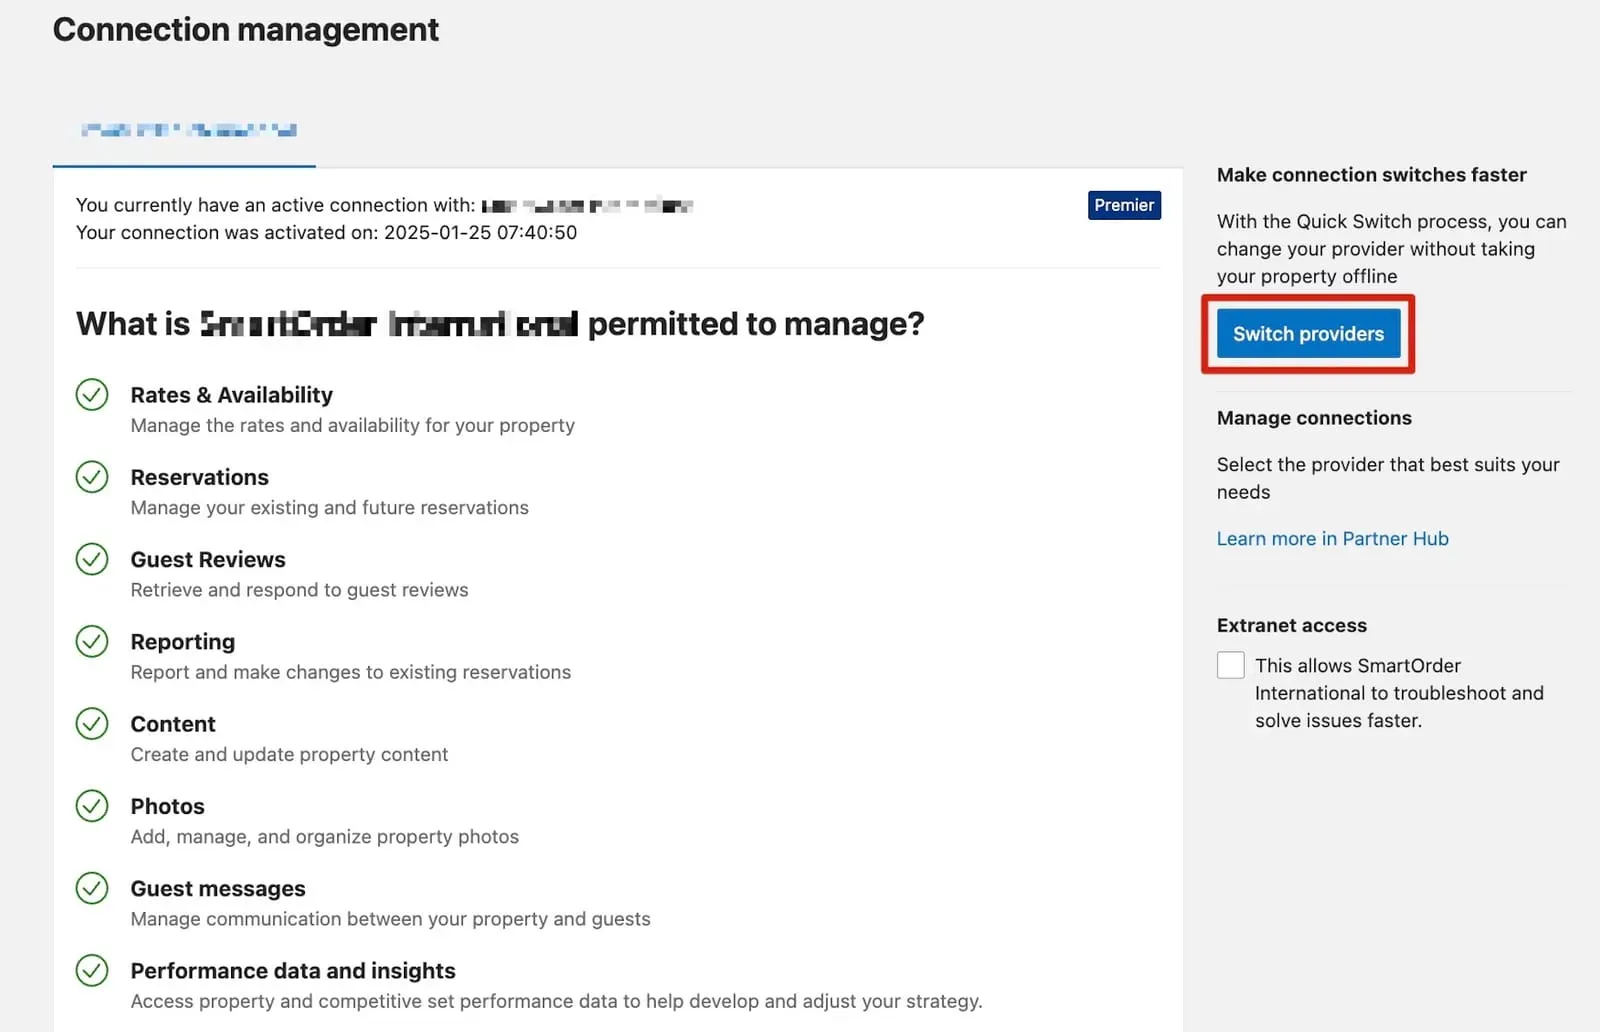
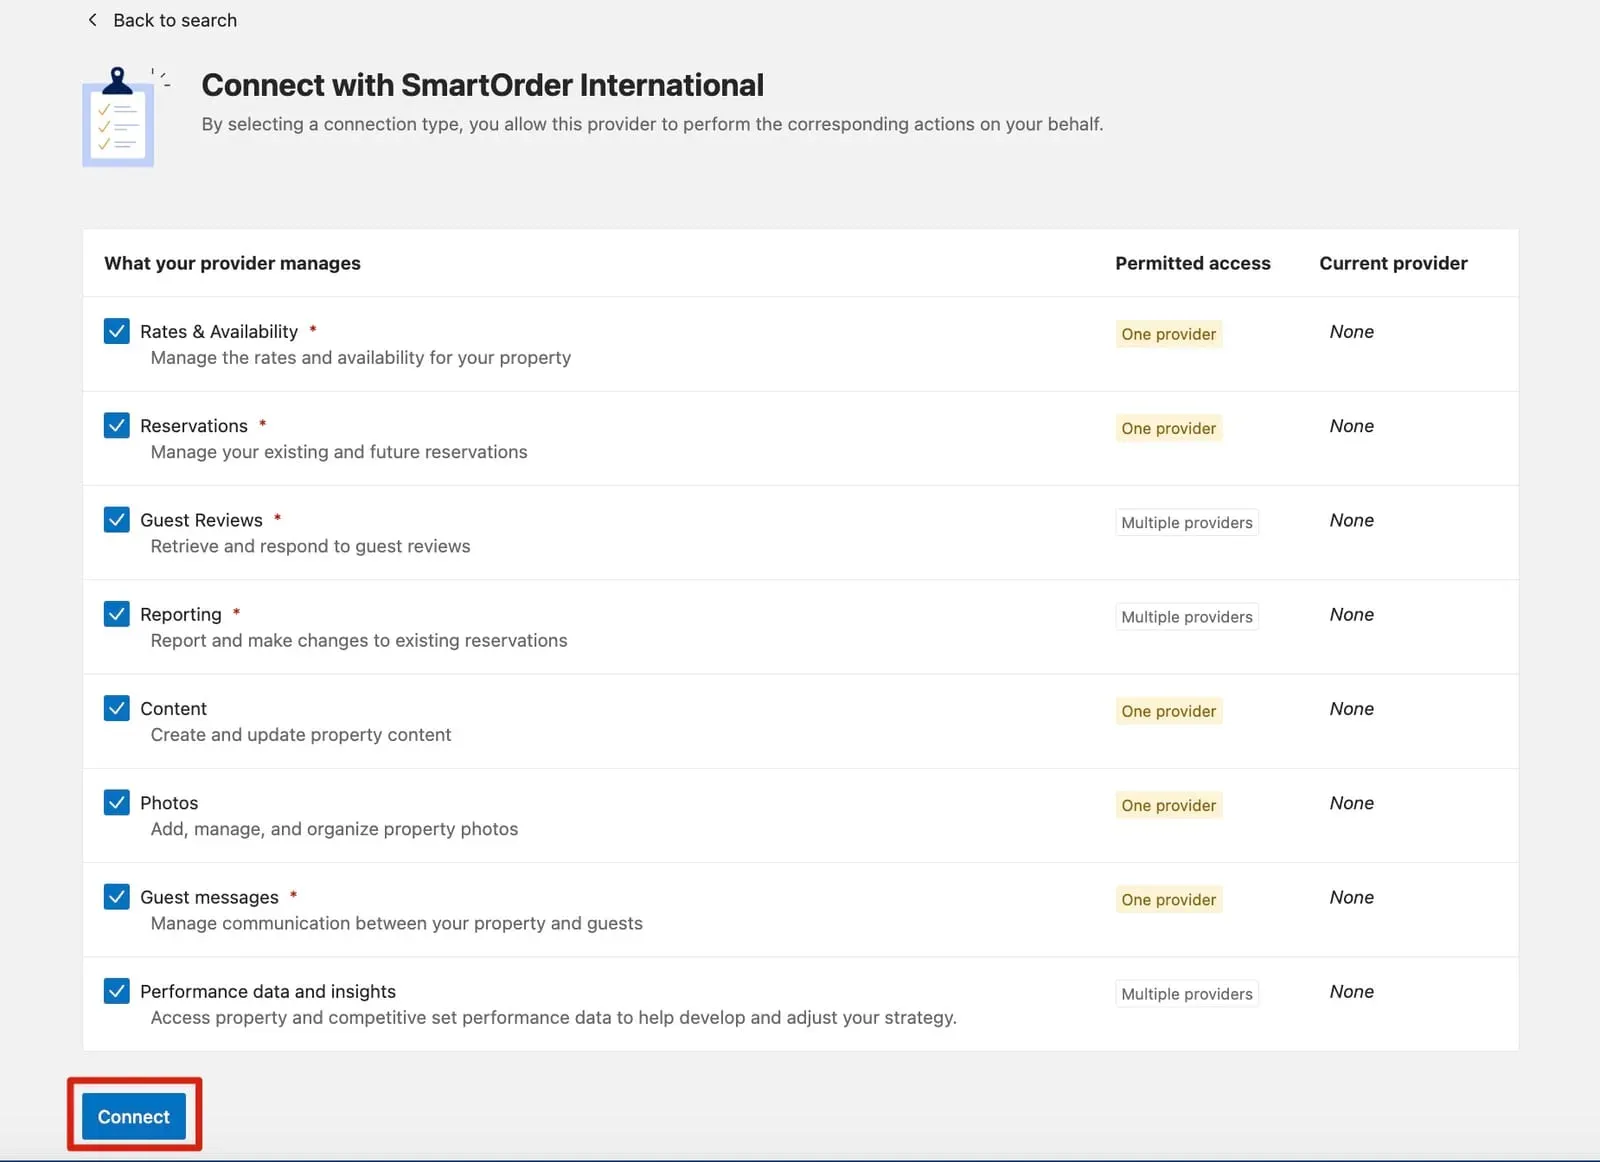
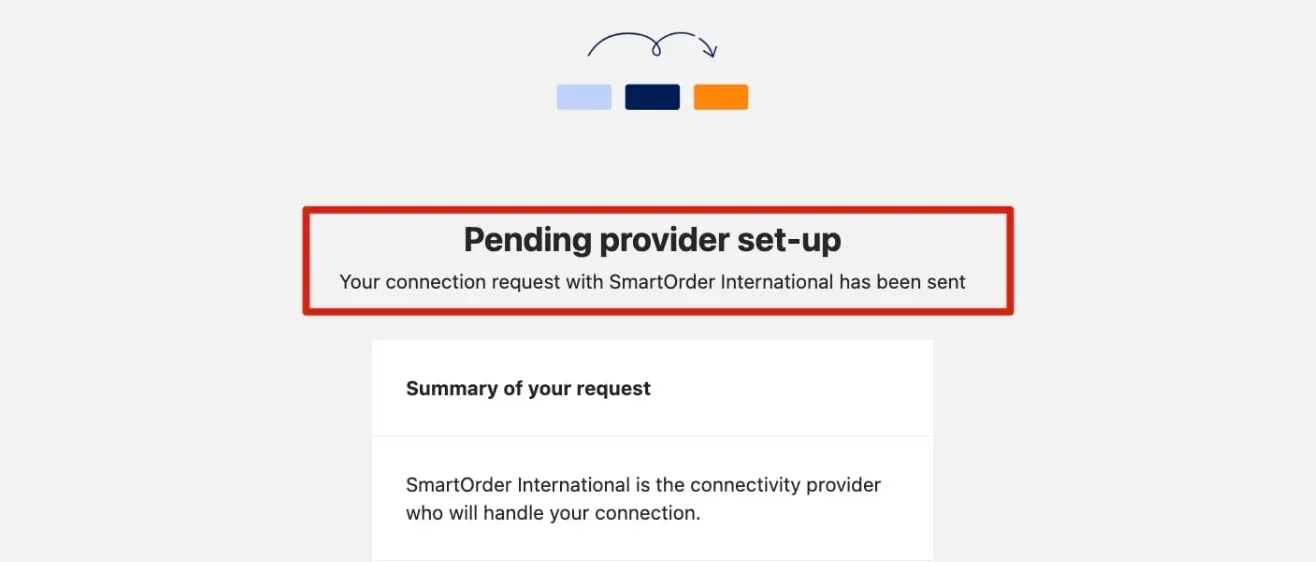
  1. If there's no existing connection, search SmartOrder International and connect.
Click on Search > Type in SmartOrder International > Check all checkboxes and click Connect
Booking.com connection guide with Smart Order PMS, search Smart Order International

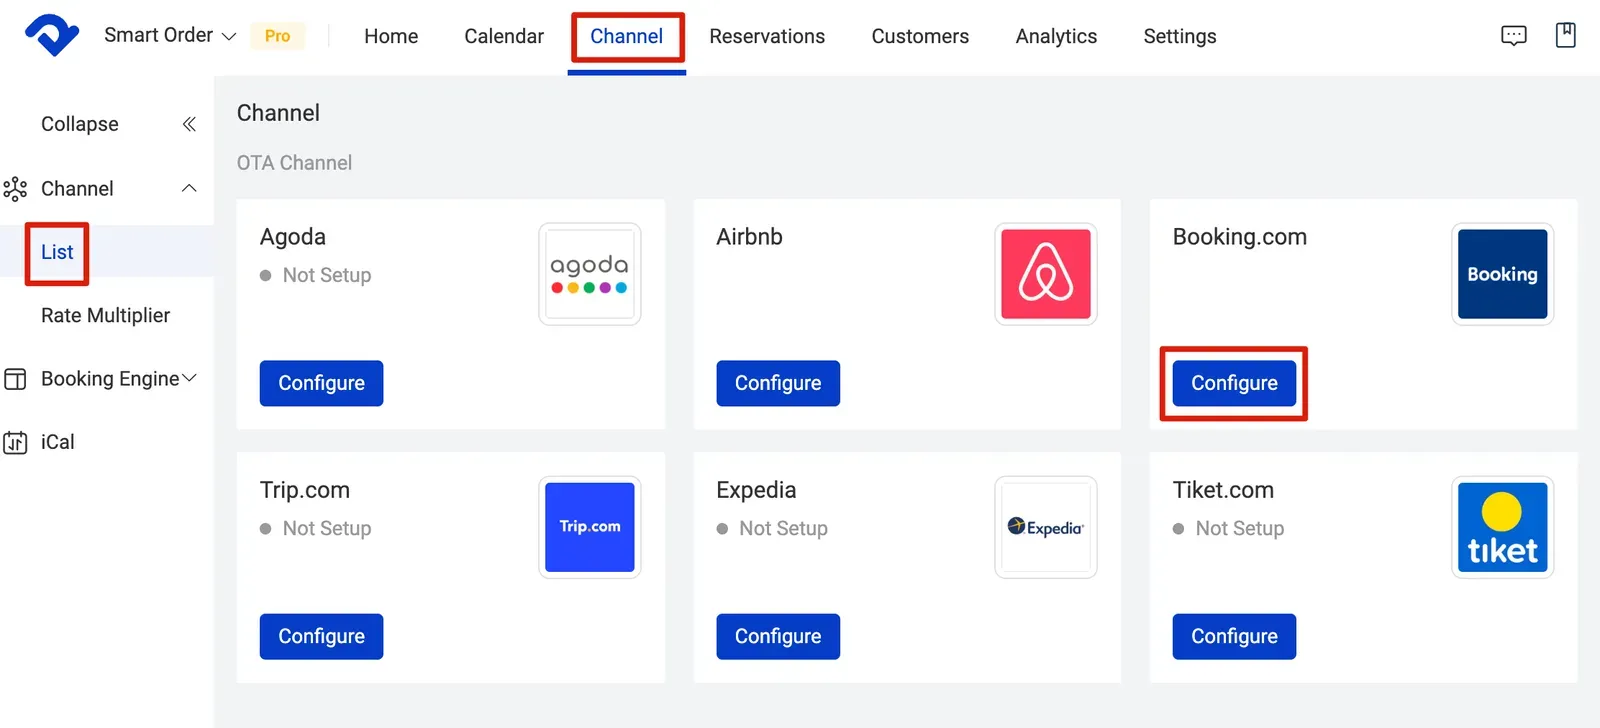
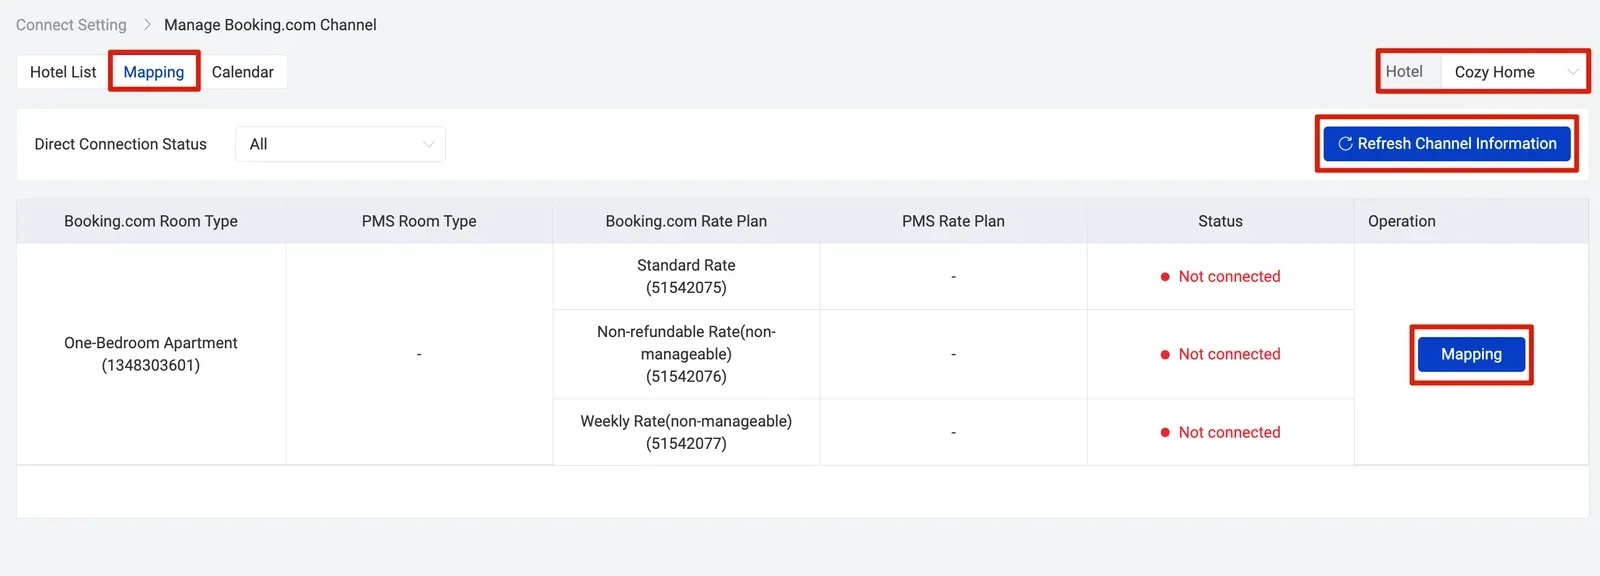
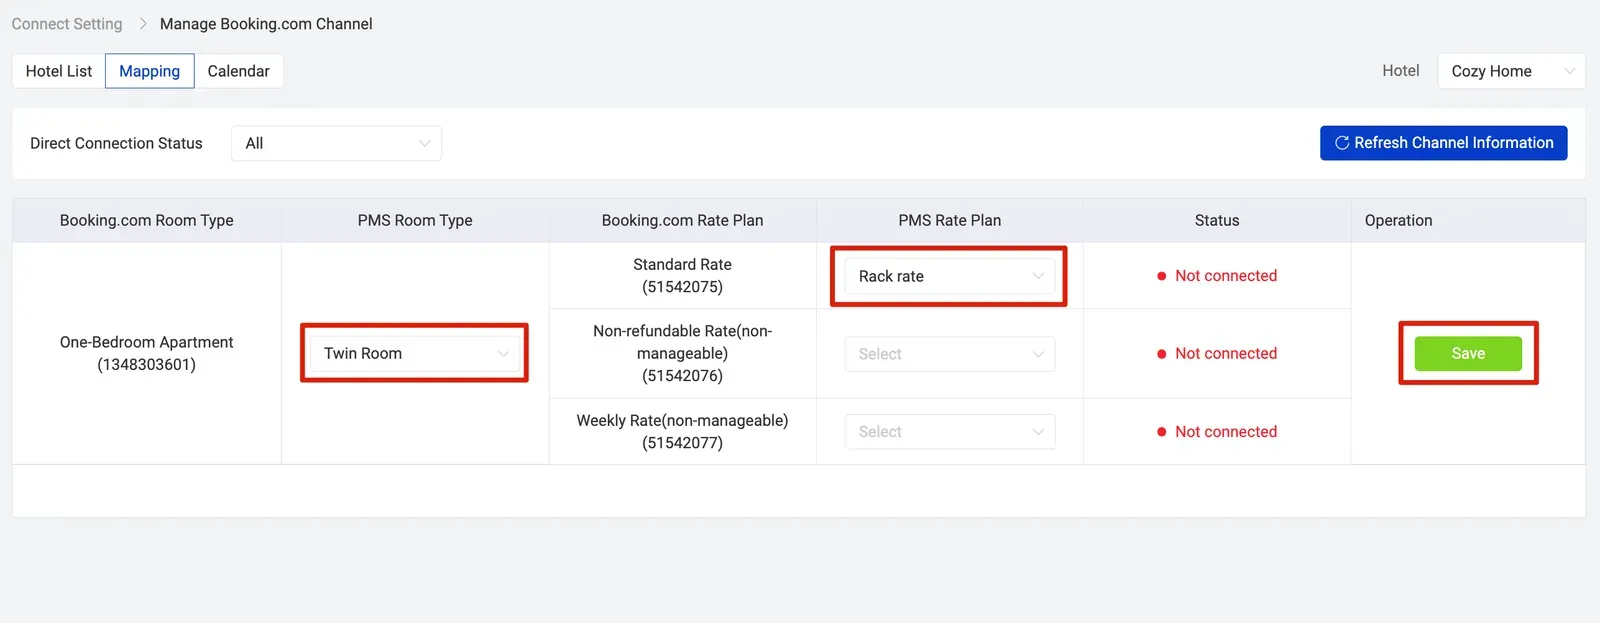
Step 3 - Start mapping in the Smart Order PMS

  1. Log in to the PMS system and start authorization.
Go to Channel > List > Configure > Click on Add Hotel > Click Agree and start authorization
Booking.com connection guide with Smart Order PMS, start mapping in the PMS

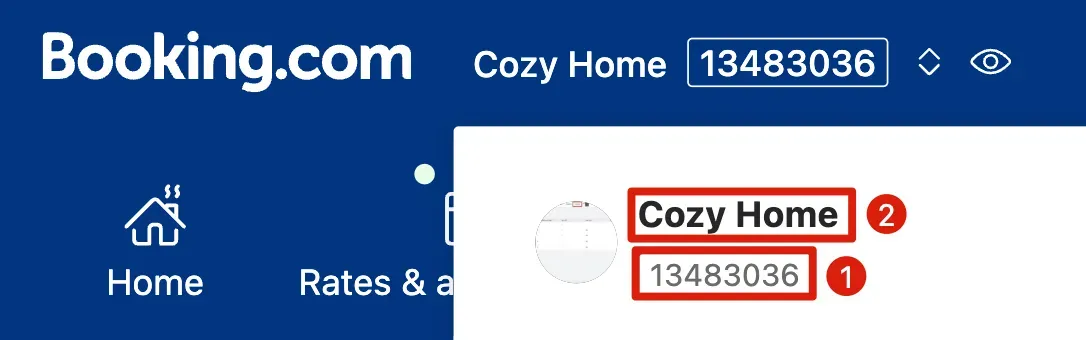
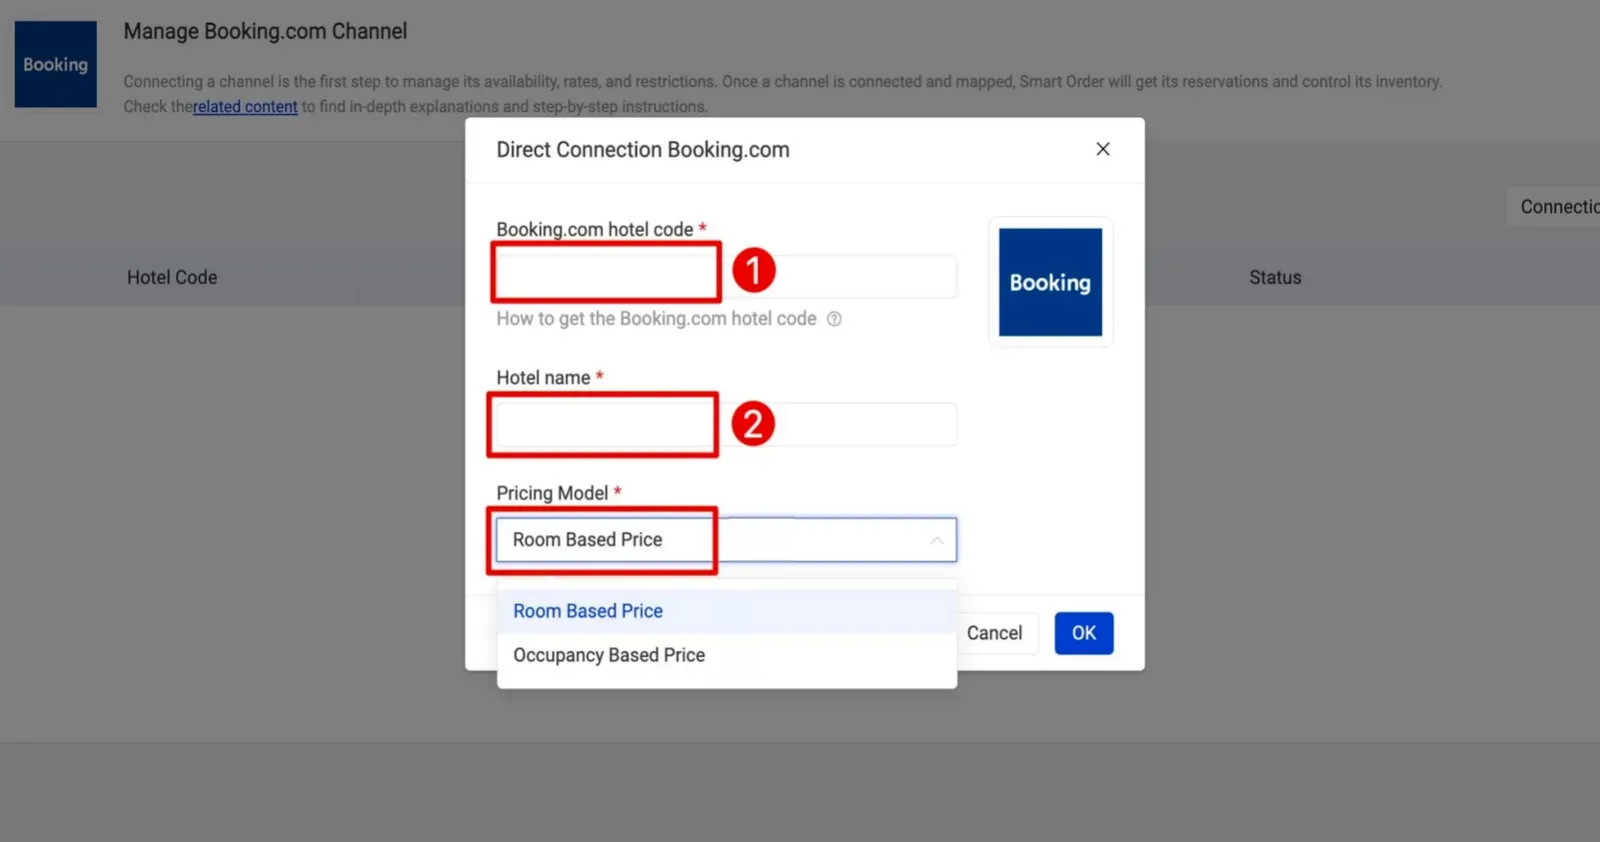
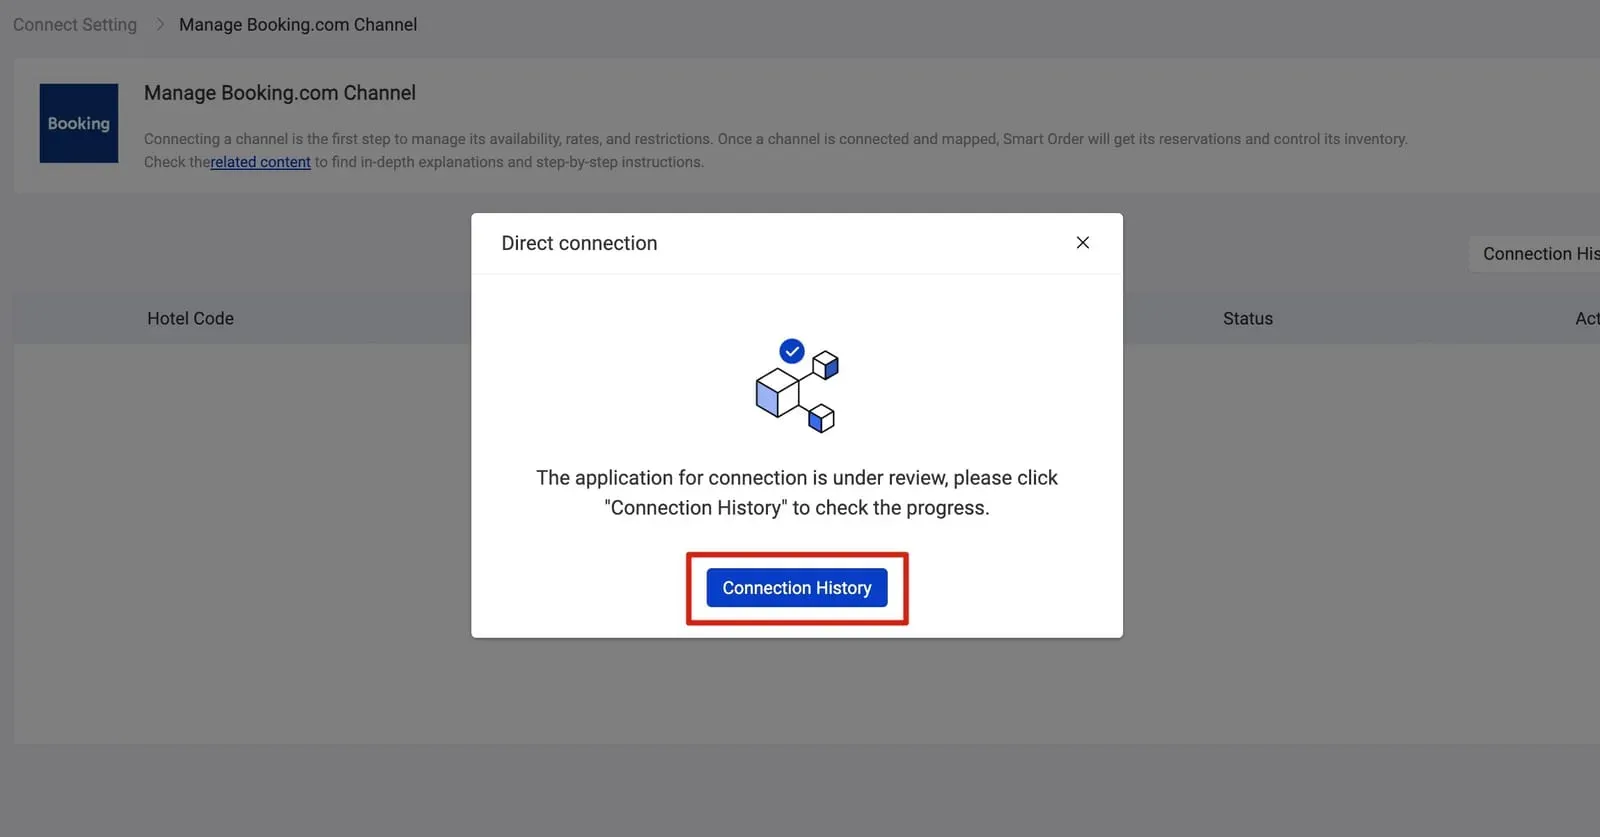
  1. Fill in the basic info to connect.
Fill in Booking.com hotel code > Fill in Hotel name > Choose the Pricing Model > Check Connection History
💡
Room Based Pricing: A pricing model where the rate is determined by the number of rooms booked, regardless of the number of guests.

Occupancy Based Pricing: A pricing model where the rate is based on the number of guests in a room. You can set up extra person charge in Rate Plan settings.
Booking.com connection guide with Smart Order PMS, mapping in the PMS
💡
Please then contact us for approval.

  1. Start mapping.
Click Mapping > Hotel > Refresh Channel Information > Mapping > Select PMS Room Type > Select PMS Rate Plan > Click on Save
Booking.com connection guide with Smart Order PMS, mapping in the PMS
💡
Please do not map non-manageable Rate Plan for Booking.com.

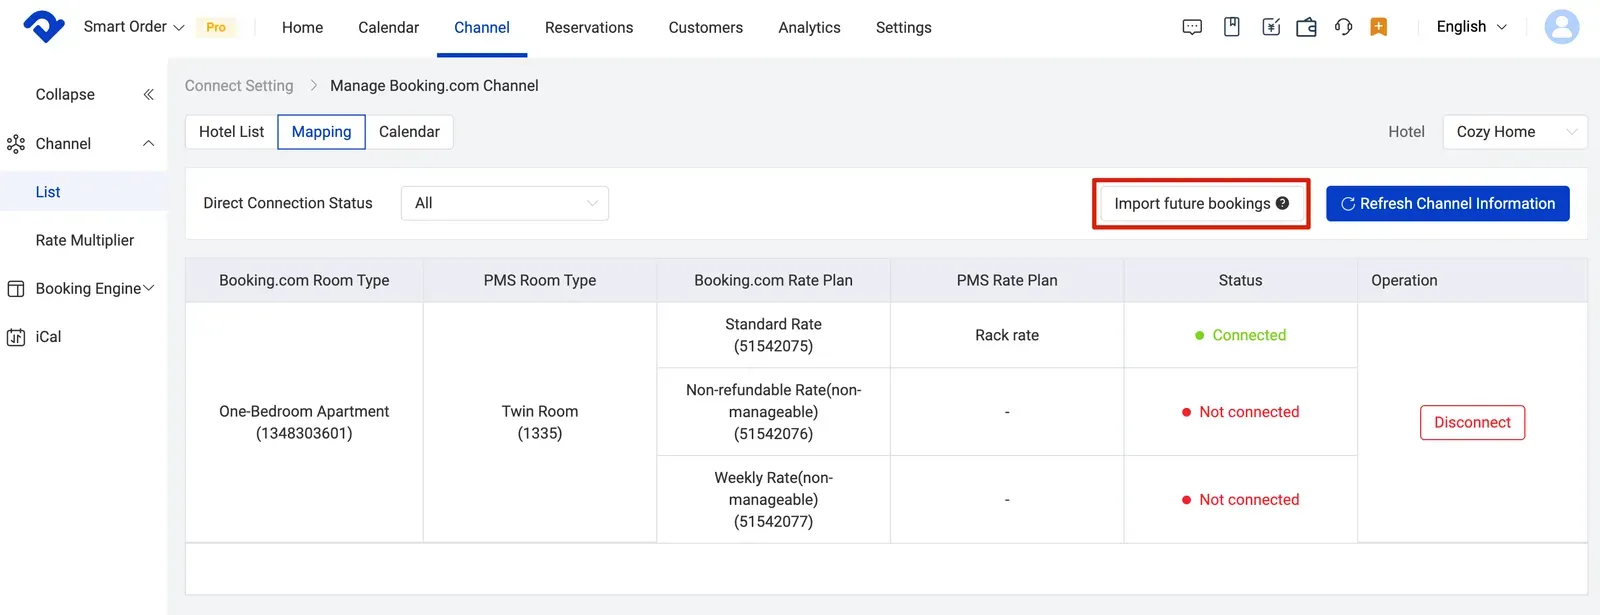
Step 4 - Import future bookings from Booking.com and check the pricing on Booking.com extranet

  1. You must import future bookings into our PMS since this will affect your availability.
Click Import future bookings
Booking.com connection guide with Smart Order PMS, import future bookings to the PMS

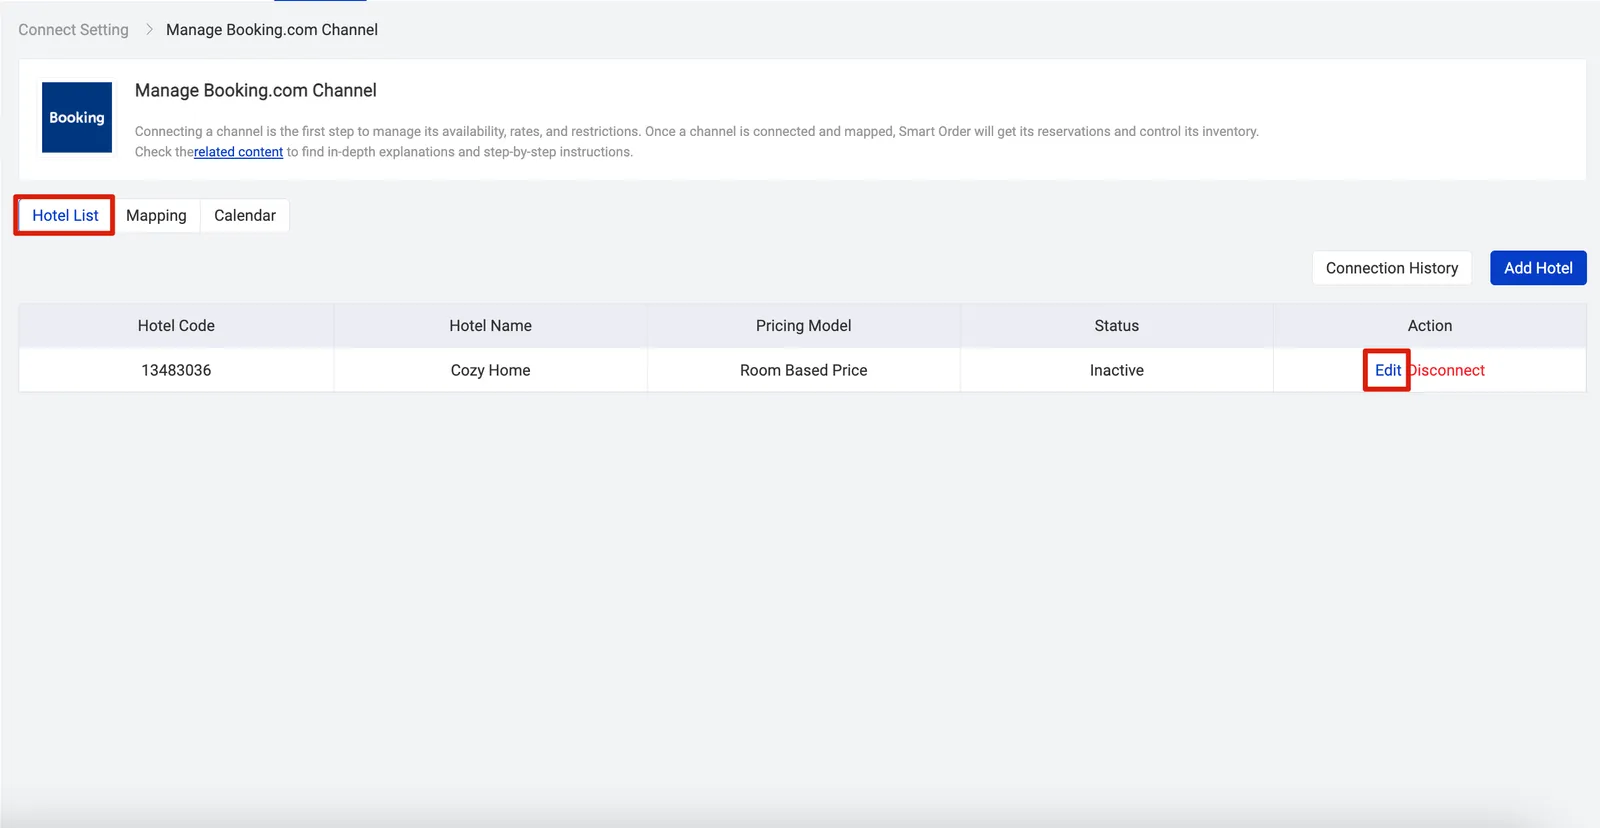
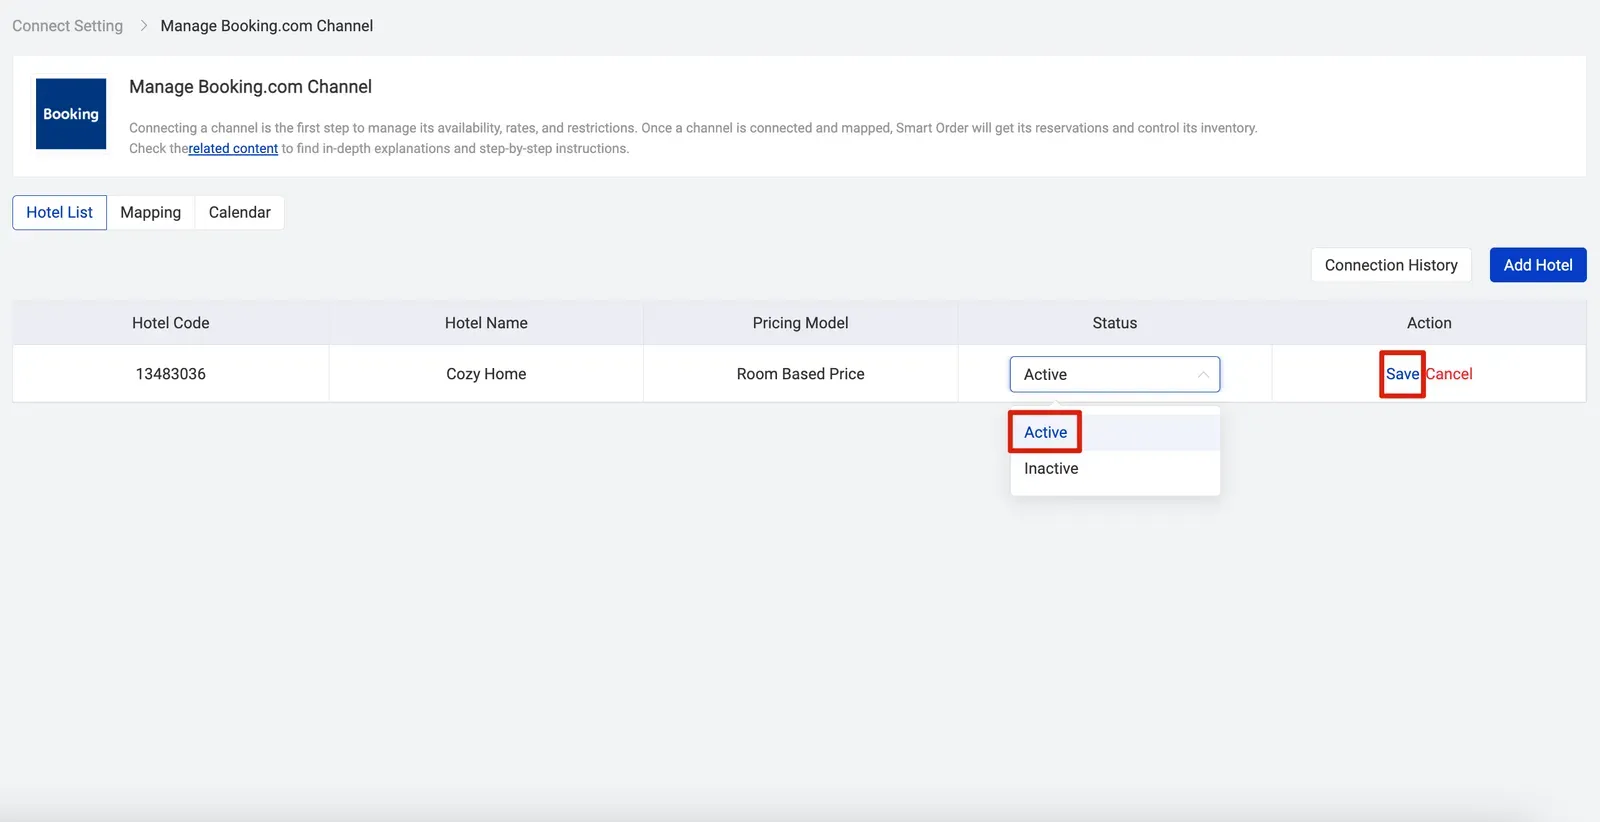
  1. Please note that you need to manually activate the connection for Booking.com.
Go to Hotel List > Edit > Select Active > Click on Save
Booking.com connection guide with Smart Order PMS, activate the channel in the PMS

  1. You're almost done! Wait for another 5 minutes and check the pricing on Booking.com after all the above setup.
💡
Please then contact us in case you have any questions.

Related Articles

Frequent Questions
Derived rate plan Derived rates plans inherit their pricing and restrictions from their parent rate plan on OTA extranet, which means our platform does not send any inventory updates to OTA for these rates; the channel blocks the values being sent. You need to change the price as set up
Channel multi-mapping
What is multi-mapping? The channel manager’s room mapping functionality allows multiple channel rates to be mapped to, and managed by, a single channel manager room rate. This is known as multi-mapping and it provides flexible mapping options to help you simplify your setup. When to use multi-mapping? Multi-mapping is
Manage room allotment by channels
1. Click the specific Channel that you want to change room allotment  2. Click Configure to open a channel you would like to edit 3. Click Allotment Settings on the top 4. Click on the date you would like to change and edit the allotment of a room type 5.
Perform a bulk update
You can use Bulk Update to quickly and easily perform extensive updates to rates and restrictions across your room type and channels for one or more date ranges and specific days of the week. Navigation overview The inventory grid is where you manage the day-to-day pricing, and restrictions for your
How to set up the extra person rate
Follow the steps below to set up extra person rate. 1. Go to Settings: Next to the menu at the top, click "Settings." 2. Choose Rate Plan: Tap "Rate Plan" in the "Settings" section. 3. Select Occupancy Rate: Click on "Occupancy Rate"
Add and edit rate plan
Step 1 - Create a rate plan Create the rate plan first. Click on Settings > Rate Plan > Click Add New Rate Plan > Type in the Rate Plan Name > Set Default Minimum Stay > Set Default Maximum Stay > Choose Manual/Derived > Select Room Types >