Add Items in a Reservation

Overview

The items are either free or have a cost, which will be recorded as Extras. Items can be added when creating a new reservation or modifying an existing one. You can operate on the computer or the app.

Steps on PC:

Steps to add items to a newly created reservation:

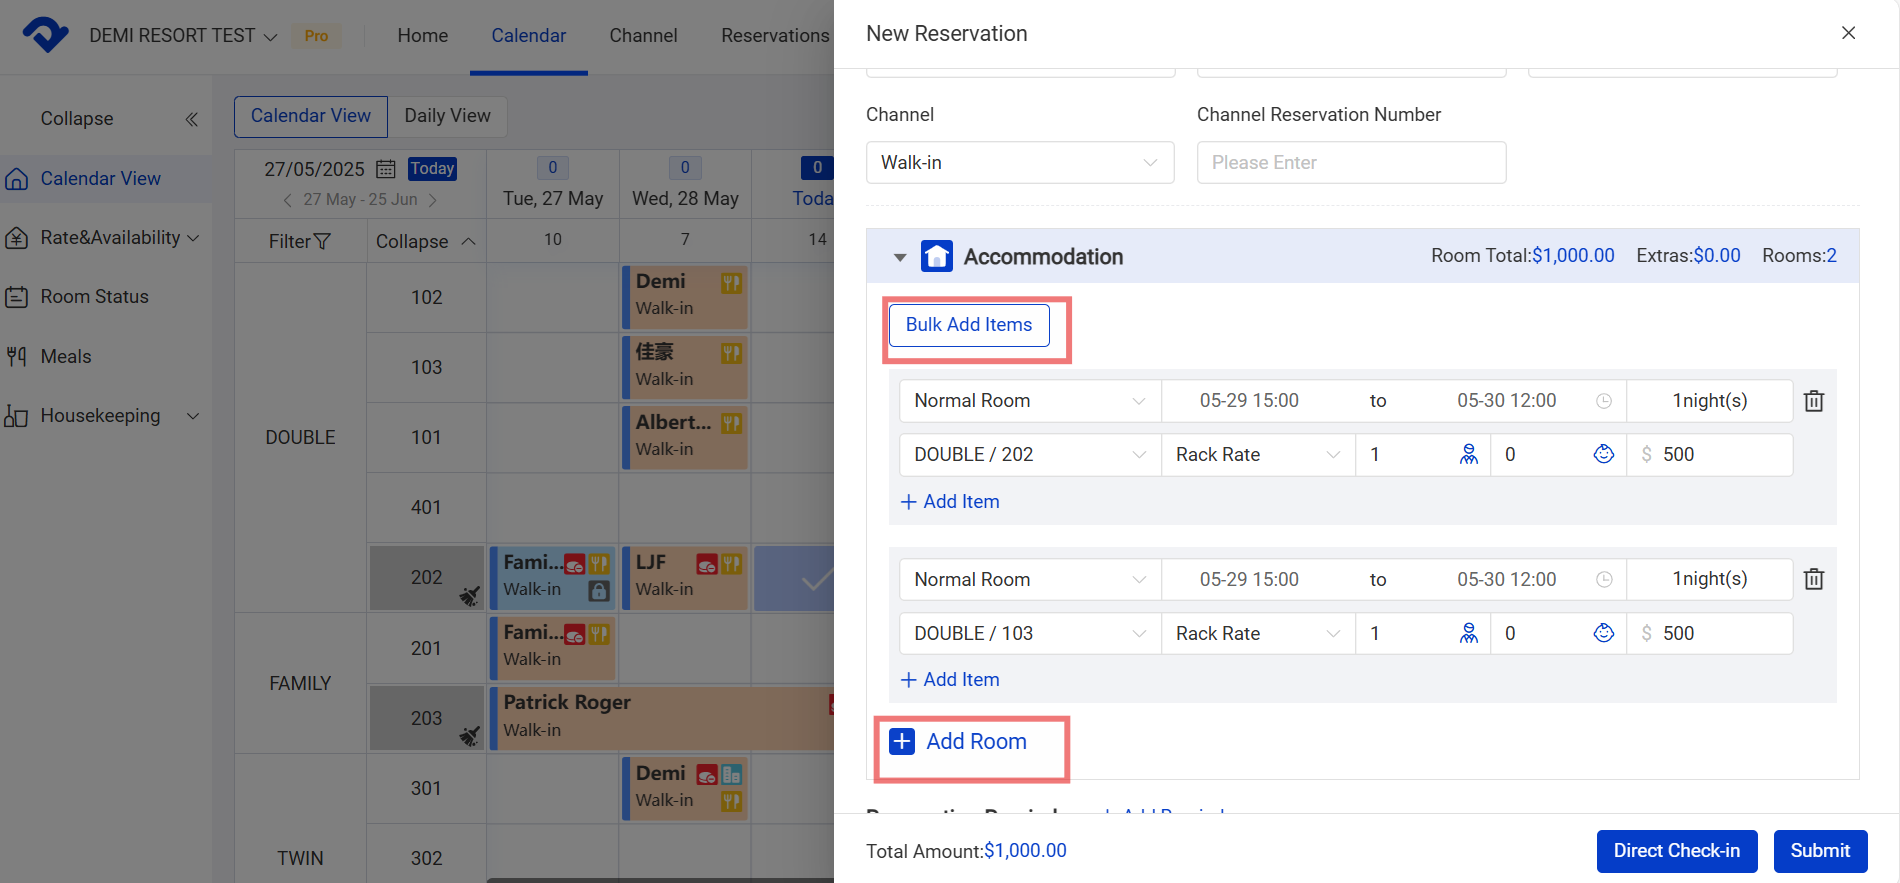
Step1: You can select Add Item under the room to record extras on this room. Or you can select Bulk Add Items to record extras on all the added rooms of this reservation.

Bulk Add Items

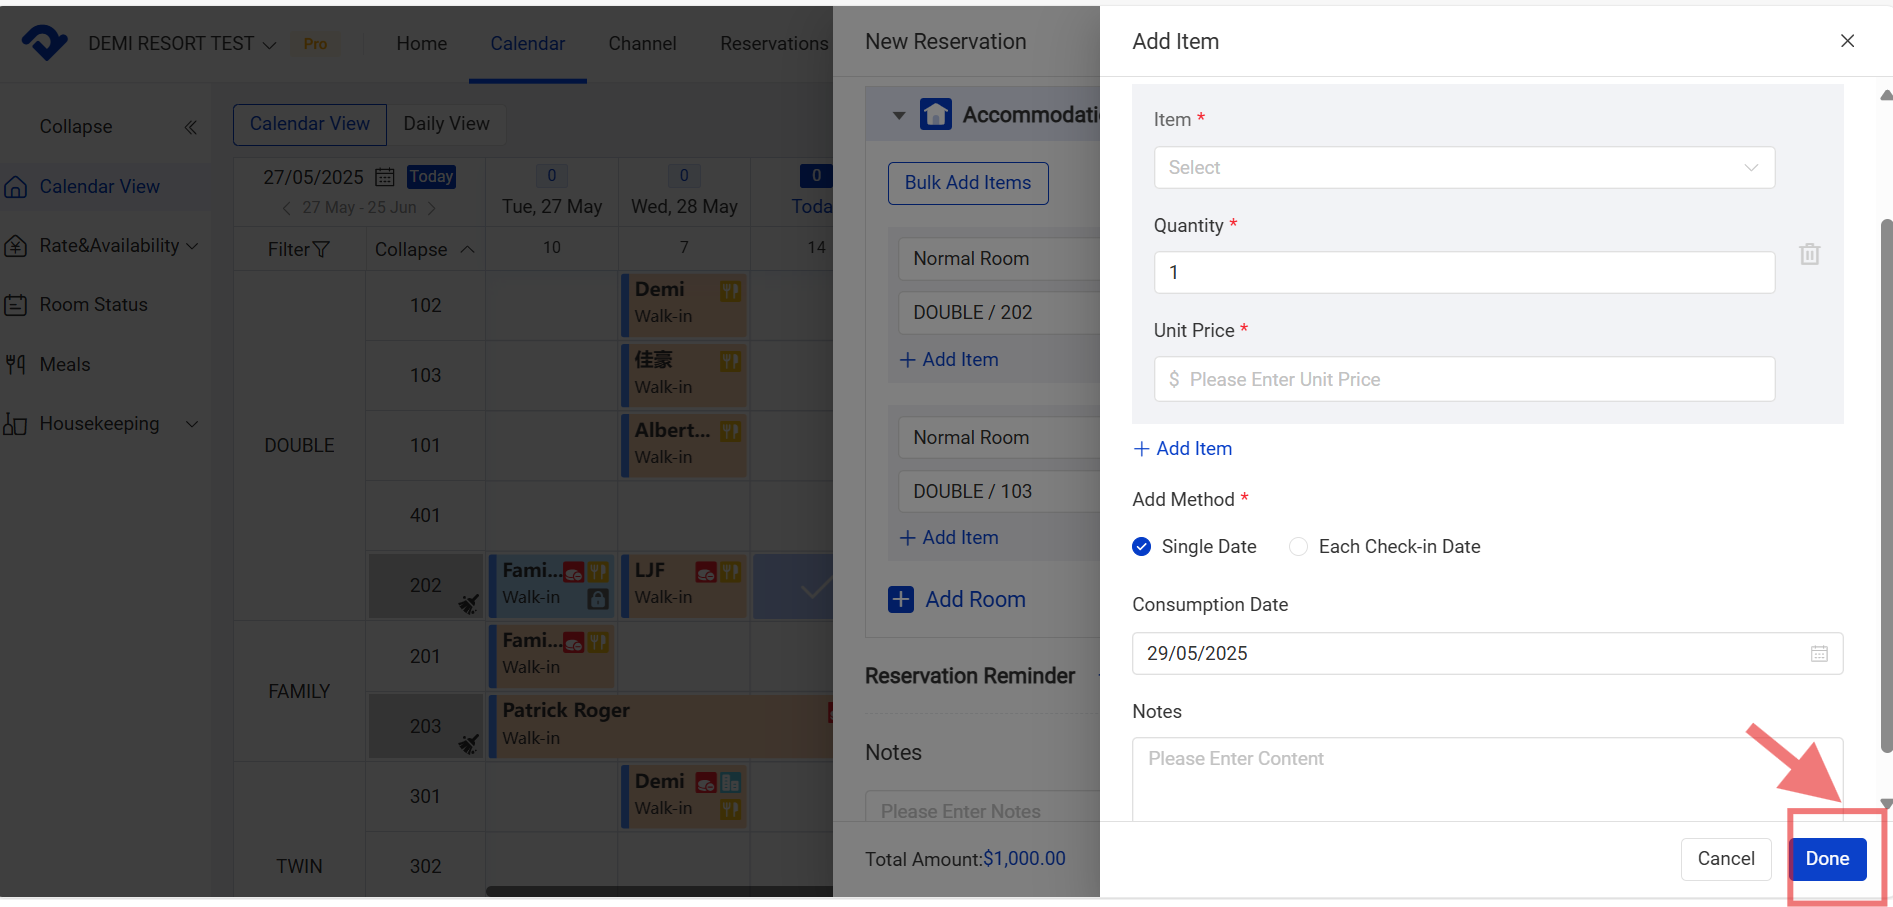
Step2: On the Add Item pop-up box, you may fill in the item, quantity, unit price, and the date, which will affect the Analytics data.

Add Item pop-up box

Steps to add items to a reserved one:

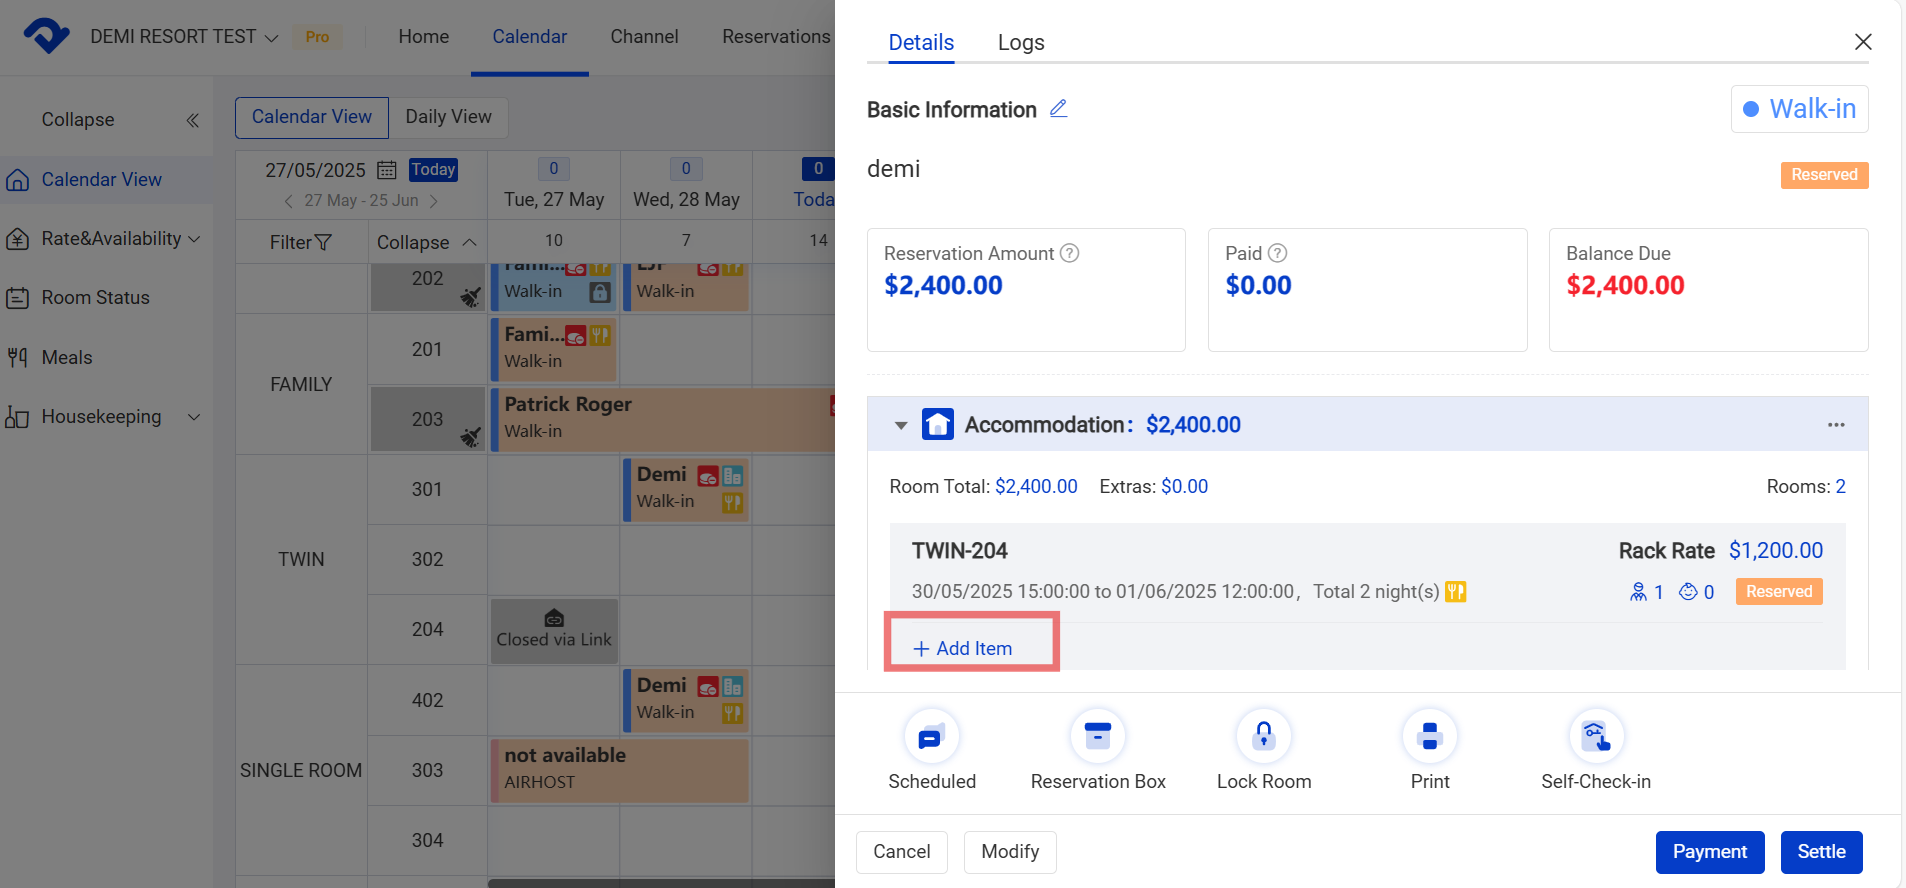
Step1: In the reservation Details page, you can add items by selecting Add Items.

Details page, Add Items.

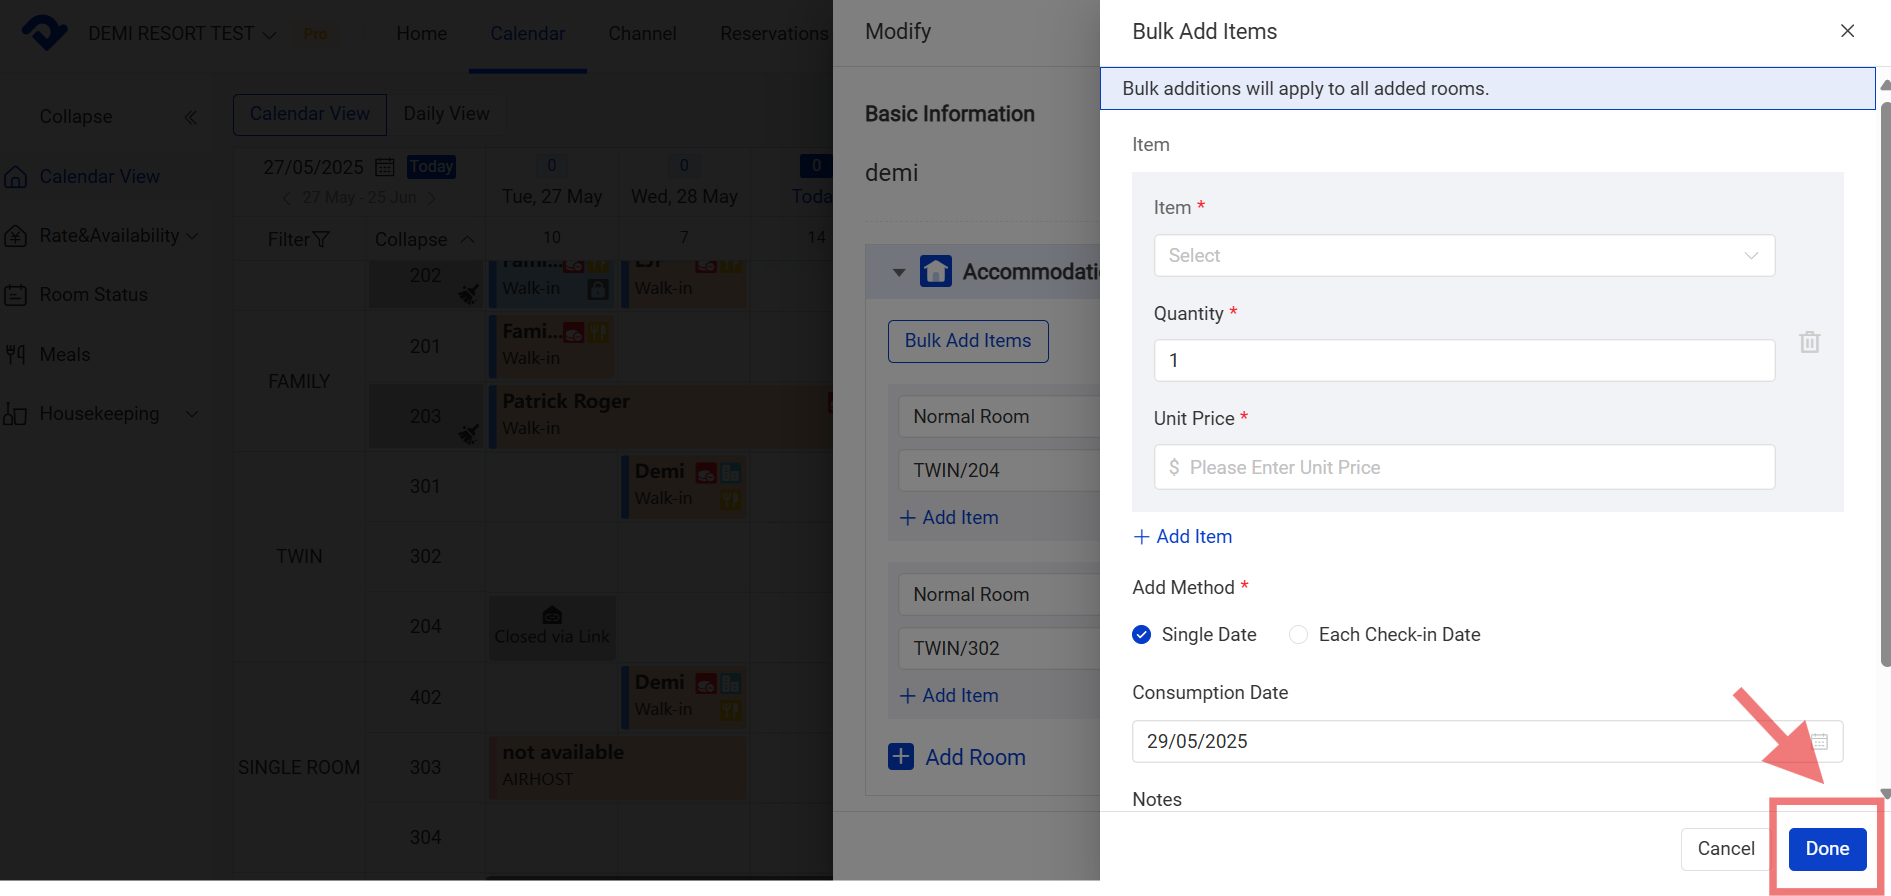
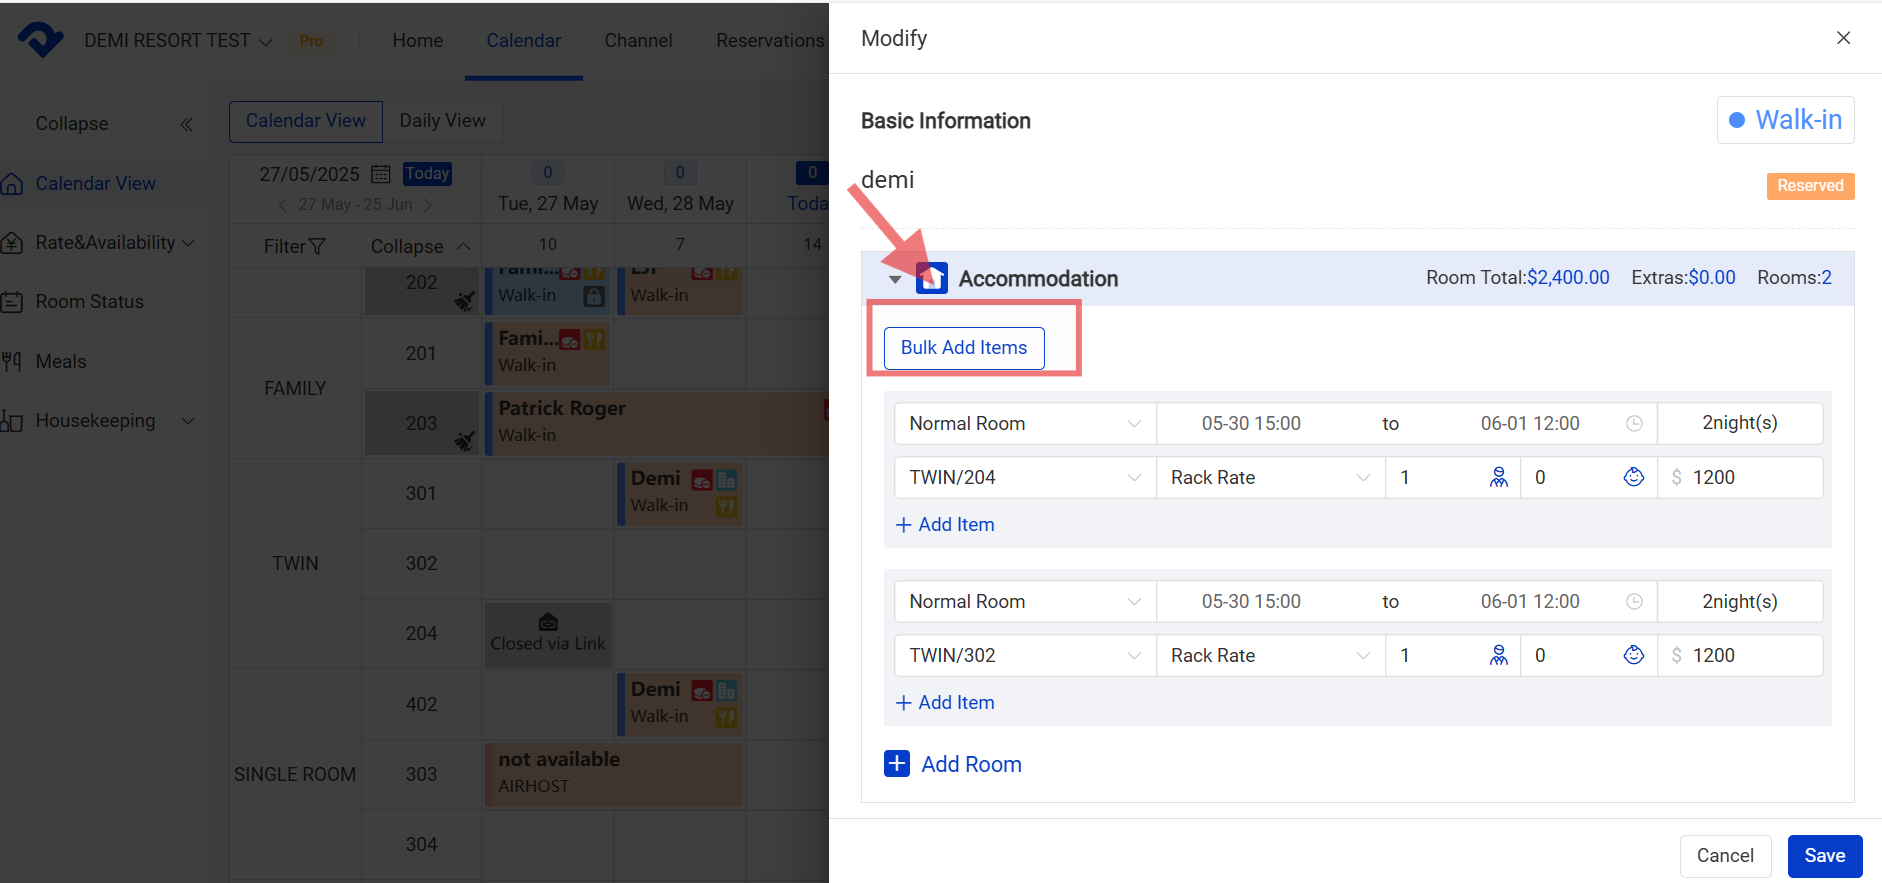
Step2: If you want to add items in bulk, you can click Bulk Add Items in the Modify page.

Bulk Add Items in the Modify page

Step3: After filling in the item, quantity, unit price, and date. Select Done.

done

Related Articles

Add Reminder in a Reservation

No matter for a newly created reservation or a reserved one, the reminders help to take notes of the customer's needs. Steps on PC: Step for a newly created reservation: When you are creating the new reservation, you select Add Reminder. Fill in the Reminder Time, Reminder Content.

Reservation Box

Overview You can move the reservation to the Reservation Box manually when you have no room for the reserved one. The OTA reservations may also automatically enter the Reservation Box when there is no room at the confirmation. As for the reservations in the Reservation Box, you need to assign

Settings of Sort, Group and Calendar View

Overview To manage the room assignment more flexibly, we support moving a room easily and setting up the rooms by group. To monitor the room status, we can operate it on Calendar View. Change the Order of A Room Type or Room: Step1: Go to the Settings page. Select Sort

Create and check in an hourly room reservation

Overview We don't connect an hourly room type with the OTA channels. Thus, you have to manually create an hourly room reservation. Create/ Check in An Hourly Room Reservation: Step1: Go to the Calendar page and select Calendar View. Select an available room from the hourly room type.

Create A Reservation and Manually Edit the Reservation Details

Overview As you have connected to OTA channels, all the reservations will be recorded automatically from the channels. However, you may still have some walk-in reservations or edit some information on them. Create A New Reservation: Way1: Go to the Calendar page and select Calendar View. Click the room and

Check in/ check out/ settle a reservation

Overview If it is the check-in date, the Check-in icon will be shown on the reservation page. After the reservation has been checked in, the checkout icon will be shown. And only when the Balance Due has been paid off, the reservation can be settled. Check in a reservation Step1: