Agoda Connection Guide

Step 1 - Set up room type and rate plan in the PMS

Please follow the steps in Initial Set Up, to set up the Room Type and Rate Plan.

Step 2 - Select Smart Order to be the channel manager

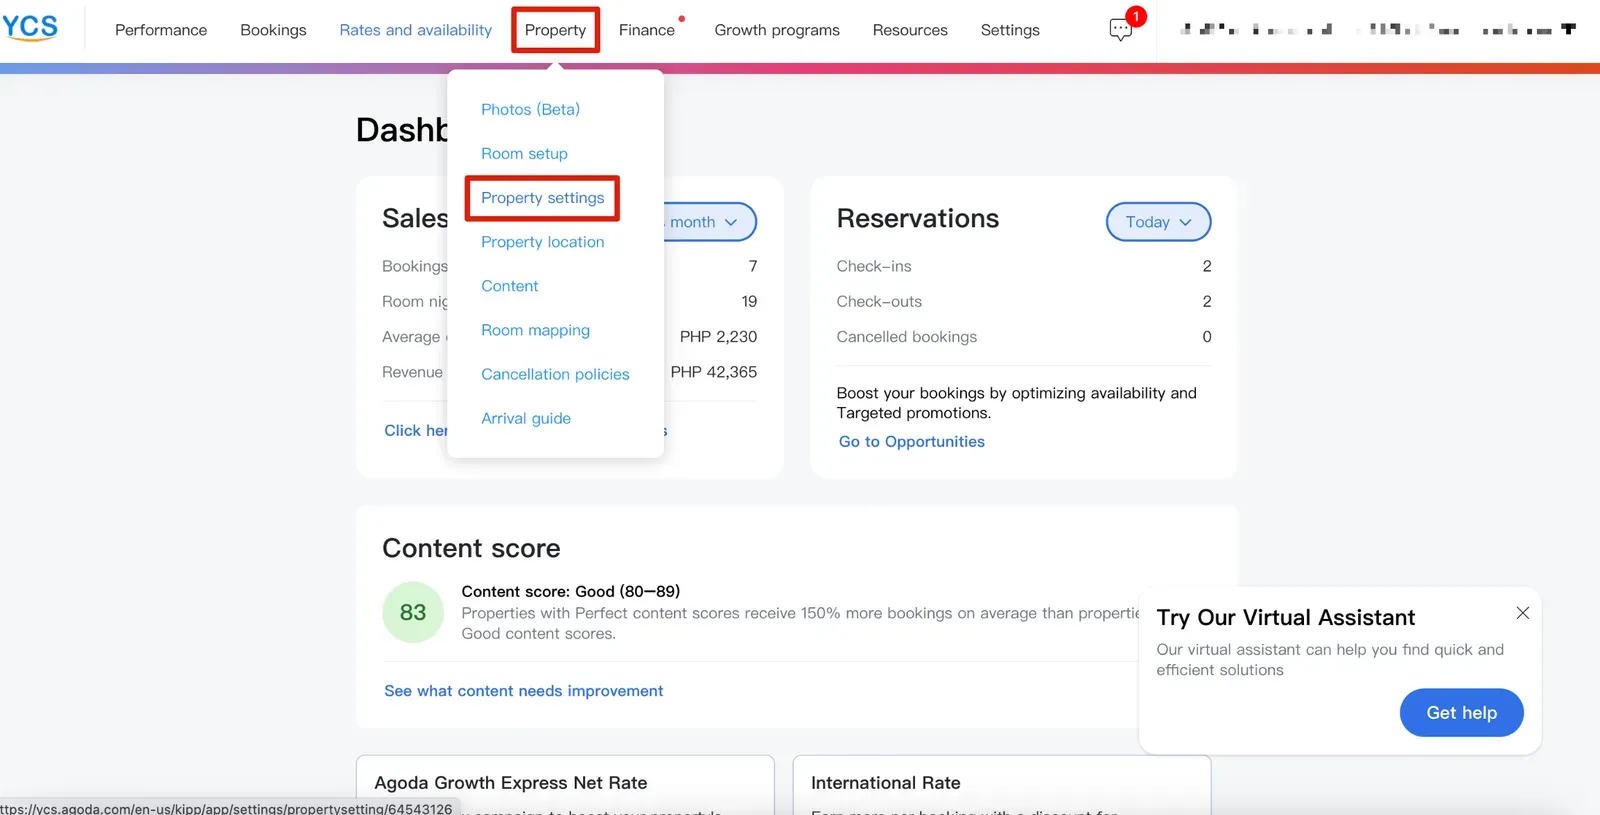
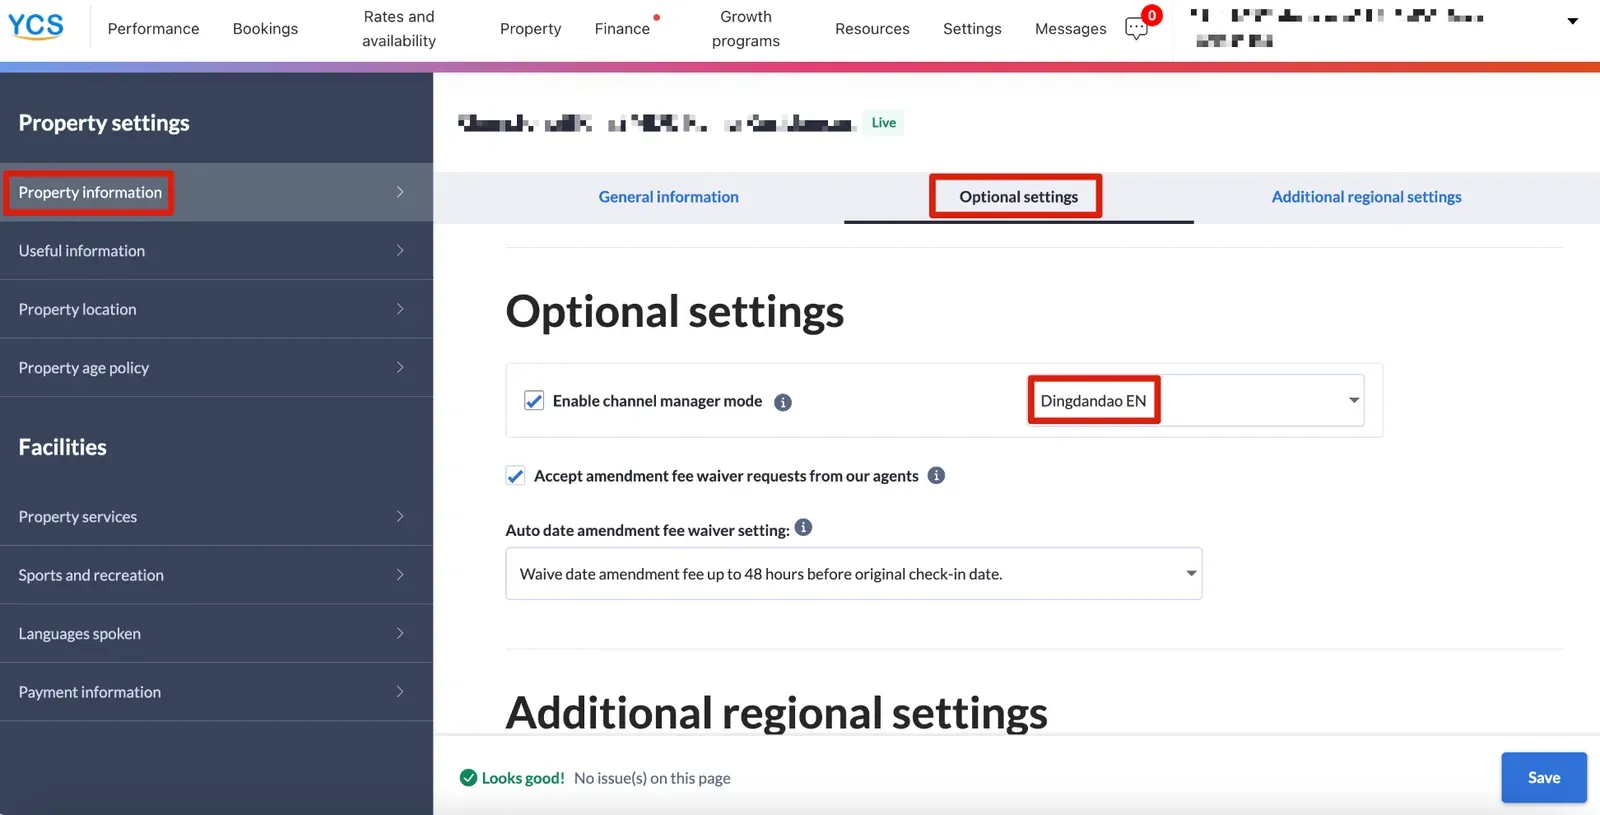
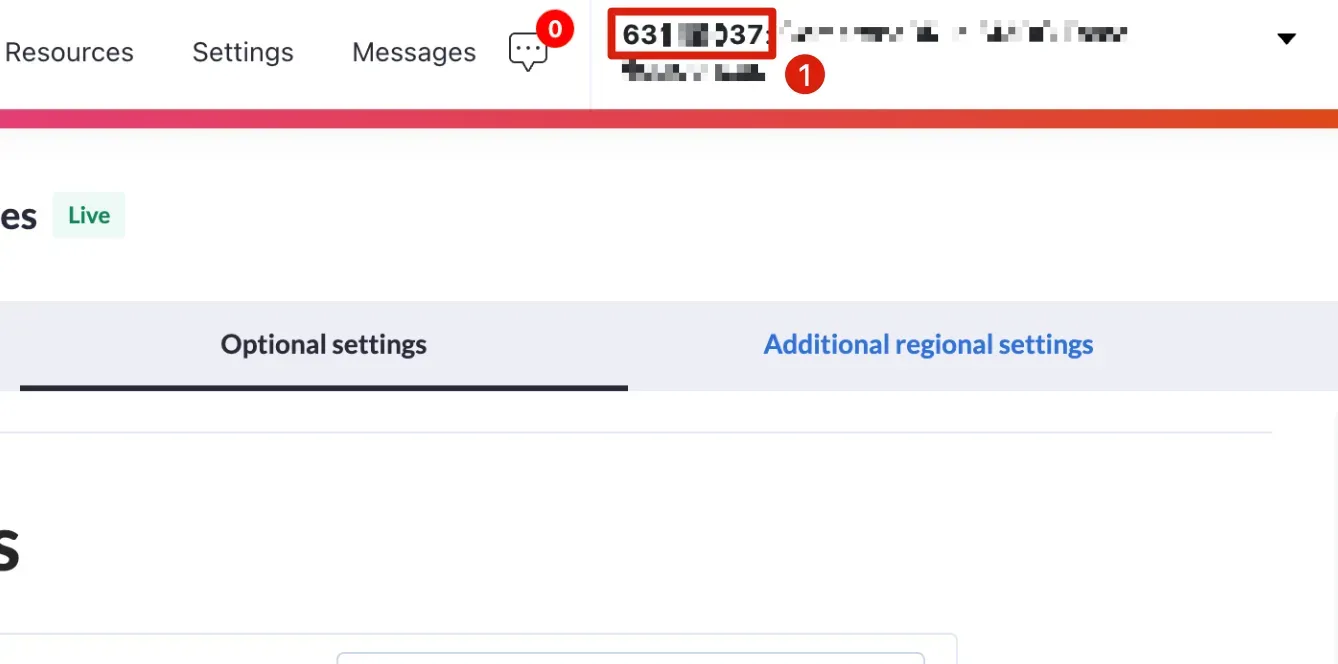
  1. If you manage a hotel property, log in to Agoda https://ycs.agoda.com/en-us/kipp/public/login and follow the steps.
Go to Property > Property settings > Select Property information > Optional settings > Choose Dingdandao EN to be the channel manager
Go to Agoda YCS and choose Dingdandao EN to be the channel manager

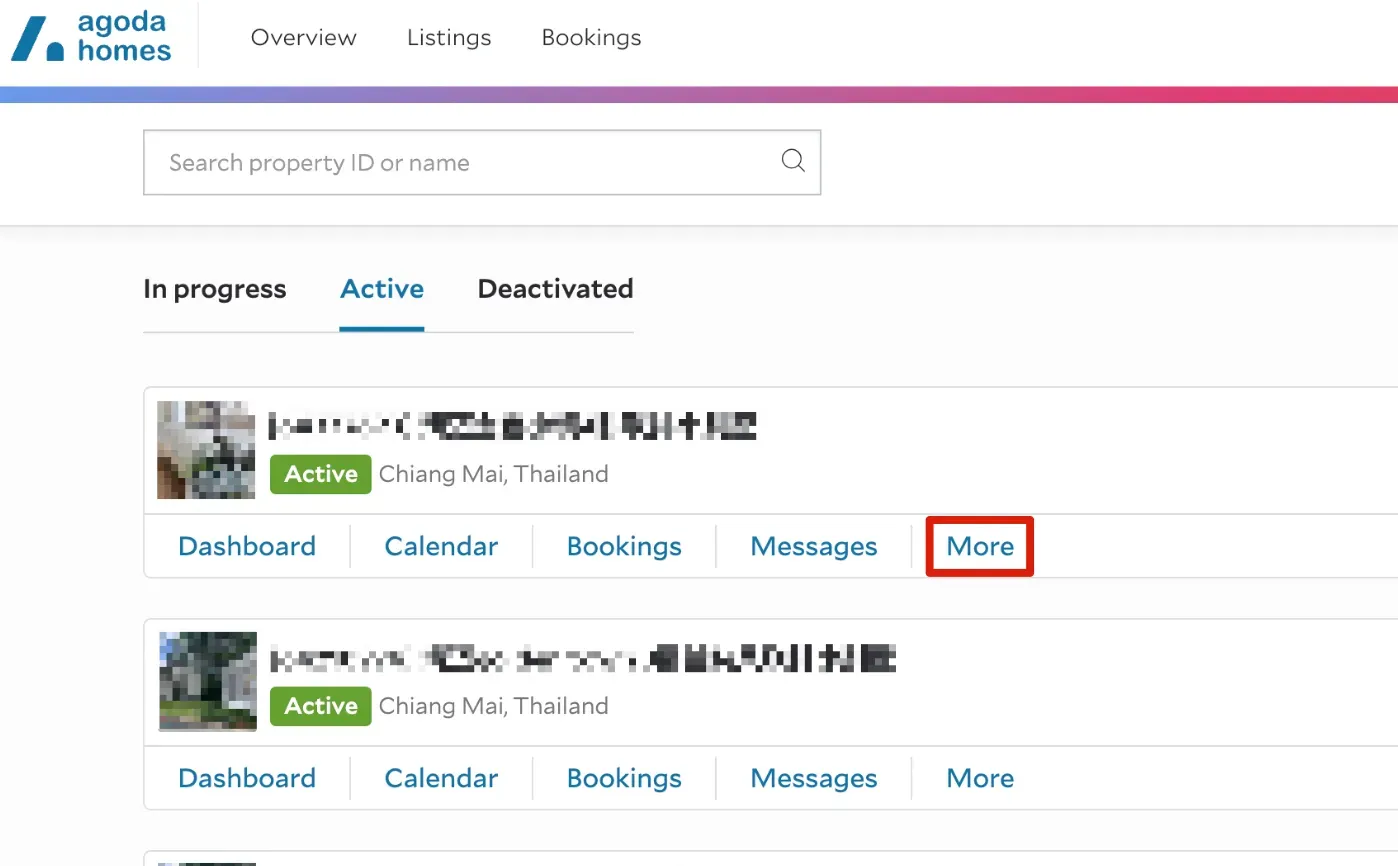
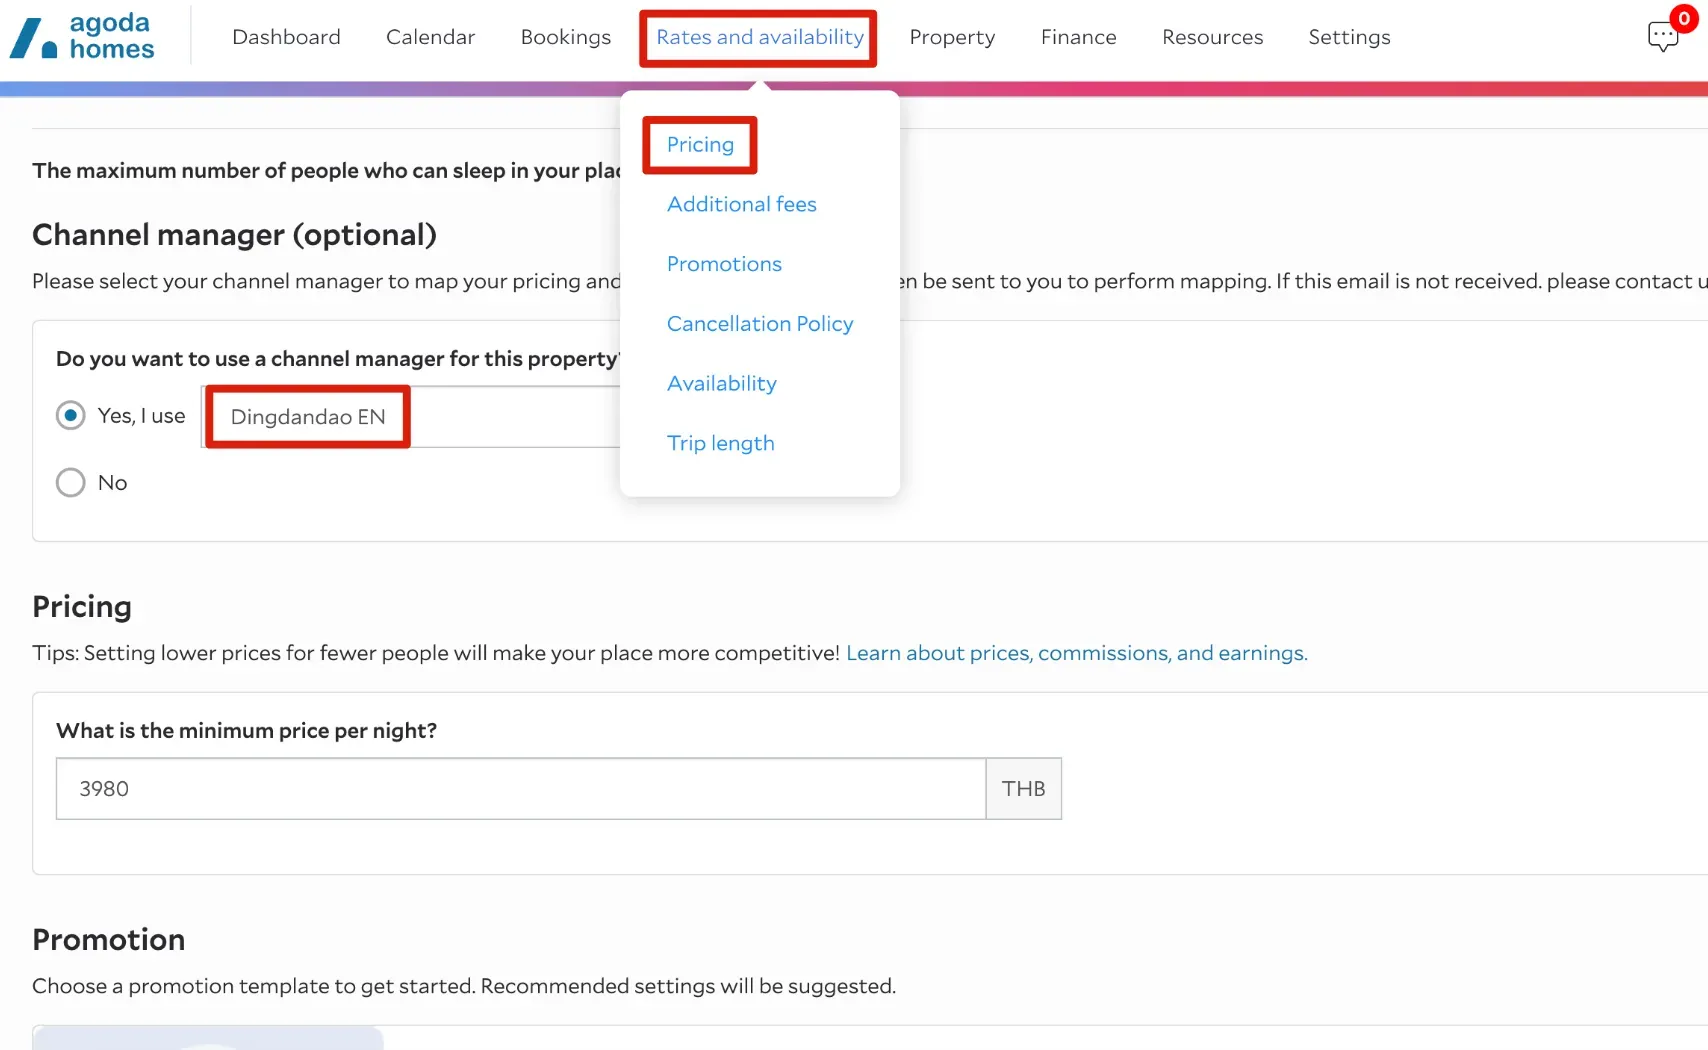
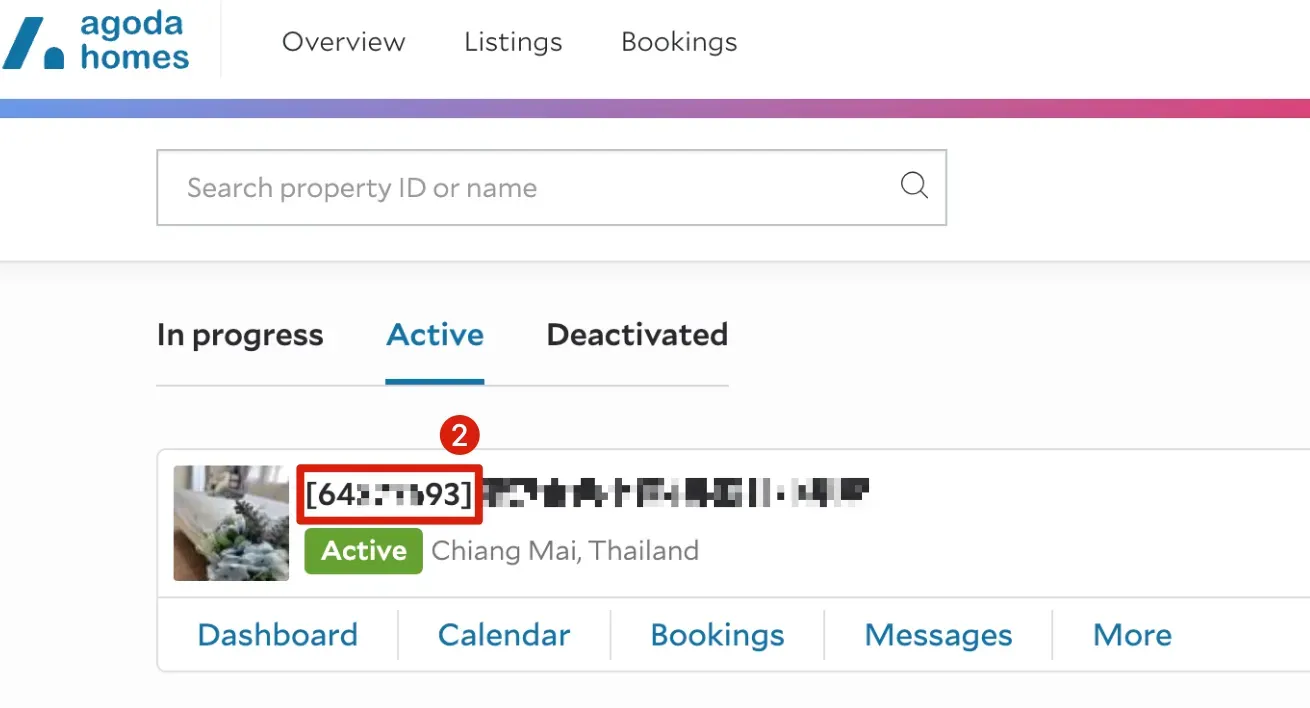
  1. If you manage a BnB property, log in to Agoda https://www.agoda.com/en-us/list-my-property and follow the steps.
Click More > Go to Rates and availability > Select Pricing > Search Dingdandao EN to be the channel manager and save
Go to Agoda Homes and choose Dingdandao EN to be the channel manager
💡
After you switch channel manager in Agoda, please wait at least 2 hours before you start mapping in Smart Order PMS.

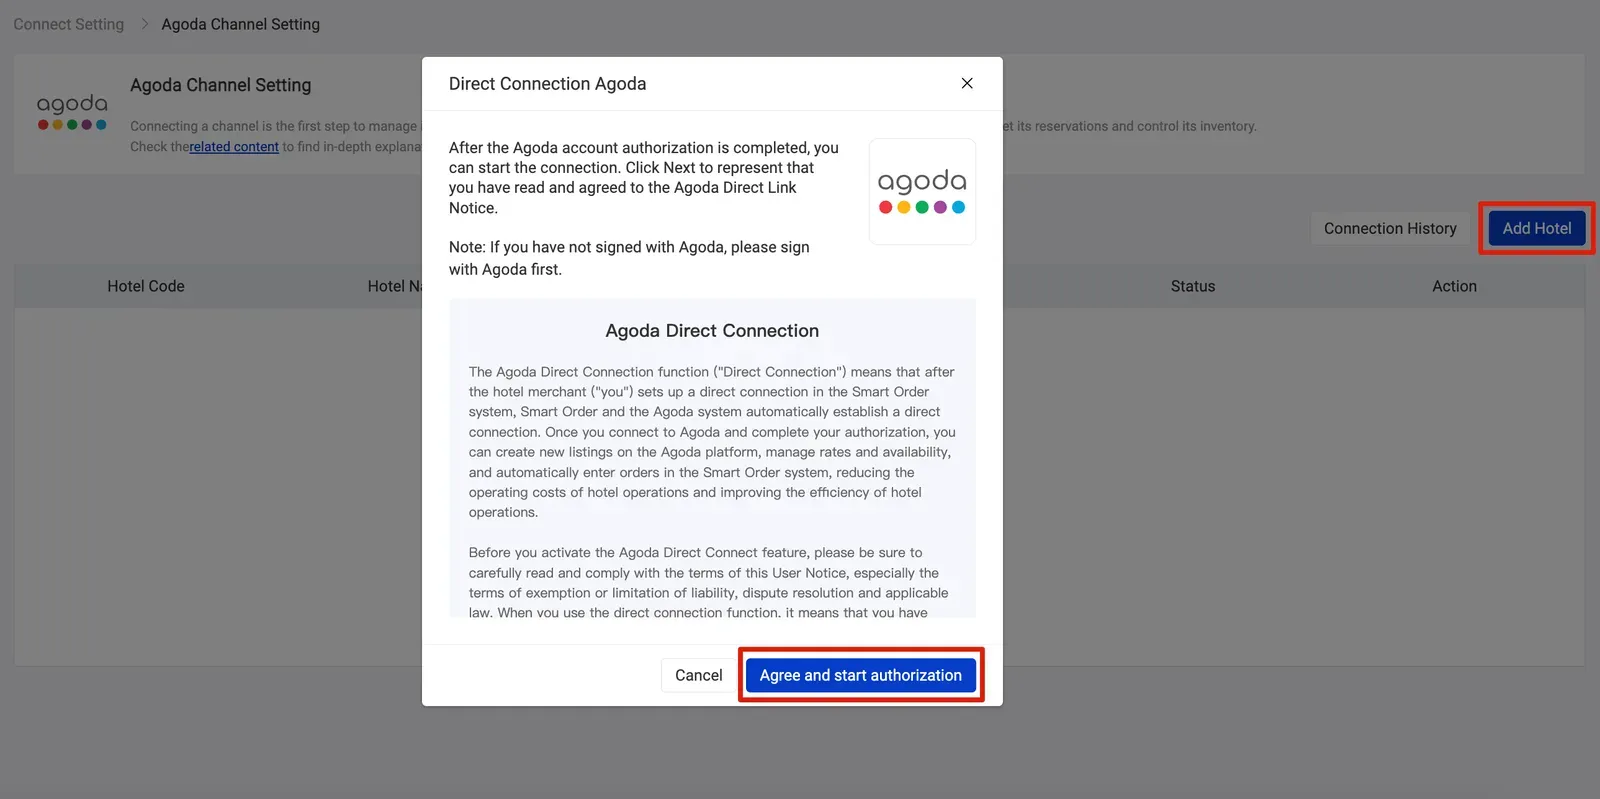
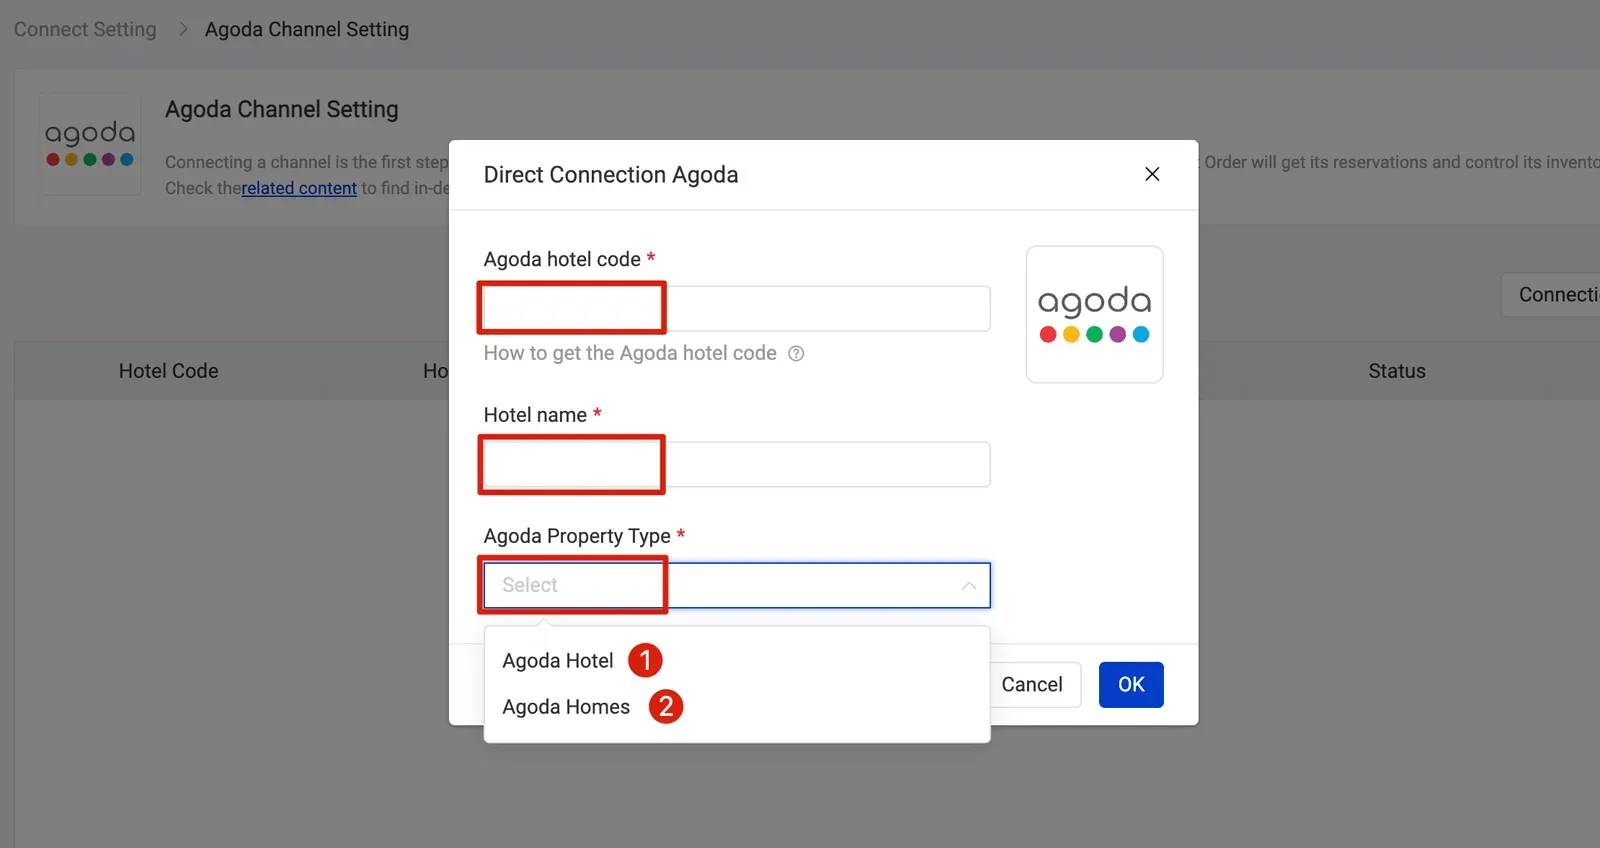
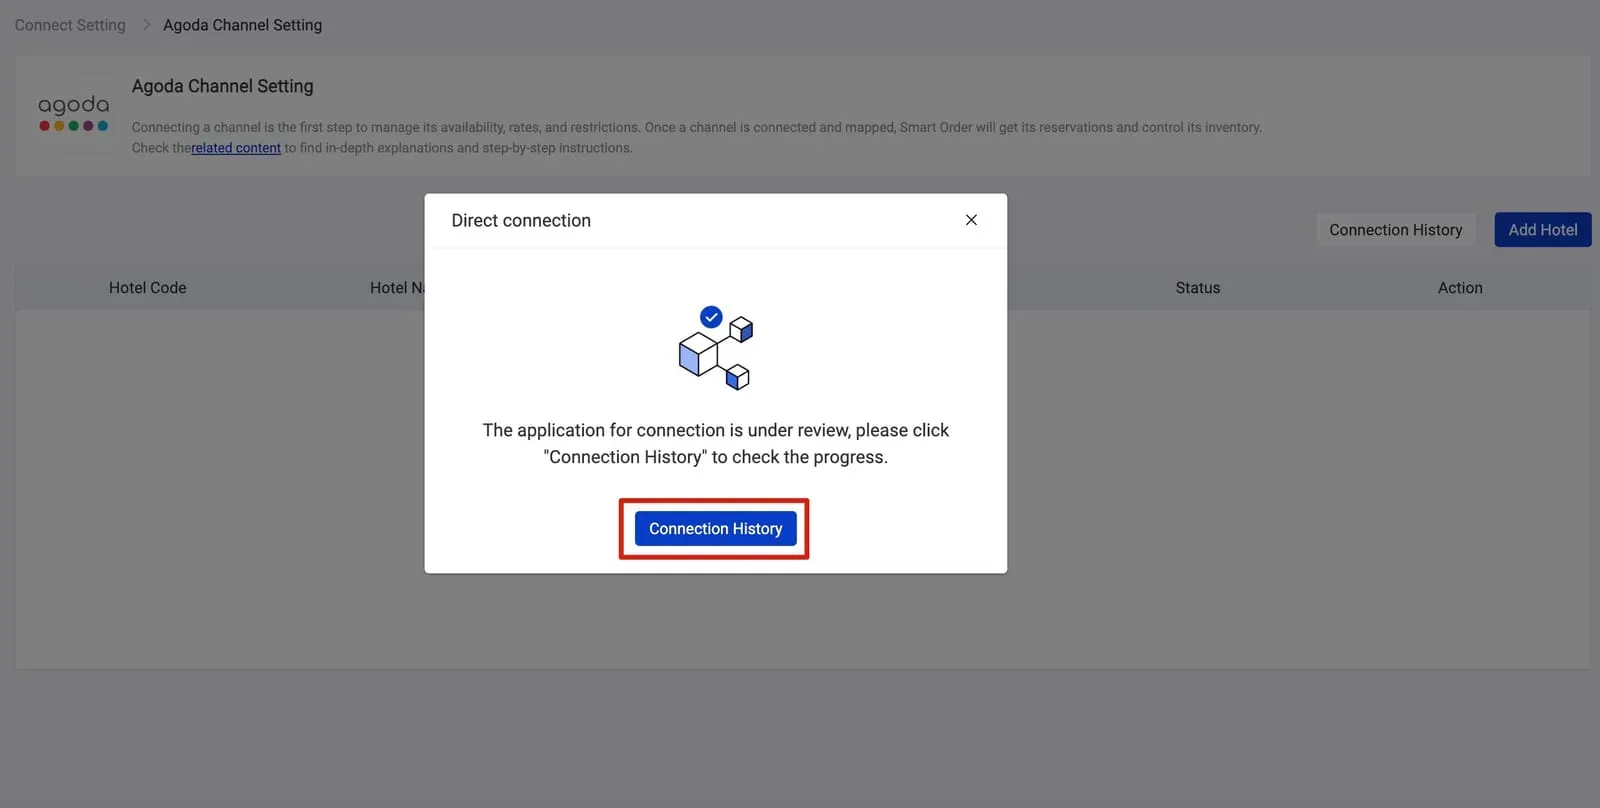
Step 3 - Start mapping in the Smart Order PMS

  1. Log in to the PMS system and start authorization.
Go to Channel > List > Configure Agoda > Click Add Hotel > Click Agree and start authorization > Input Agoda hotel code > Input Hotel name > Select the Agoda Property Type (based on your property type)
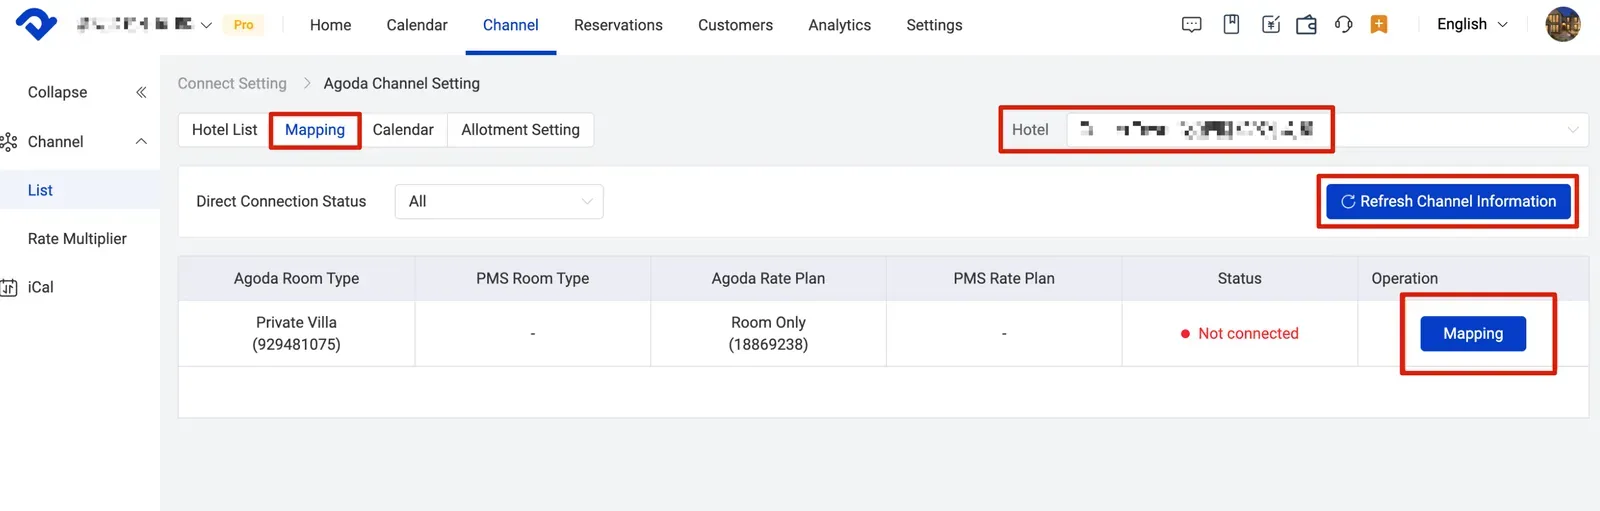
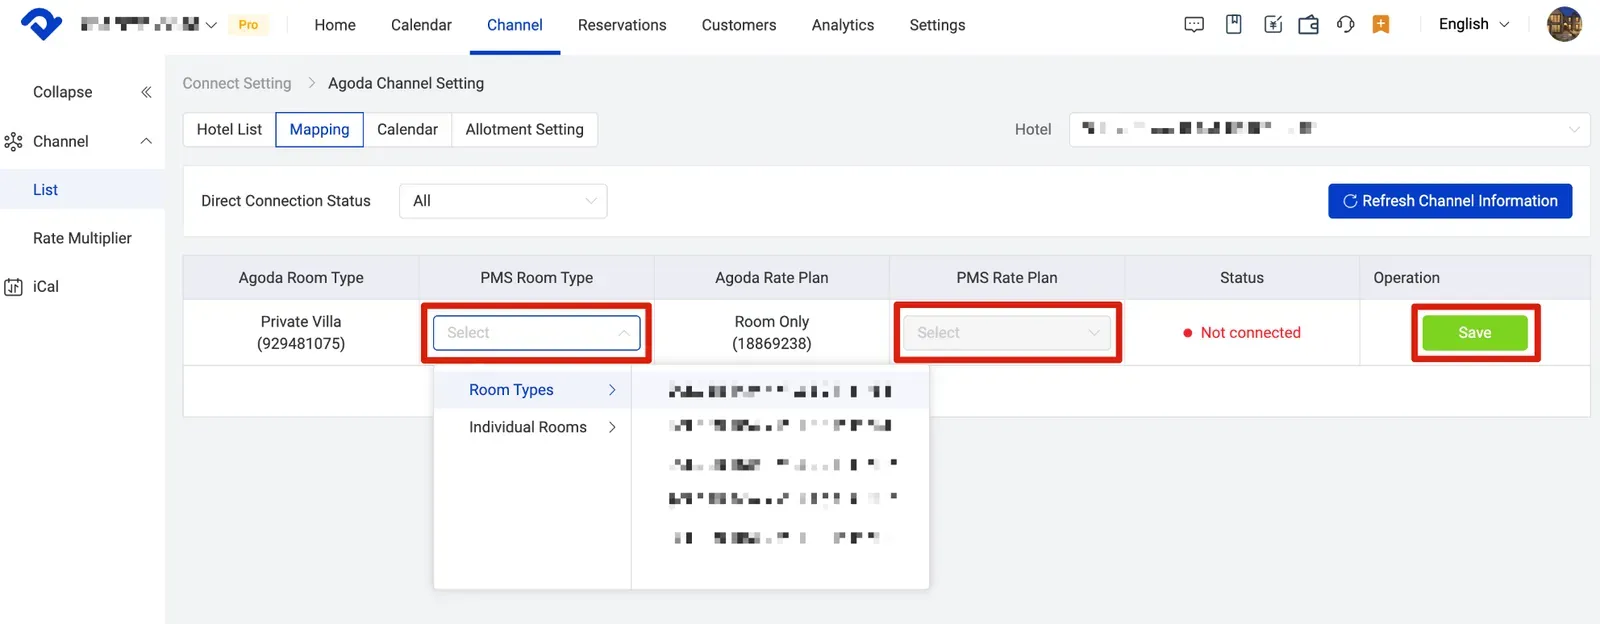
Agoda connection guide, connect Agoda with Smart Order PMS

  1. Start mapping.
Click Mapping > Choose Hotel > Click on Refresh Channel Information > Mapping > Select PMS Room Type > Select PMS Rate Plan > Click on Save
Agoda connection guide, start mapping with Smart Order PMS

Step 4 - Check the pricing in Agoda

You're almost done! Wait another 5 minutes and check the pricing in Agoda after all the above setups.

💡
Please then contact us in case you have any questions.

Related Articles

Frequent Questions

Derived rate plan Derived rates plans inherit their pricing and restrictions from their parent rate plan on OTA extranet, which means our platform does not send any inventory updates to OTA for these rates; the channel blocks the values being sent. You need to change the price as set up

Channel multi-mapping

What is multi-mapping? The channel manager’s room mapping functionality allows multiple channel rates to be mapped to, and managed by, a single channel manager room rate. This is known as multi-mapping and it provides flexible mapping options to help you simplify your setup. When to use multi-mapping? Multi-mapping is

Manage room allotment by channels

1. Click the specific Channel that you want to change room allotment  2. Click Configure to open a channel you would like to edit 3. Click Allotment Settings on the top 4. Click on the date you would like to change and edit the allotment of a room type 5.

Perform a bulk update

You can use Bulk Update to quickly and easily perform extensive updates to rates and restrictions across your room type and channels for one or more date ranges and specific days of the week. Navigation overview The inventory grid is where you manage the day-to-day pricing, and restrictions for your

How to set up the extra person rate

Follow the steps below to set up extra person rate. 1. Go to Settings: Next to the menu at the top, click "Settings." 2. Choose Rate Plan: Tap "Rate Plan" in the "Settings" section. 3. Select Occupancy Rate: Click on "Occupancy Rate"

Add and edit rate plan

Step 1 - Create a rate plan Create the rate plan first. Click on Settings > Rate Plan > Click Add New Rate Plan > Type in the Rate Plan Name > Set Default Minimum Stay > Set Default Maximum Stay > Choose Manual/Derived > Select Room Types >