Airbnb Connection Guide

Step 1 - Set up room type and rate plan in the PMS

Please follow the steps in Initial Set Up, to set up the Room Type and Rate Plan.

Please make sure you are using the owner's account (not the co-host's account) when connecting.

Step 2 - Disconnect Airbnb with channel manager

Login to Airbnb. If there's an existing connection, you need to remove it first.

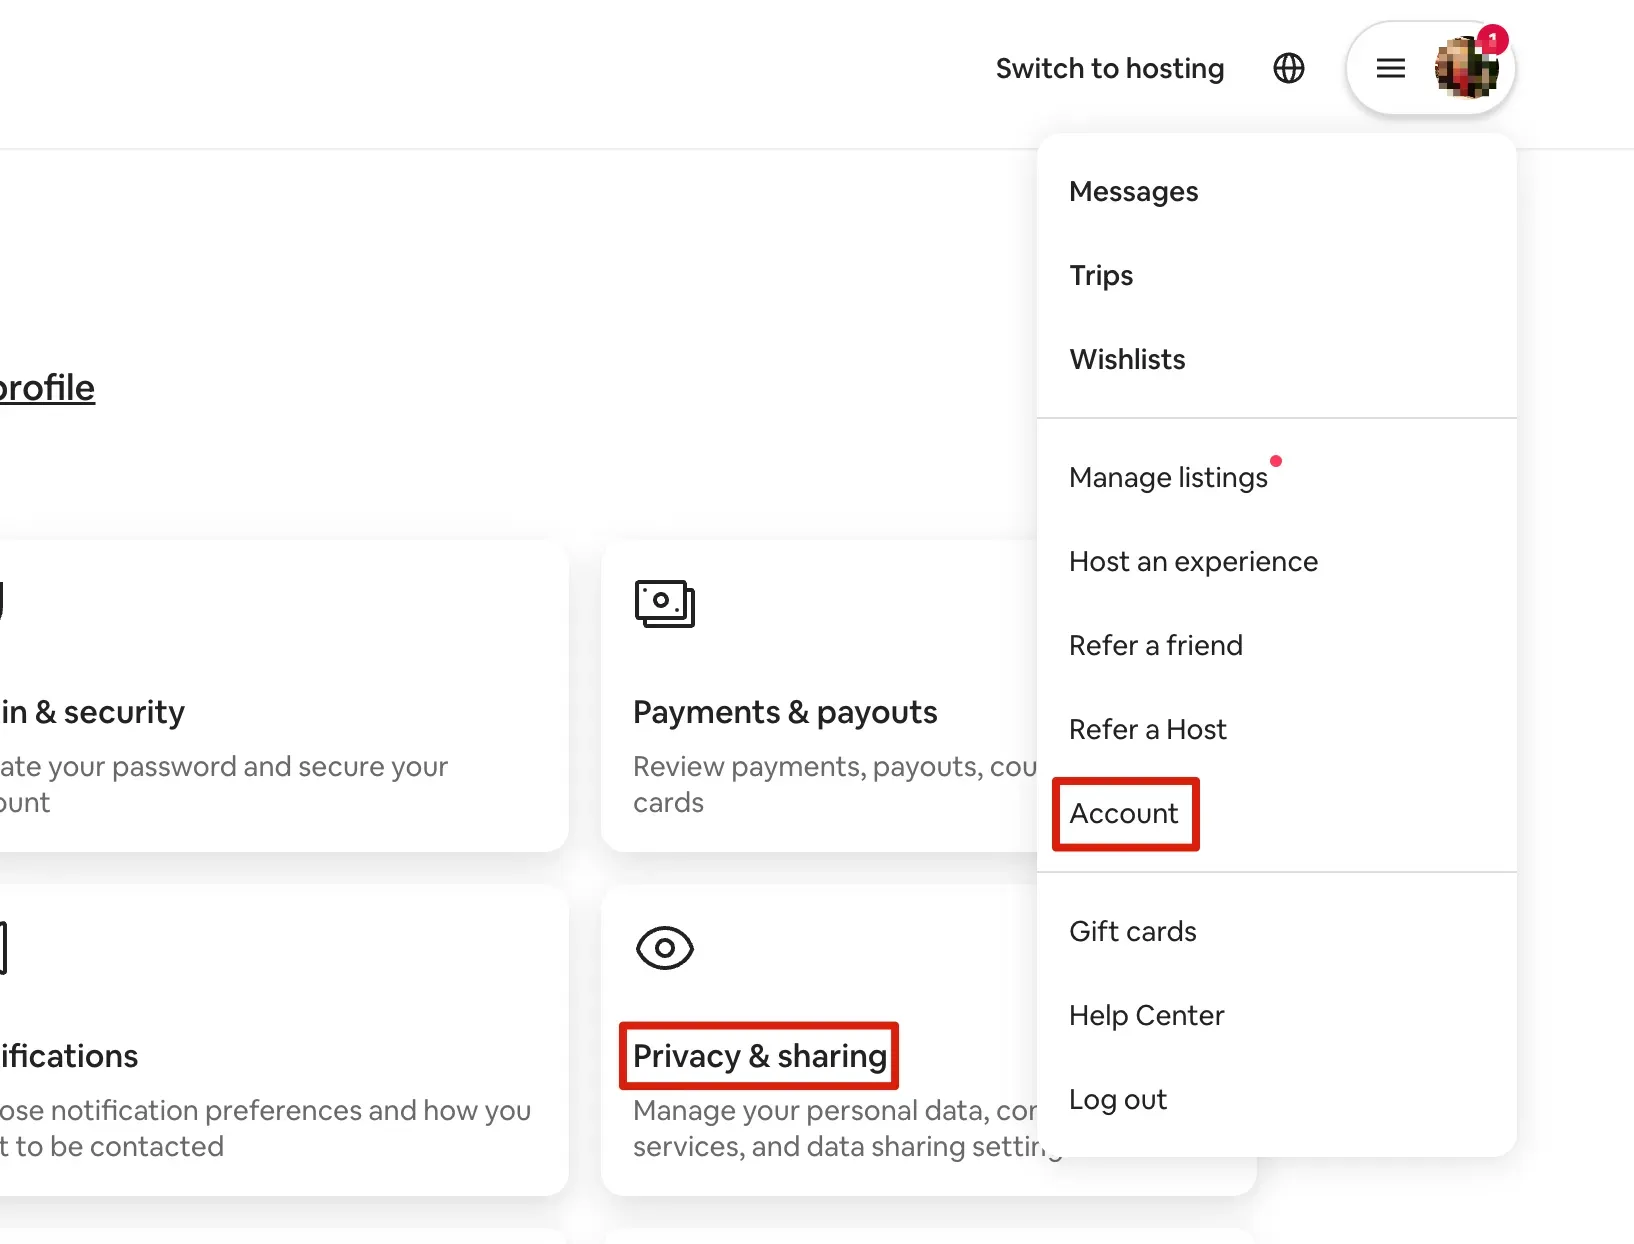
Select Account > Click on Privacy & sharing > Go to Services > Click on Remove access
Login to Airbnb
Airbnb connection guide with Smart Order PMS, Remove access

Step 3 - Start mapping in the Smart Order PMS

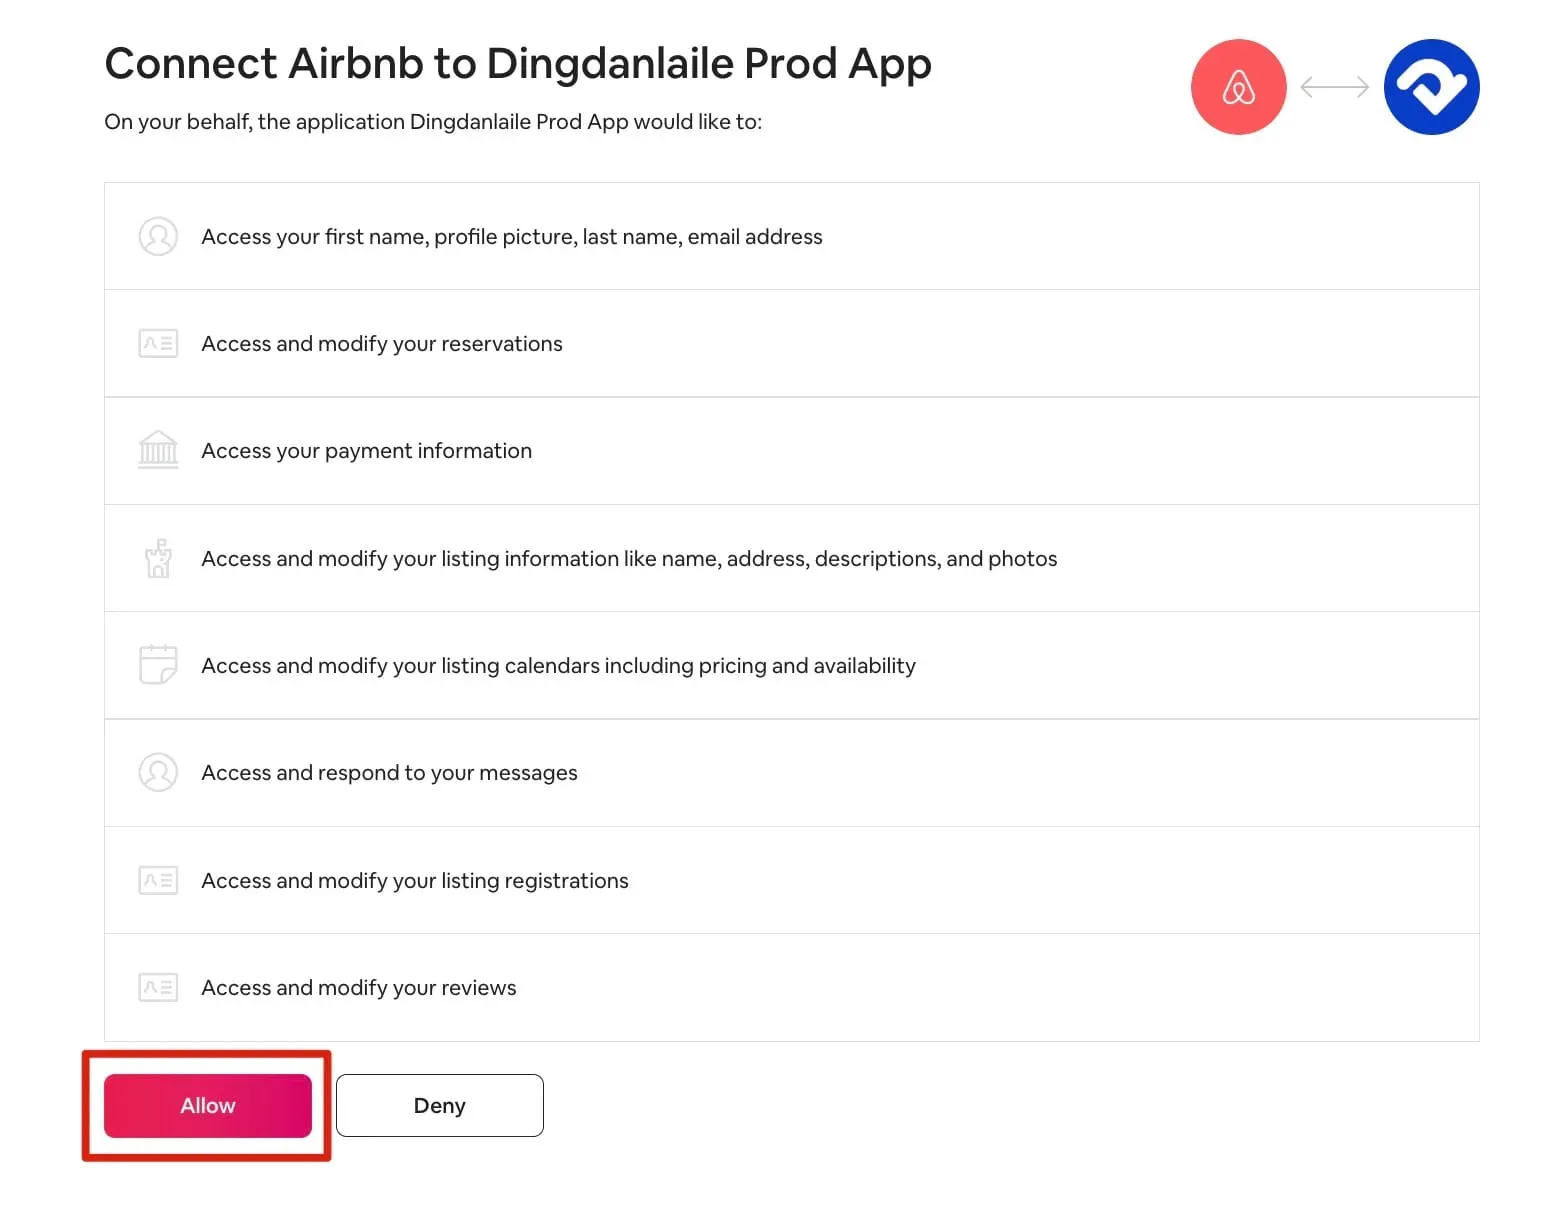
1. Authorize Airbnb to connect to Smart Order PMS.

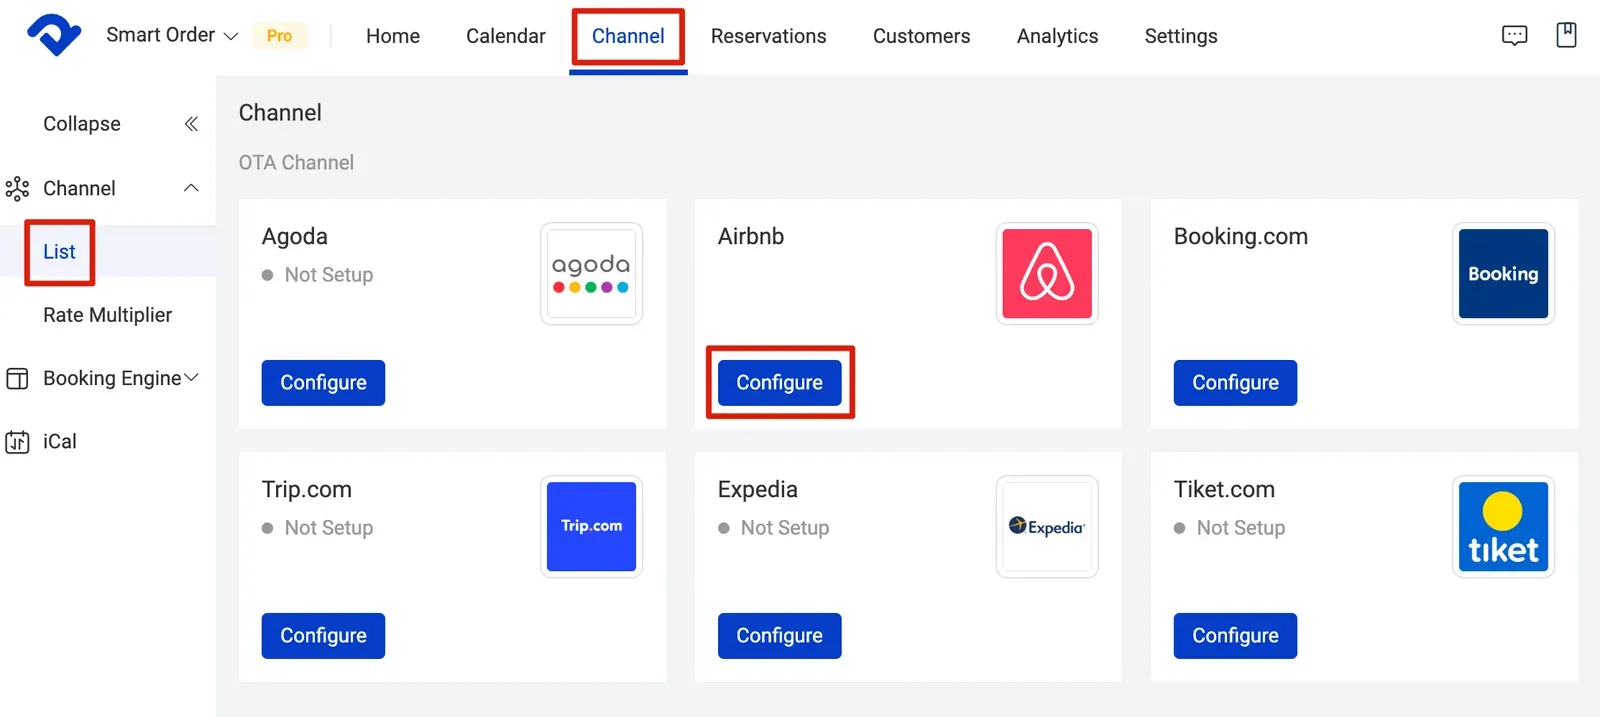
Go to Channel > Select List > Configure Airbnb > Click Add Account > Click Connect With Airbnb > Allow Connection in Airbnb
Airbnb connection guide with Smart Order PMS, starting mapping in PMS
💡
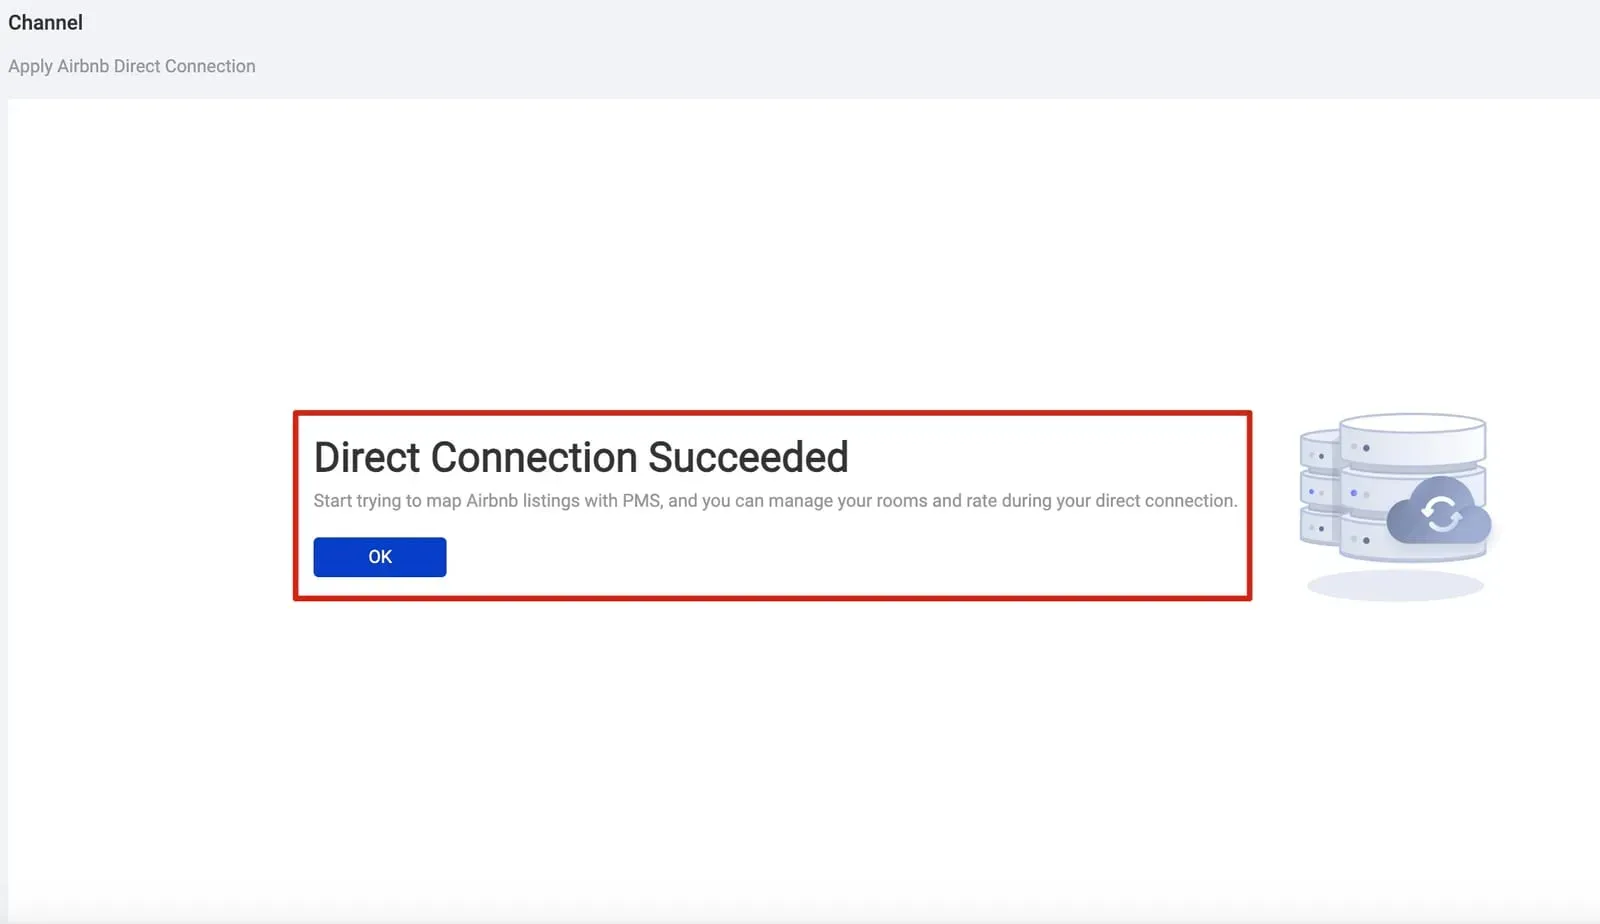
The page will be redirected to Airbnb and let you authorize the API to grab the Airbnb Listing. You will see the following notice if the connection is completed.
Airbnb connection guide with Smart Order PMS, connect with PMS

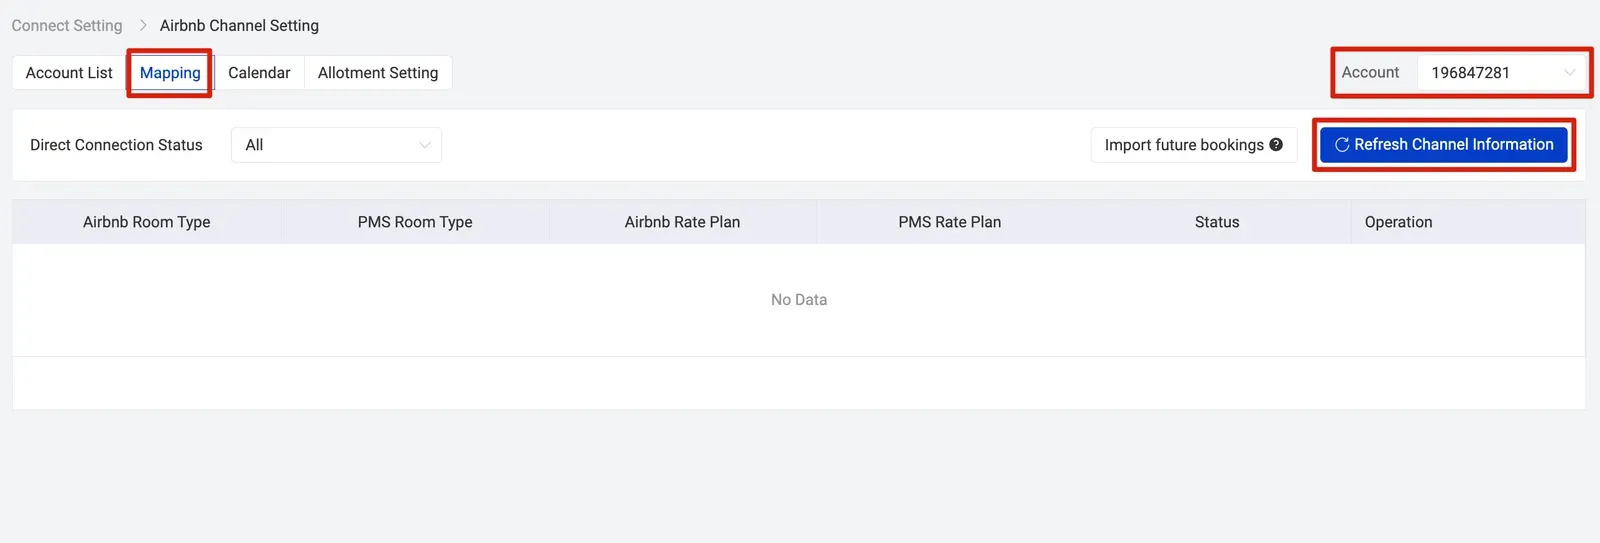
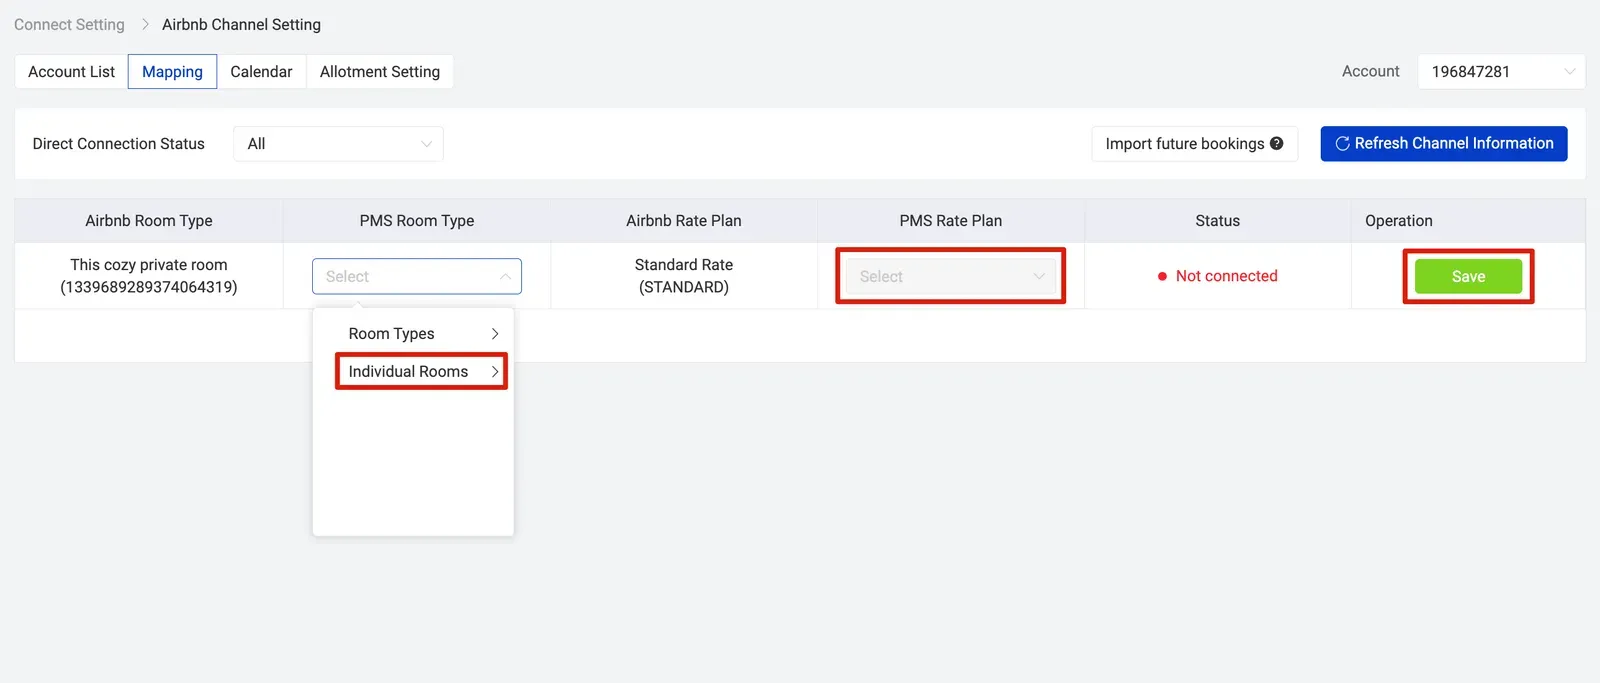
2. Go to Smart Order PMS and start mapping.

Click Mapping > Choose the Account > Click Refresh Channel Information > Click Mapping > Go to PMS Room Type and select Individual Rooms > Select PMS Rate Plan > Click Save
Airbnb connection guide with Smart Order PMS, starting mapping in PMS and refresh channel information
Airbnb connection guide with Smart Order PMS, starting mapping in PMS
Airbnb connection guide with Smart Order PMS, starting mapping PMS room type and rate plan
💡
Please note that for the Airbnb channel, you can only connect individual rooms in the PMS to Airbnb Room Type.

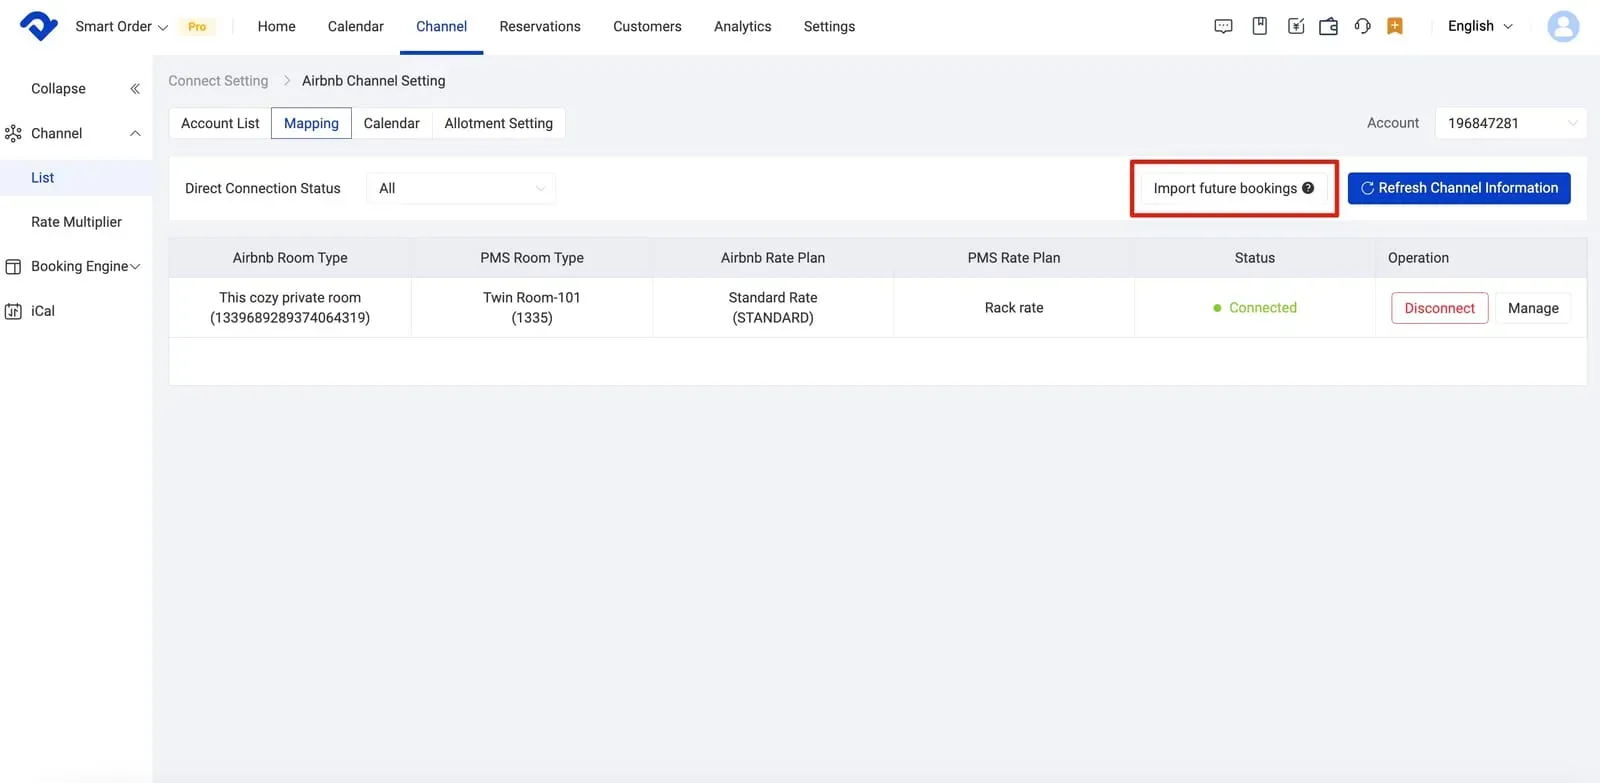
Step 4 - Import future bookings from Airbnb

Click Import future bookings
Airbnb connection guide with Smart Order PMS, import future bookings into PMS
💡
Please make sure to finish this step. This will directly affect availability.

Related Articles

Frequent Questions
Derived rate plan Derived rates plans inherit their pricing and restrictions from their parent rate plan on OTA extranet, which means our platform does not send any inventory updates to OTA for these rates; the channel blocks the values being sent. You need to change the price as set up
Channel multi-mapping
What is multi-mapping? The channel manager’s room mapping functionality allows multiple channel rates to be mapped to, and managed by, a single channel manager room rate. This is known as multi-mapping and it provides flexible mapping options to help you simplify your setup. When to use multi-mapping? Multi-mapping is
Manage room allotment by channels
1. Click the specific Channel that you want to change room allotment  2. Click Configure to open a channel you would like to edit 3. Click Allotment Settings on the top 4. Click on the date you would like to change and edit the allotment of a room type 5.
Perform a bulk update
You can use Bulk Update to quickly and easily perform extensive updates to rates and restrictions across your room type and channels for one or more date ranges and specific days of the week. Navigation overview The inventory grid is where you manage the day-to-day pricing, and restrictions for your
How to set up the extra person rate
Follow the steps below to set up extra person rate. 1. Go to Settings: Next to the menu at the top, click "Settings." 2. Choose Rate Plan: Tap "Rate Plan" in the "Settings" section. 3. Select Occupancy Rate: Click on "Occupancy Rate"
Add and edit rate plan
Step 1 - Create a rate plan Create the rate plan first. Click on Settings > Rate Plan > Click Add New Rate Plan > Type in the Rate Plan Name > Set Default Minimum Stay > Set Default Maximum Stay > Choose Manual/Derived > Select Room Types >