I. What This Feature Does?
“Automated messages ”let system Automatically sends messages to your guests at the right time.
• You just write the message once.
• Set when it should be sent.
• The system sends it automatically to every guest that matches your rule.
For example :If you set a rule to send check-out instructions at 5 PM the day before departure.
The system will then automatically send that message to every eligible order at exactly that time (via email or chat).
Automated Messages significantly reduce manual work while ensuring timely and consistent communication with your guests.
II. How to Access
Path: [Settings] → [General Settings] → [Scheduled Msg] .
Note: In the system interface, this feature (“Automated messages ”) appears as ("Scheduled Msg")
![[Settings] → [General Settings] → [Scheduled] .](https://www.smartorder.ai/content/images/2026/03/image-257-1.png)
III.How to Set It Up?
(A): Create a New Automated Message
1. Click “Create” in the top-right corner.
2. Set up message content for guests:
• A. Enter a Title(visible to the guest).
• B. Edit the message body:
Write your message using text and URL or insert variables (like guest name, check-in date, etc.) to add placeholders. The system will automatically replace them with these variables for each order when sending.
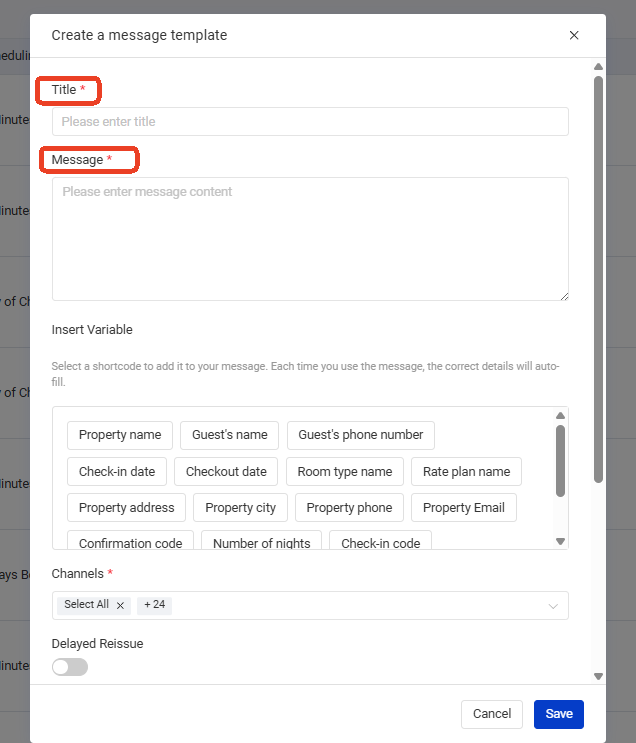
- Set automatic Sending Rules
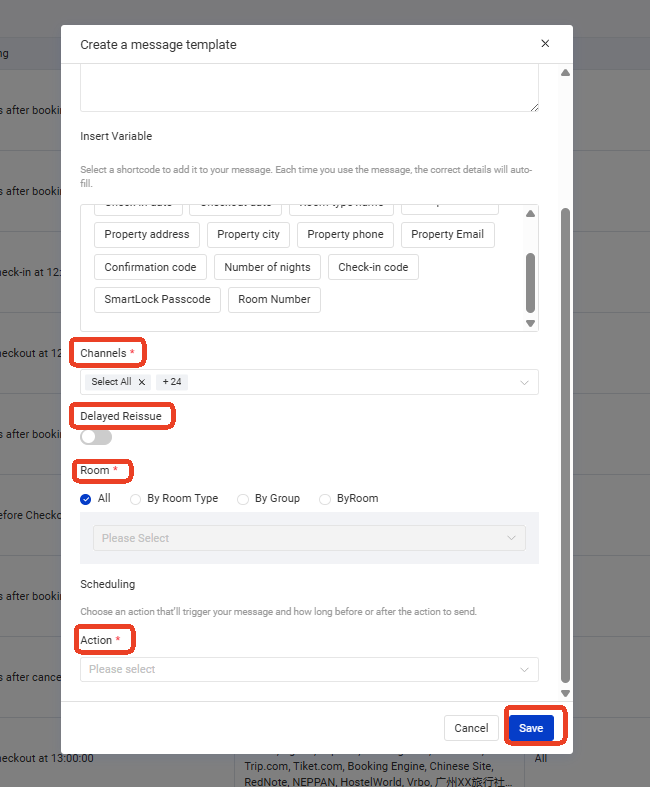
A. Select channels
• All channels are selected by default. You can create different messages and rules for certain channels based on your needs.
B. Delayed Reissue feature(Resend for missed messages)
• Turn Delayed Reissue button on the system will automatically resend messages that failed to be sent on time due to the order was entered late or the room wasn’t assigned in time.
• * Resend conditions
• Resending will be triggered only if the time difference between Original scheduled sending time and Order ready time (when the order was entered and room assigned) is ≤ 24 .
If the system misses the message by less than 24 hours, it will still send it.
• If the difference exceeds 24 hours, it will not send
Example
• Rule: Send 10:00 AM, one day before check-in
• Check-in: Nov 9
• Original scheduled time: November 8 at 10:00
• Reservation imported & room assigned: November 9 at 09:00
Time difference = 23 hours (≤ 24 hours) → The message will be sent automatically.
C. Select Rooms
All rooms are selected by default. You can customize messages and rules for specific rooms, room types, or groups.
D. Set Timing Rules(Click Action button)
Four options are available : [Booking Confirmation], [Check-in], [Check-out], [Cancellation]. you can choose the specific sending time (e.g.,"Send immediately after booking confirmation",Send at 6:00 PM the day before check-in, etc.)
- Click Save.
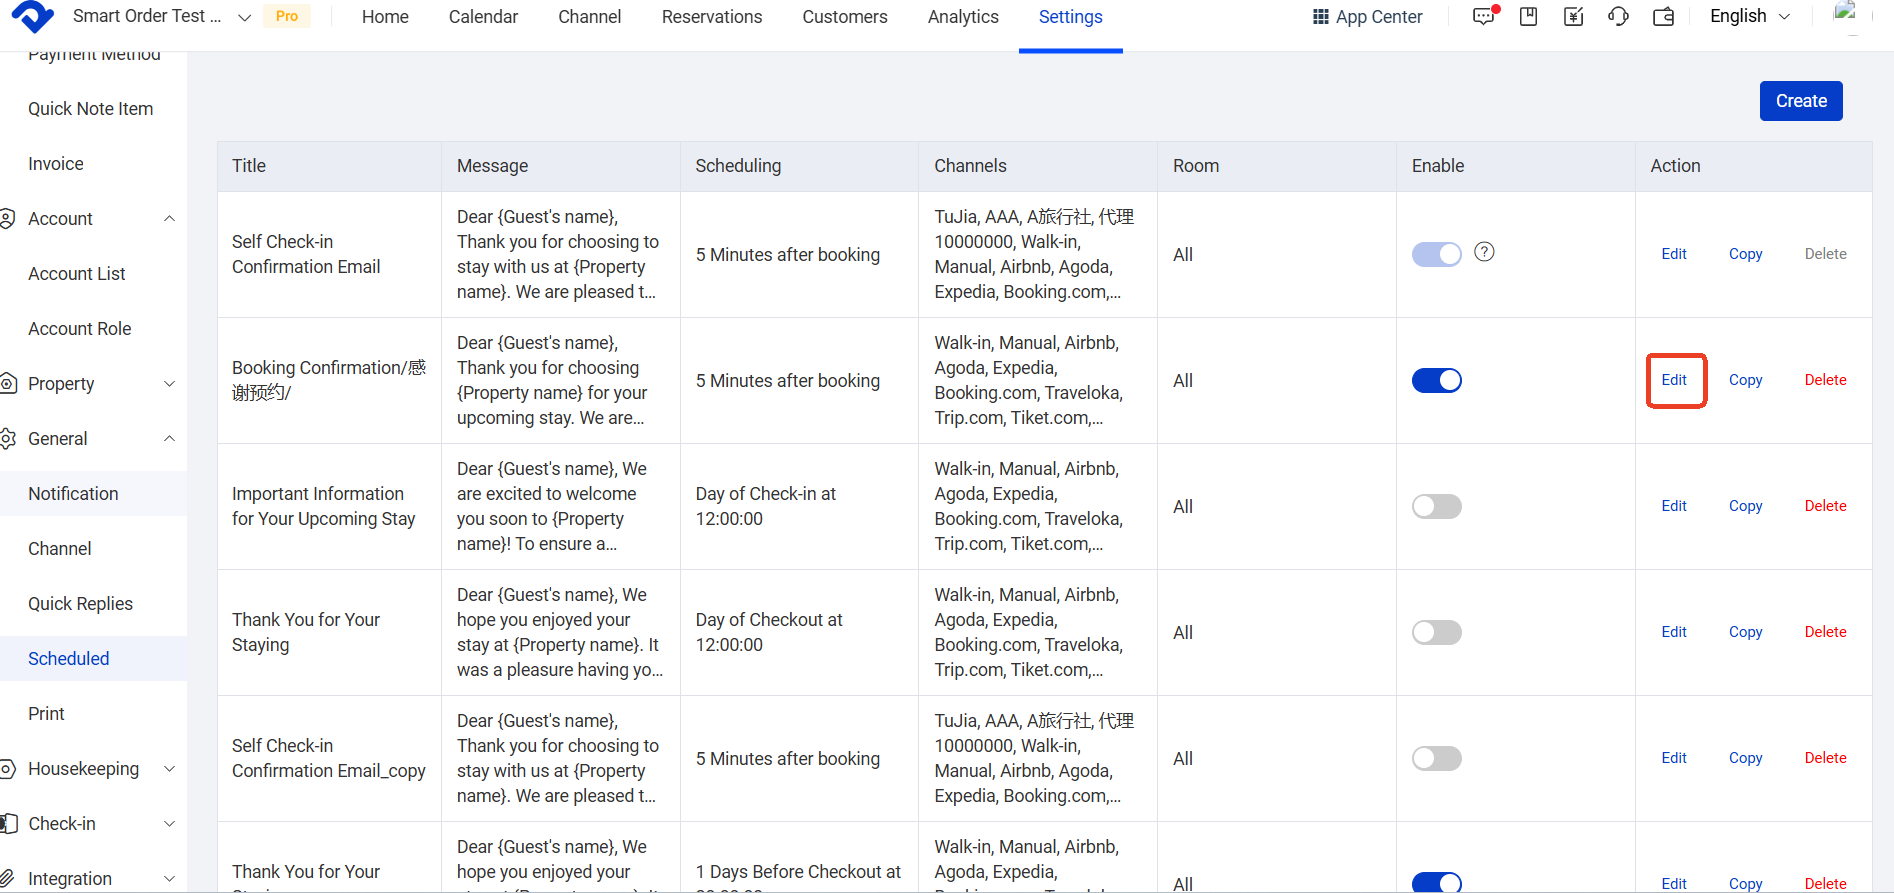
(B): Edit an Automated Message:
Click the [Edit] button to modify the title, content, or sending rules of an existing automated message.
After editing, the previous rules will be overwritten. All eligible orders whose messages have not yet been sent will follow the new rules.
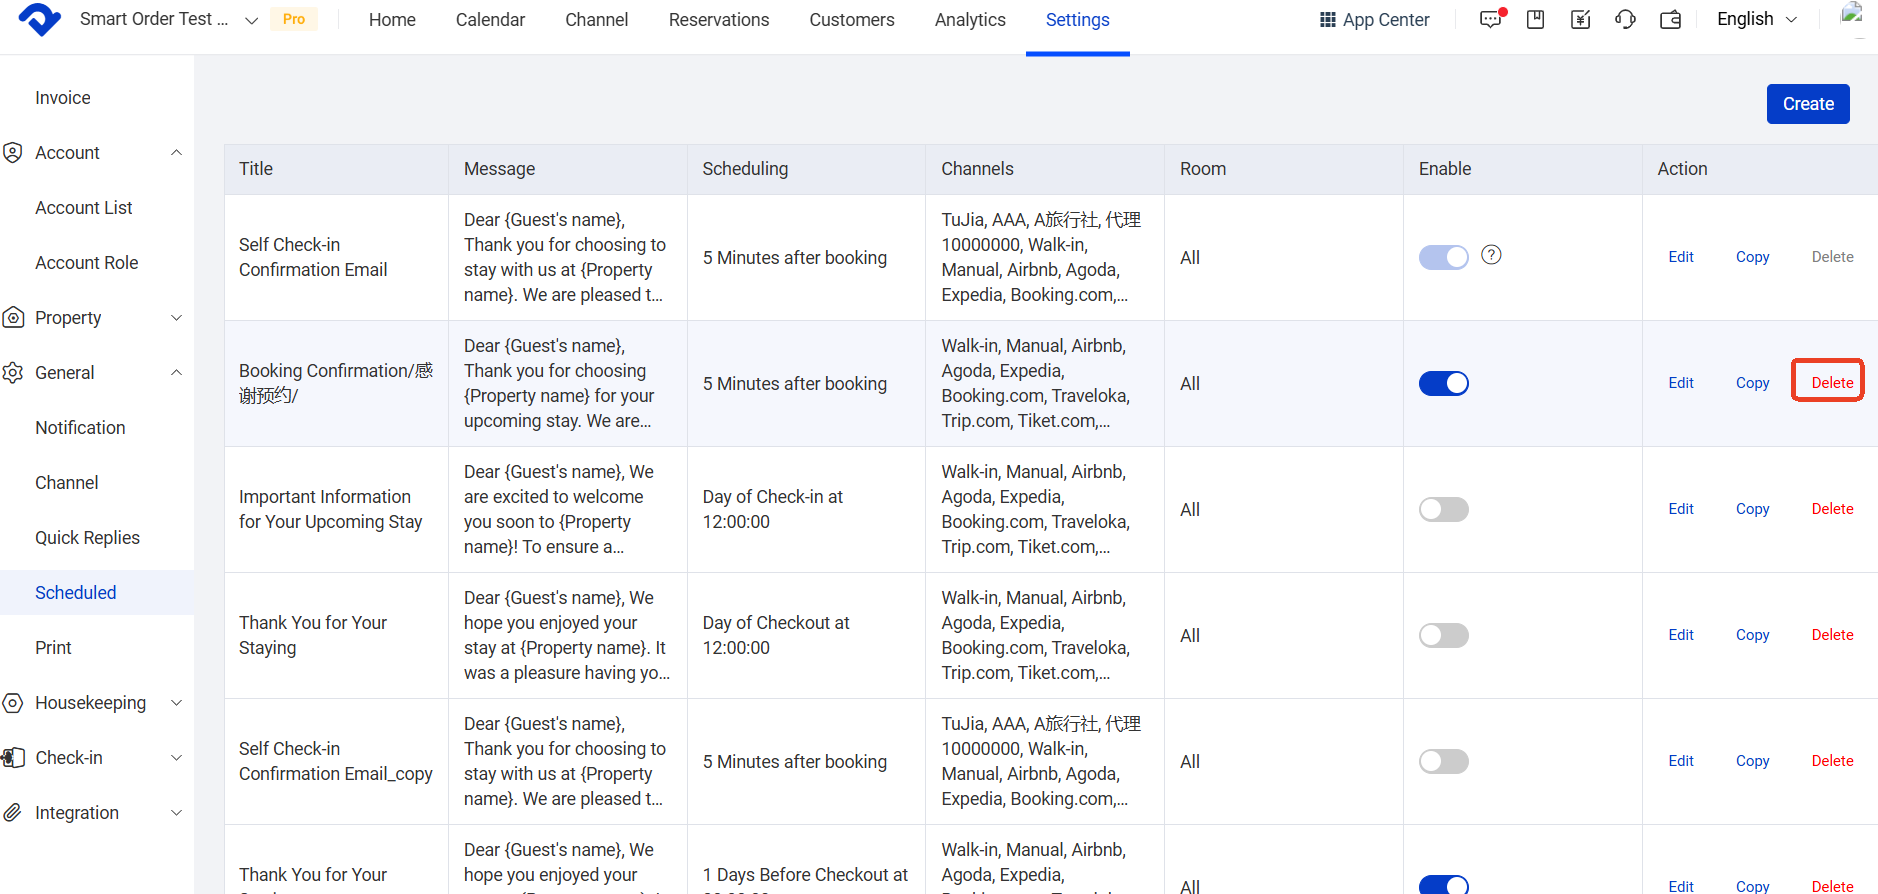
(C) Delete an Automated Message
Deleting a rule will clear all associated tasks, and the message will no longer be sent.
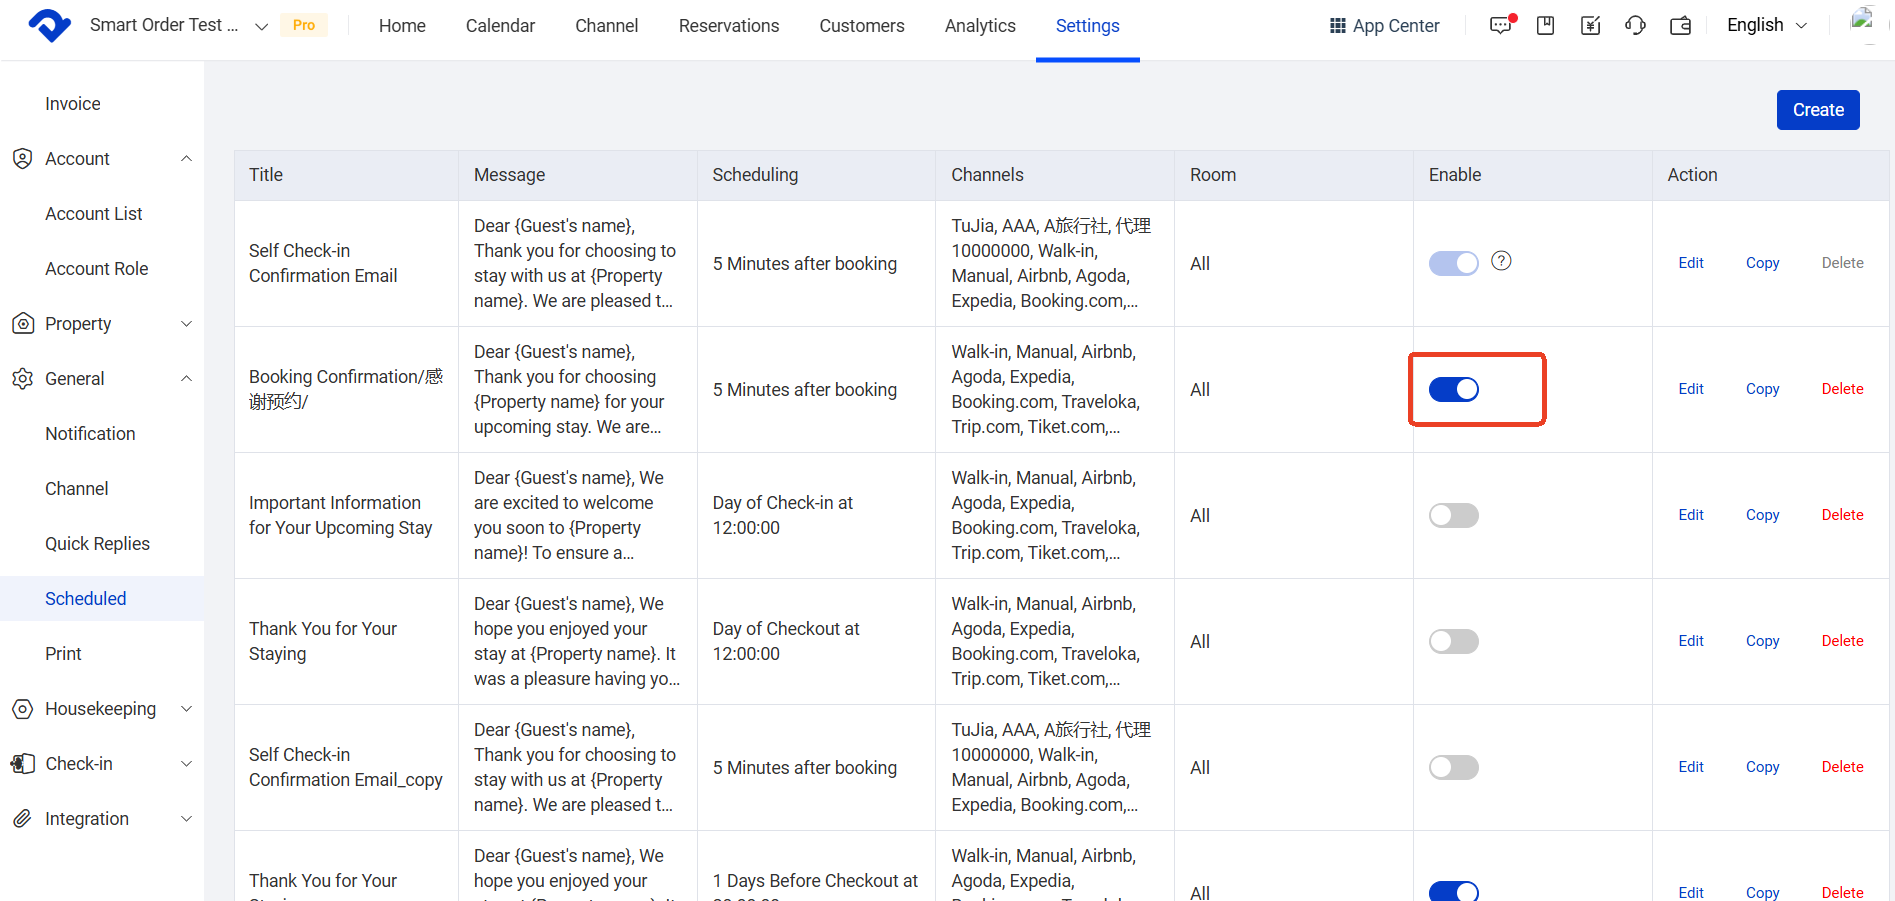
(D) Enable/Disable Automated Messages
Click the toggle switch to turn automated messages on or off. When disabled, all unsent tasks will be cleared, and no automated messages will be sent.
(E) View Sending History
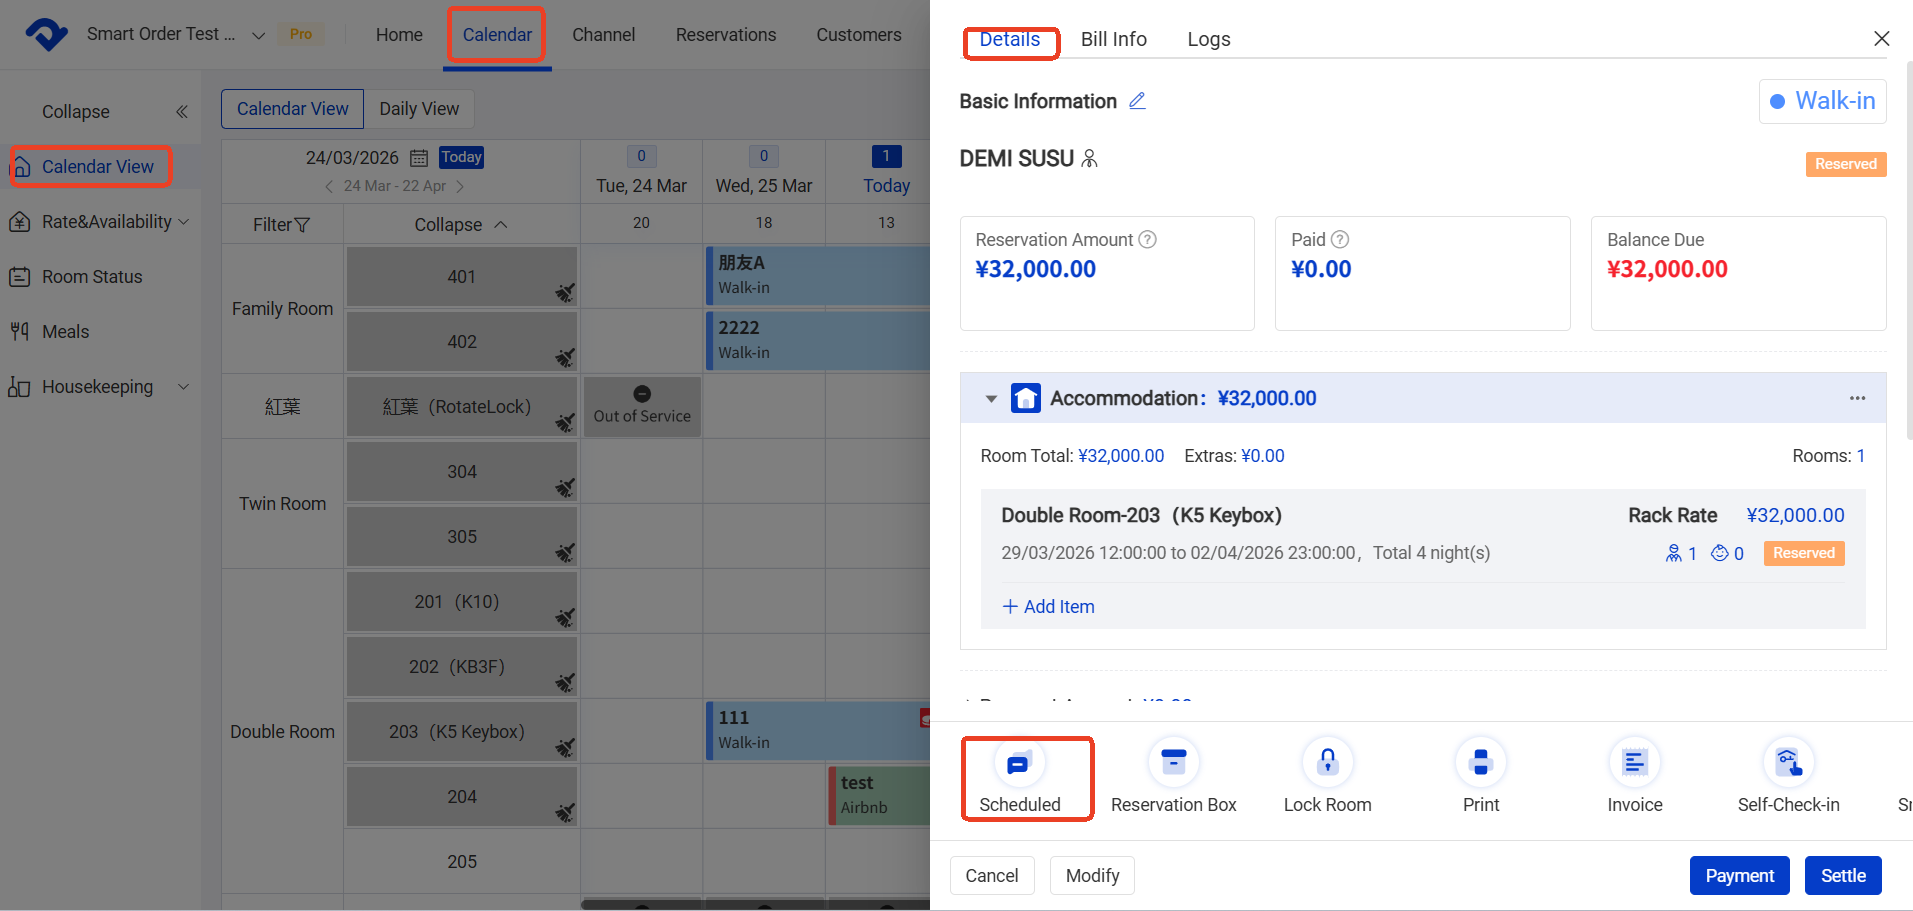
Path: [Calender] → [Calender View] → Click a reservation → [Click the Scheduled button] → [Resend]
1. After a message is sent, open the reservation in the Calendar view. The Scheduled panel will show the full sending history.
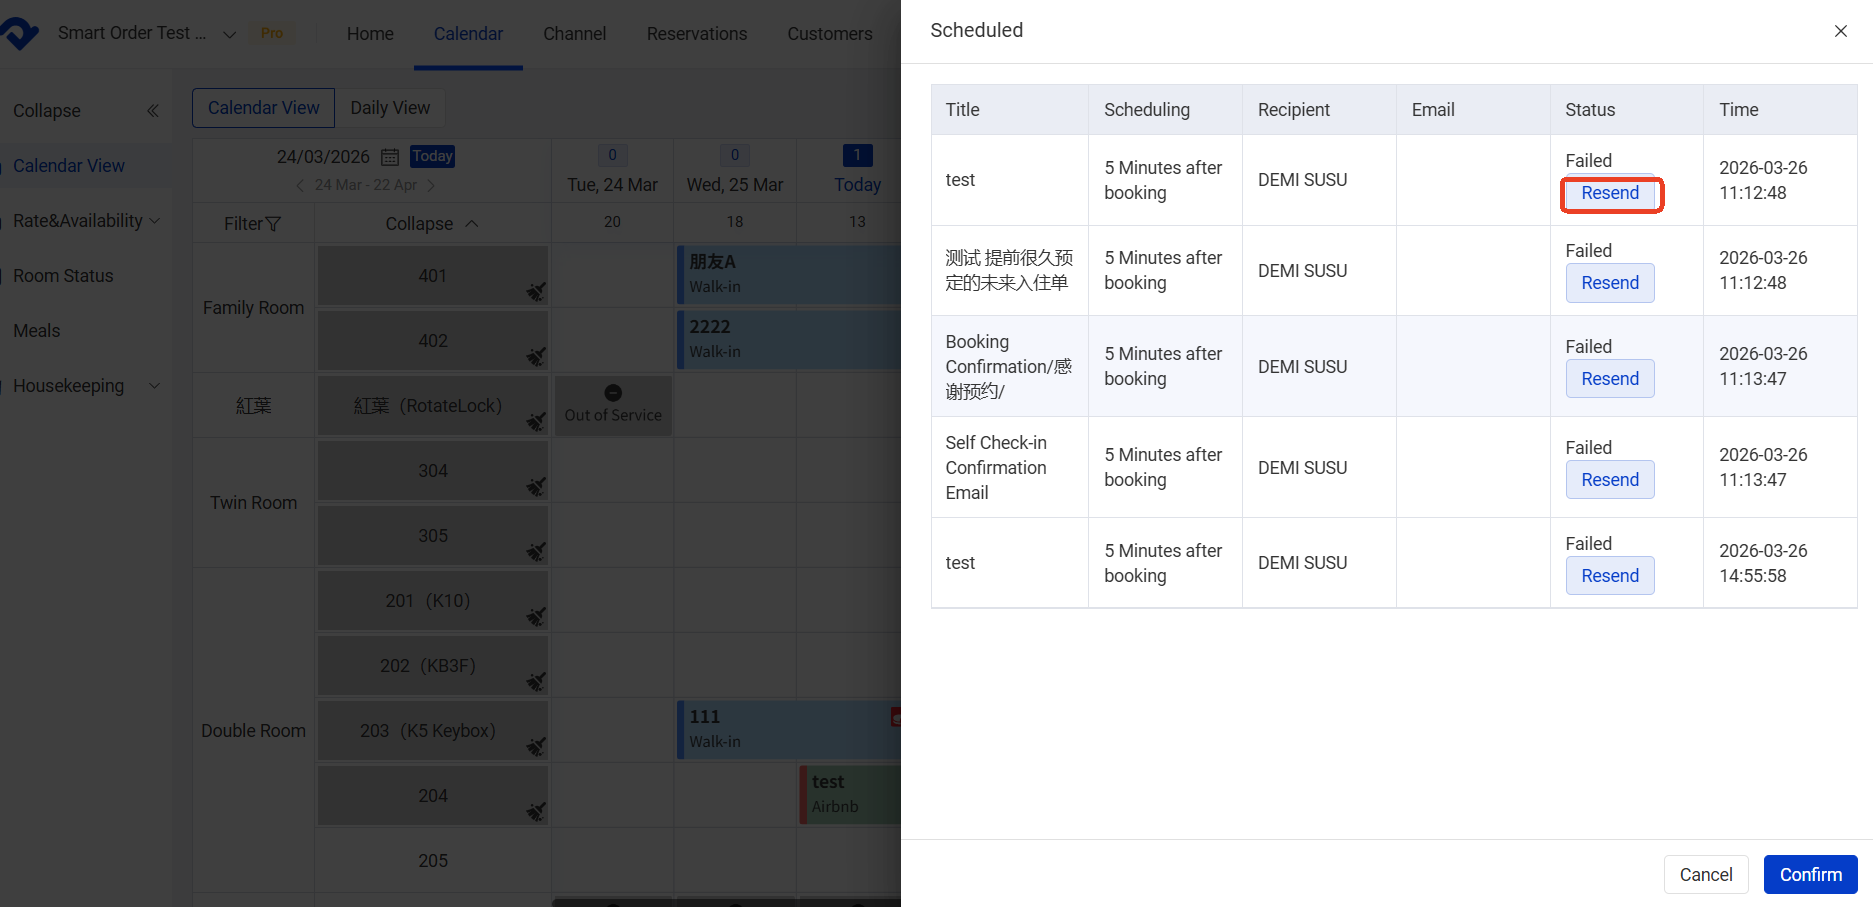
2. If the sending status is [Failed] , you can click [Resend] button next to the message to attempt to send the message again.
- The system includes four default automated message templates.
The first one — Self Check-in Confirmation Email — is linked to the Self Check-in feature. It can be edited but cannot be deleted. When Self Check-in is enabled, this template is automatically turned on and will automatically send the customized self-check-in message to guests according to the content and rules set in this template. - Without Resend enabled, automated messages only applies to reservations that meet the rules after it is enabled. Example: If you create and enable a “booking confirmation” message (rule: send immediately after confirmation) at 5:00 PM on December 1, 2024, this message will not be sent to reservations that entered the PMS before 5:00 PM on December 1, 2024.
- Sending Methods: . Airbnb : Sent via the Airbnb chat window. . Other channels: Sent to the email address saved in the reservation. If no email is available, the message cannot be sent.(All reservations that were manually imported by operations staff before direct channel connection cannot receive automated messages.
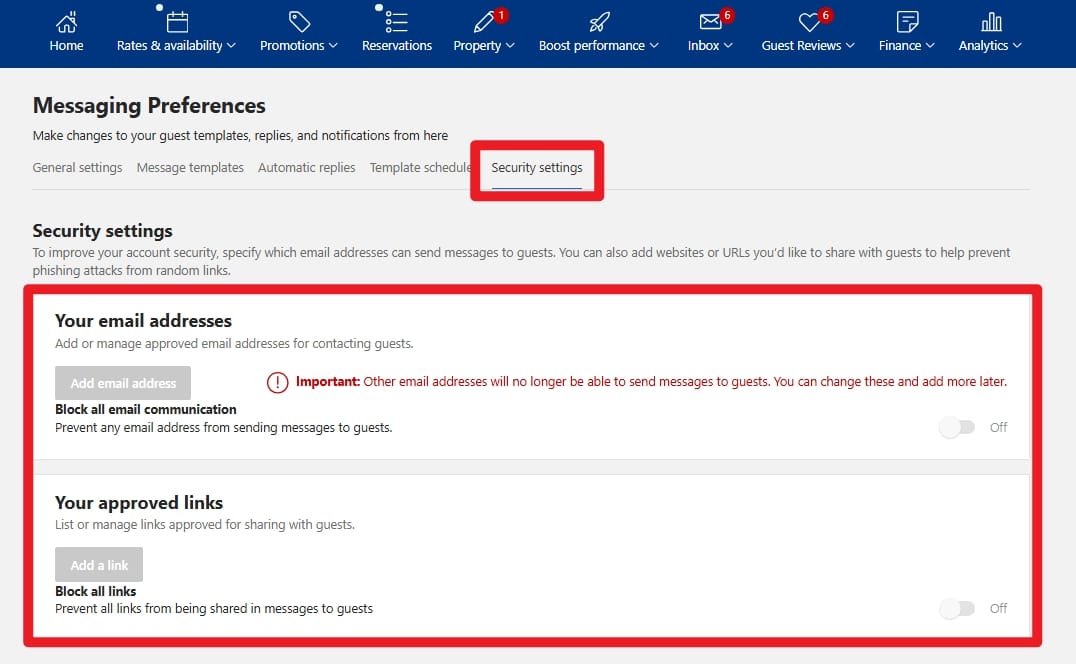
- Booking.com Requirements : To ensure messages and self check-in instructions reach Booking.com guests successfully, do not restrict emails or links in the Booking.com settings: Accommodation → Messaging settings → Security settings. If you have not added any email addresses yet in booking.com, you don’t have to add ours. If you have already added other emails in booking.com. You need to add our system email too:no-reply@email.smartorder.ai
- The system does not send automated messages to unassigned reservations. Once a room is assigned: . If the scheduled send time has not passed → the message will be sent normally. . If the scheduled send time has passed → the message will only be sent if “Resend” feature is enabled. Example: Automated Message A: The rule is Send immediately after booking Automated Message B: The rule is Send 8 hours after booking A reservation is booked and enters the system at 10:00 (unassigned at that time).
You assign a room at 12:00 the same day. Message A → Not sent (scheduled time(10:00 ) has passed) Message B → Sent normally at 18:00 If Resend feature is enabled, Message A will also be automatically resent. - Distributed Orders (Booking.com to Other OTAs) : Due to OTA distribution mechanisms,rooms listed on Booking.com may be distributed to other OTAs (e.g., Agoda). For orders distributed to Agoda, guests can still receive self check-in and automated messages. However, all links will be blocked by the platform. In such cases, you can try modifying the link format and manually copy the check-in code to the guest, or send the message directly to the guest’s real email address and guide them to view it from the email.
- Tujia Channel Limitation: Due to Tujia channel limitations, each message is limited to a maximum of 1,000 characters. Please keep the message content concise when sending Automated Message to Tujia reservations.
