Cancel a reservation

When Should You Cancel a Reservation?

You may need to cancel a reservation when:

  • A guest requests cancellation
  • A booking was created by mistake
  • The guest does not meet payment or policy requirements
  • Operational changes require releasing the room inventory

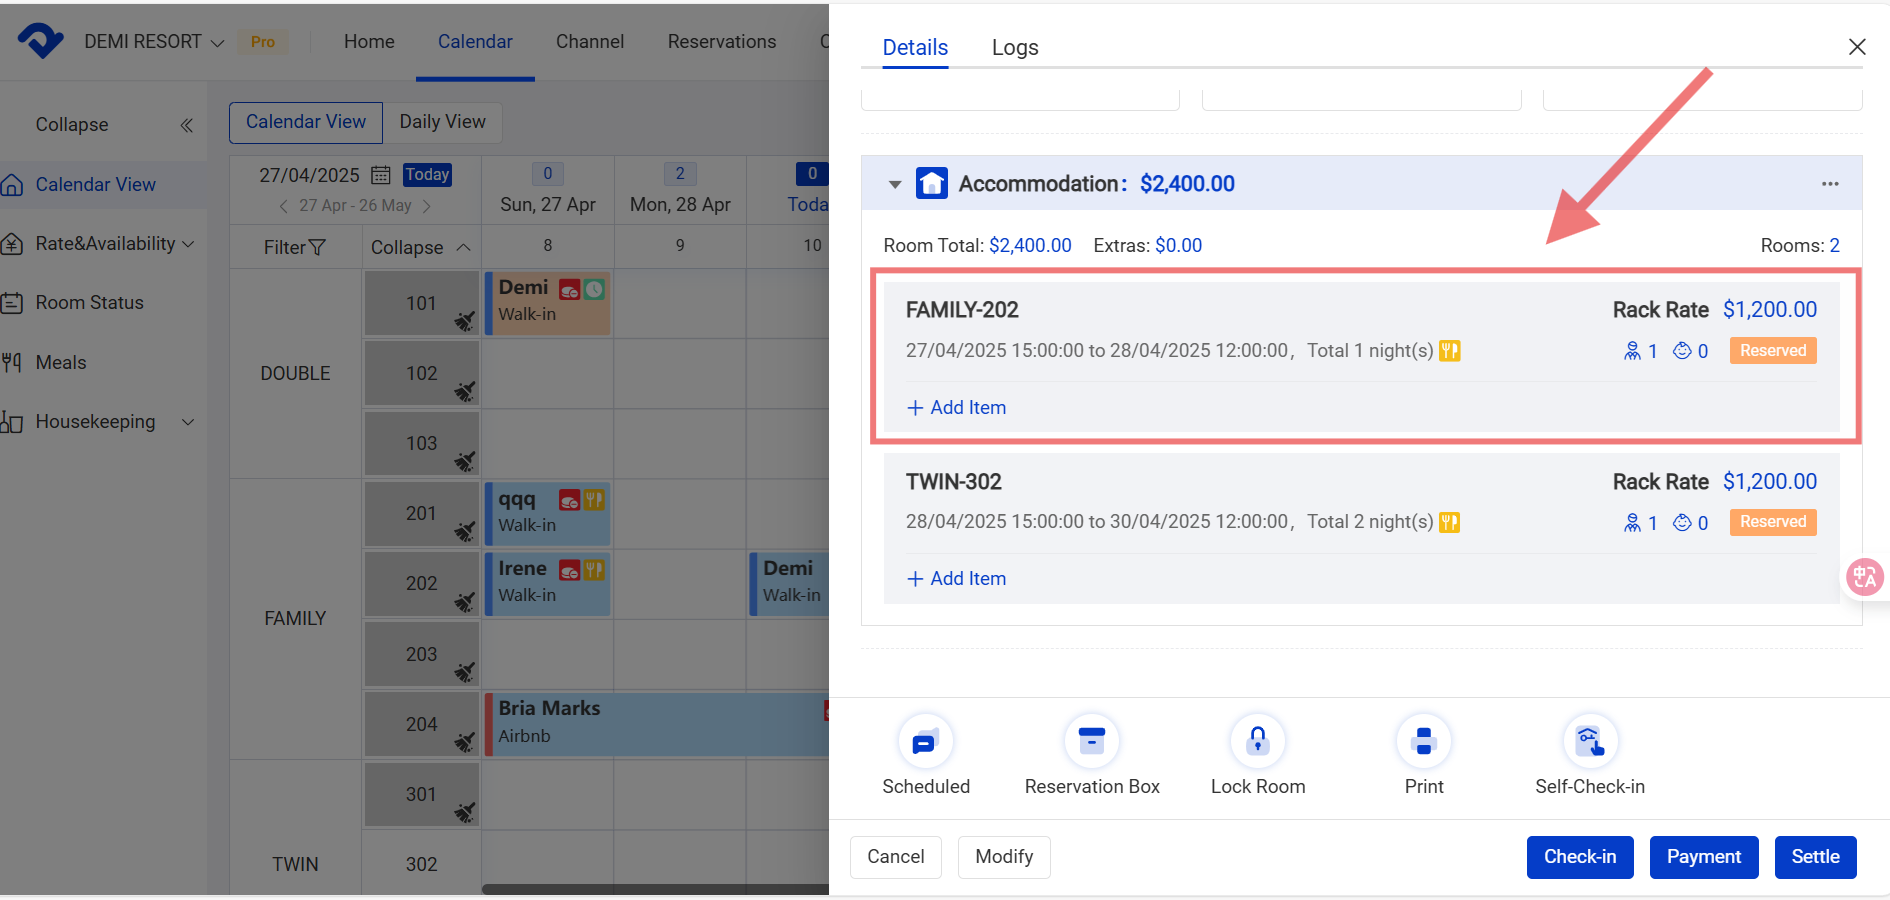
Once a reservation is canceled, the room inventory will be released and made available for sale again.

1. How to Cancel a Reservation on PC (Web Version)

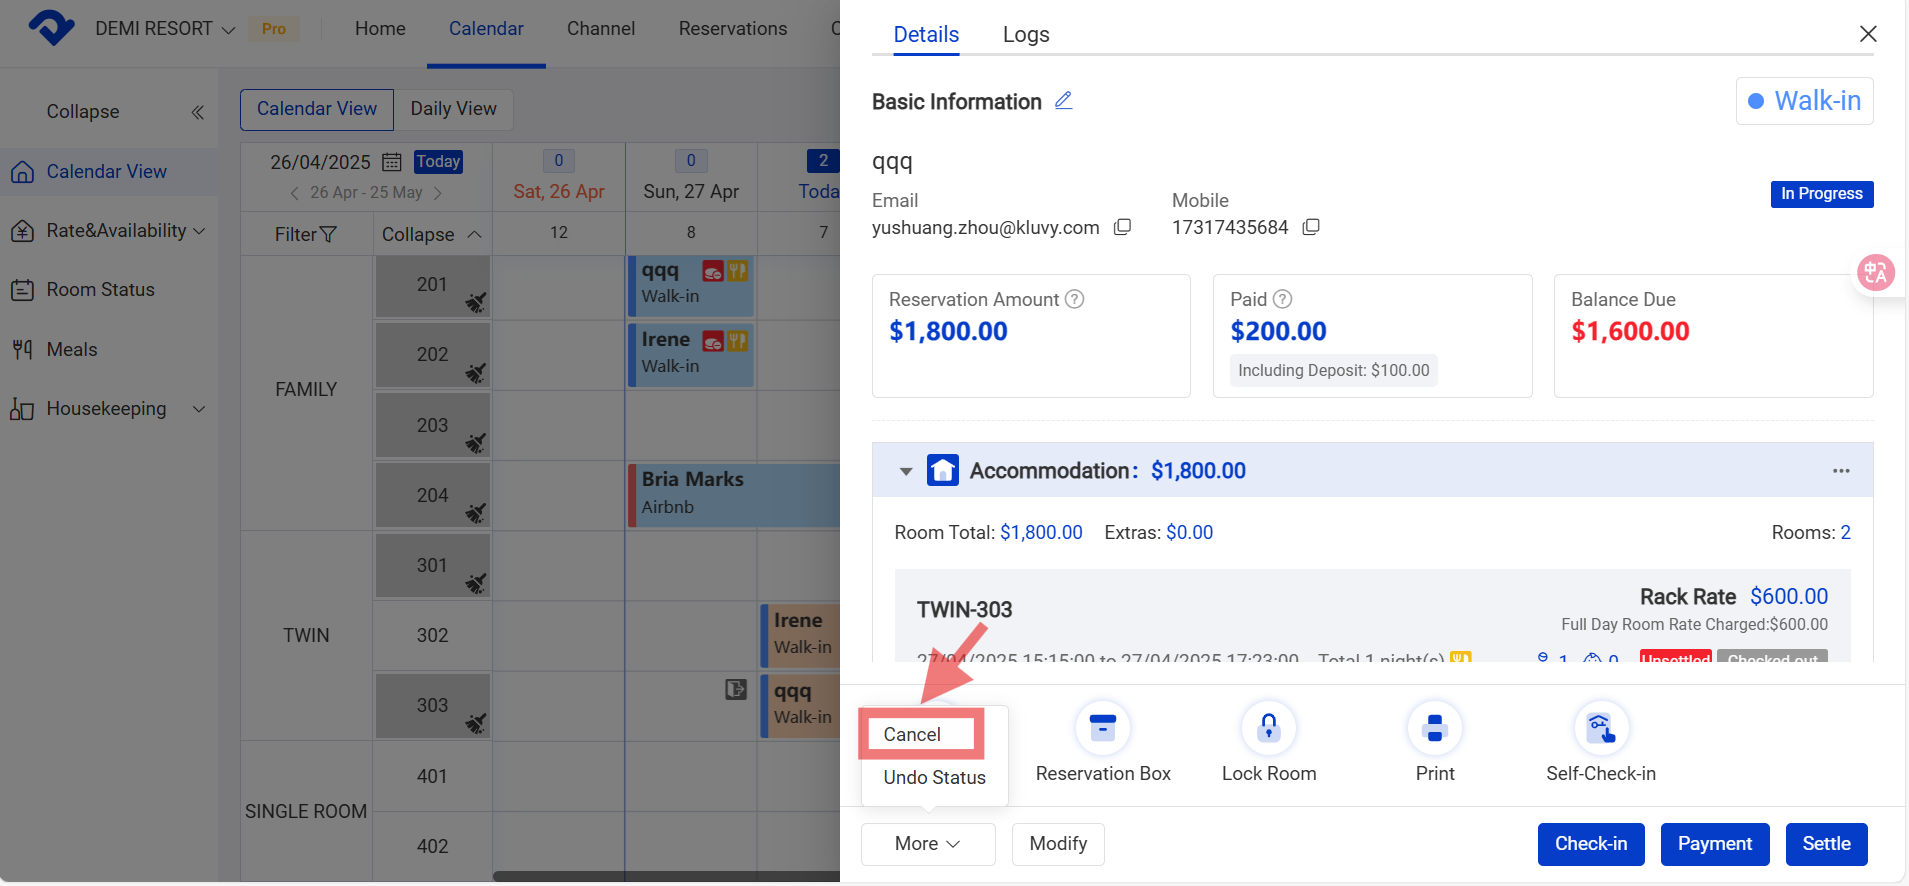
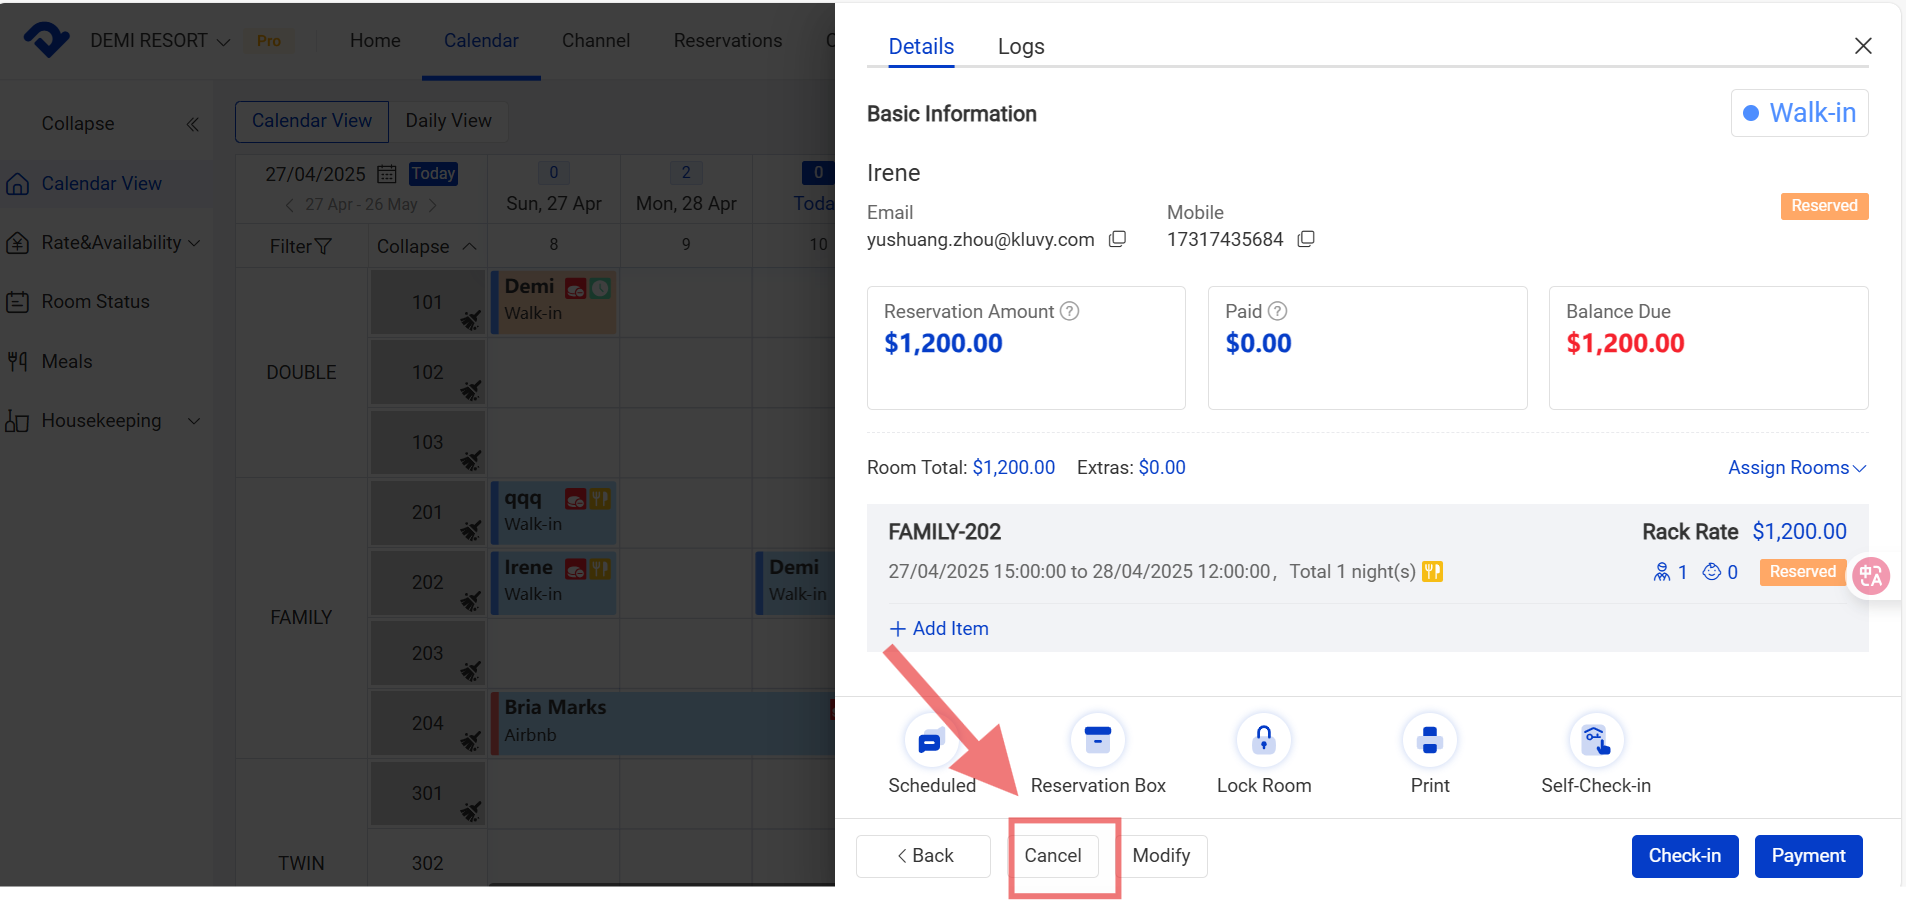
Step1: Go to the Calendar View and select the reservation. Select More and click Cancel.

Calendar View

Step2: On the Cancel page, select the reservation and fill in the penalty. Click Confirm.
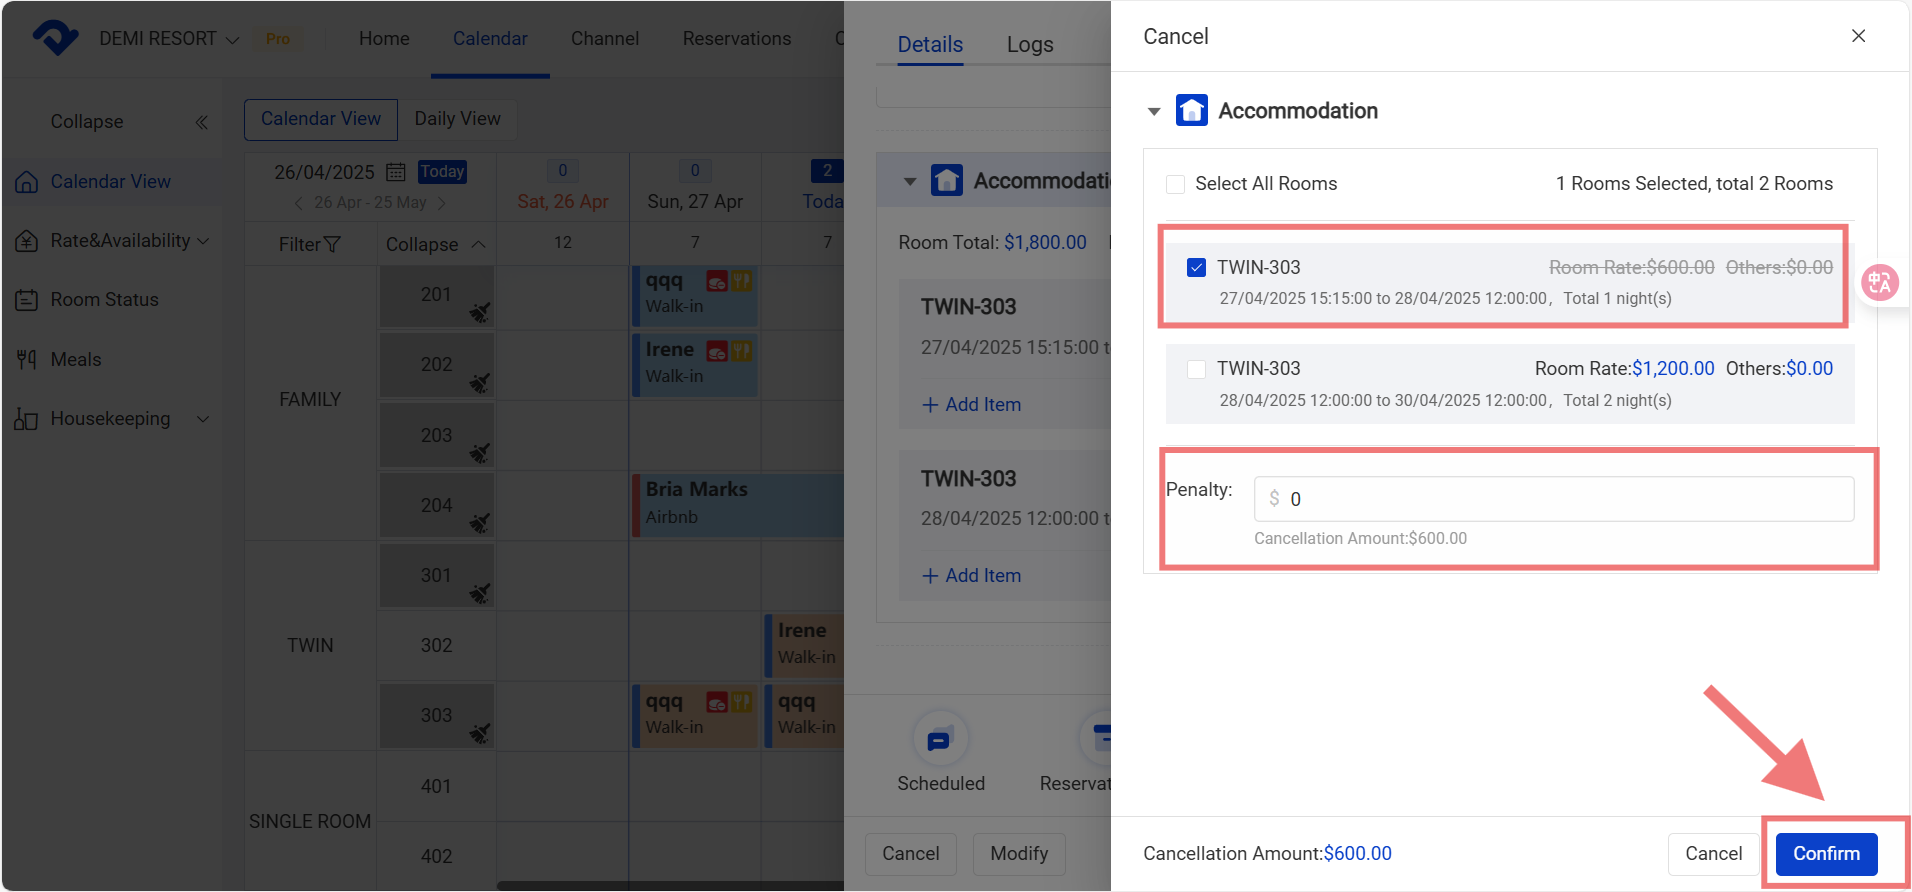
Confirm reservation on cancel page

📌 Notes

  • The reservation information will be cleared out once it is canceled. There will be a pop-up box to remind you to settle. The pop-up box won't be shown if you still have another room in the reservation.
system prompt
  • You may cancel the rooms one by one.
cancel the rooms one by one
  • You can select the room details and cancel the room.
select the room details and cancel the room

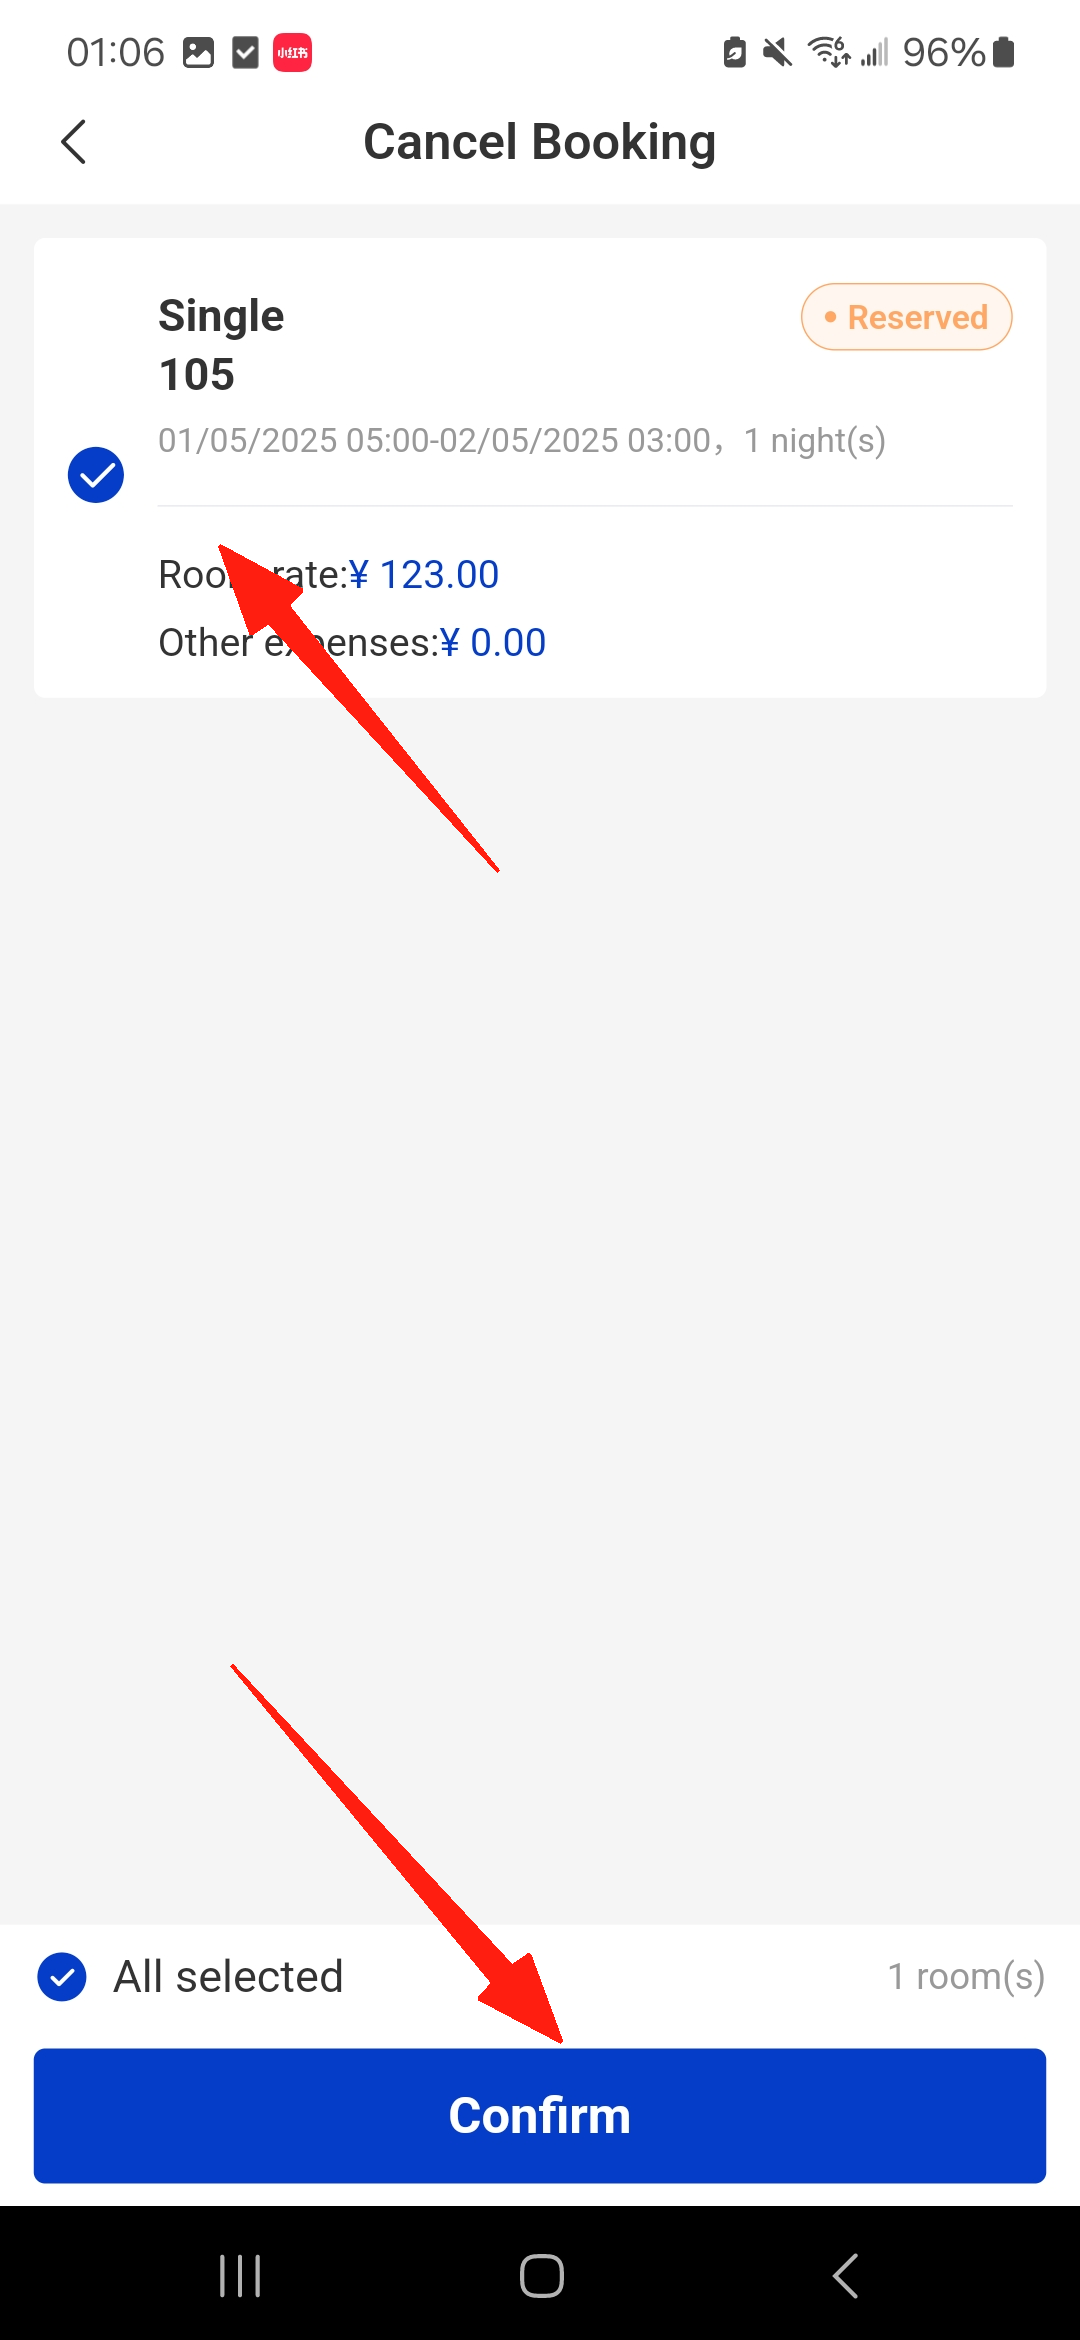
2. How to Cancel a Reservation on the Mobile App

Step1. Open the Smart Order App → Go to the reservation details page → Tap Cancel (usually located in the top-right corner).

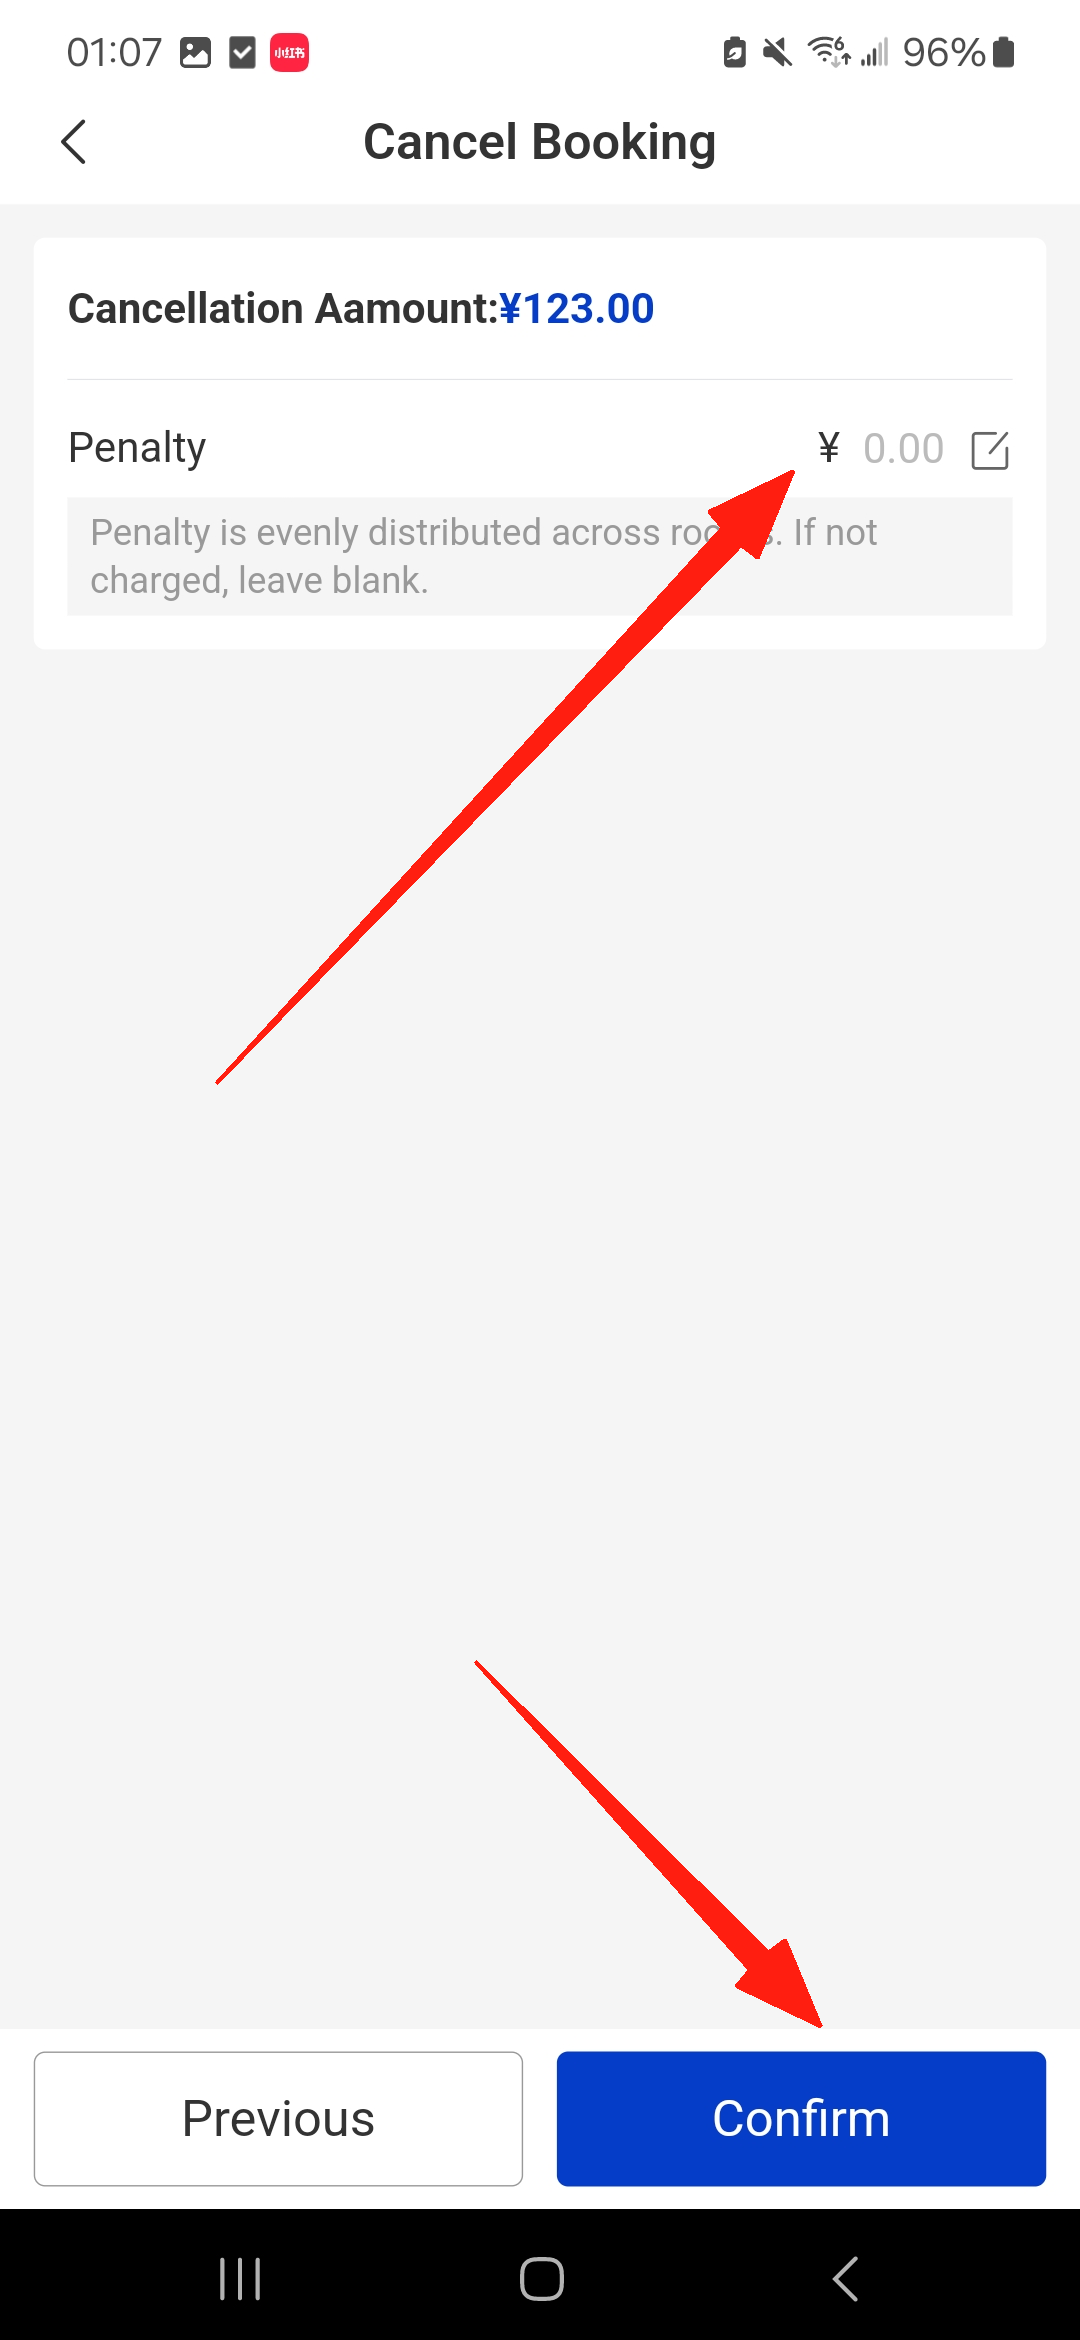
Step2. Select the room(s) to cancel and enter a cancellation fee if required, tap Confirm to finish.

confirm penalty

The cancellation will be processed immediately, and inventory will be released.

3. Important Things to Know

  • OTA bookings (e.g. Booking.com, Expedia)
    If the reservation comes from an OTA, you may also need to cancel it directly on the OTA platform to avoid mismatched inventory or penalties.
  • Cancellation fees
    Any penalty charged should follow your property’s cancellation policy.
  • Inventory sync
    After cancellation, Smart Order automatically updates room availability across the system.

By using the Cancel Reservation feature in the Smart Order, you can easily manage cancellations and ensure a smooth and efficient experience for both your guests and staff.

Related Articles

Add Reminder in a Reservation

No matter for a newly created reservation or a reserved one, the reminders help to take notes of the customer's needs. Steps on PC: Step for a newly created reservation: When you are creating the new reservation, you select Add Reminder. Fill in the Reminder Time, Reminder Content.

Reservation Box

Overview You can move the reservation to the Reservation Box manually when you have no room for the reserved one. The OTA reservations may also automatically enter the Reservation Box when there is no room at the confirmation. As for the reservations in the Reservation Box, you need to assign

Settings of Sort, Group and Calendar View

Overview To manage the room assignment more flexibly, we support moving a room easily and setting up the rooms by group. To monitor the room status, we can operate it on Calendar View. Change the Order of A Room Type or Room: Step1: Go to the Settings page. Select Sort

Create and check in an hourly room reservation

Overview We don't connect an hourly room type with the OTA channels. Thus, you have to manually create an hourly room reservation. Create/ Check in An Hourly Room Reservation: Step1: Go to the Calendar page and select Calendar View. Select an available room from the hourly room type.

Create A Reservation and Manually Edit the Reservation Details

Overview As you have connected to OTA channels, all the reservations will be recorded automatically from the channels. However, you may still have some walk-in reservations or edit some information on them. Create A New Reservation: Way1: Go to the Calendar page and select Calendar View. Click the room and

Check in/ check out/ settle a reservation

Overview If it is the check-in date, the Check-in icon will be shown on the reservation page. After the reservation has been checked in, the checkout icon will be shown. And only when the Balance Due has been paid off, the reservation can be settled. Check in a reservation Step1: