Collect Deposit and Penalty

Overview

For a channel reservation, if the reservation has been cancelled, the penalty will be recorded automatically. However, whether for a walk-in reservation or a channel reservation, both the deposit and penalty can be recorded manually.

Steps on PC to Collect Deposit

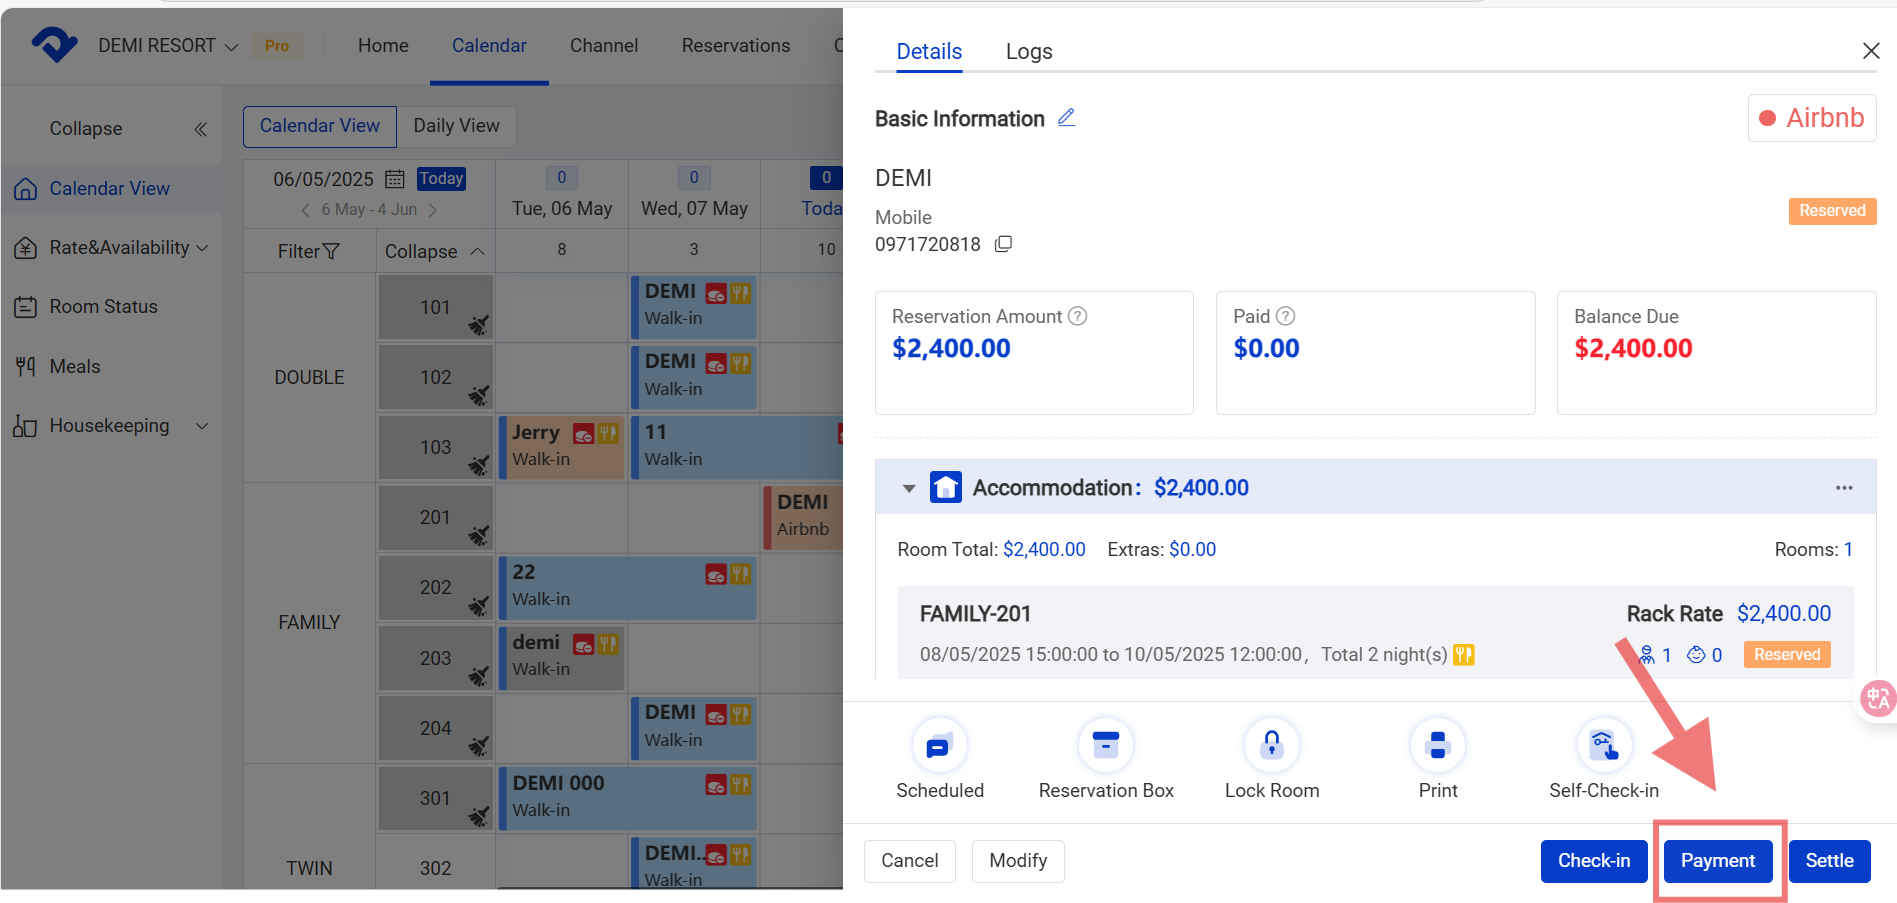
Step1: Select the reservation and go to the reservation details page. Click Payment.

 reservation details page,click Payment.

Step2: Select Deposit in the Type drop-down list. After filling in the Payment Method and Amount details, click Done.

Select and fill the Type, Payment Method and Amount details, click Done

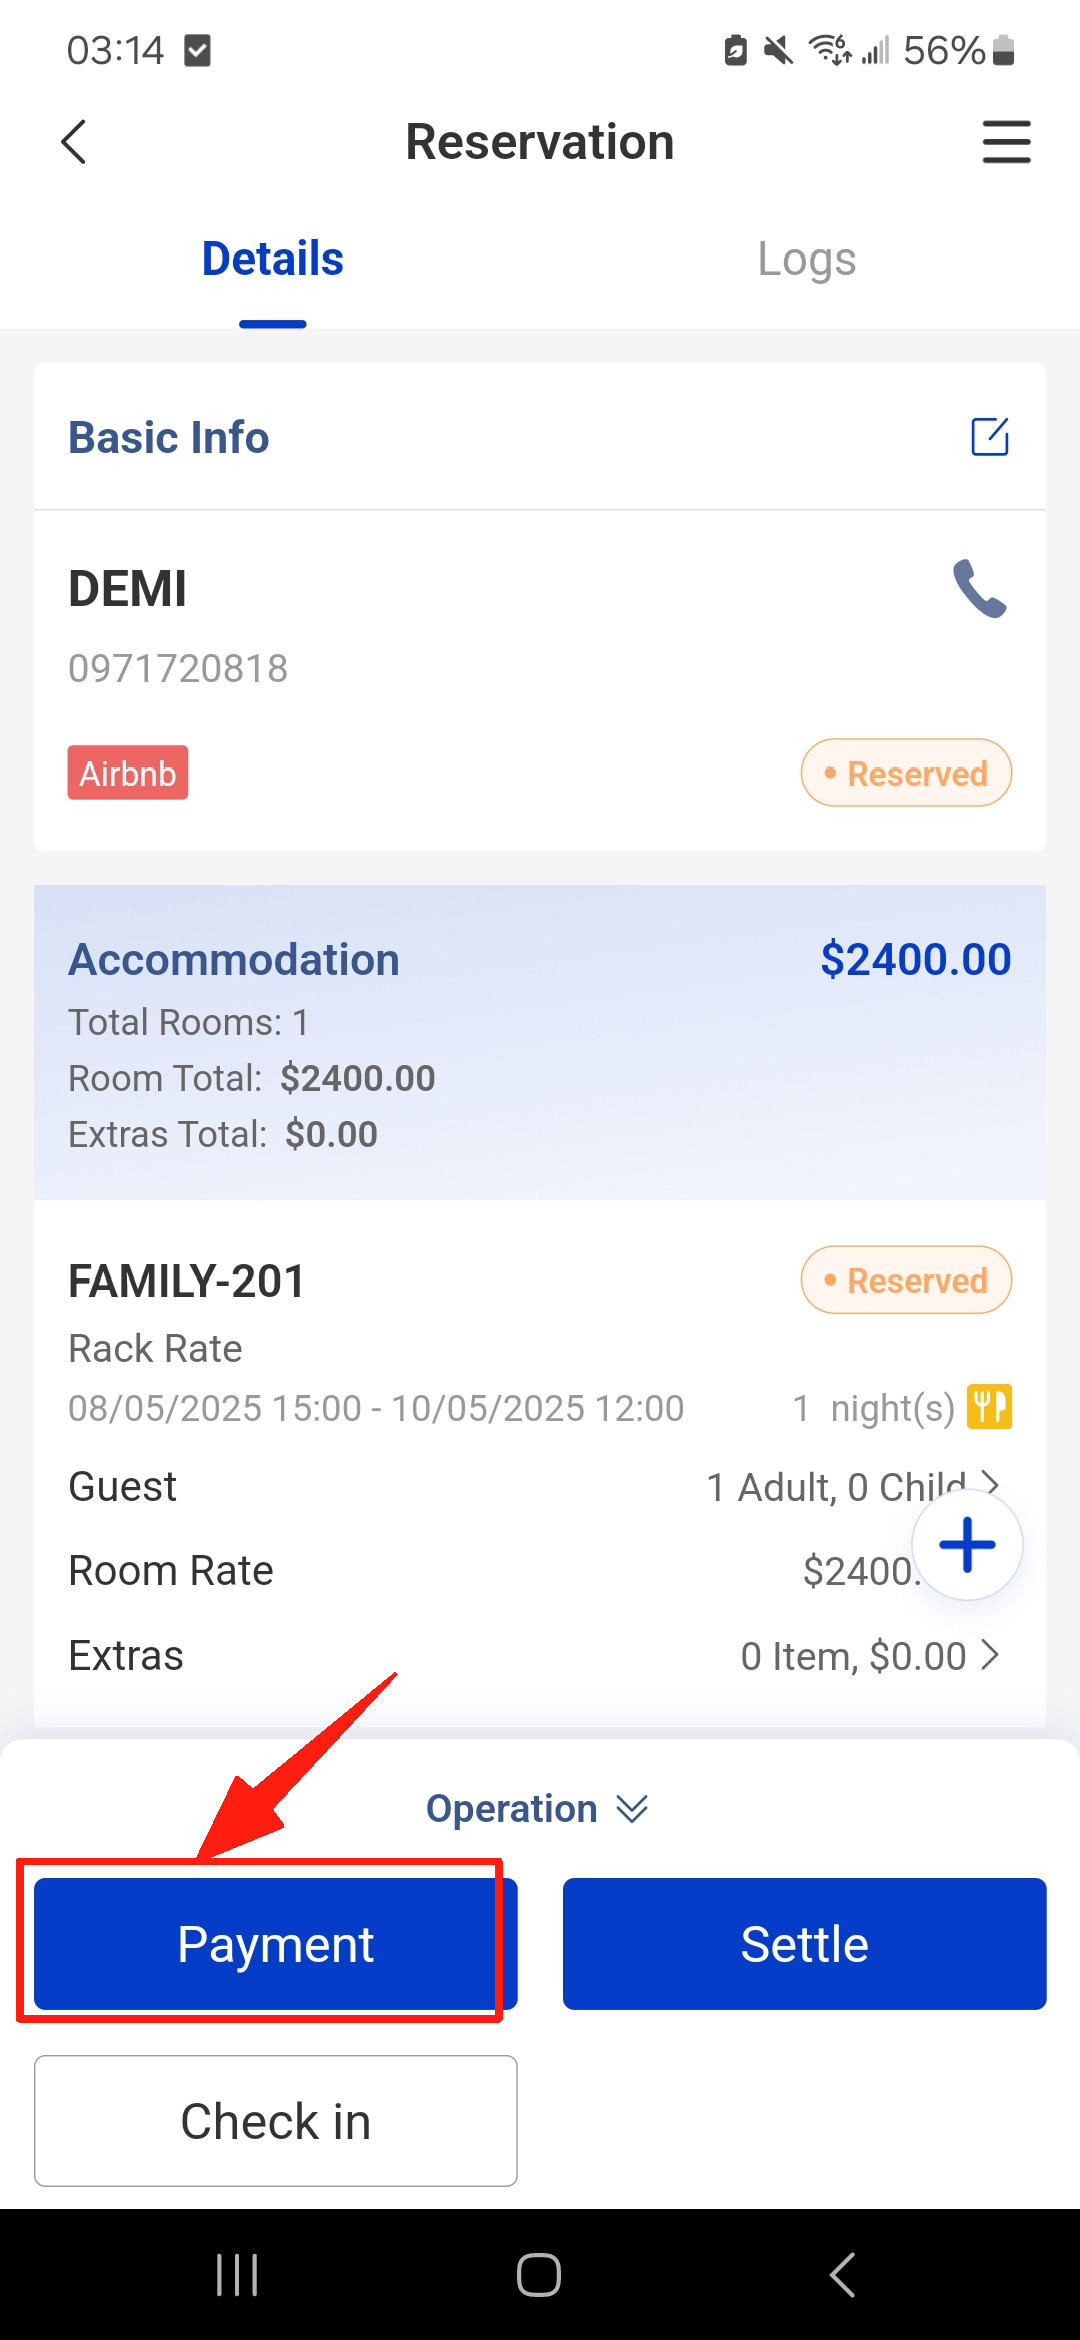
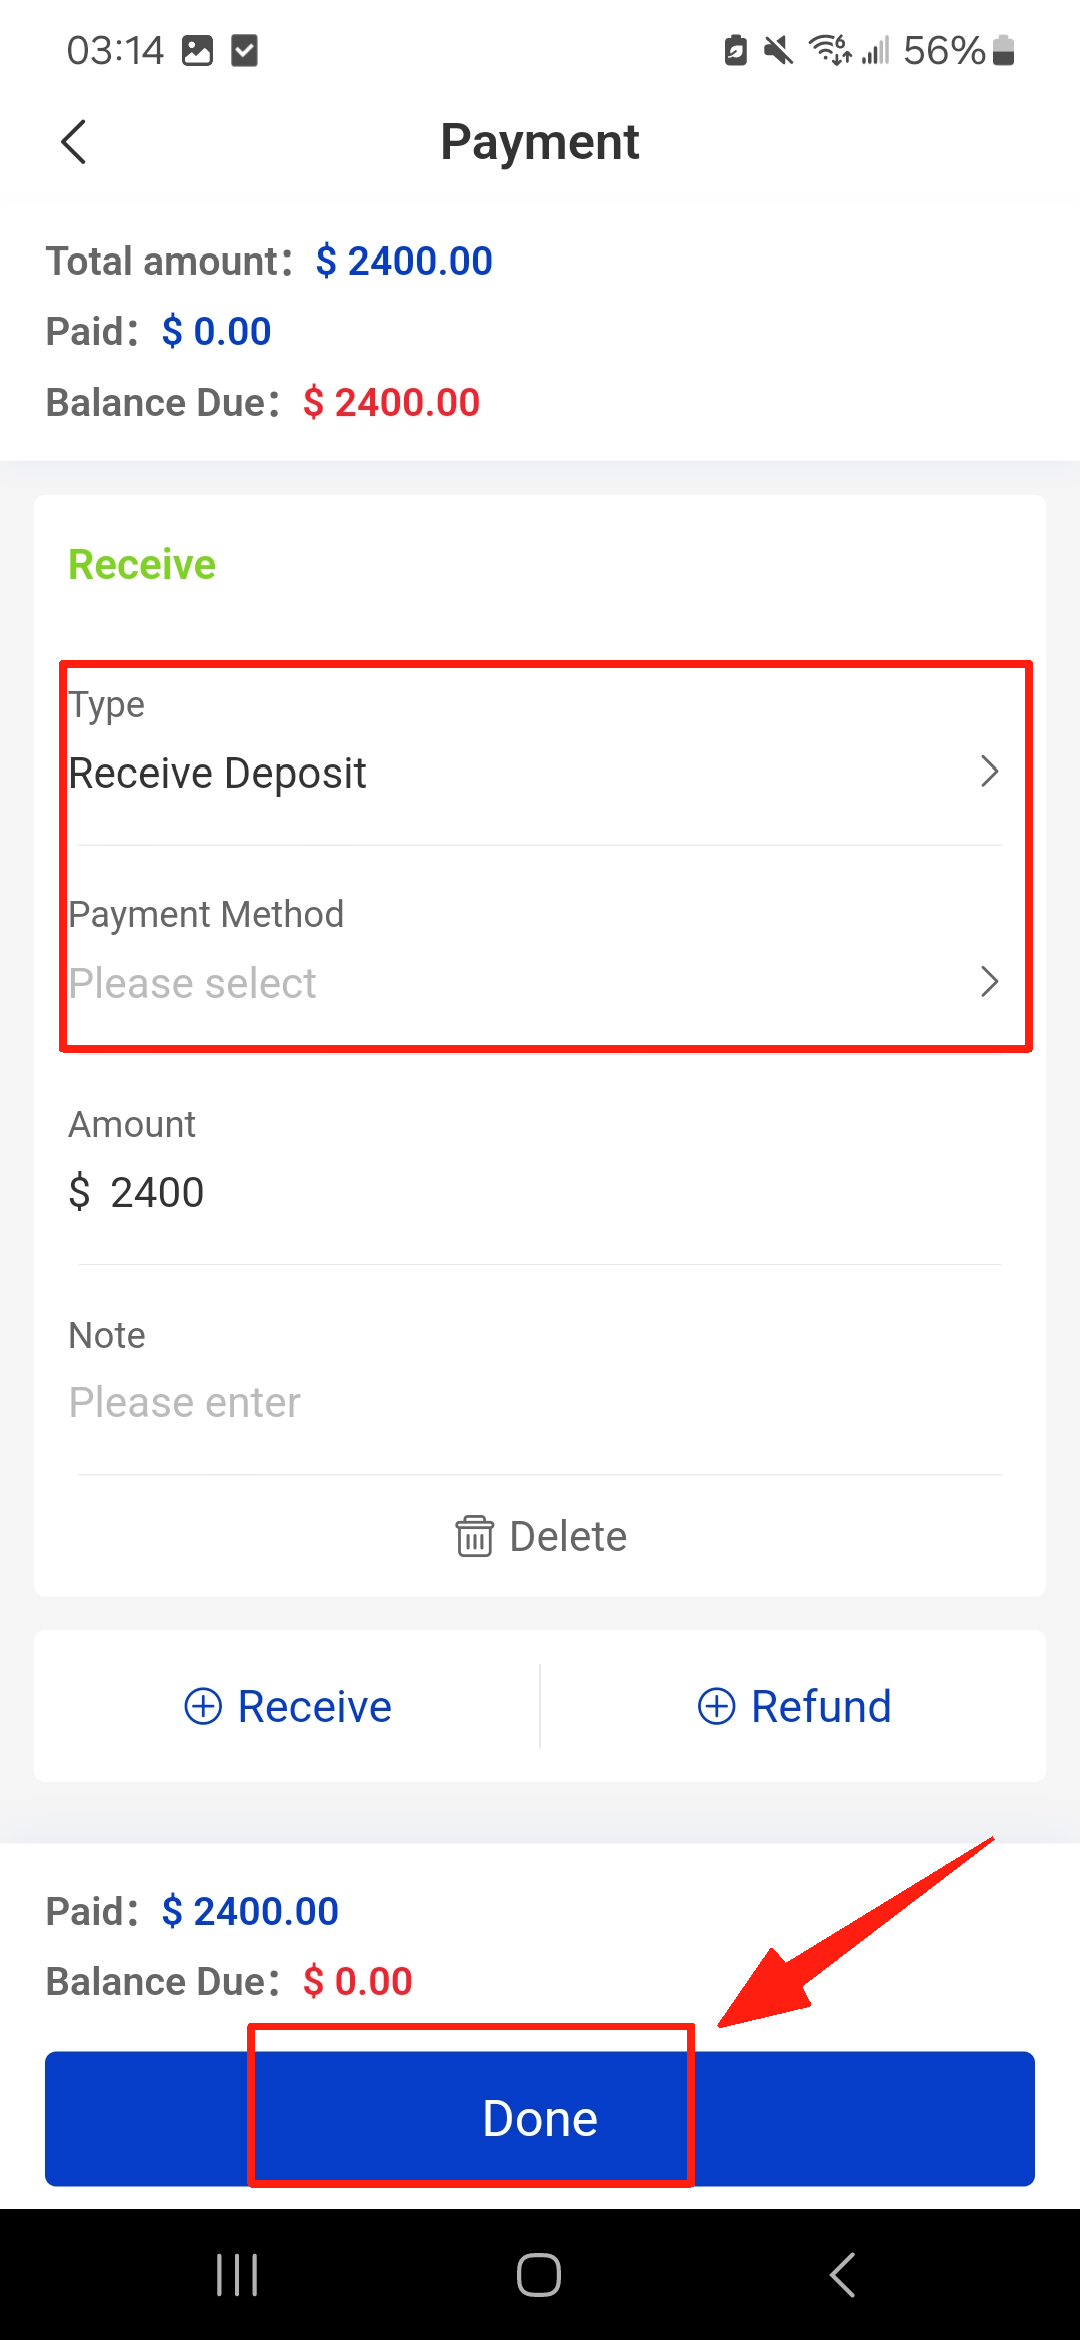
Steps on the APP to Collect Deposit

Go to the reservation details page and select Payment in the Operation drop-down list. Select Receive and fill in the Type and Payment Method details.

details page and select Payment
Select Receive and fill in the Type and Payment Method details.

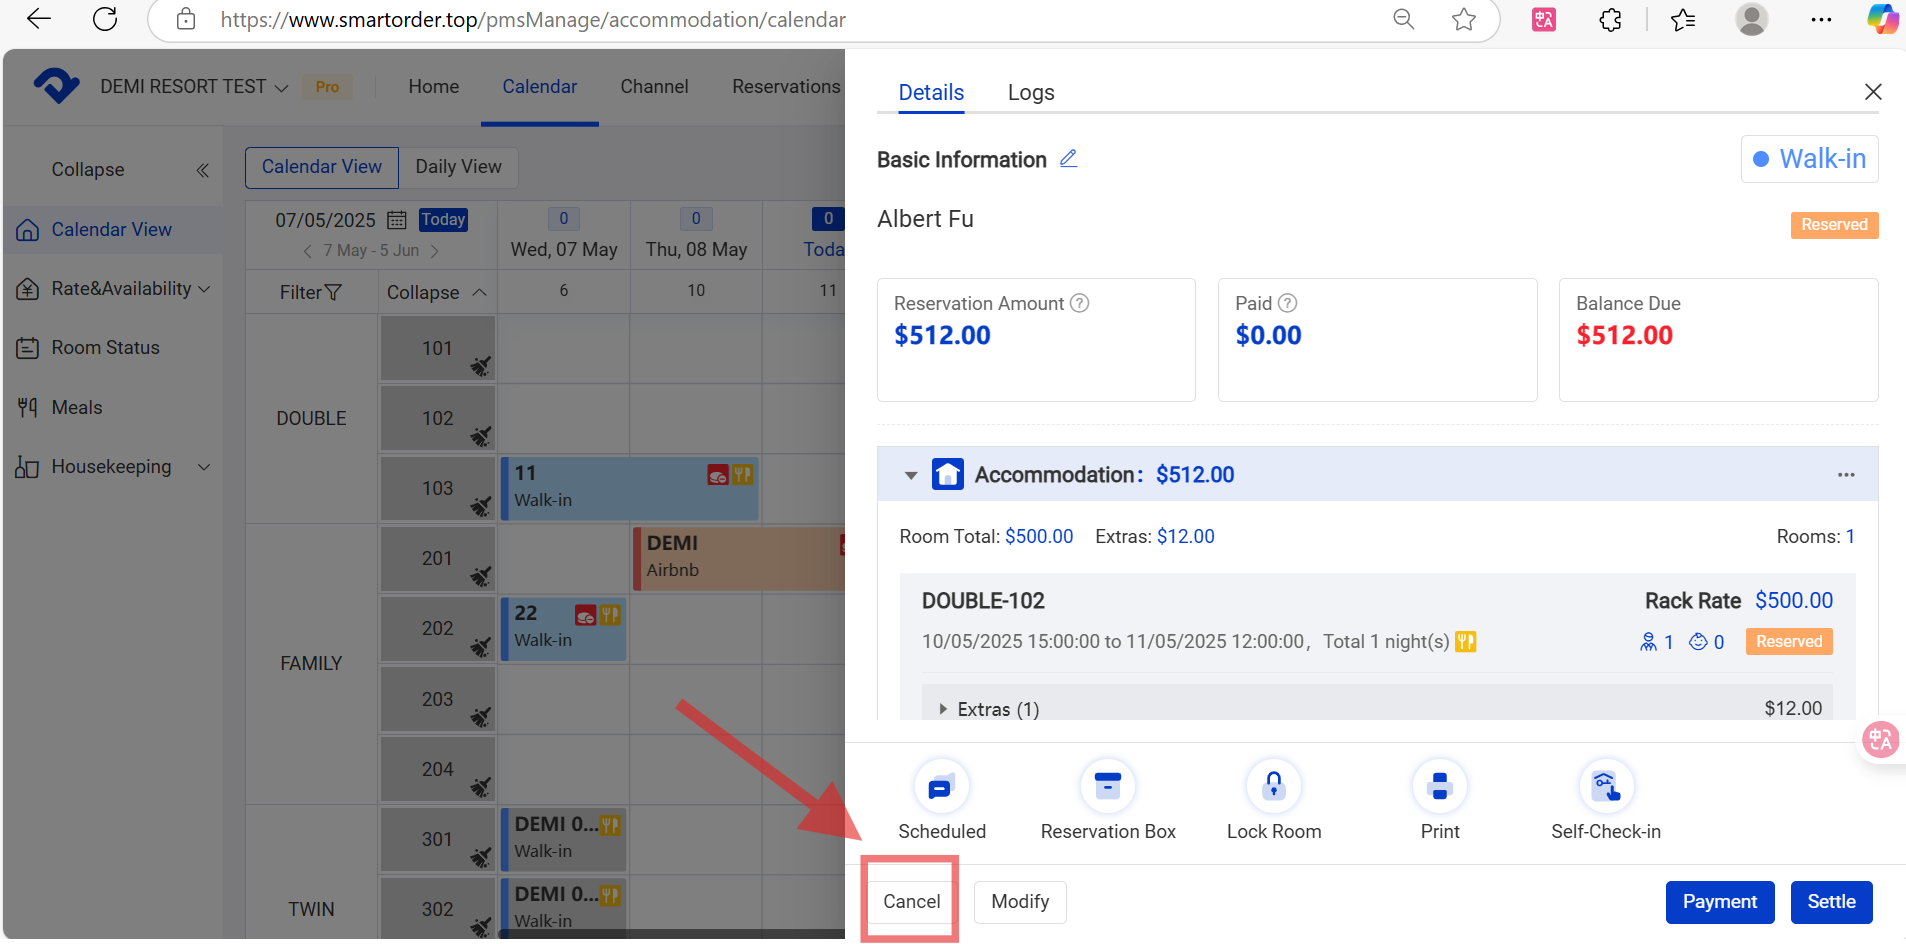
Steps on PC to Collect Penalty

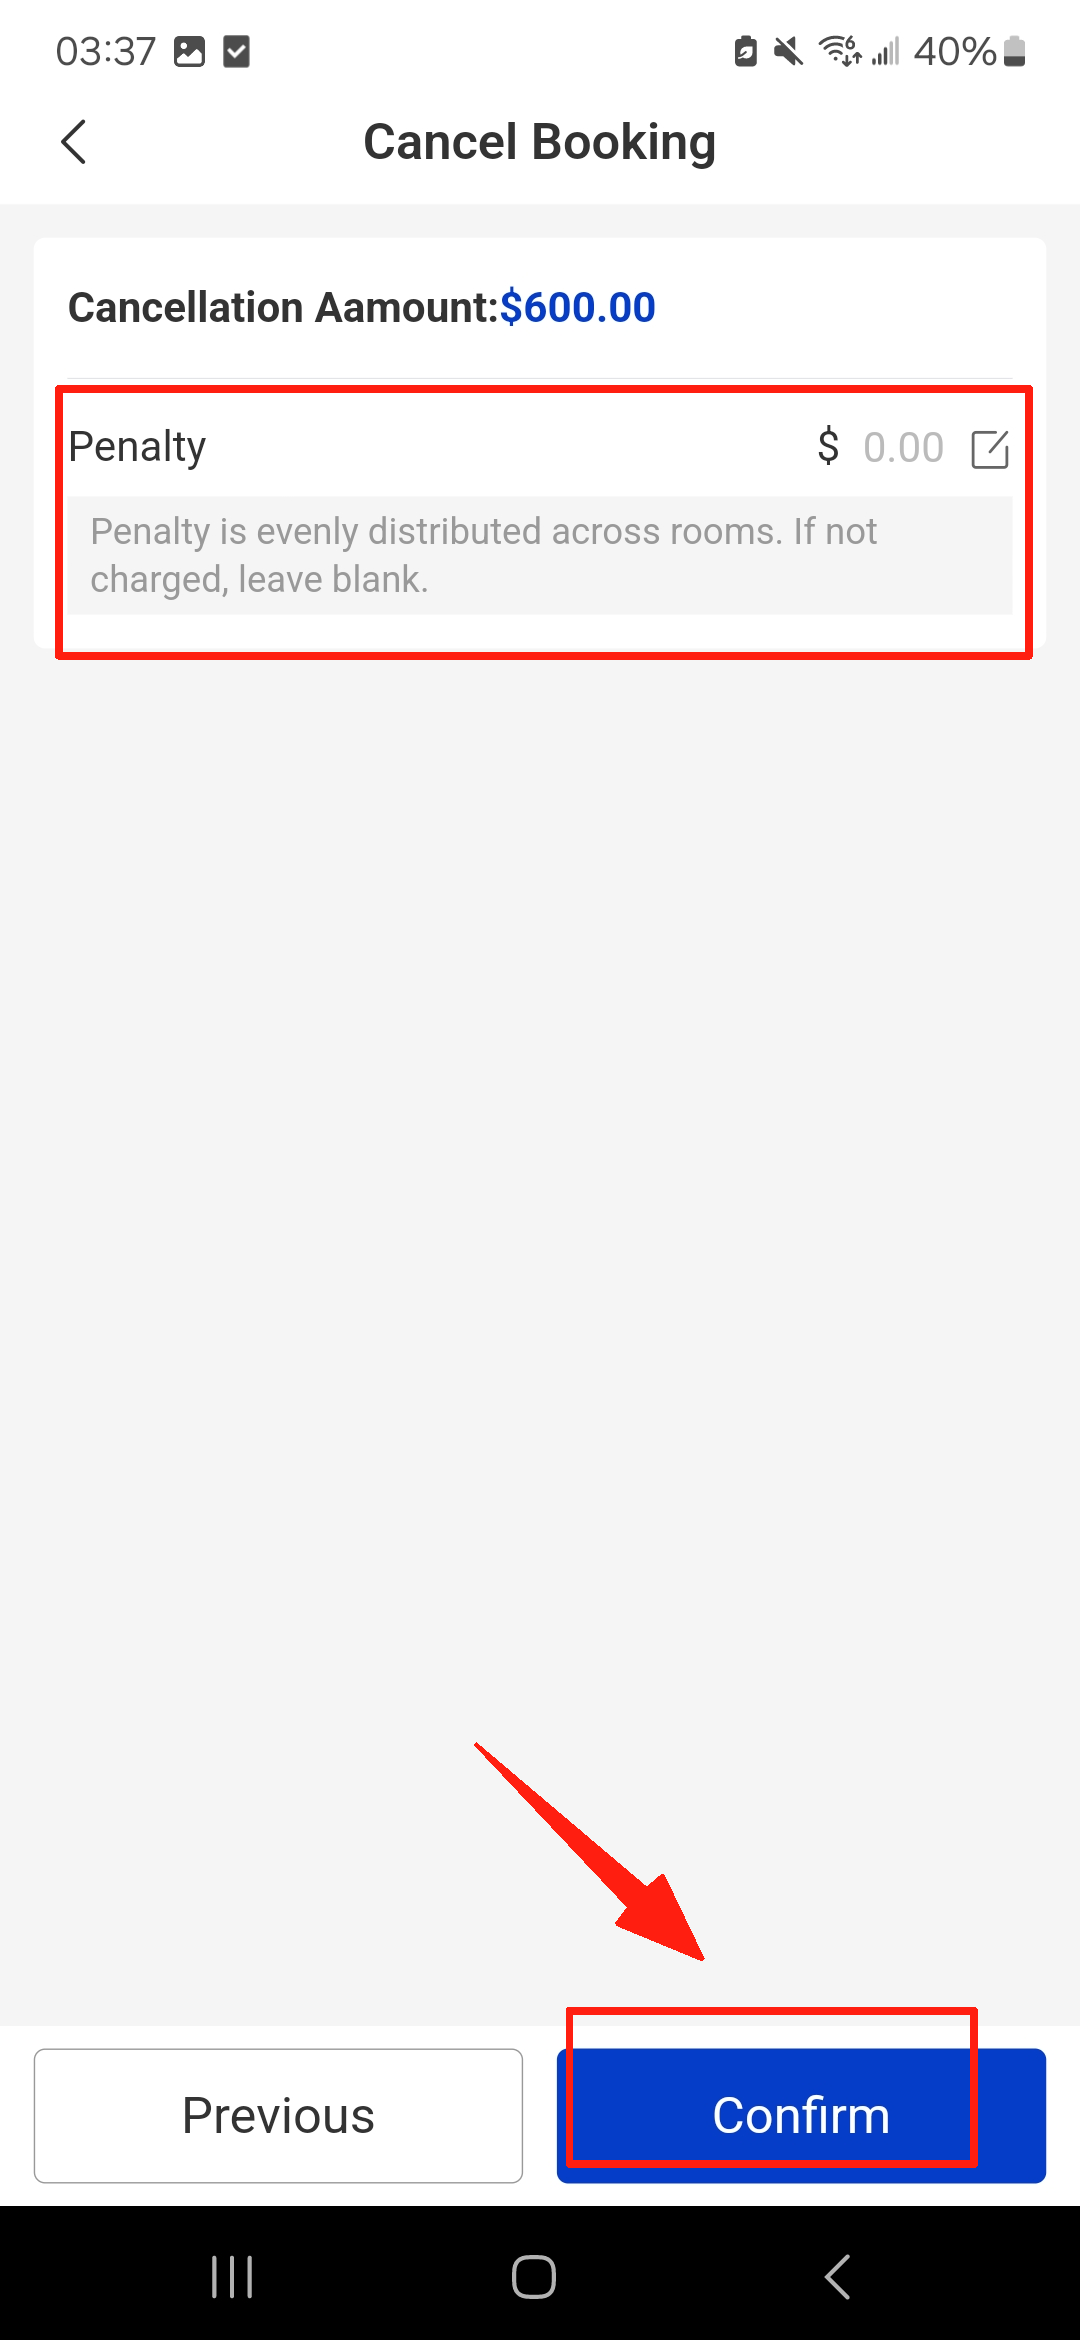
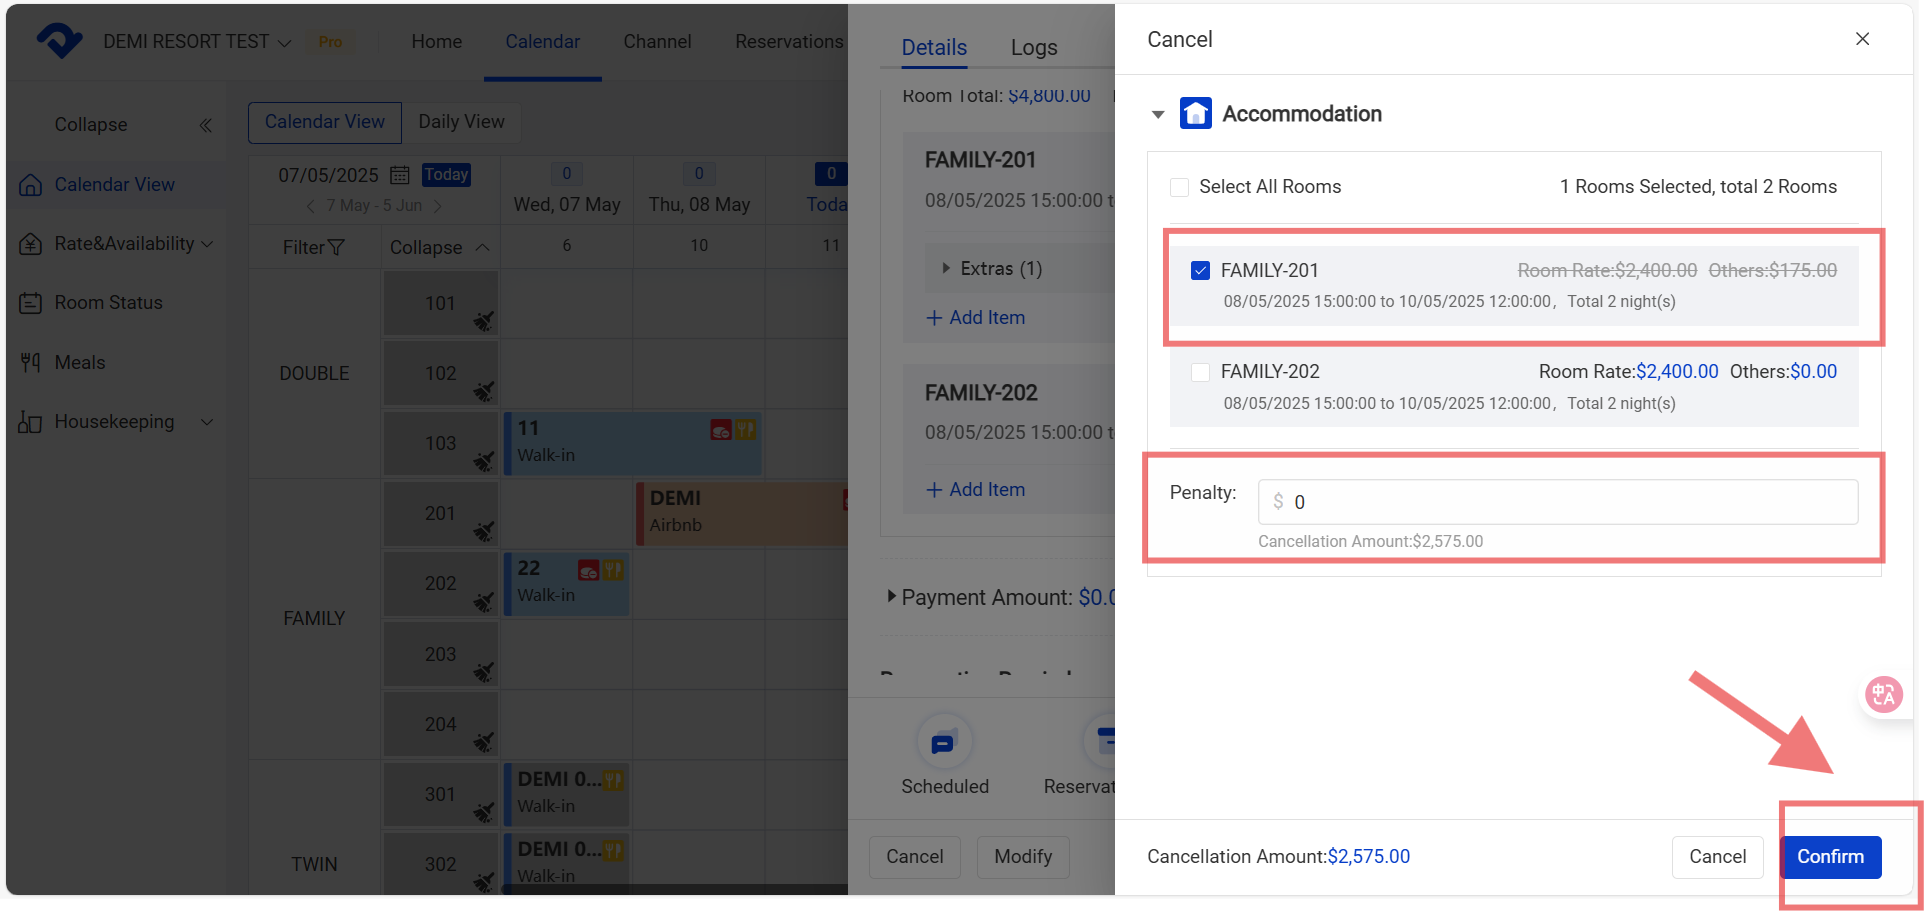
Step1: Select the reservation and click Cancel. Fill in the Penalty in the Cancel pop-up box and click Confirm.

Select the reservation and click Cancel
Fill in the Penalty

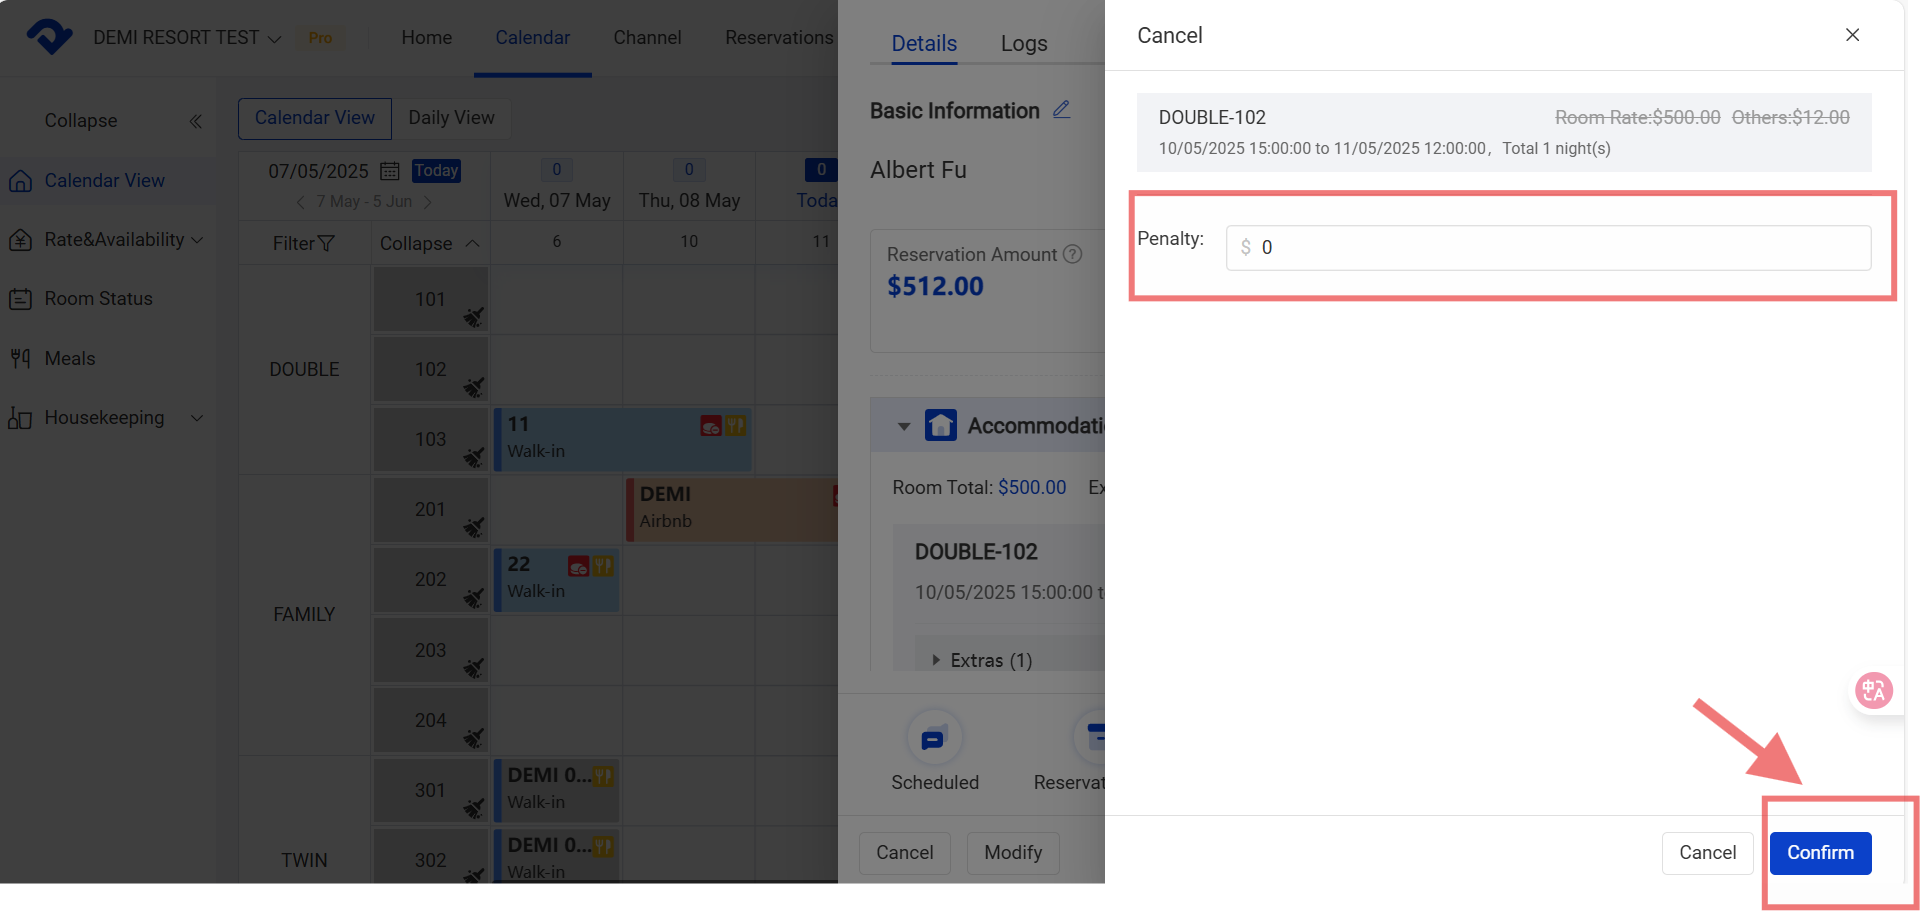
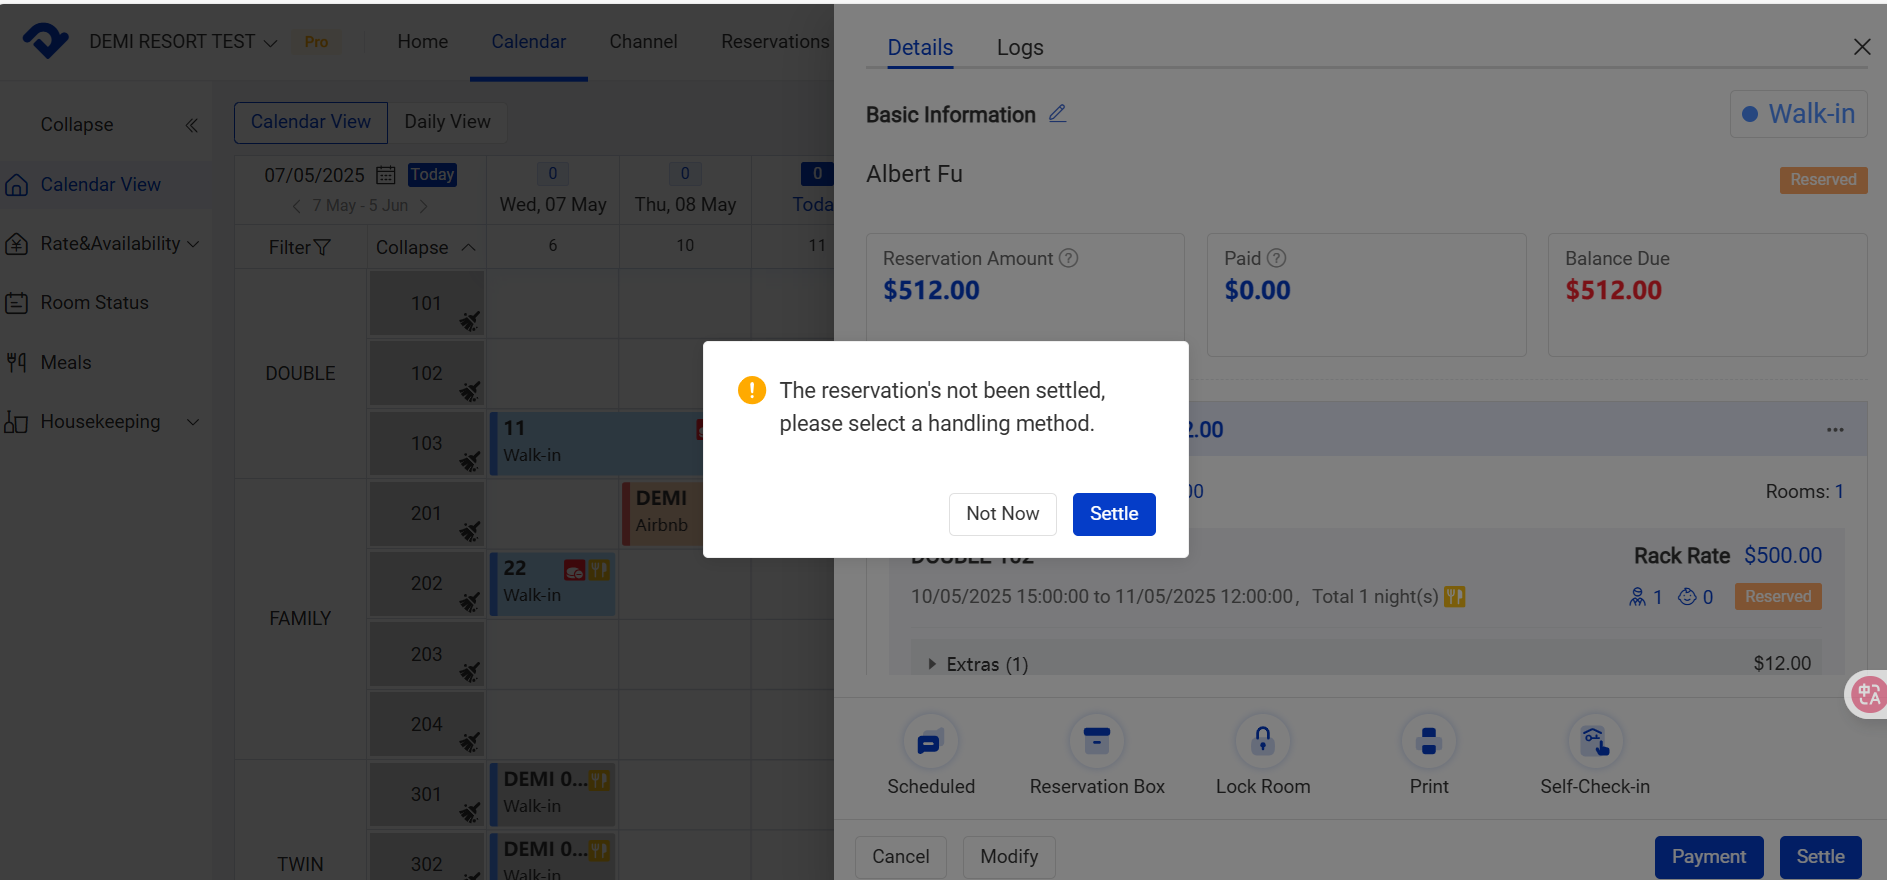
Step2: After filling in the Penalty, there will be a pop-up box to notify you to settle. If there is no Penalty, there won't be a pop-up box. After filling in the Penalty, click Confirm.

pop-up box

Step3: If there are other rooms in the reservation, there won't be a pop-up box to notify you to settle. And you can select the room to cancel in the reservation. And the Penalty will be collected together when settling the whole reservation.

select the room to cancel

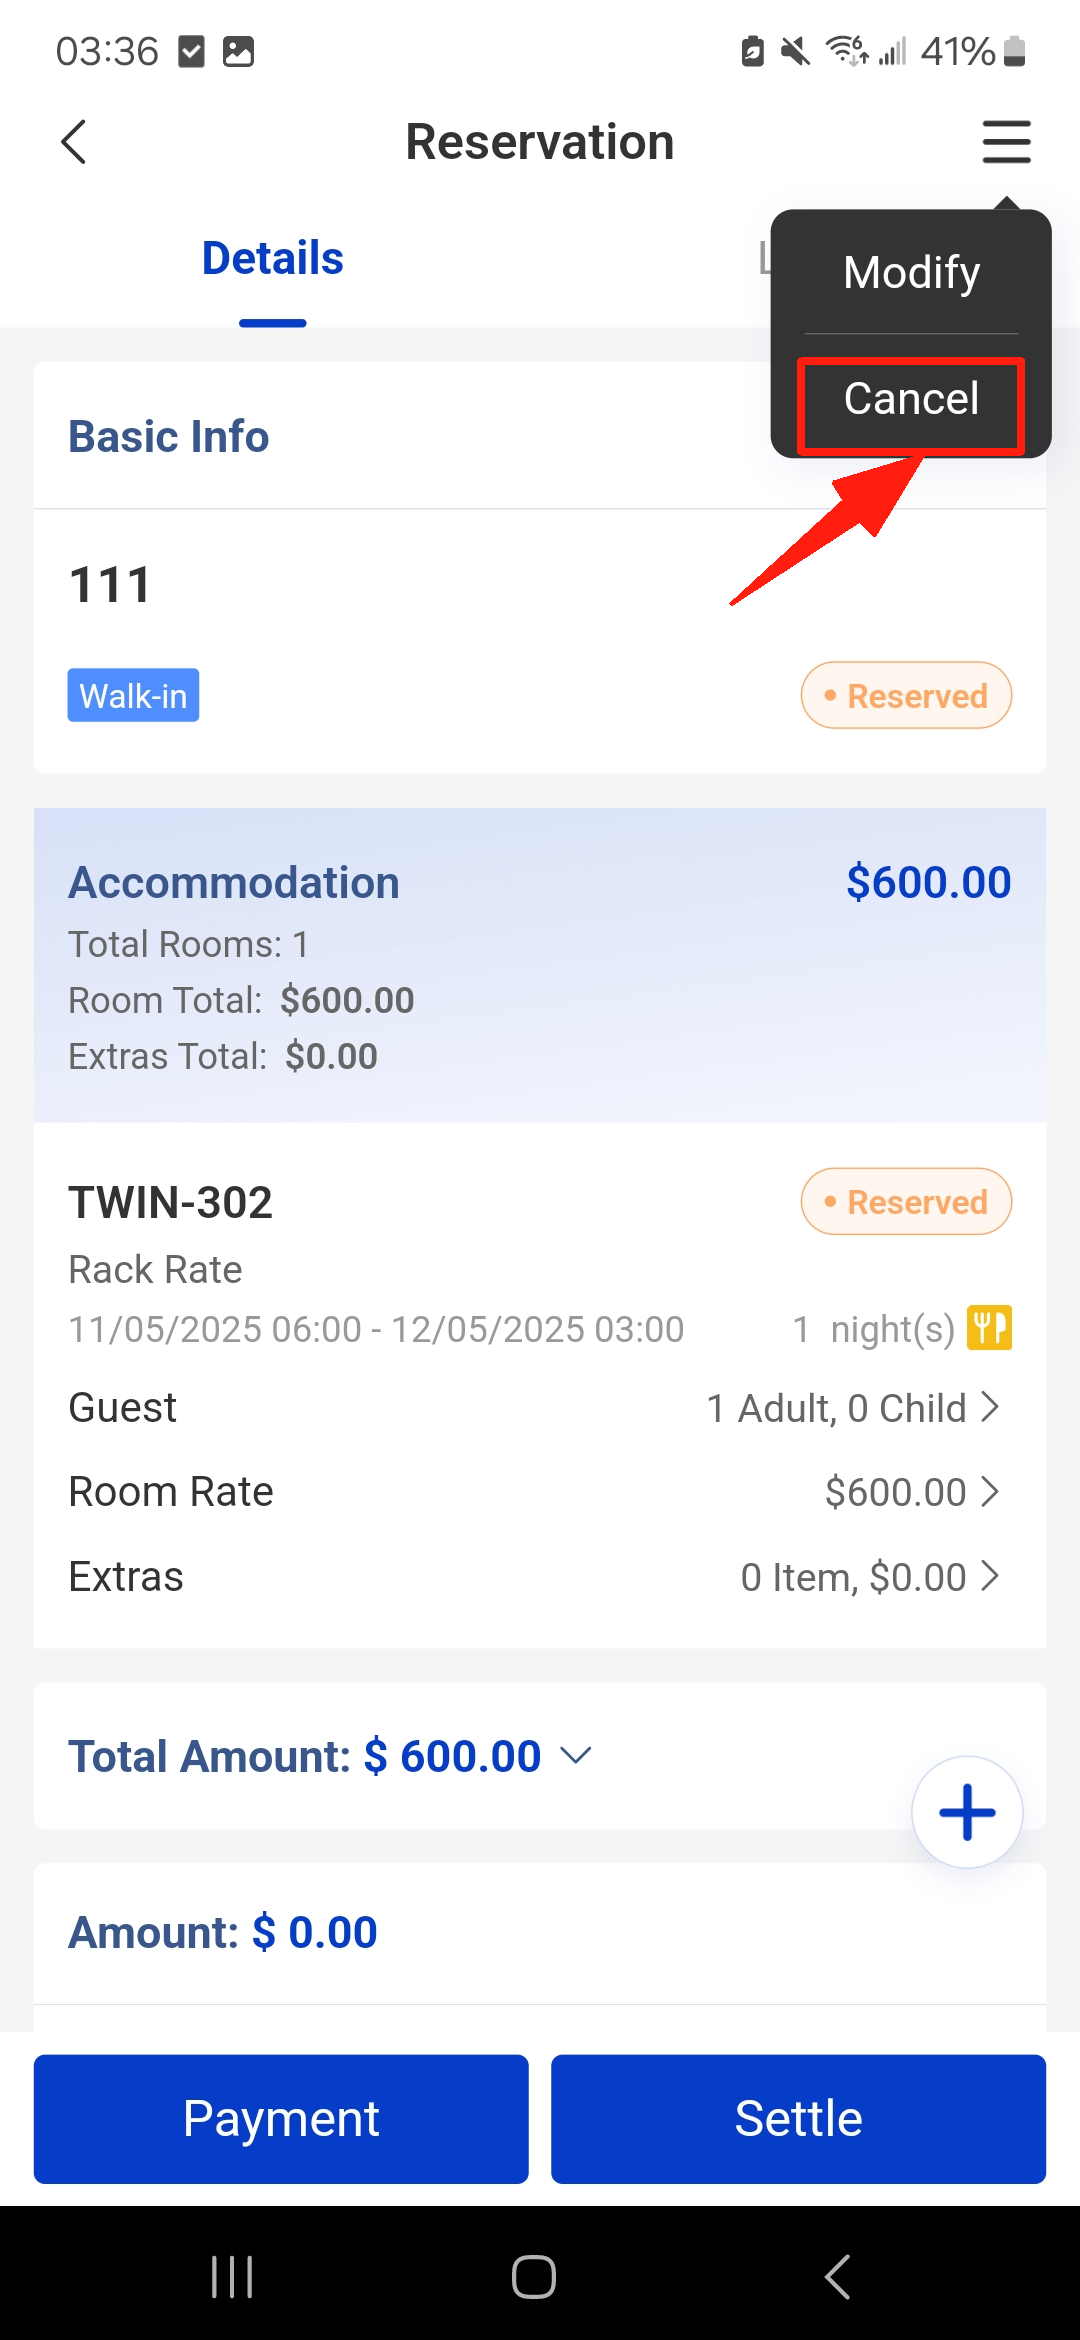
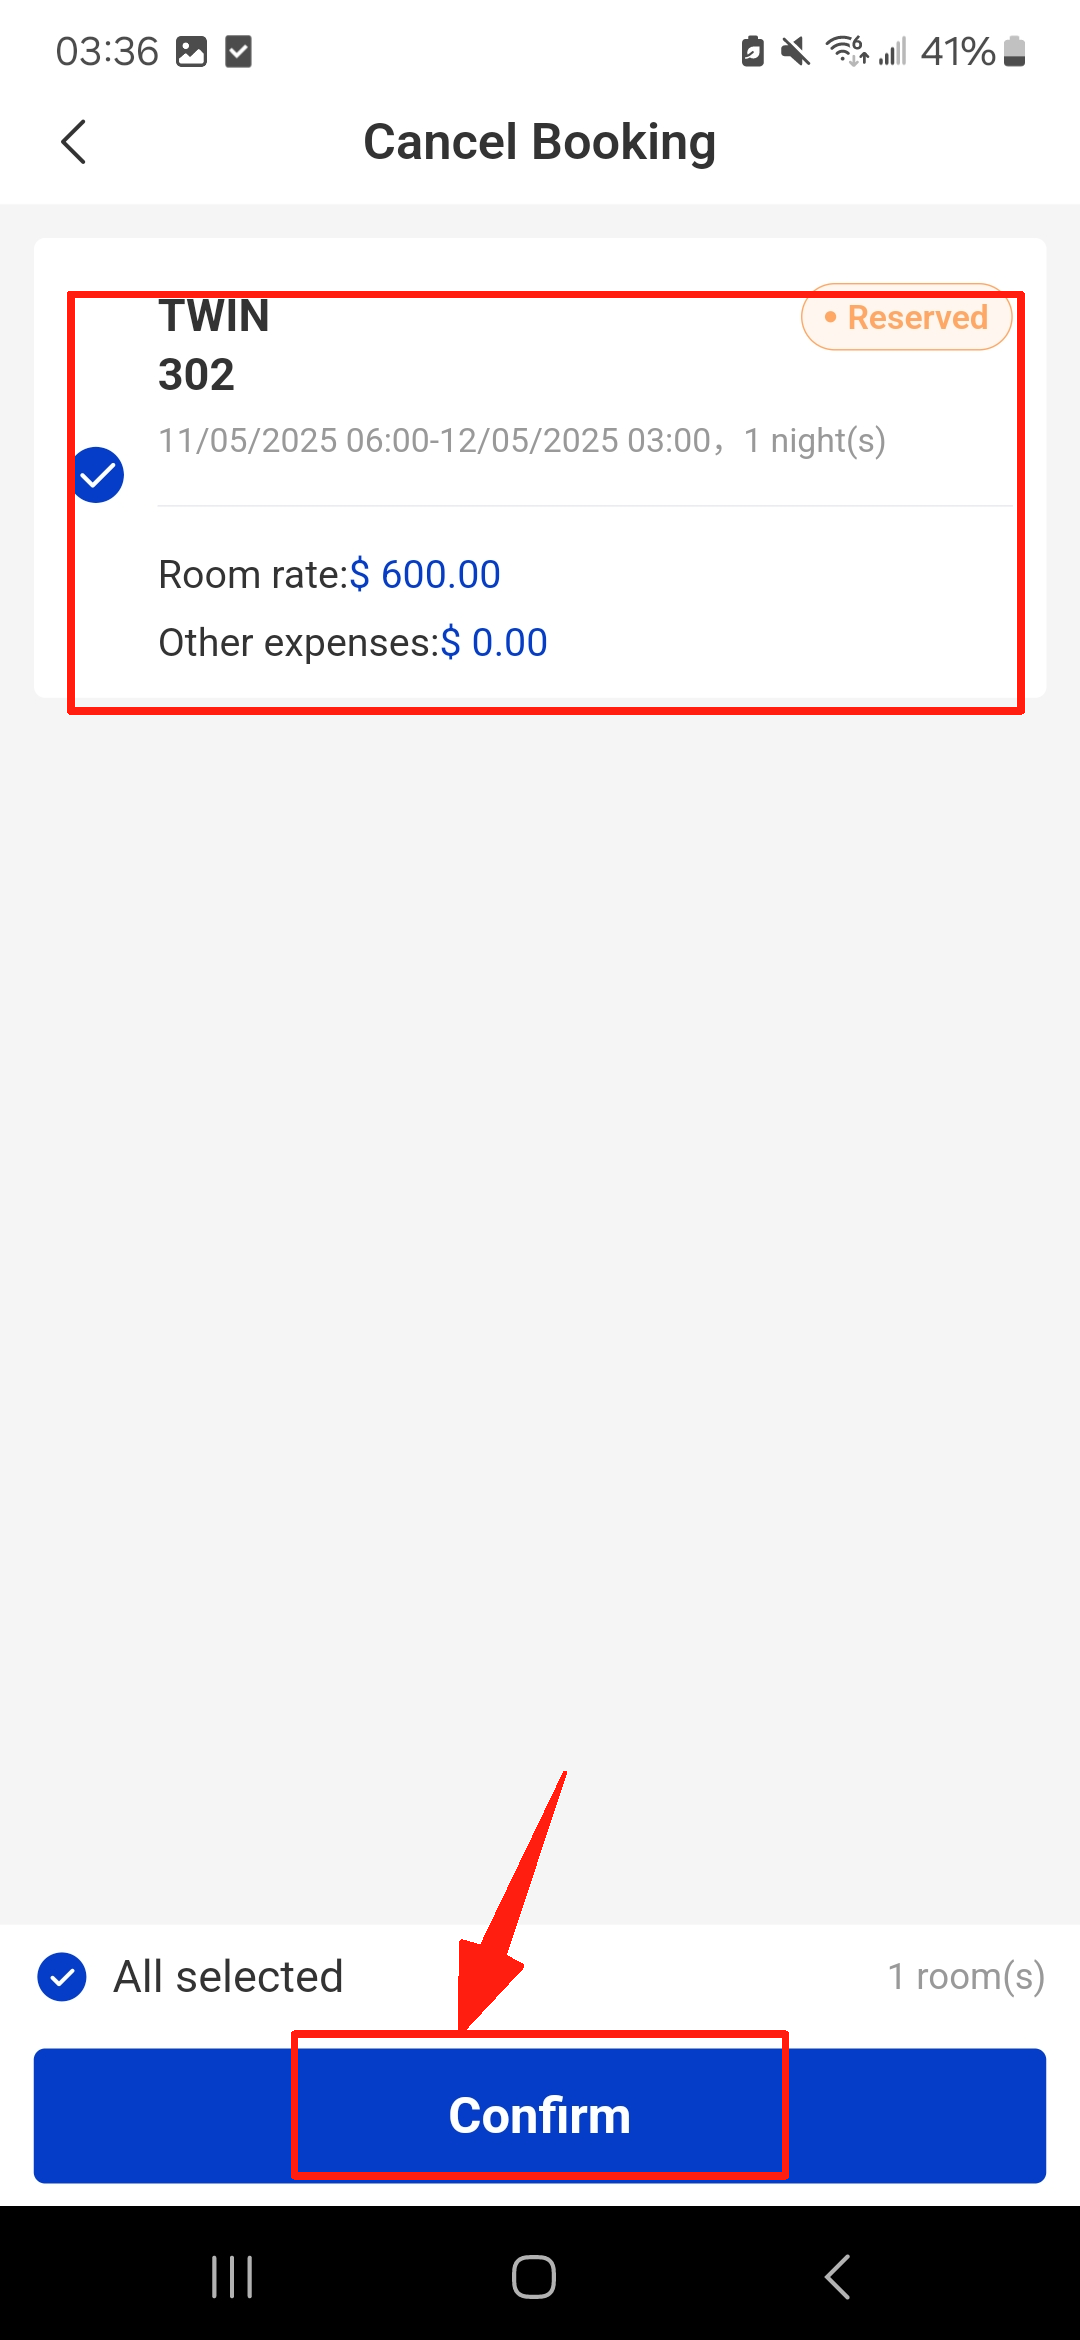
Steps on the APP to Collect Penalty

Select the reservation and click Cancel from the expand icon in the top-right corner. Select the room and click Confirm. After filling in the Penalty, click Confirm.

click Cancel from the expand icon
the
Select the room and click Confirm

After filling in the Penalty, click Confirm

Related Articles

Add Reminder in a Reservation

No matter for a newly created reservation or a reserved one, the reminders help to take notes of the customer's needs. Steps on PC: Step for a newly created reservation: When you are creating the new reservation, you select Add Reminder. Fill in the Reminder Time, Reminder Content.

Reservation Box

Overview You can move the reservation to the Reservation Box manually when you have no room for the reserved one. The OTA reservations may also automatically enter the Reservation Box when there is no room at the confirmation. As for the reservations in the Reservation Box, you need to assign

Settings of Sort, Group and Calendar View

Overview To manage the room assignment more flexibly, we support moving a room easily and setting up the rooms by group. To monitor the room status, we can operate it on Calendar View. Change the Order of A Room Type or Room: Step1: Go to the Settings page. Select Sort

Create and check in an hourly room reservation

Overview We don't connect an hourly room type with the OTA channels. Thus, you have to manually create an hourly room reservation. Create/ Check in An Hourly Room Reservation: Step1: Go to the Calendar page and select Calendar View. Select an available room from the hourly room type.

Create A Reservation and Manually Edit the Reservation Details

Overview As you have connected to OTA channels, all the reservations will be recorded automatically from the channels. However, you may still have some walk-in reservations or edit some information on them. Create A New Reservation: Way1: Go to the Calendar page and select Calendar View. Click the room and

Check in/ check out/ settle a reservation

Overview If it is the check-in date, the Check-in icon will be shown on the reservation page. After the reservation has been checked in, the checkout icon will be shown. And only when the Balance Due has been paid off, the reservation can be settled. Check in a reservation Step1: