Create and check in an hourly room reservation

Overview

We don't connect an hourly room type with the OTA channels. Thus, you have to manually create an hourly room reservation.

Create/ Check in An Hourly Room Reservation:

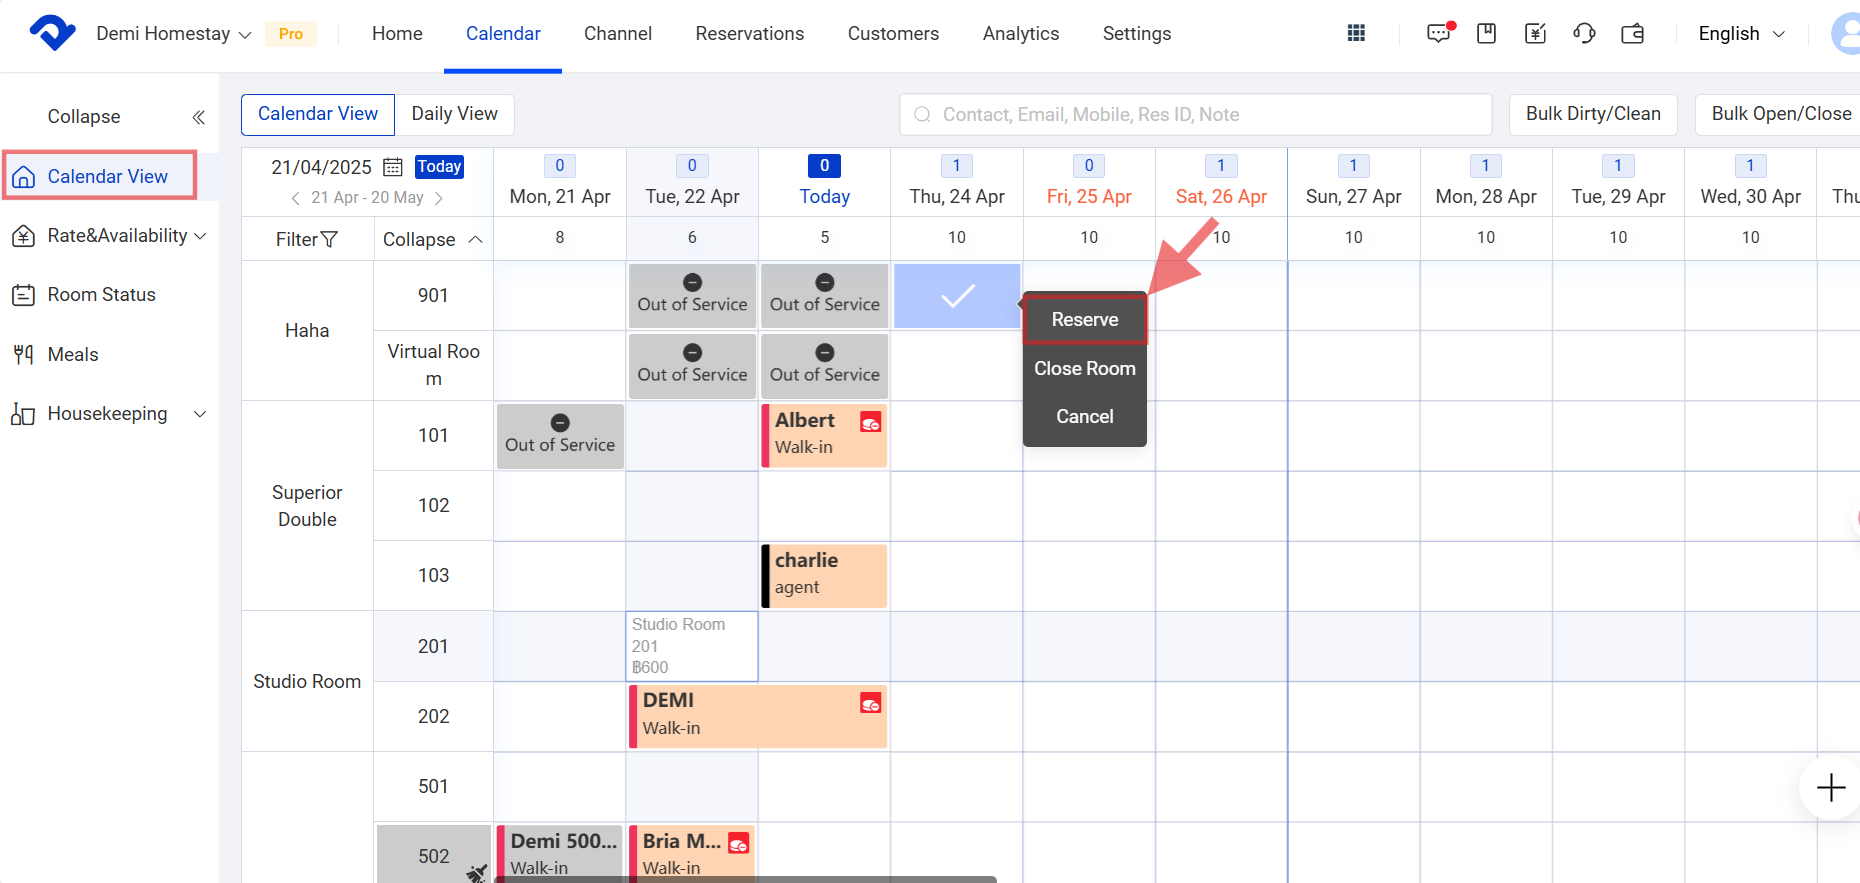
Step1: Go to the Calendar page and select Calendar View. Select an available room from the hourly room type. And click Reserve.

Reserve

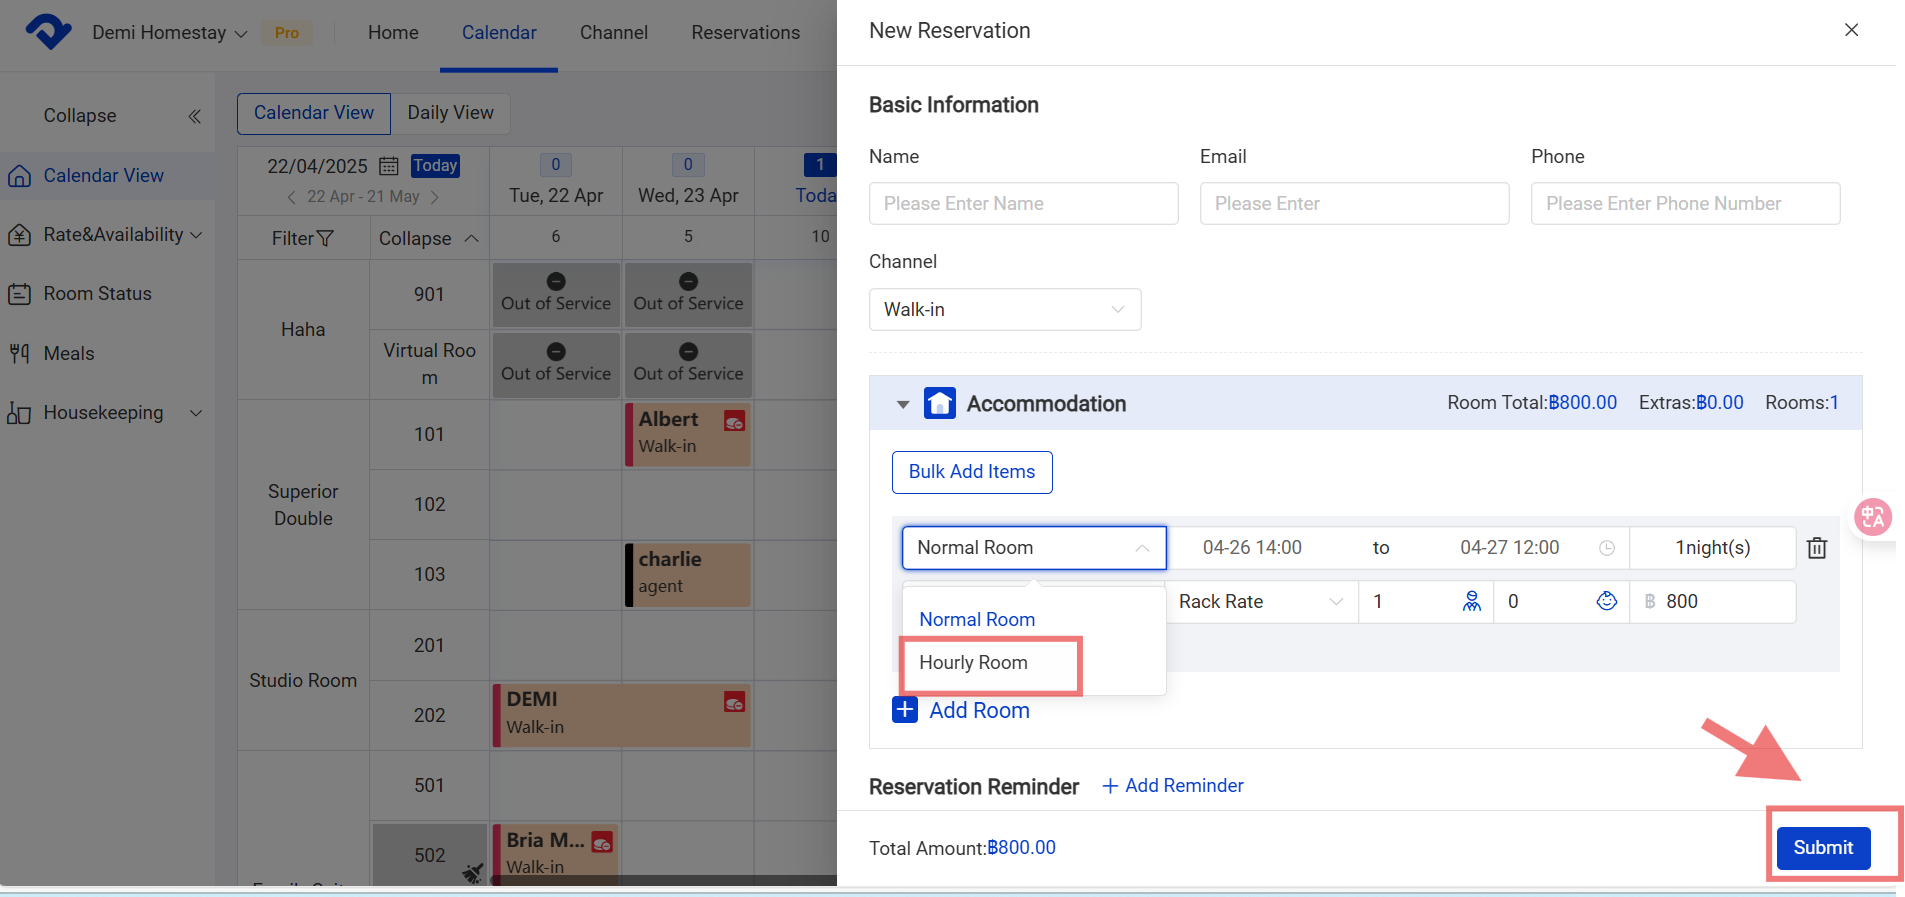
Step2: After filling in the Basic Information, select Hourly Room from the Accommodation drop-down list and click Submit after filling in the Accommodation.

Hourly Room

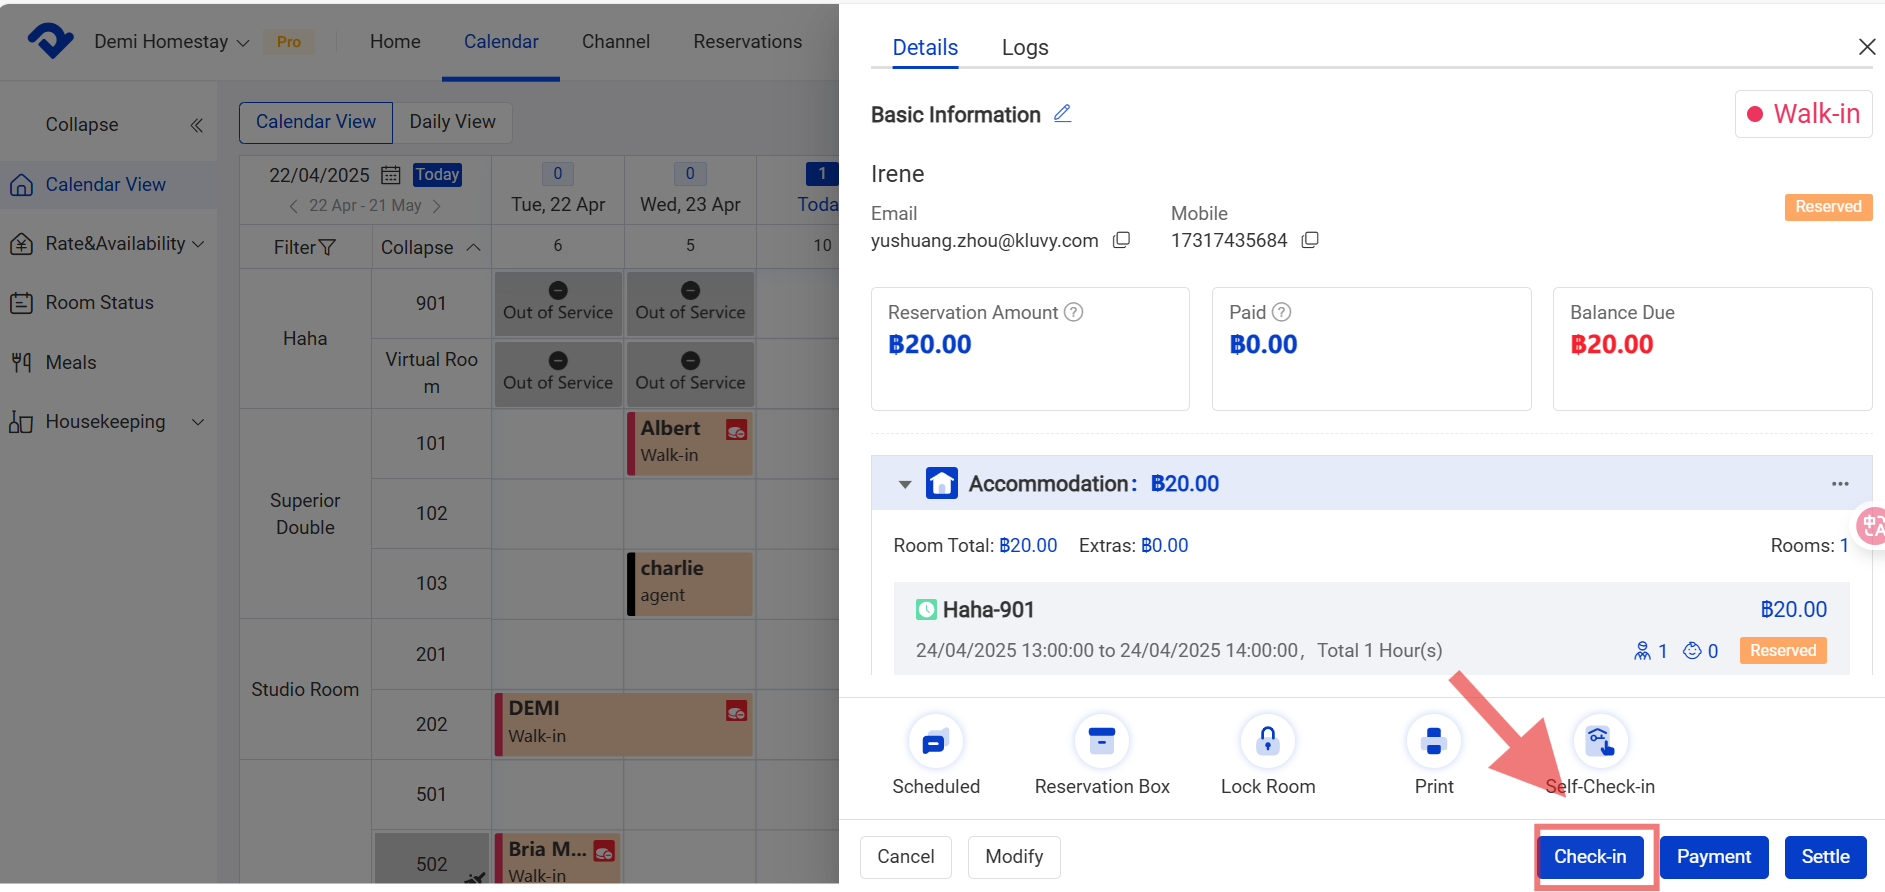
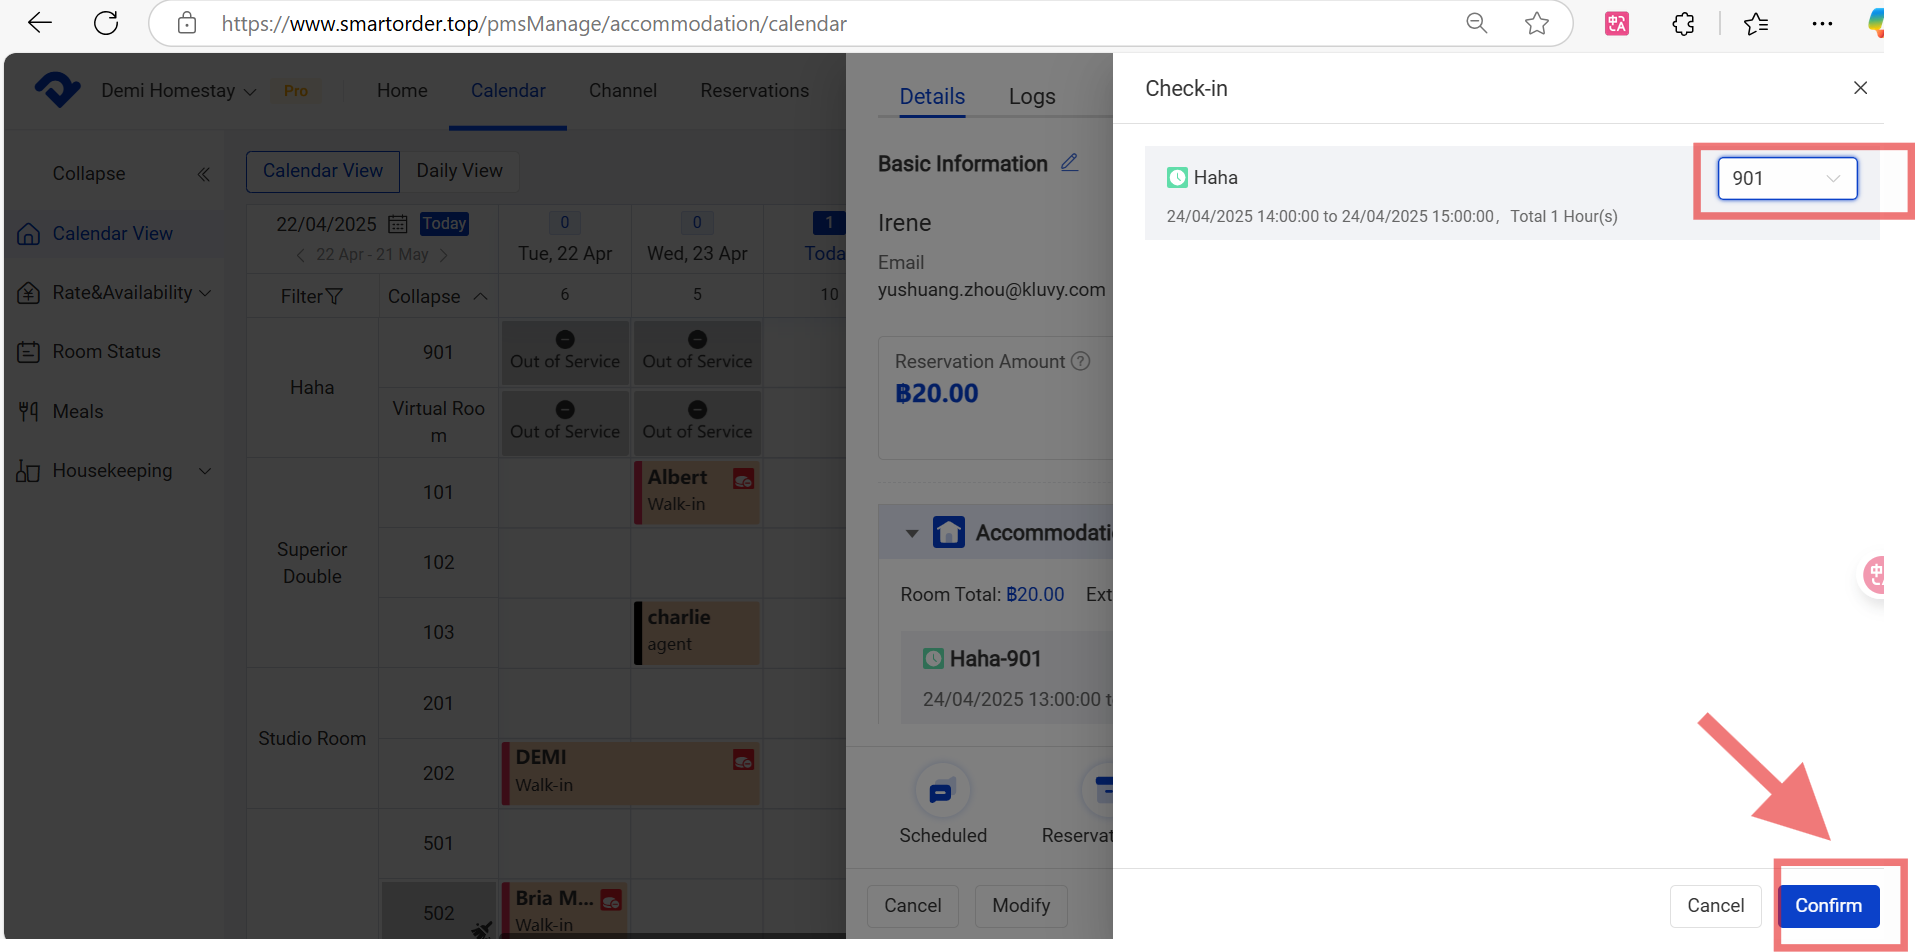
Step3: Select Check in on the Details page. Choose the right room from the room type drop-down list. Click Confirm.

Check in
Choose the right room

Note:

The check-in time will be refreshed after the operation of check-in. The expected check-in time of the reservation will be refreshed.

Related Articles

Add Reminder in a Reservation

No matter for a newly created reservation or a reserved one, the reminders help to take notes of the customer's needs. Steps on PC: Step for a newly created reservation: When you are creating the new reservation, you select Add Reminder. Fill in the Reminder Time, Reminder Content.

Reservation Box

Overview You can move the reservation to the Reservation Box manually when you have no room for the reserved one. The OTA reservations may also automatically enter the Reservation Box when there is no room at the confirmation. As for the reservations in the Reservation Box, you need to assign

Settings of Sort, Group and Calendar View

Overview To manage the room assignment more flexibly, we support moving a room easily and setting up the rooms by group. To monitor the room status, we can operate it on Calendar View. Change the Order of A Room Type or Room: Step1: Go to the Settings page. Select Sort

Create A Reservation and Manually Edit the Reservation Details

Overview As you have connected to OTA channels, all the reservations will be recorded automatically from the channels. However, you may still have some walk-in reservations or edit some information on them. Create A New Reservation: Way1: Go to the Calendar page and select Calendar View. Click the room and

Check in/ check out/ settle a reservation

Overview If it is the check-in date, the Check-in icon will be shown on the reservation page. After the reservation has been checked in, the checkout icon will be shown. And only when the Balance Due has been paid off, the reservation can be settled. Check in a reservation Step1:

Restore A Canceled Reservation

Overview If you want to restore a canceled reservation, you can go to the Reservations page to search for it and then restore it. Search for a canceled reservation/room on PC : Go to the Reservation page and select Accommodation from the Reservation drop-down list. Select Canceled from the Reservation