Overviews
Smart Order allows you to create your own reservations, saving money and empowering you to manage the guest relationship.
This article covers how to create a reservation and which details you should enter.
When do I need to create manual reservations?
As your Smart Order is connected to OTAs (also called channels) and a direct booking engine, most new reservations will be created and added to your calendar automatically. However, if a guest decides to make a booking directly via phone or email, you'll need to manually create that reservation in your Smart Order.
Creating a reservation allows you to select and hold a room for guests. Your availability will also be updated automatically on your connected channels will show this new availability. Making sure these bookings have a reservation in your front desk helps to prevent overbookings.
How do I create a reservation on my Calendar page?
1. Go to the Calendar page.
2. Locate the new reservation’s check-in date.
3. On the cell corresponding with the room where you wish to create this reservation, click and drag to the right or left across the days the booking will be required.
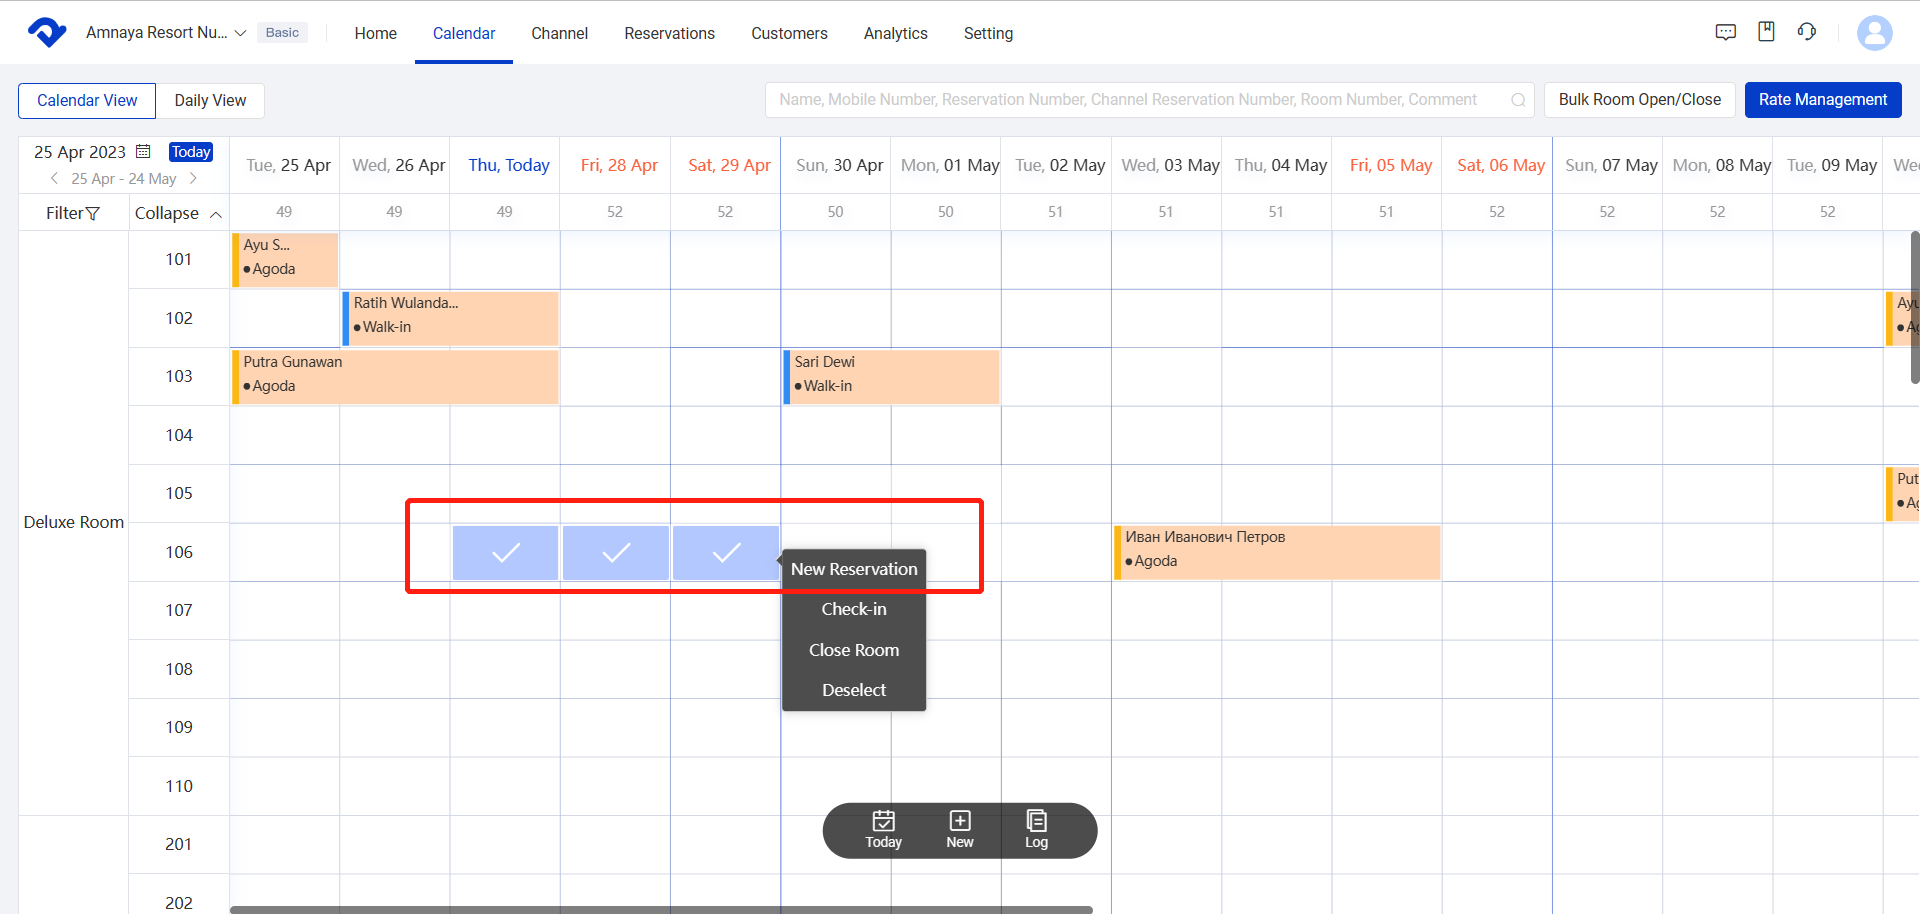
4. On the pop-up window, click on the New Reservation button.
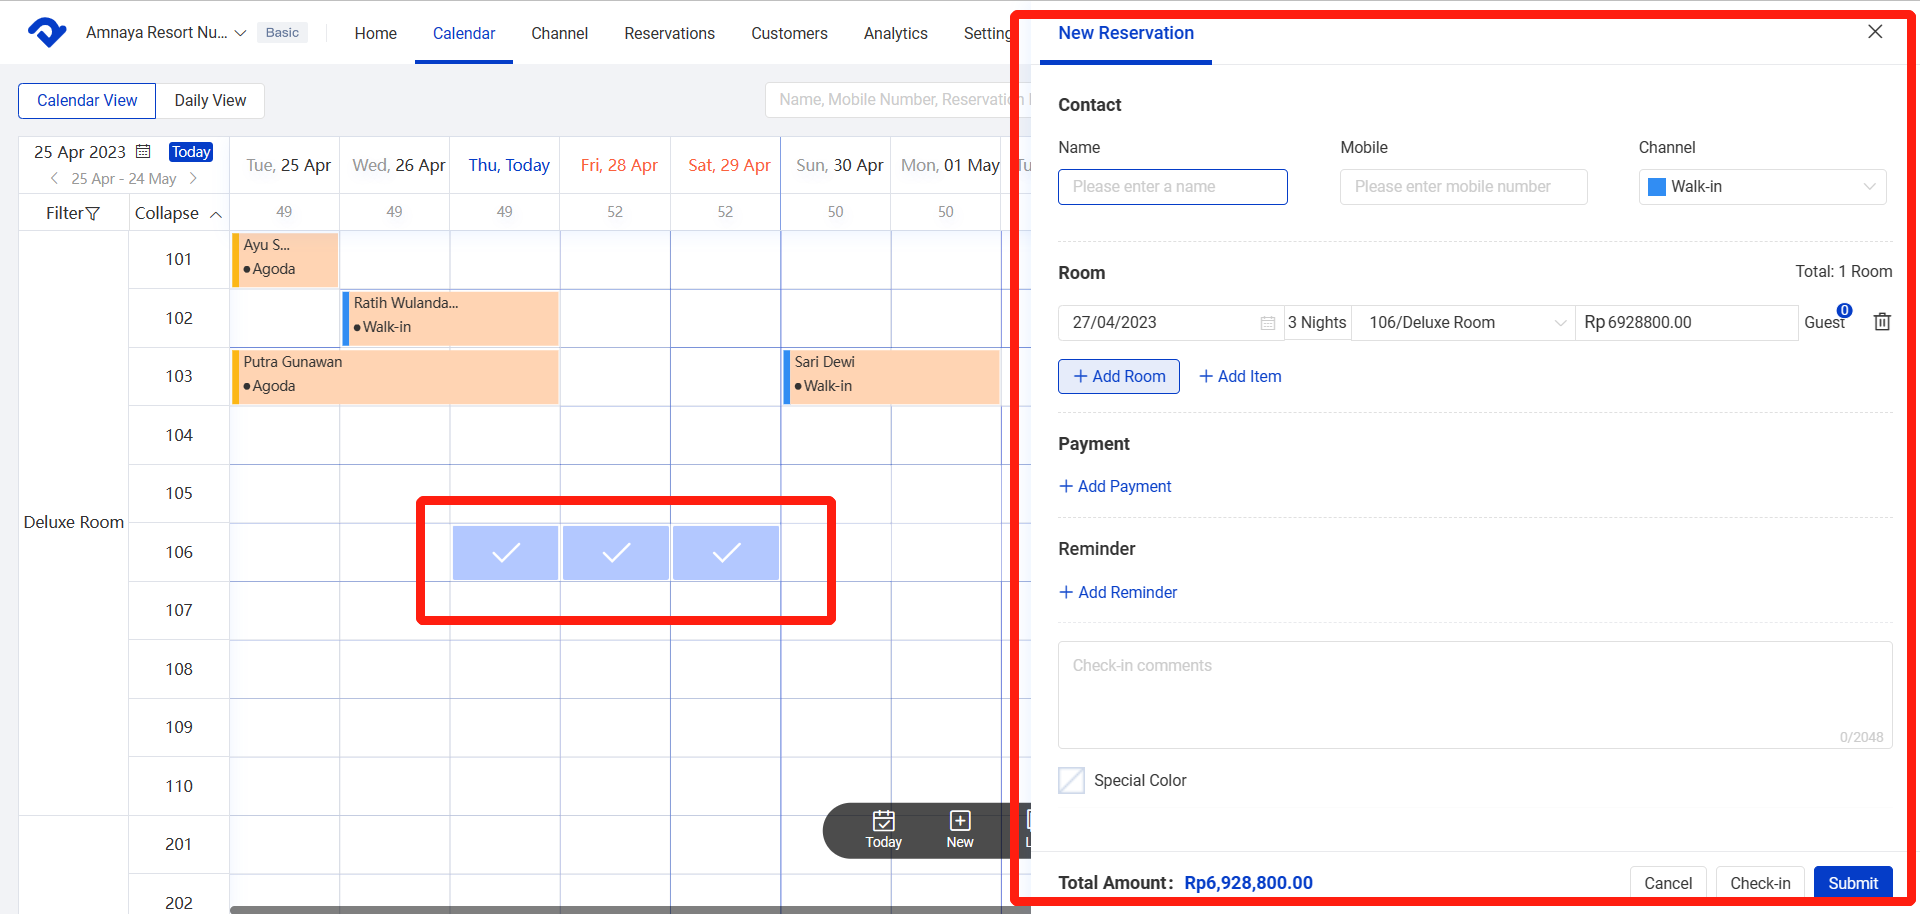
5. A New Reservation pop-up will appear where you can enter the reservation information in the applicable fields.
Add new reservation details
Once you have created a reservation, you'll need to fill out some fields from the New Reservation tab. This tab contains a reservation's most crucial data, including general information about the stay, the primary guest, and payment summary.
Reservation details
1. Enter contact name and mobile.
2. Select channel where the contact from.
3. Enter guest information including name, mobile and certificate number.
4. Enter check-in date and select the length of stay.
5. Select the room type and the rate follows the room type.
6. Select a specific room name and number from the drop-down to allocate a physical room to the reservation.
7. You can add multiple rooms by clicking add room.
8. Click add item to add additional charges for the reservation.
9. Select the type of payment, payment mode and enter rate.
10. Enter reminders.
11. Select special color about the reservation.
Just below the new reservation, is a section called contact. The contact is the main guest of a reservation, usually either the person who made the booking or the one paying.
ID document type and ID number are legally required in some locations.
Booking summary
On the New Reservation tab, when creating you will find the booking summary providing a quick overview of the total amount for the reservation.
Once you click submit, your new reservation will be created.
