How to check in and check out

Overviews

Checking in and checking out guests is an important part of the property management process. With the help of the Calendar and Reservation module in the Smart Order, you can easily manage the check-in and check-out process for your guests.

Checking in guests

1. Login to the Smart Order and go to the Calendar or Reservation module.

2. Click on the reservation for the guest you want to check in.

Click on the reservation for the guest you want to check in.

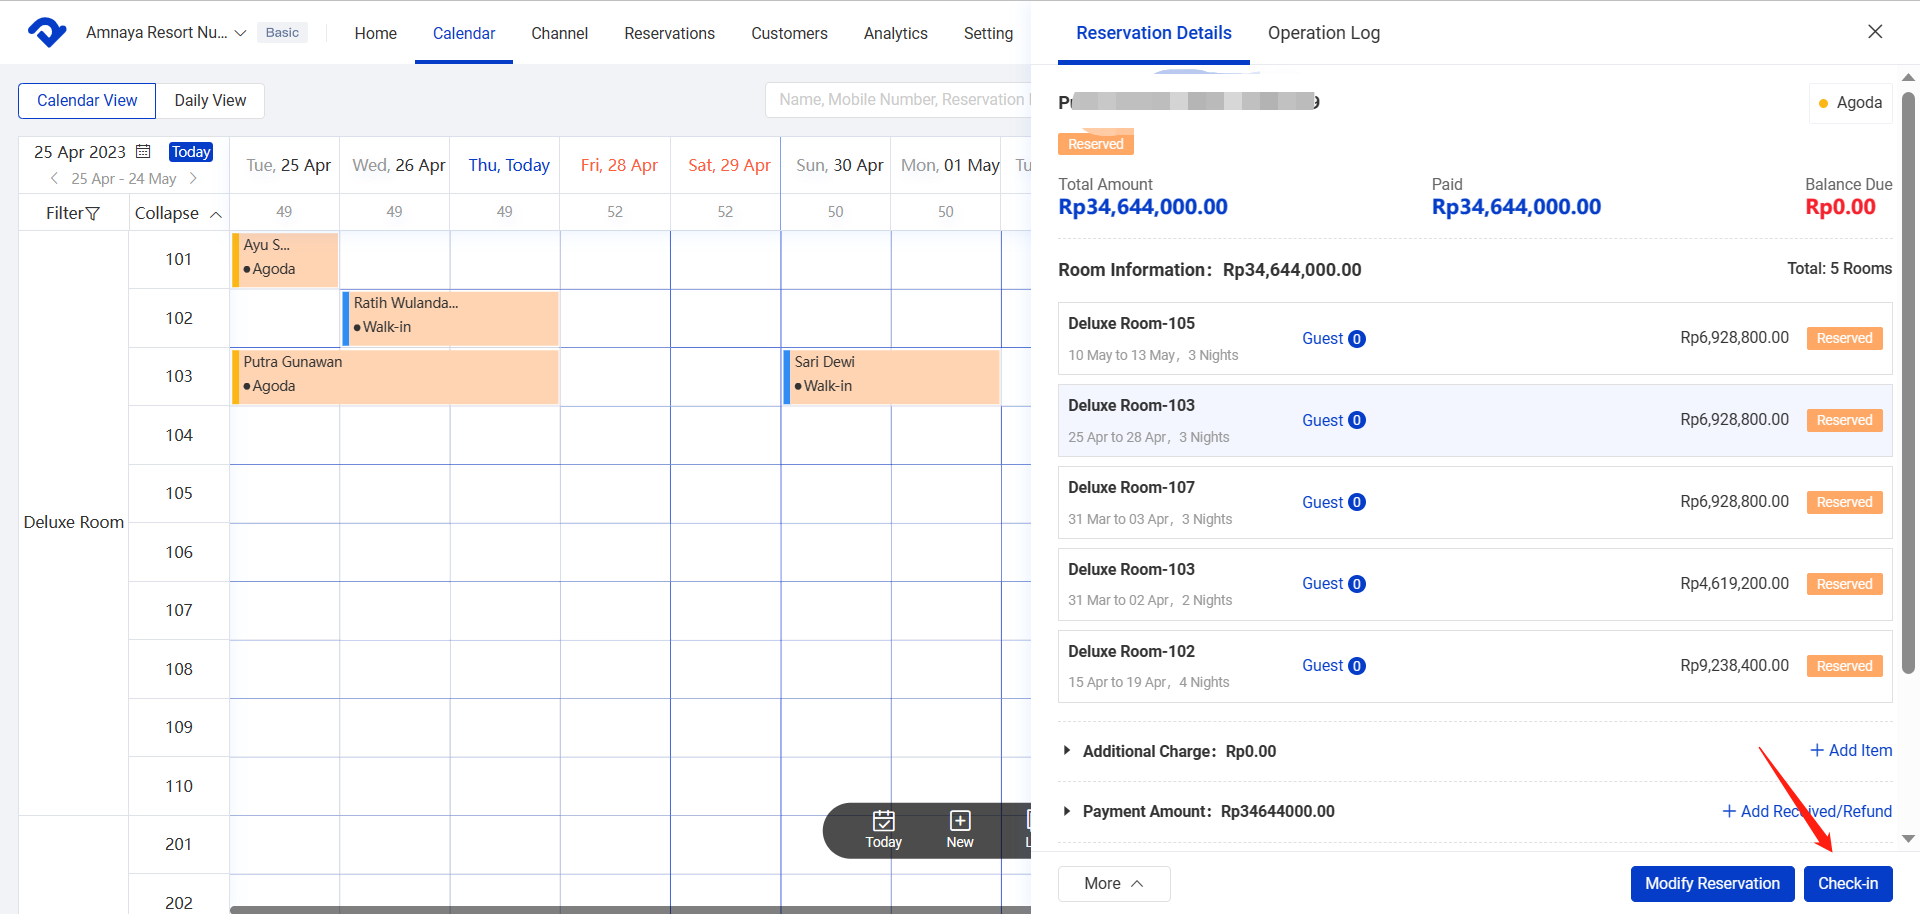
3. In the reservation details page, click on the "Check-in" button.

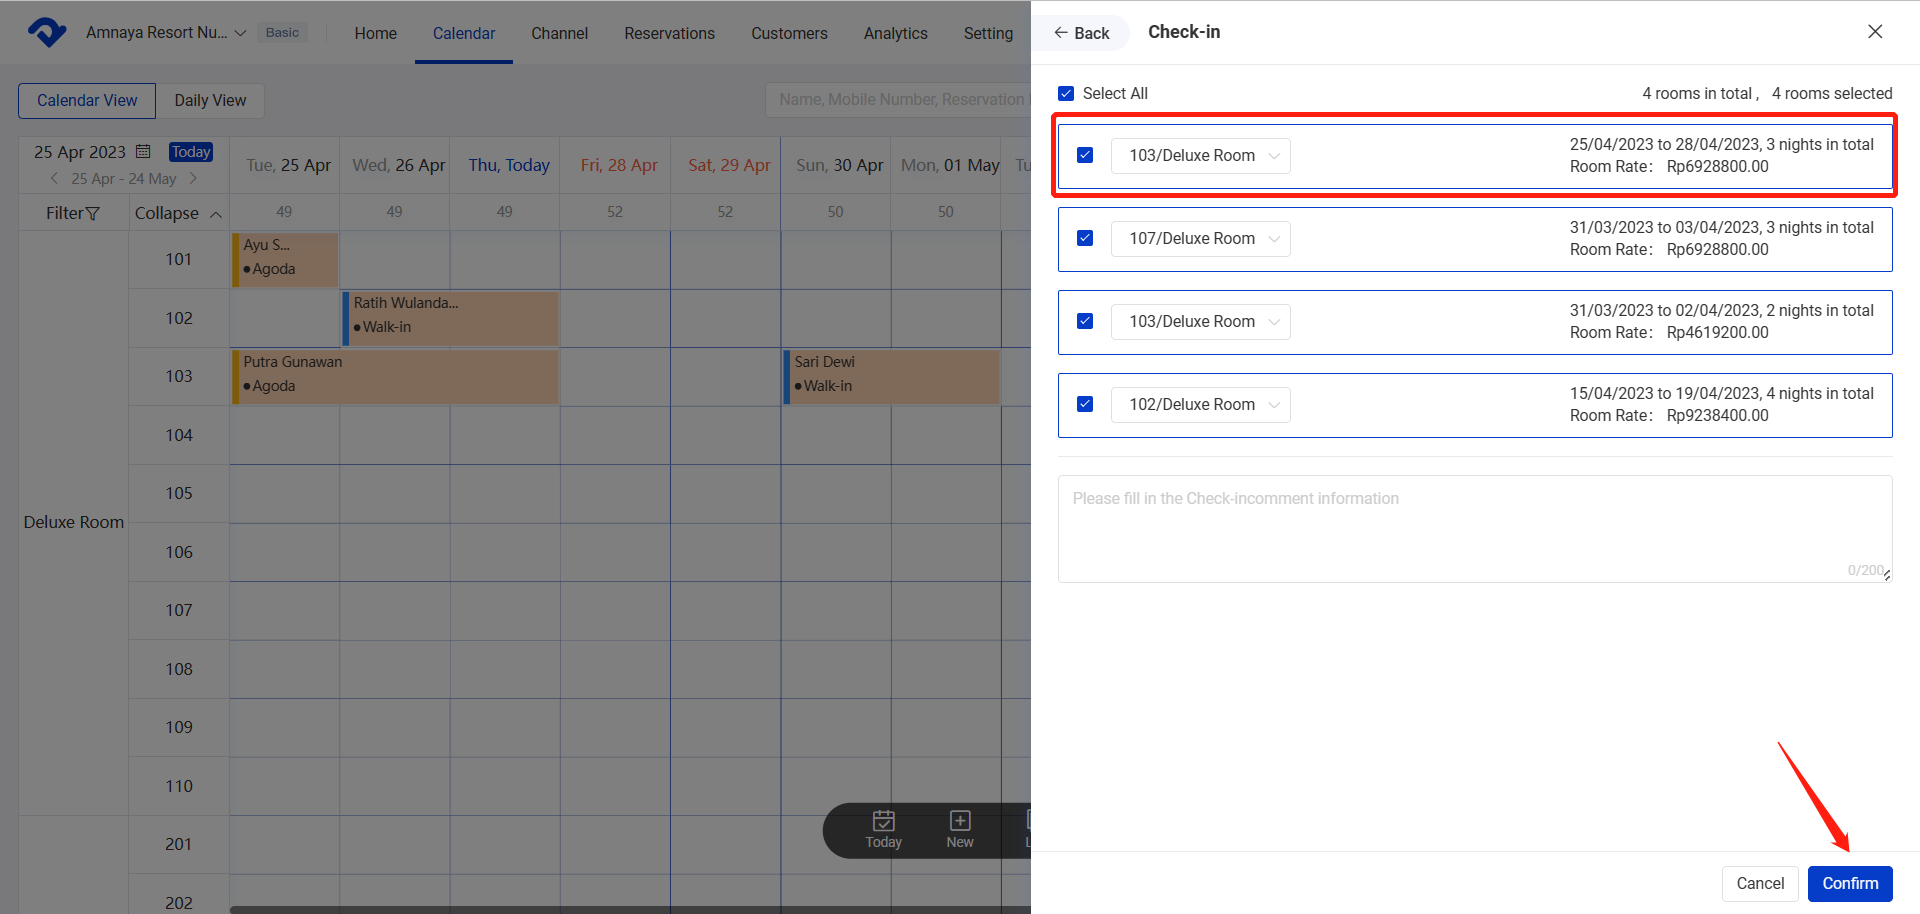
4. Select the room the guest will be staying in and check-in date.

5. Click the "Confirm" button to complete the process.

Select the room the guest will be staying in and check-in date and click the confirm

Checking out guests

1. Login to the Smart Order and go to the Calendar or Reservation module.

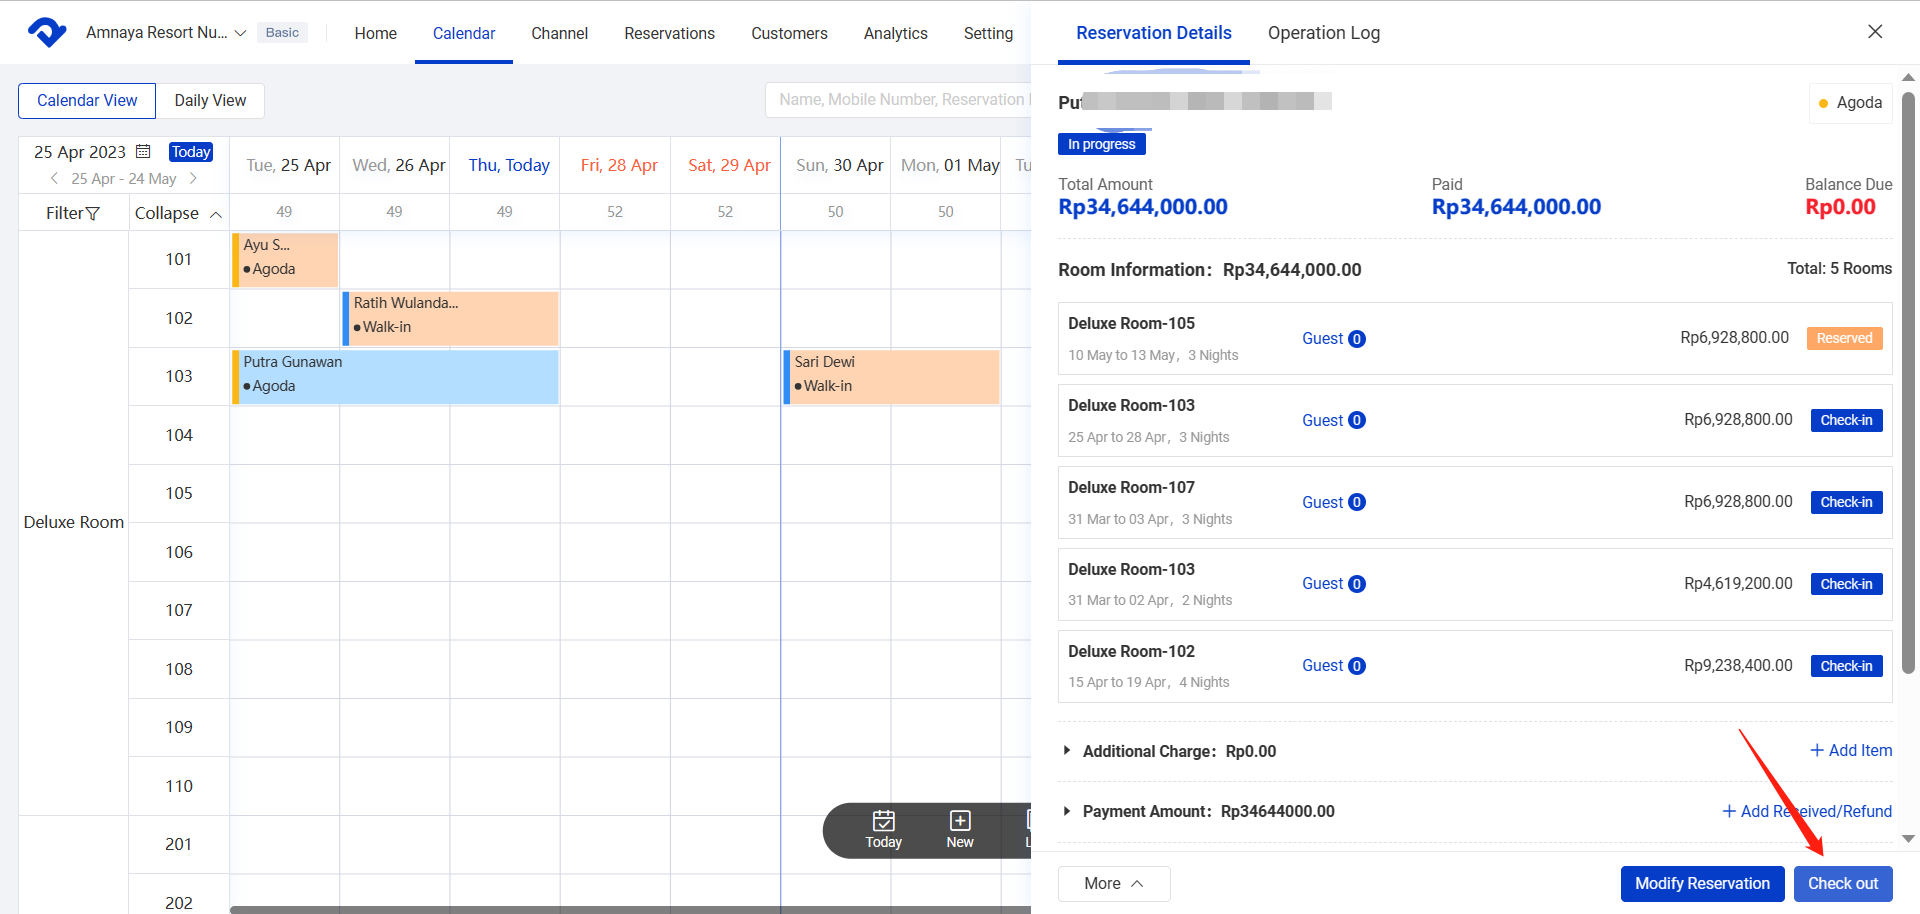
2. Click on the reservation for the guest you want to check out.

3. In the reservation details page, click on the "Check-out" button.

In the reservation details page, click on the "Check-out" button

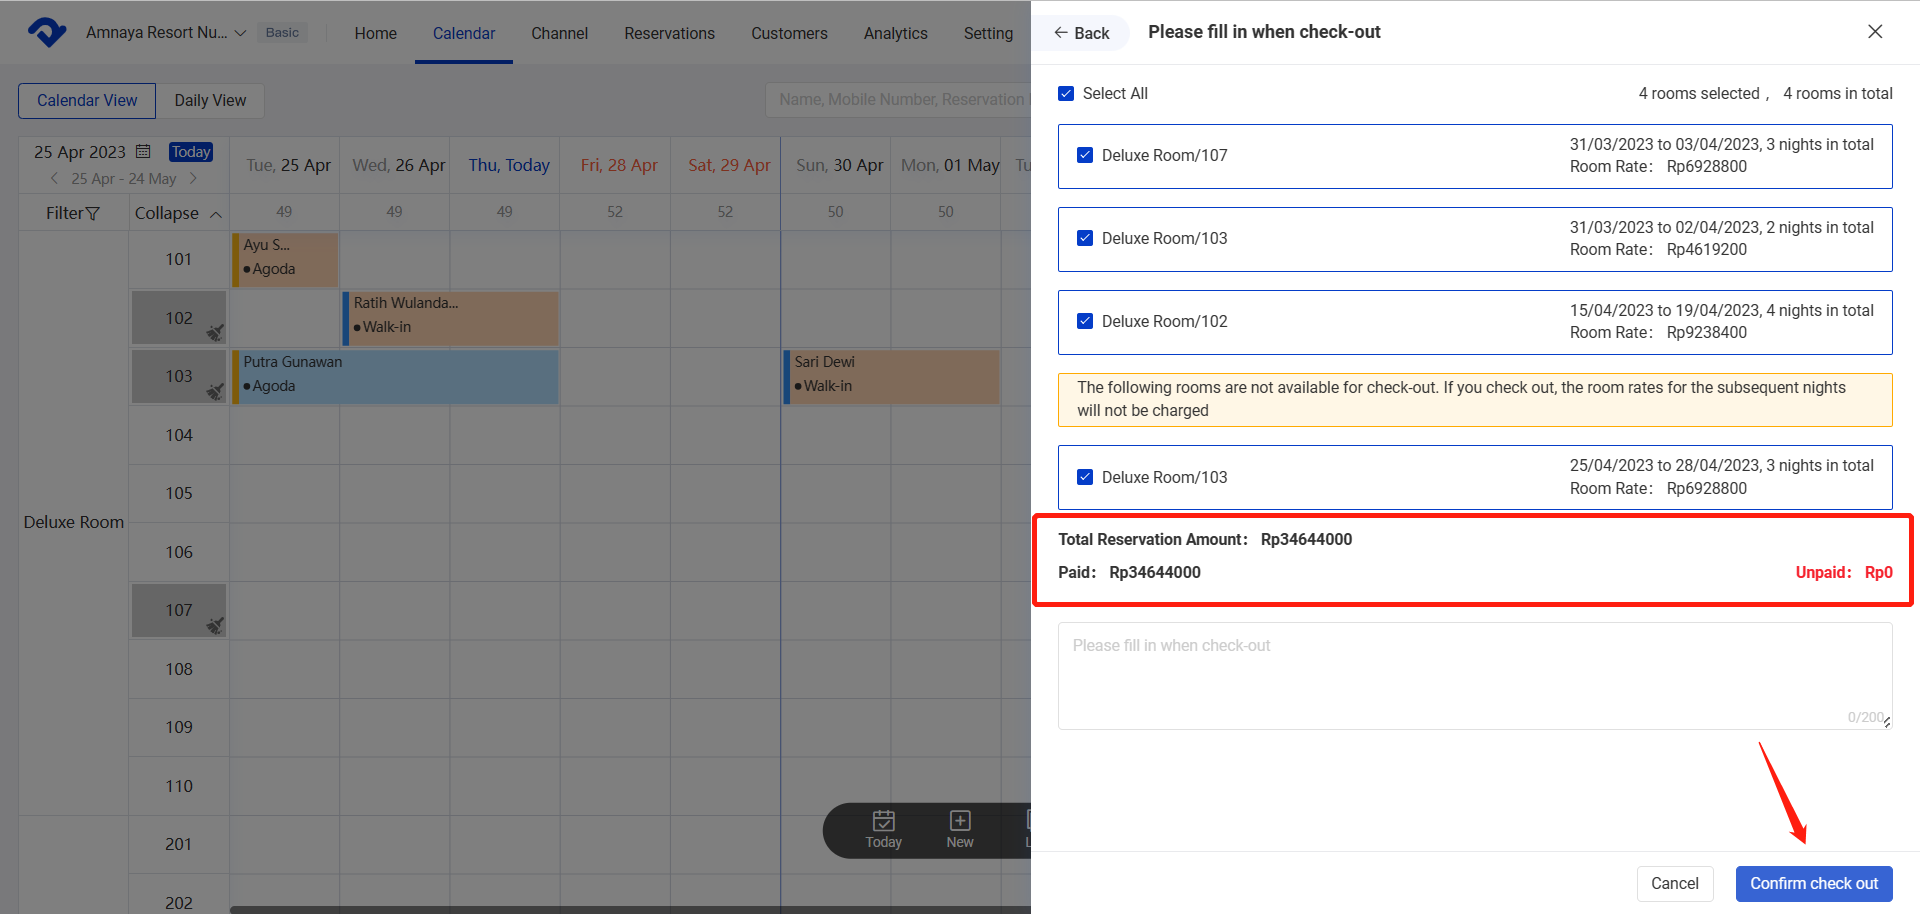
4. Select the room the guest is leaving and the check-out date.

5. Click the "Confirm check-out" button to complete the process.

Select the room the guest is leaving and the check-out date and click the confirm check-out

Additional Tips:

1. The system will automatically calculate the room charge based on the check-in and check-out dates, as well as any additional charges added during the stay.

2. If a guest wants to extend their stay, you can easily modify the reservation in the Calendar & Reservation module and adjust the charges accordingly.

3. If a guest needs to check out early, you can modify the check-out date in the reservation details page and finalize the bill accordingly.

By using the Calendar and Reservation module in the Smart Order, you can streamline the check-in and check-out process and ensure a smooth and efficient experience for both your guests and staff.

Related Articles

Add Reminder in a Reservation

No matter for a newly created reservation or a reserved one, the reminders help to take notes of the customer's needs. Steps on PC: Step for a newly created reservation: When you are creating the new reservation, you select Add Reminder. Fill in the Reminder Time, Reminder Content.

Reservation Box

Overview You can move the reservation to the Reservation Box manually when you have no room for the reserved one. The OTA reservations may also automatically enter the Reservation Box when there is no room at the confirmation. As for the reservations in the Reservation Box, you need to assign

Settings of Sort, Group and Calendar View

Overview To manage the room assignment more flexibly, we support moving a room easily and setting up the rooms by group. To monitor the room status, we can operate it on Calendar View. Change the Order of A Room Type or Room: Step1: Go to the Settings page. Select Sort

Create and check in an hourly room reservation

Overview We don't connect an hourly room type with the OTA channels. Thus, you have to manually create an hourly room reservation. Create/ Check in An Hourly Room Reservation: Step1: Go to the Calendar page and select Calendar View. Select an available room from the hourly room type.

Create A Reservation and Manually Edit the Reservation Details

Overview As you have connected to OTA channels, all the reservations will be recorded automatically from the channels. However, you may still have some walk-in reservations or edit some information on them. Create A New Reservation: Way1: Go to the Calendar page and select Calendar View. Click the room and

Check in/ check out/ settle a reservation

Overview If it is the check-in date, the Check-in icon will be shown on the reservation page. After the reservation has been checked in, the checkout icon will be shown. And only when the Balance Due has been paid off, the reservation can be settled. Check in a reservation Step1: