What is Booking Engine?
Smart Order’s direct booking engine allows you to get secure direct online reservations. Your direct booking engine displays your rates and availability in real-time so that your guests can book by themselves, making it easy for you and them.
Set up Booking Engine
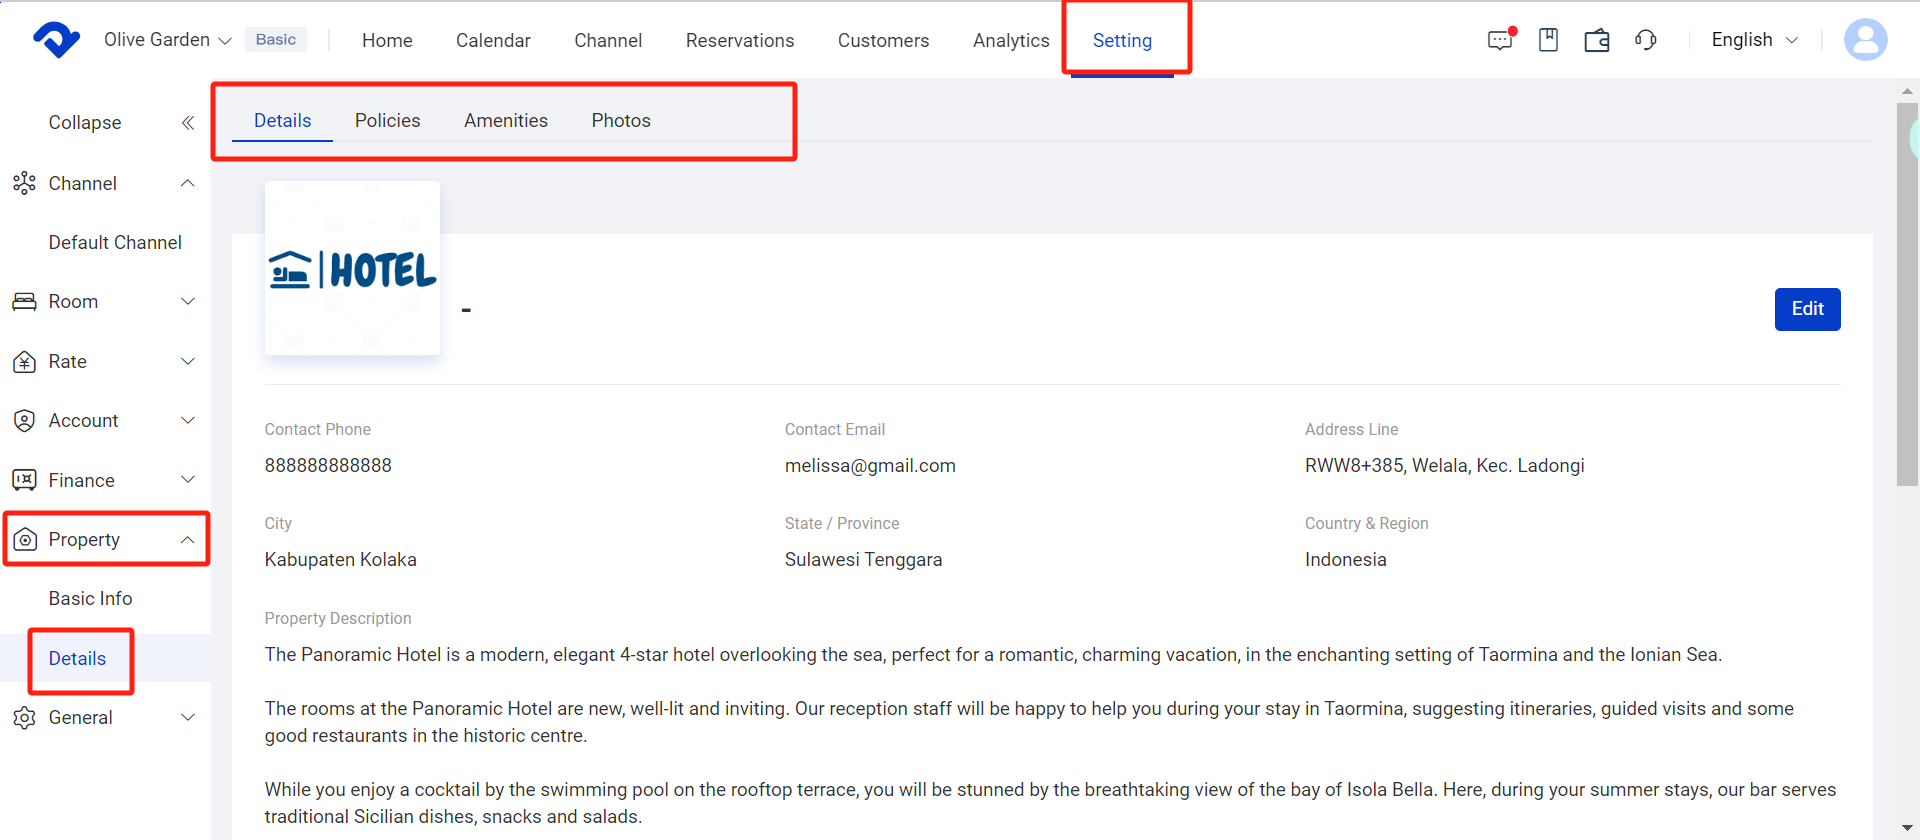
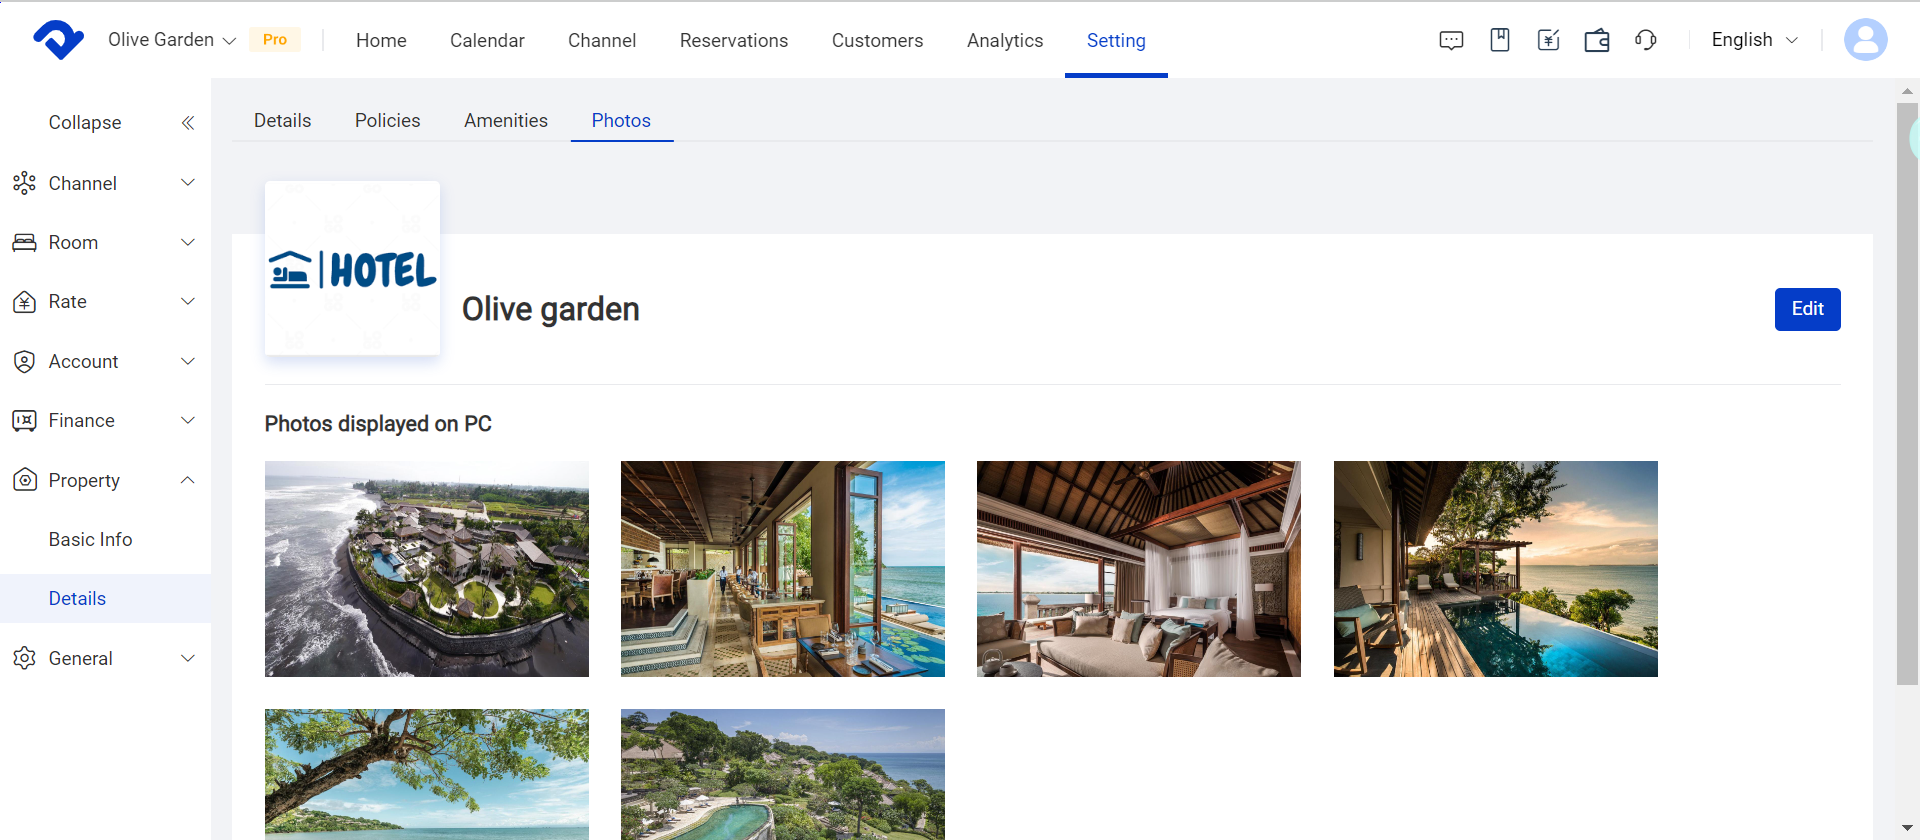
Step 1: Fill in Booking Engine Property Info
- Click Settings- property- details to edit Booking Engine property info
- Click Tab on the top to switch between Property Details, Policies, Amenities and Photos
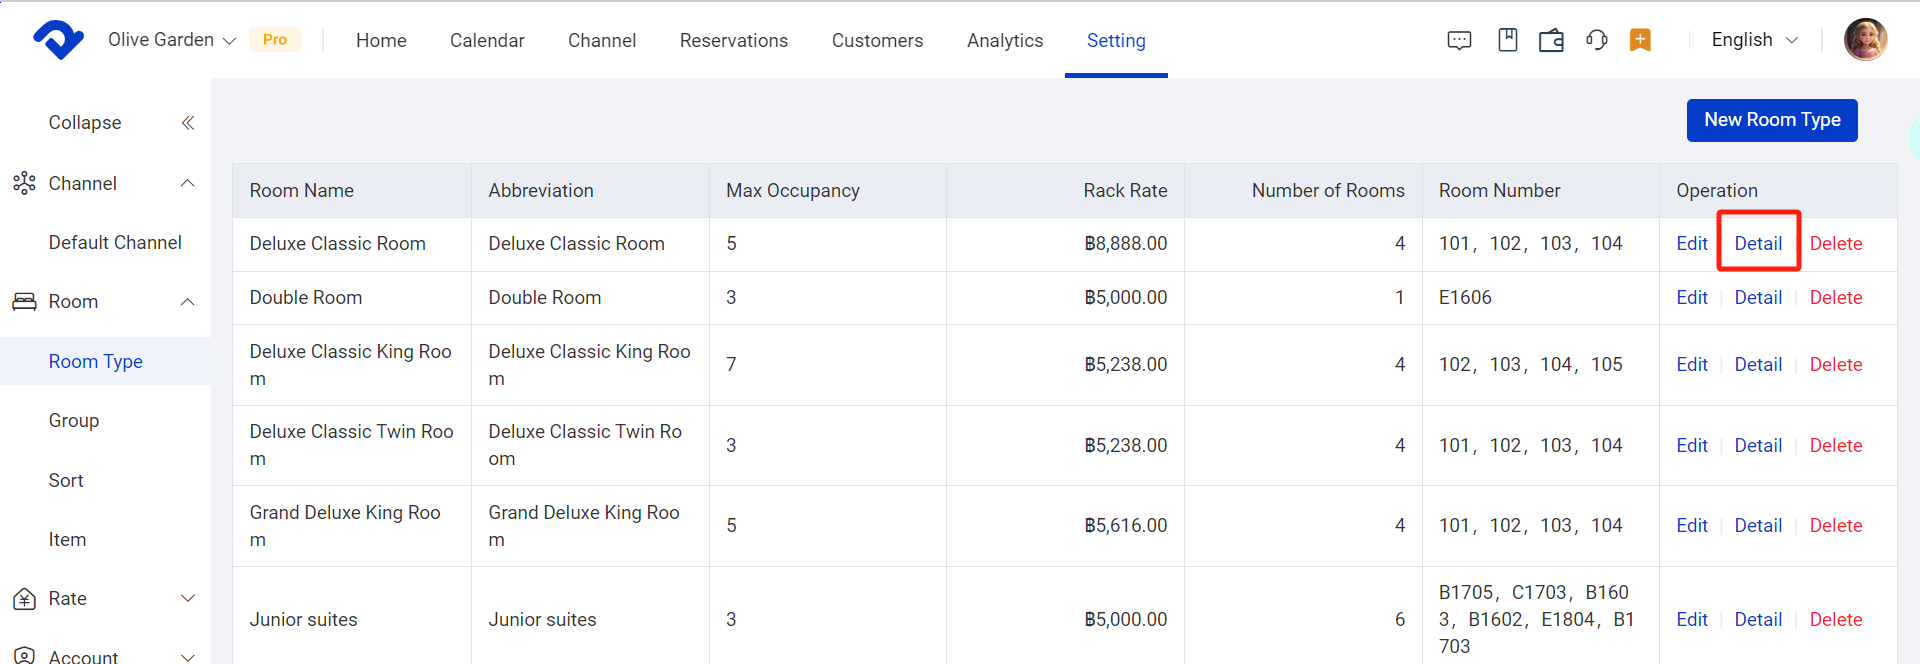
Step 2: Add room type details
- Click Settings and Click the Room type in the Room drop down in the left navigation
- Click Details in the room type list (If there is no room type, please add room type first)
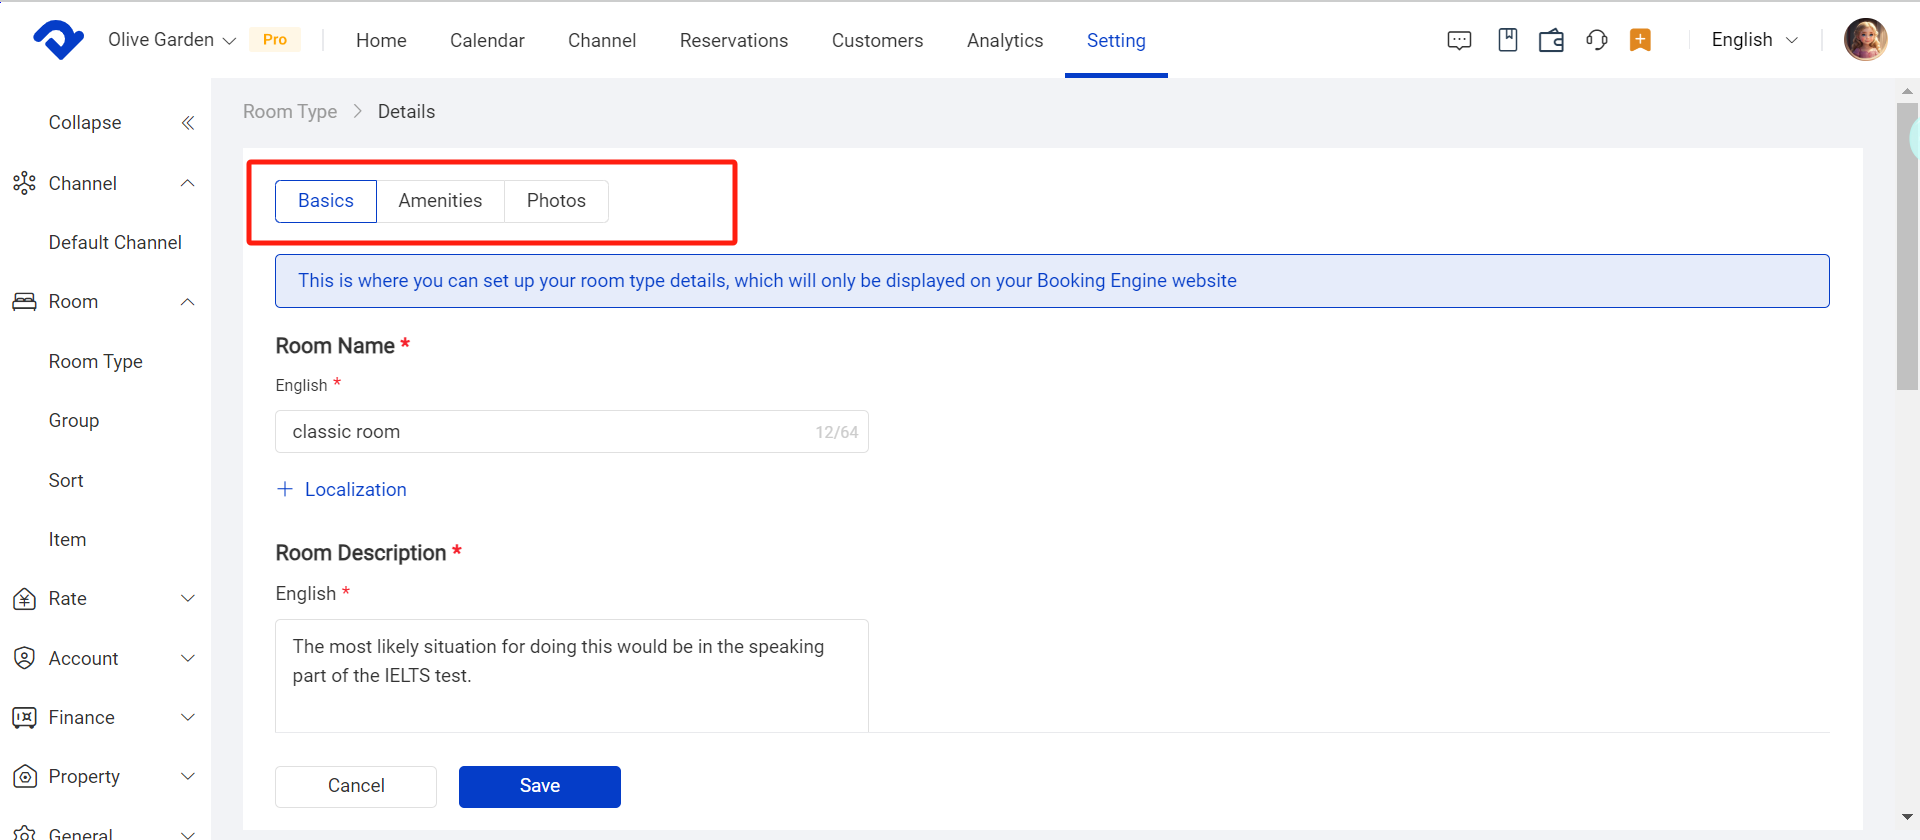
- Enter the required information of Basic info, Amenities, and Photos
*You can click the +Localization button to add Chinese content to display on Booking Engine Chinese version
Step 3: Add Rate Plan details
- Click Settings
- Click the Rate Plan in the Rate drop down
- Click Details in the rate plan list (If there is no rate plan, please add first)
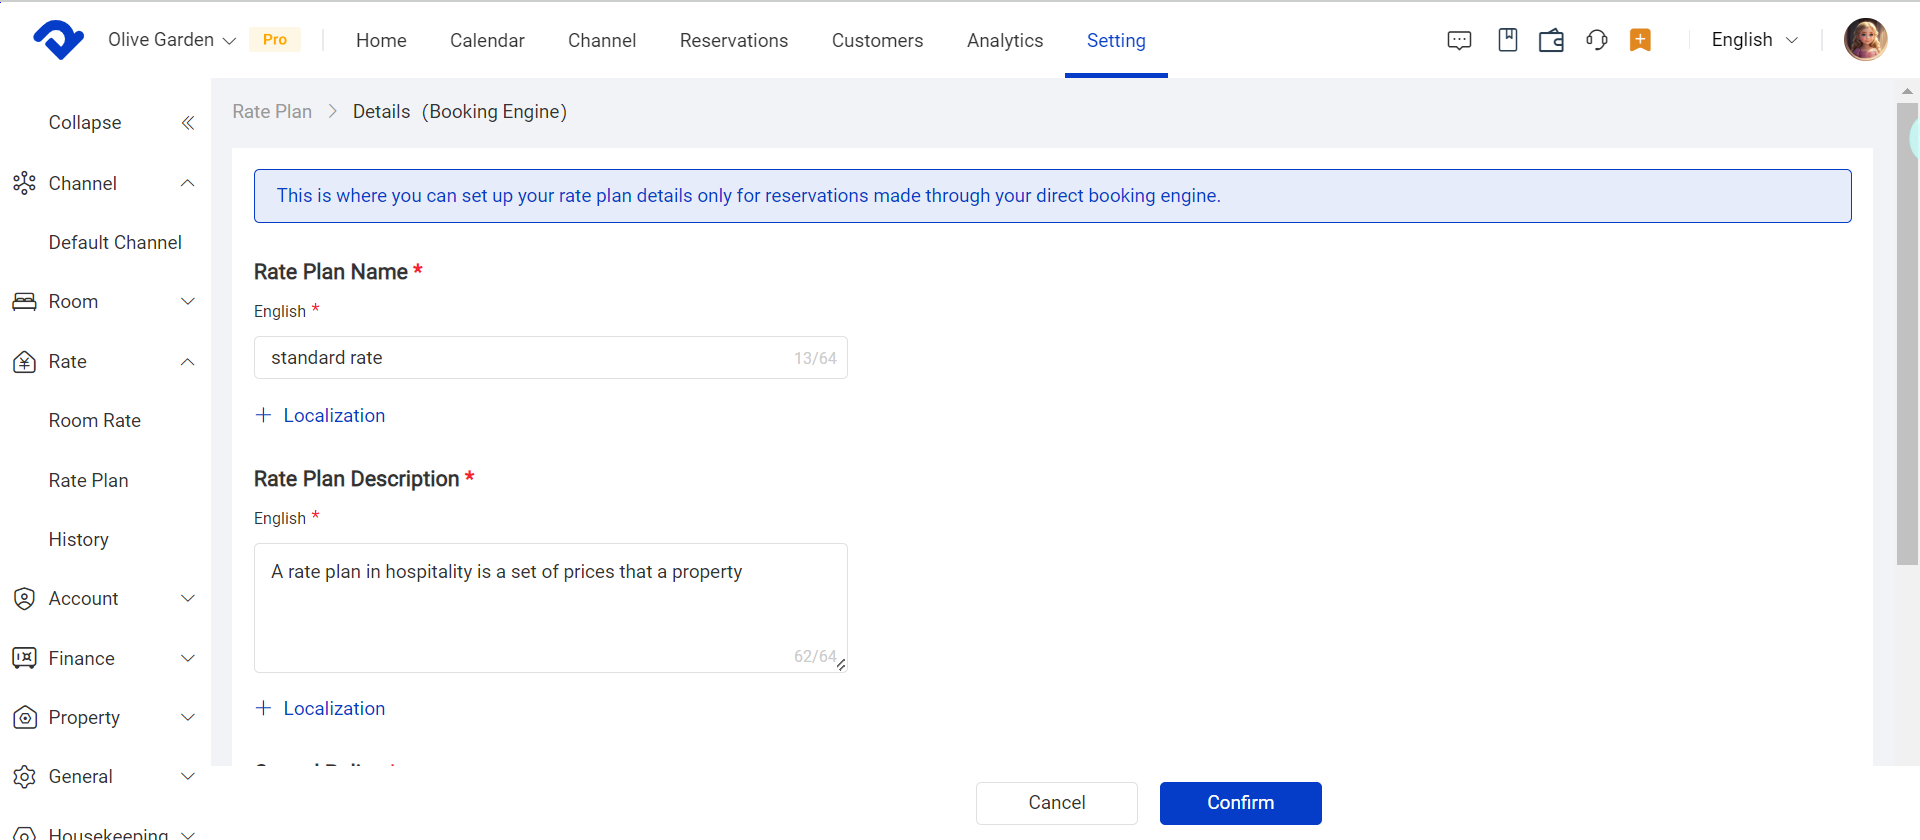
- Enter the required information and click Confirm
*You can click the +Localization button to add Chinese content to display on Booking Engine Chinese version

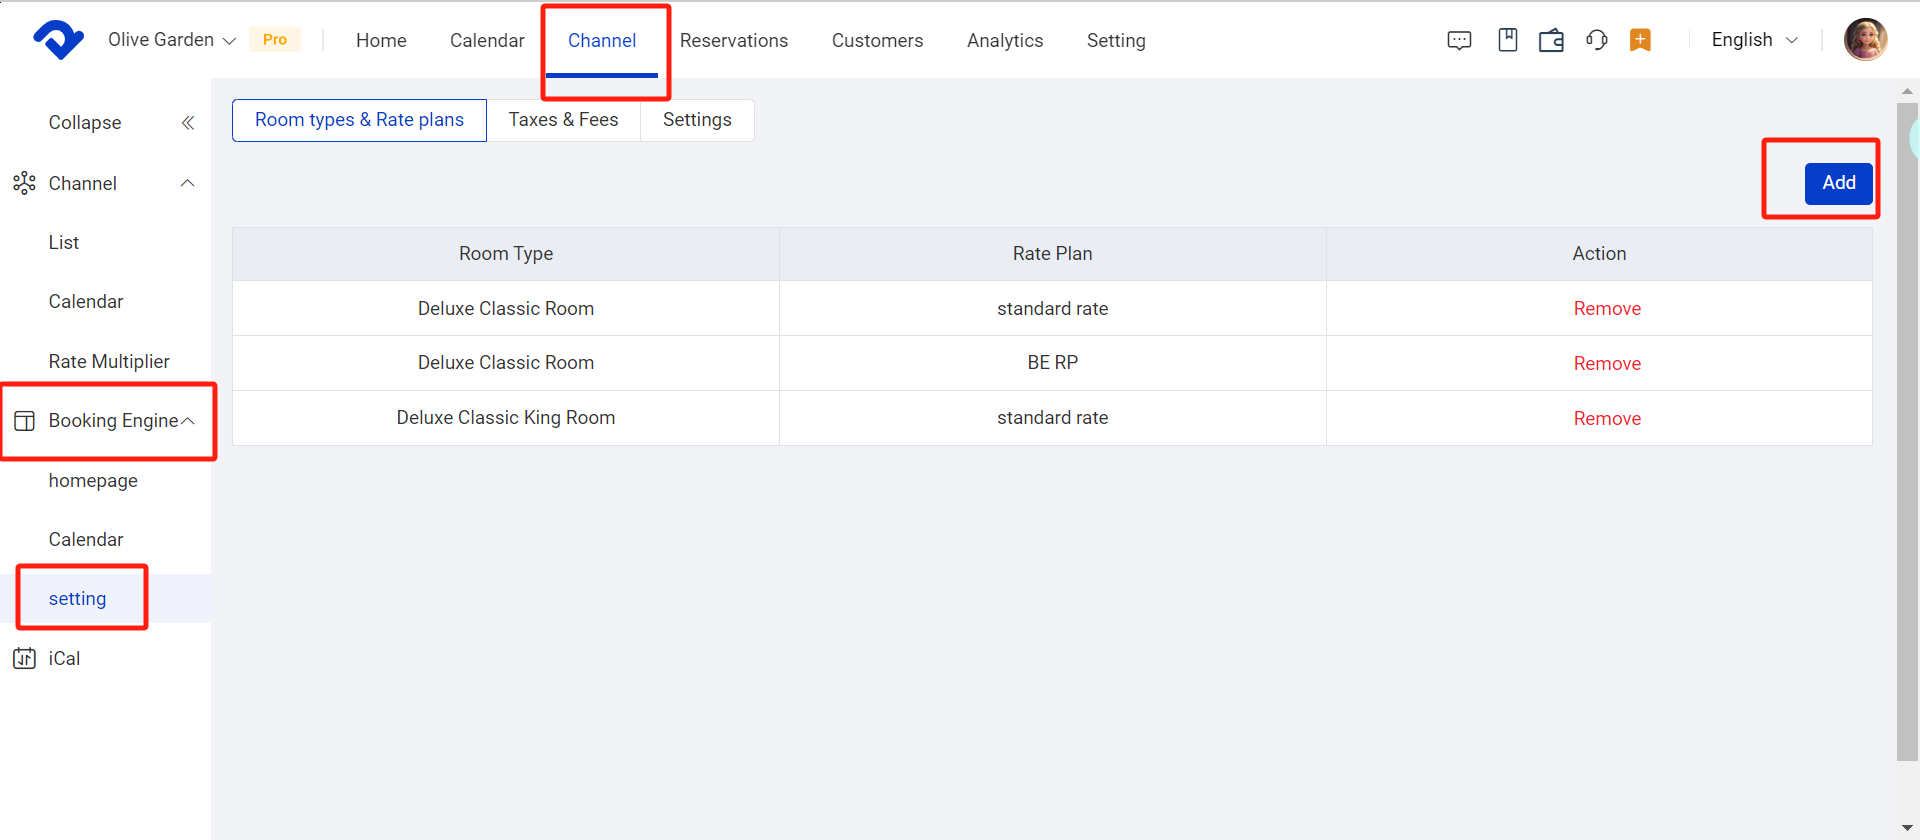
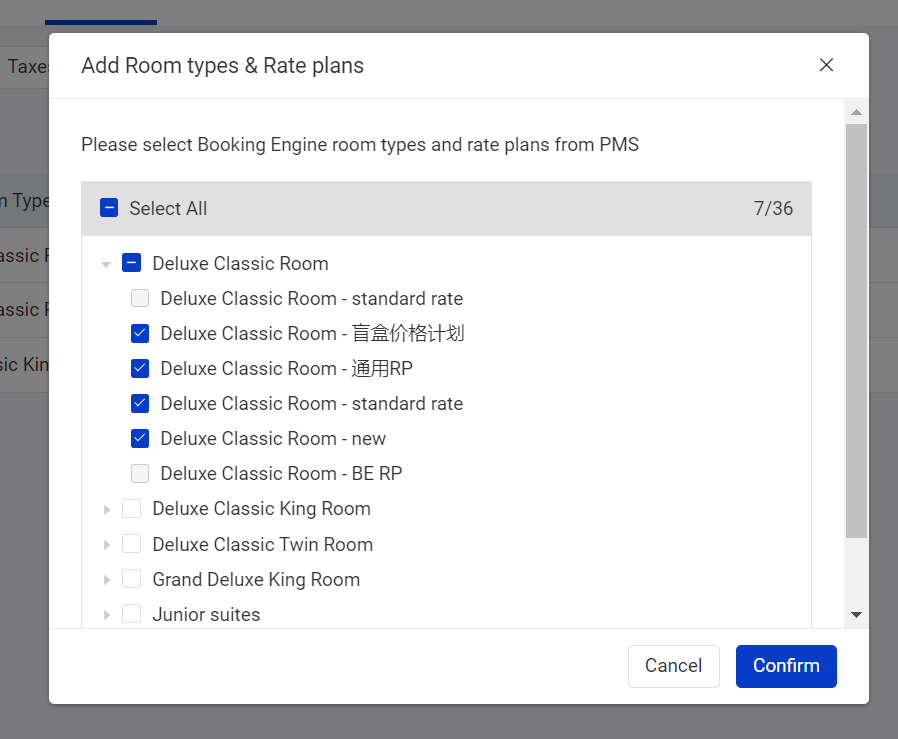
Step 4: Add room types and rate plans to Booking Engine
1. Click Channel on the top, and select Settings under the Booking Engine drop-down
2. Click Add button in the right
3. Select Booking Engine room types and rate plans from PMS
Step 5: Set up Rate
1. Click Channel
2. Click the Calendar in the Booking Engine-Calendar drop down
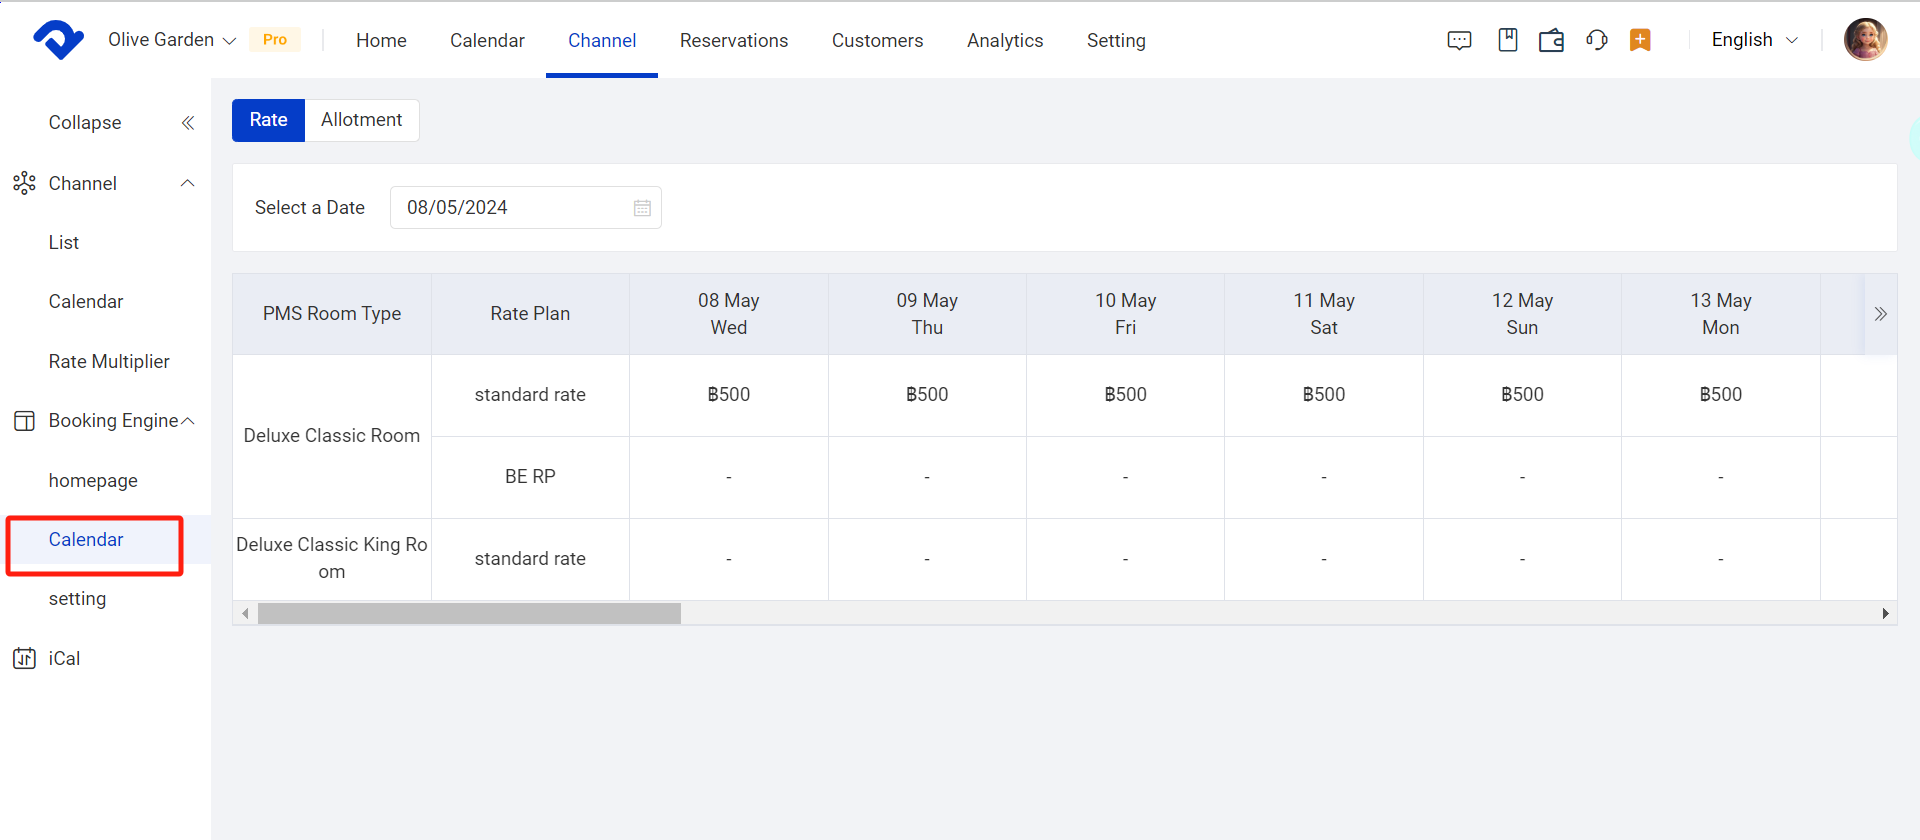
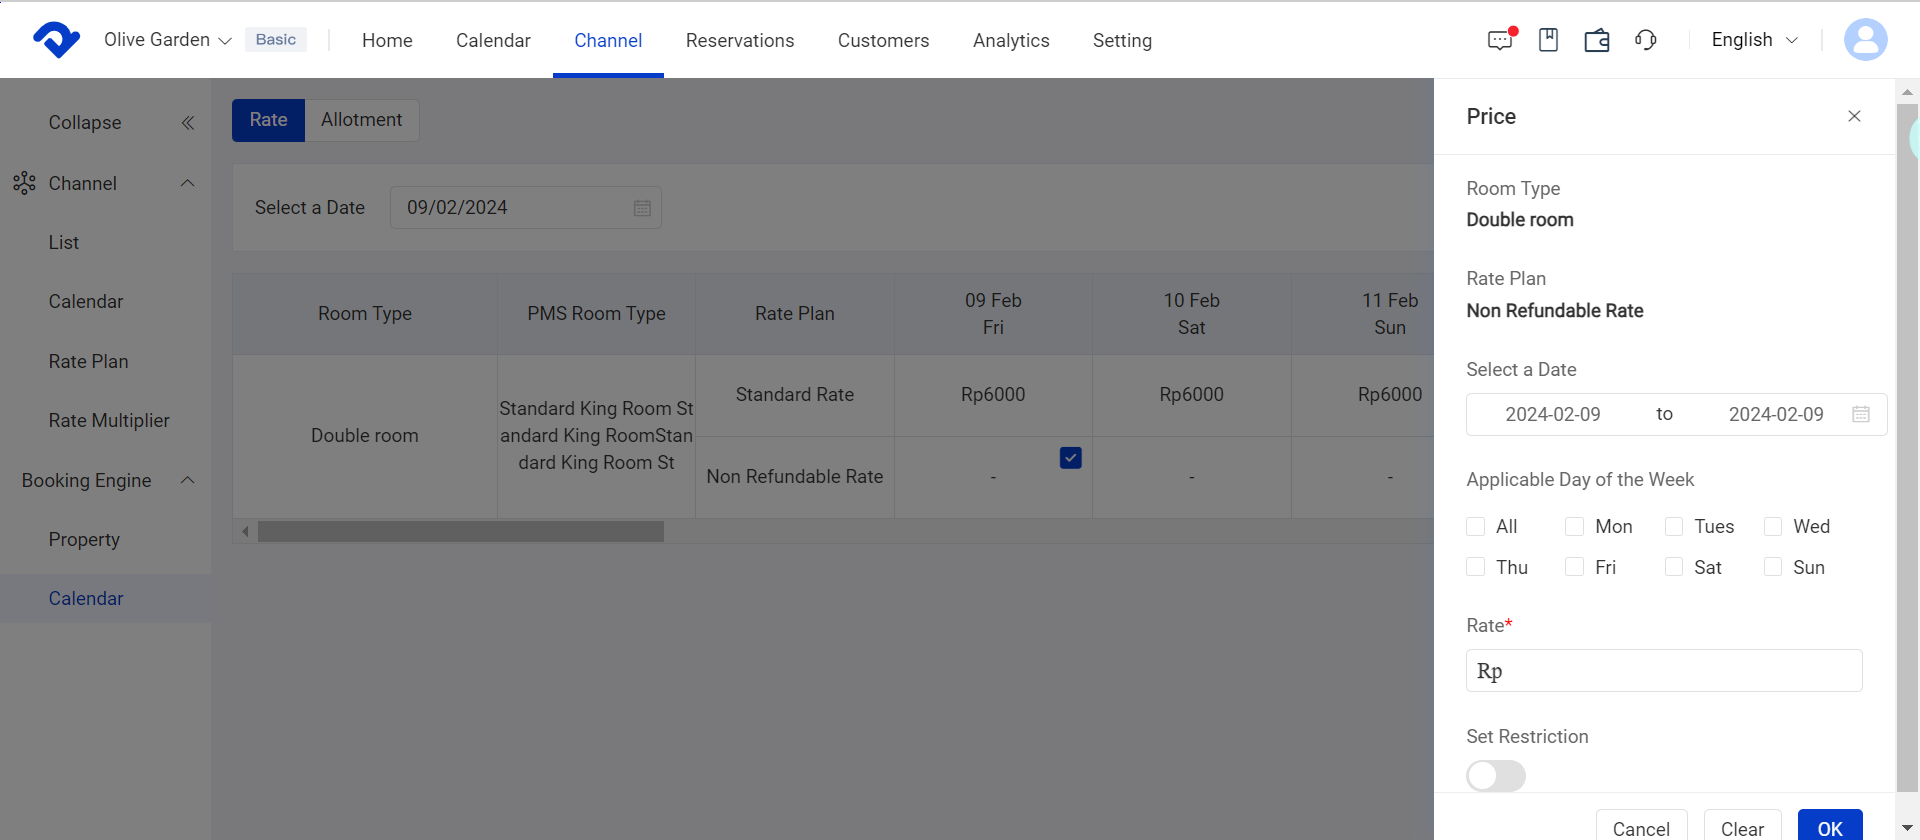
3. Click on the rate of the date you would like to change and add the rate
4. Set the start date and end date of the rate
5. Select on which days of week the rate will be available
6. Enter the price
7. Set restriction if you need, which includesrestrictions:
- Close: Choose whether to close the room (only applicable for Booking Engine)
- CTA: Set Closed to Arrival restrictions if applicable (for the whole interval)
- Set Min LOS or Max LOS restrictions if applicable (for the whole interval)
8. Click OK to enter the same rate to all selected days
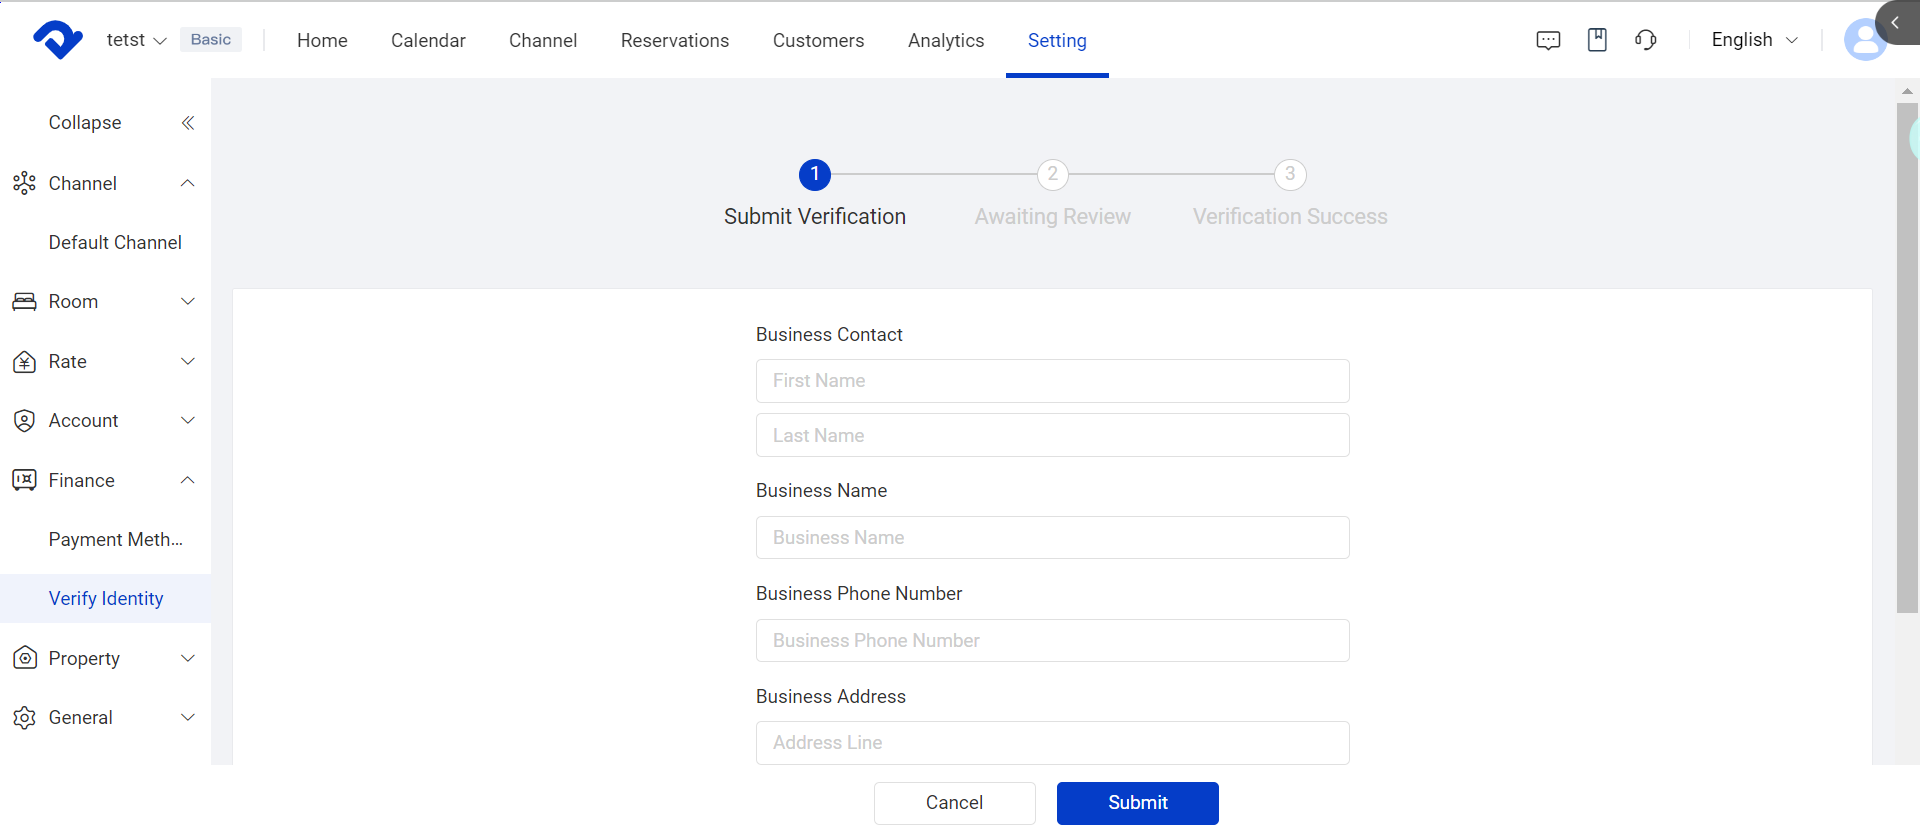
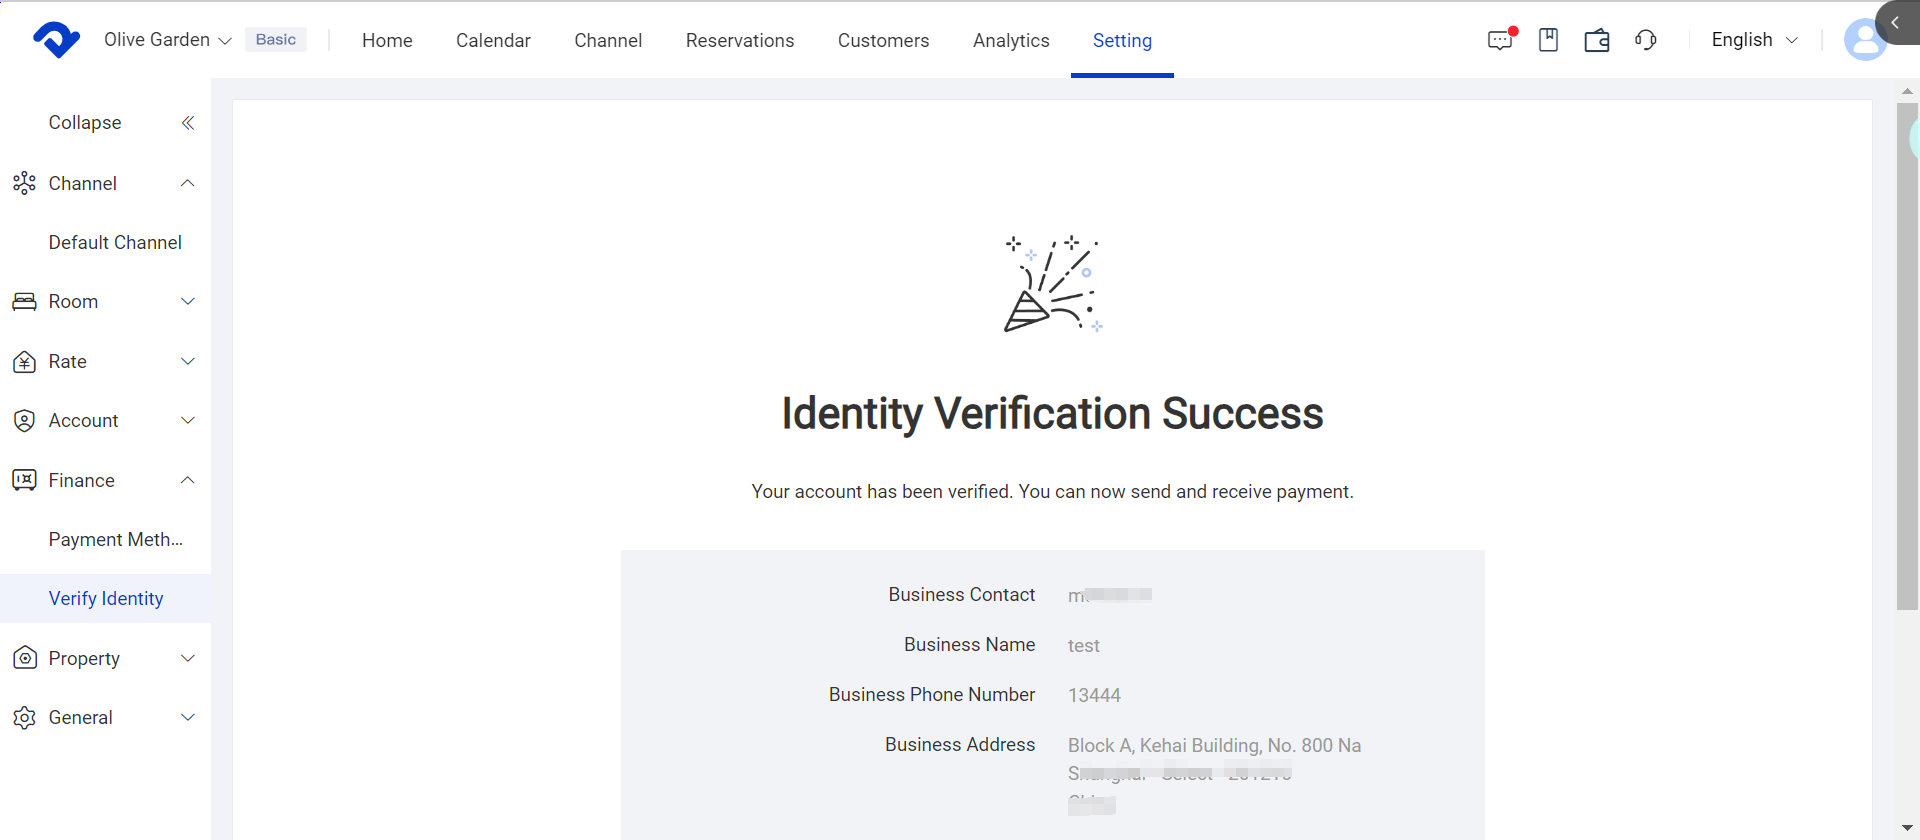
Step 6: Verify Identity
- Get verified to start accepting payments.
- Fill in verification info and submit to review