Overview
To manage the room assignment more flexibly, we support moving a room easily and setting up the rooms by group. To monitor the room status, we can operate it on Calendar View.
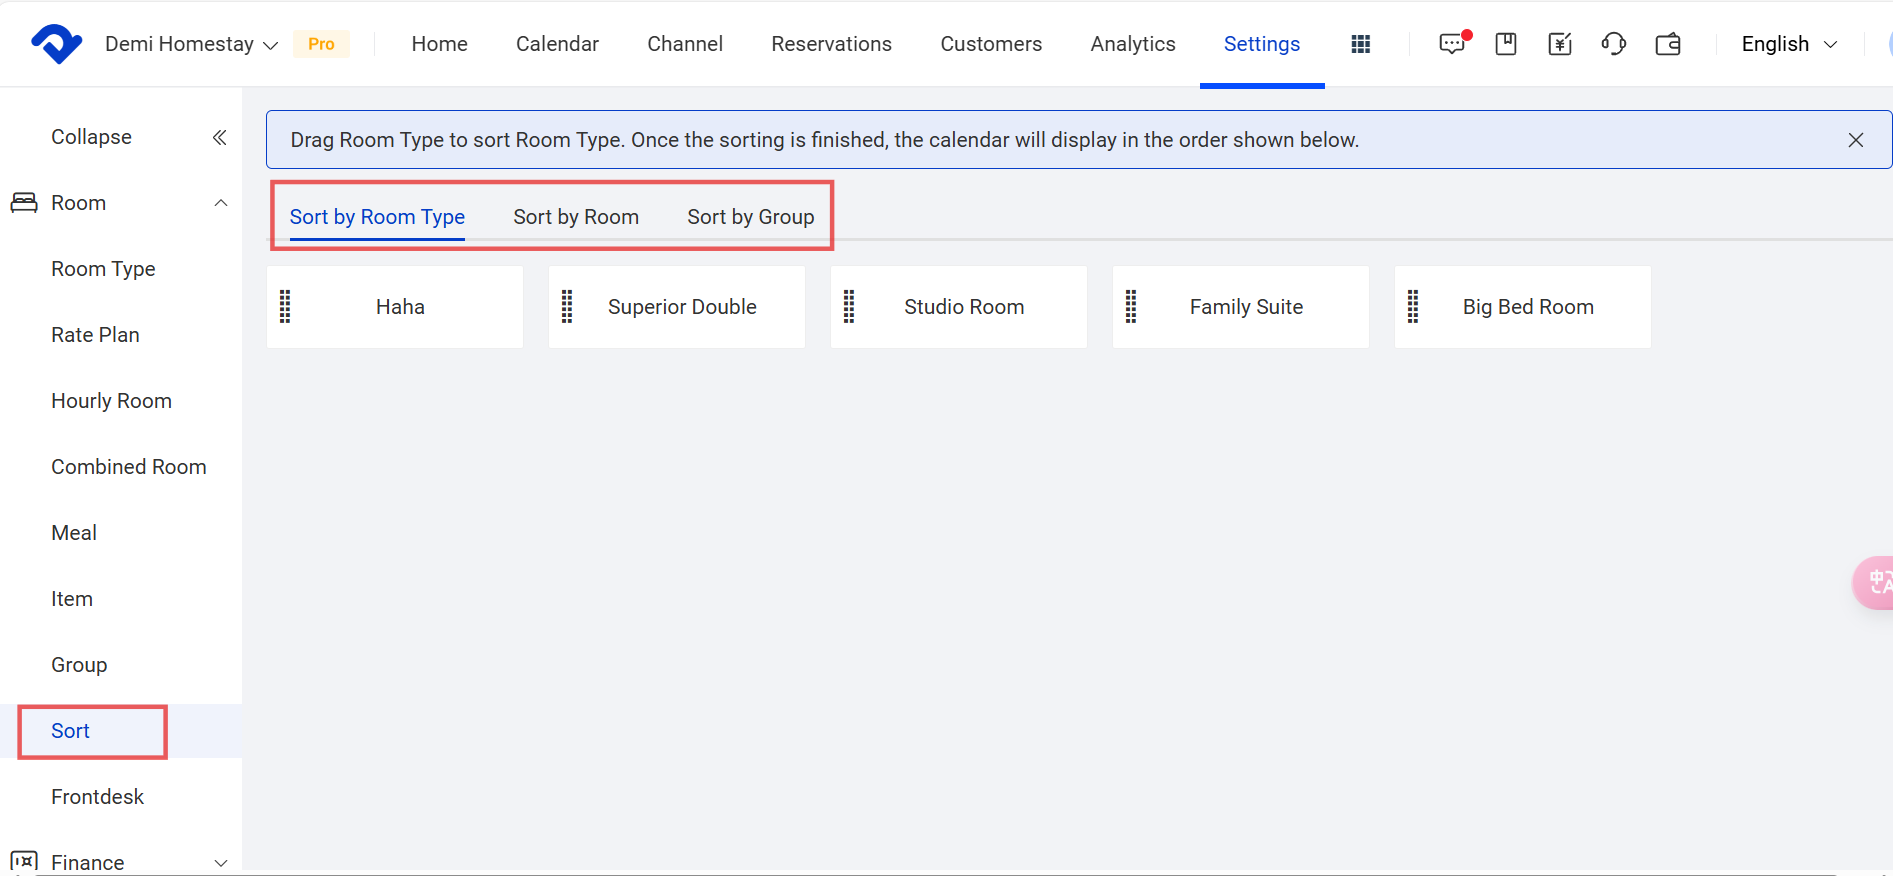
Change the Order of A Room Type or Room:
Step1: Go to the Settings page. Select Sort from the Room drop-down list. You can see Sort by Room Type, Sort by Room, and Sort by Group. You can hover over the rooms, room types, and the groups easily to change the order.
Note1:
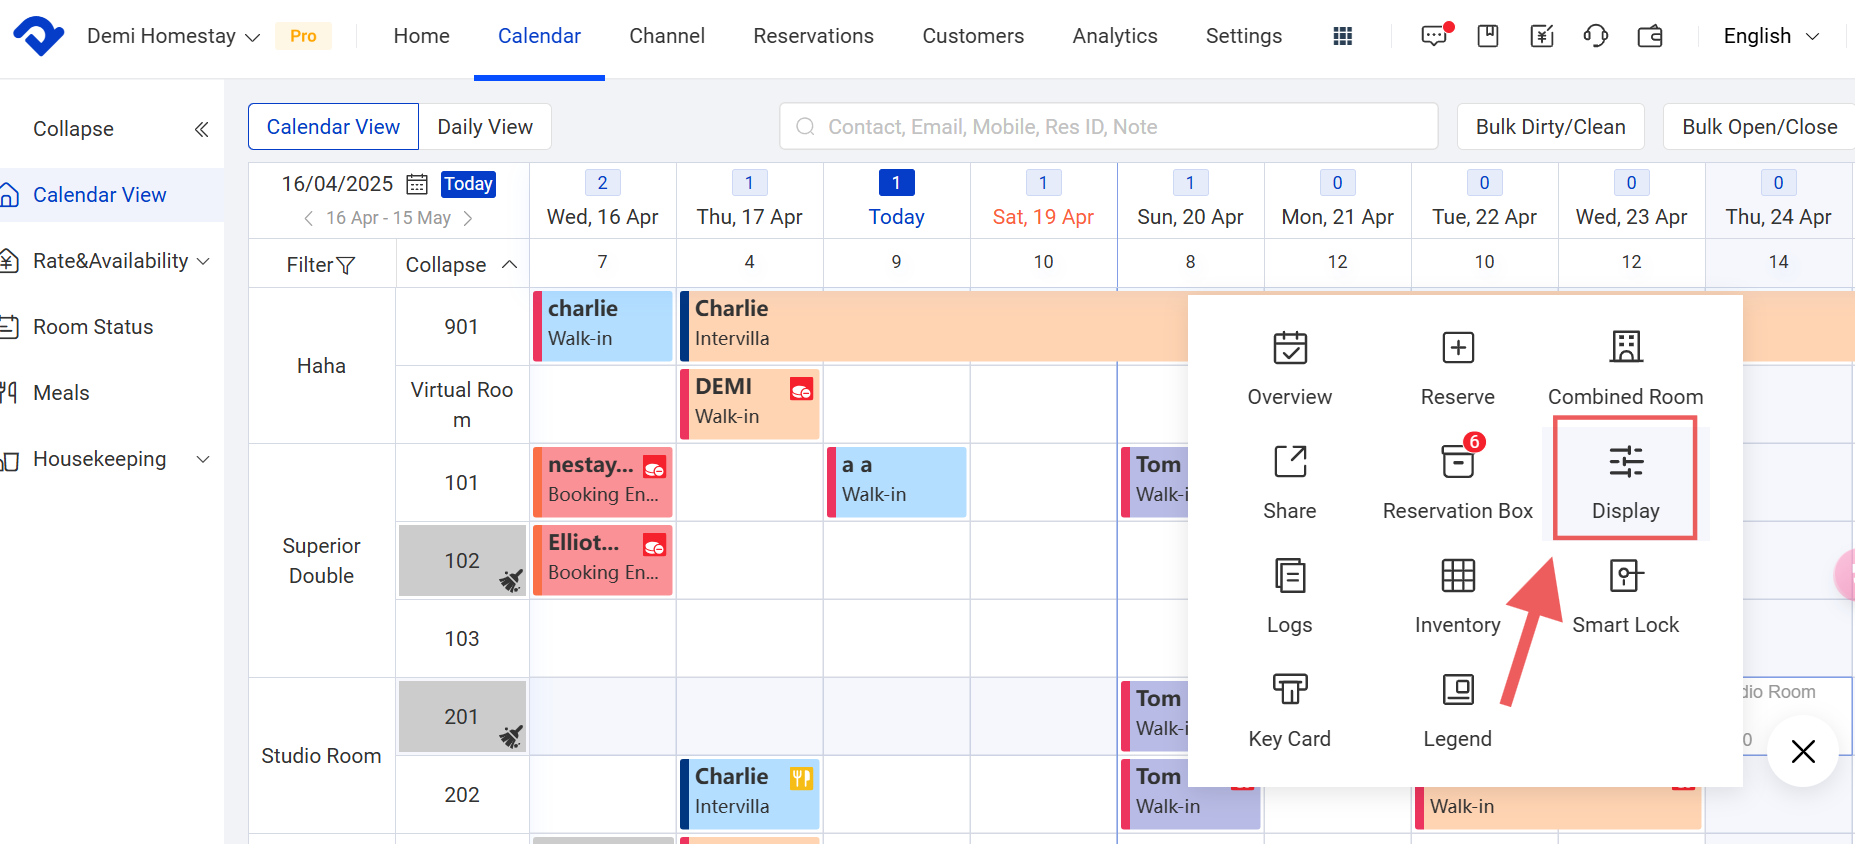
The Calendar View will show you the order according to the above settings. Go to Calendar > Calendar View. Click the plus symbol in the bottom-right corner. Select Display, and you will see the order. You can set up the order by clicking the Default Display Order.

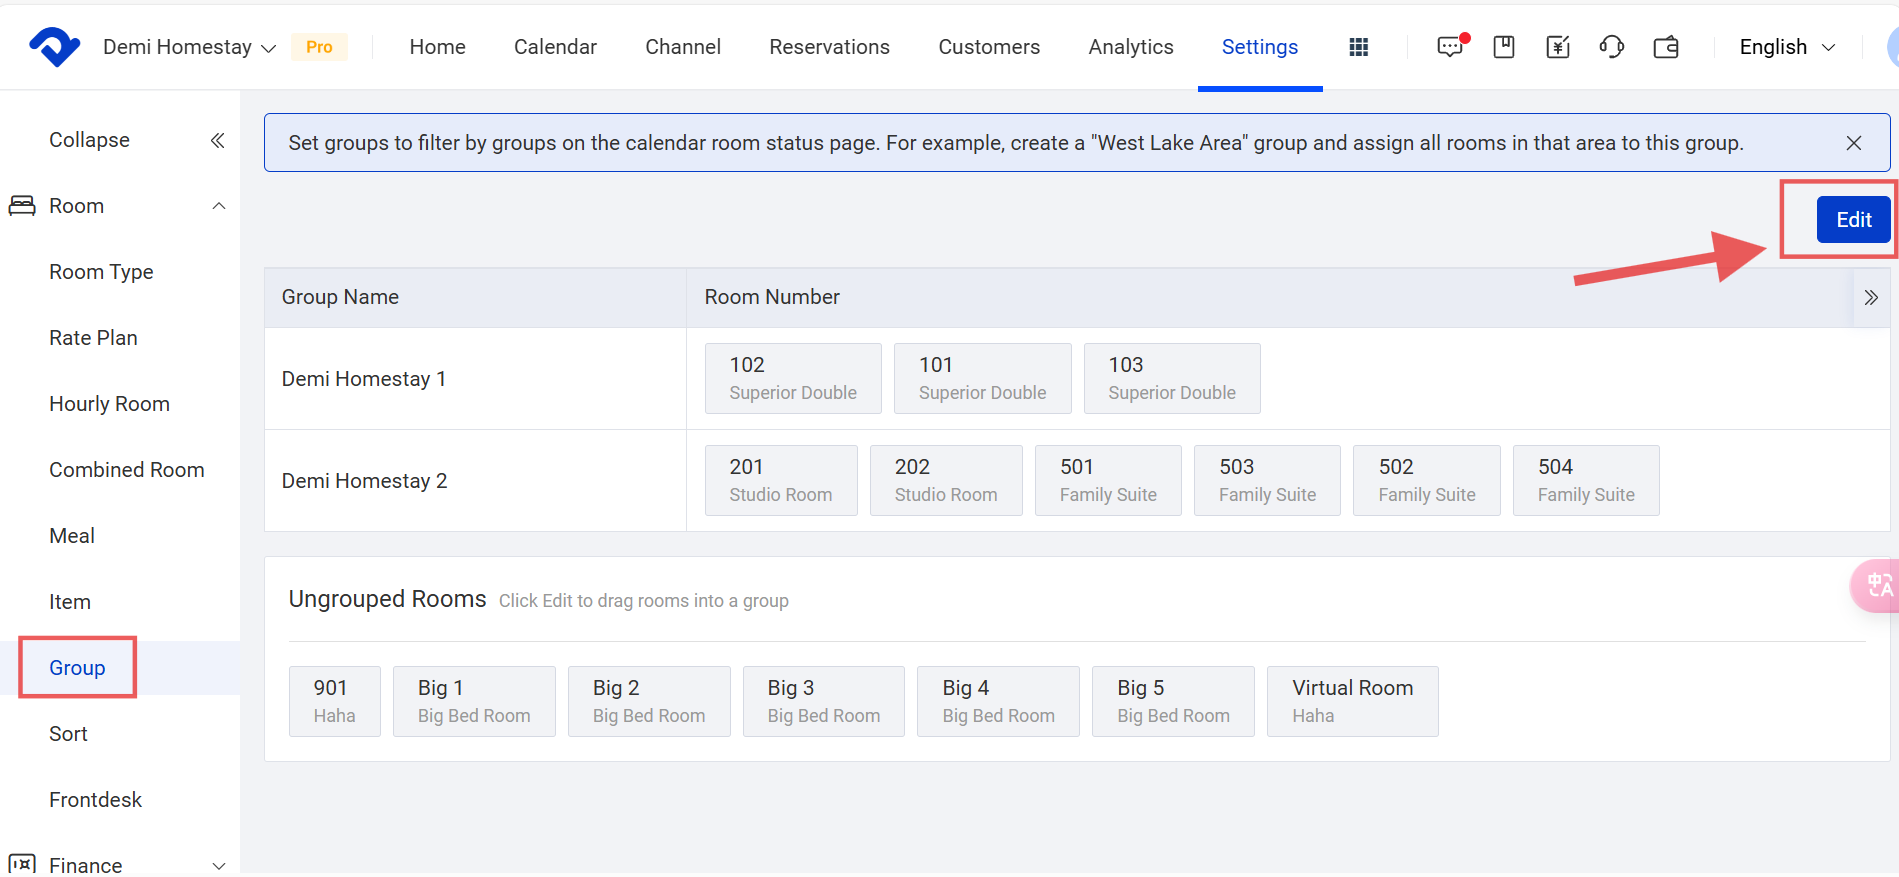
Set Up Rooms by Group:
Step1: Go to the Settings page. Select Group from the Room drop-down list. Click Edit.
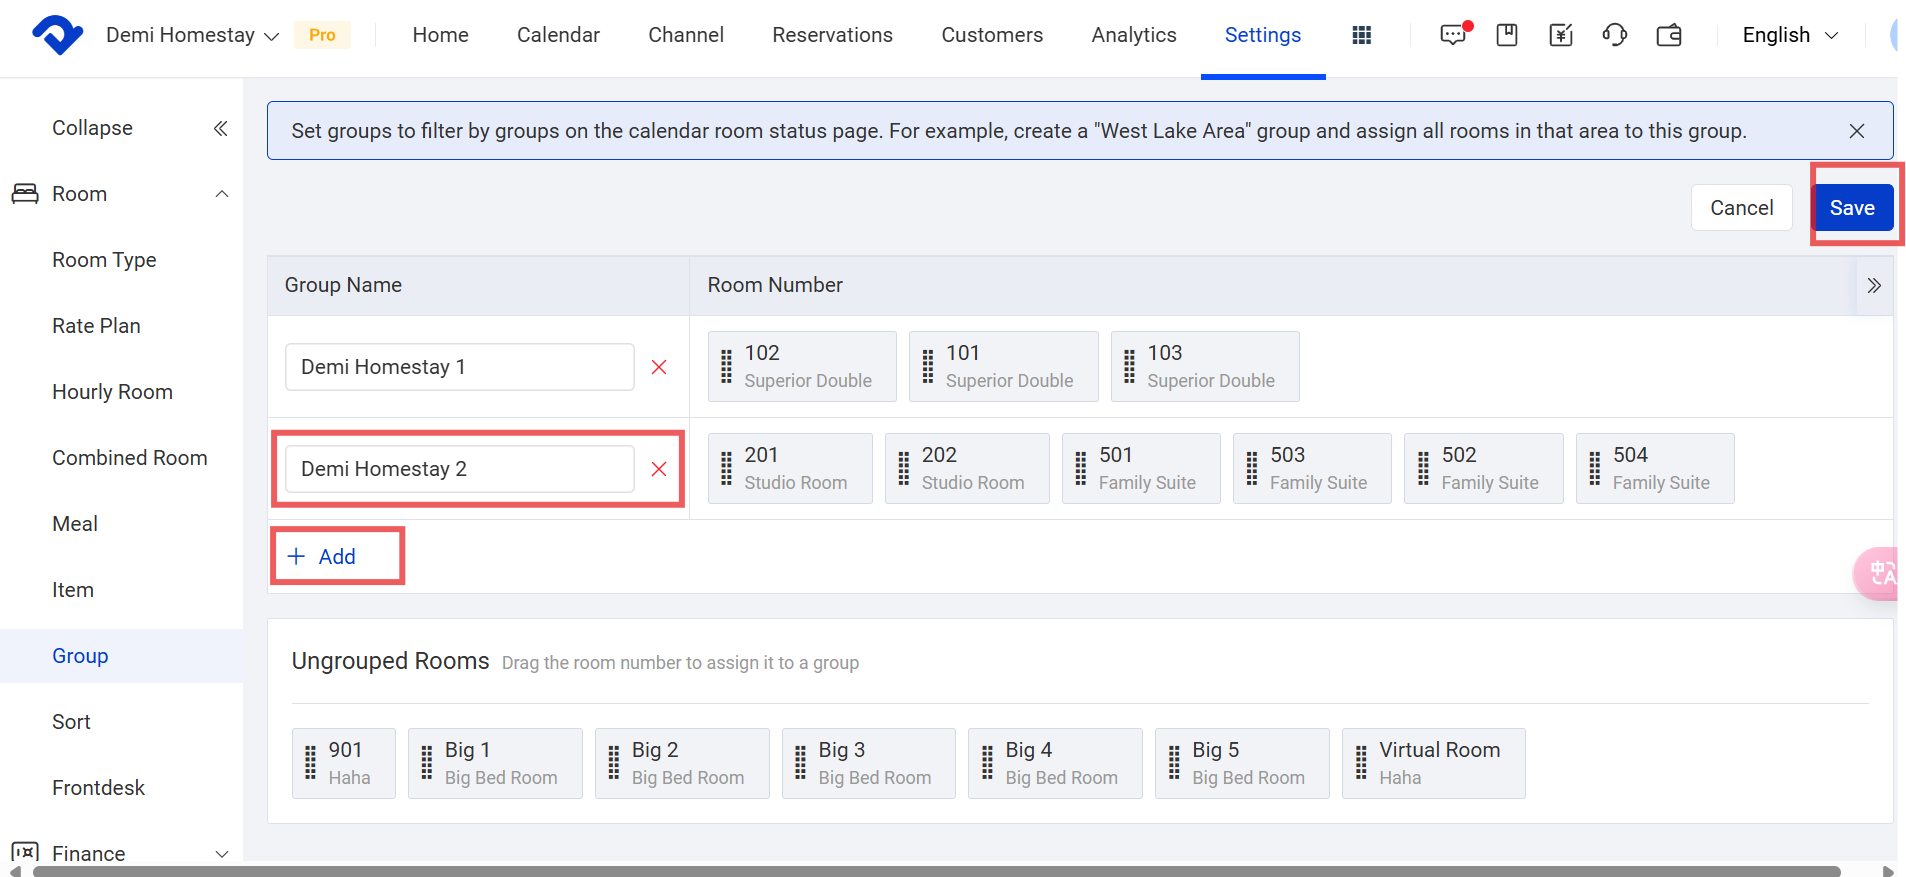
Step2: On the Edit page, you can add and edit the group name and the order of the rooms in the group. Click Save.
Note2:
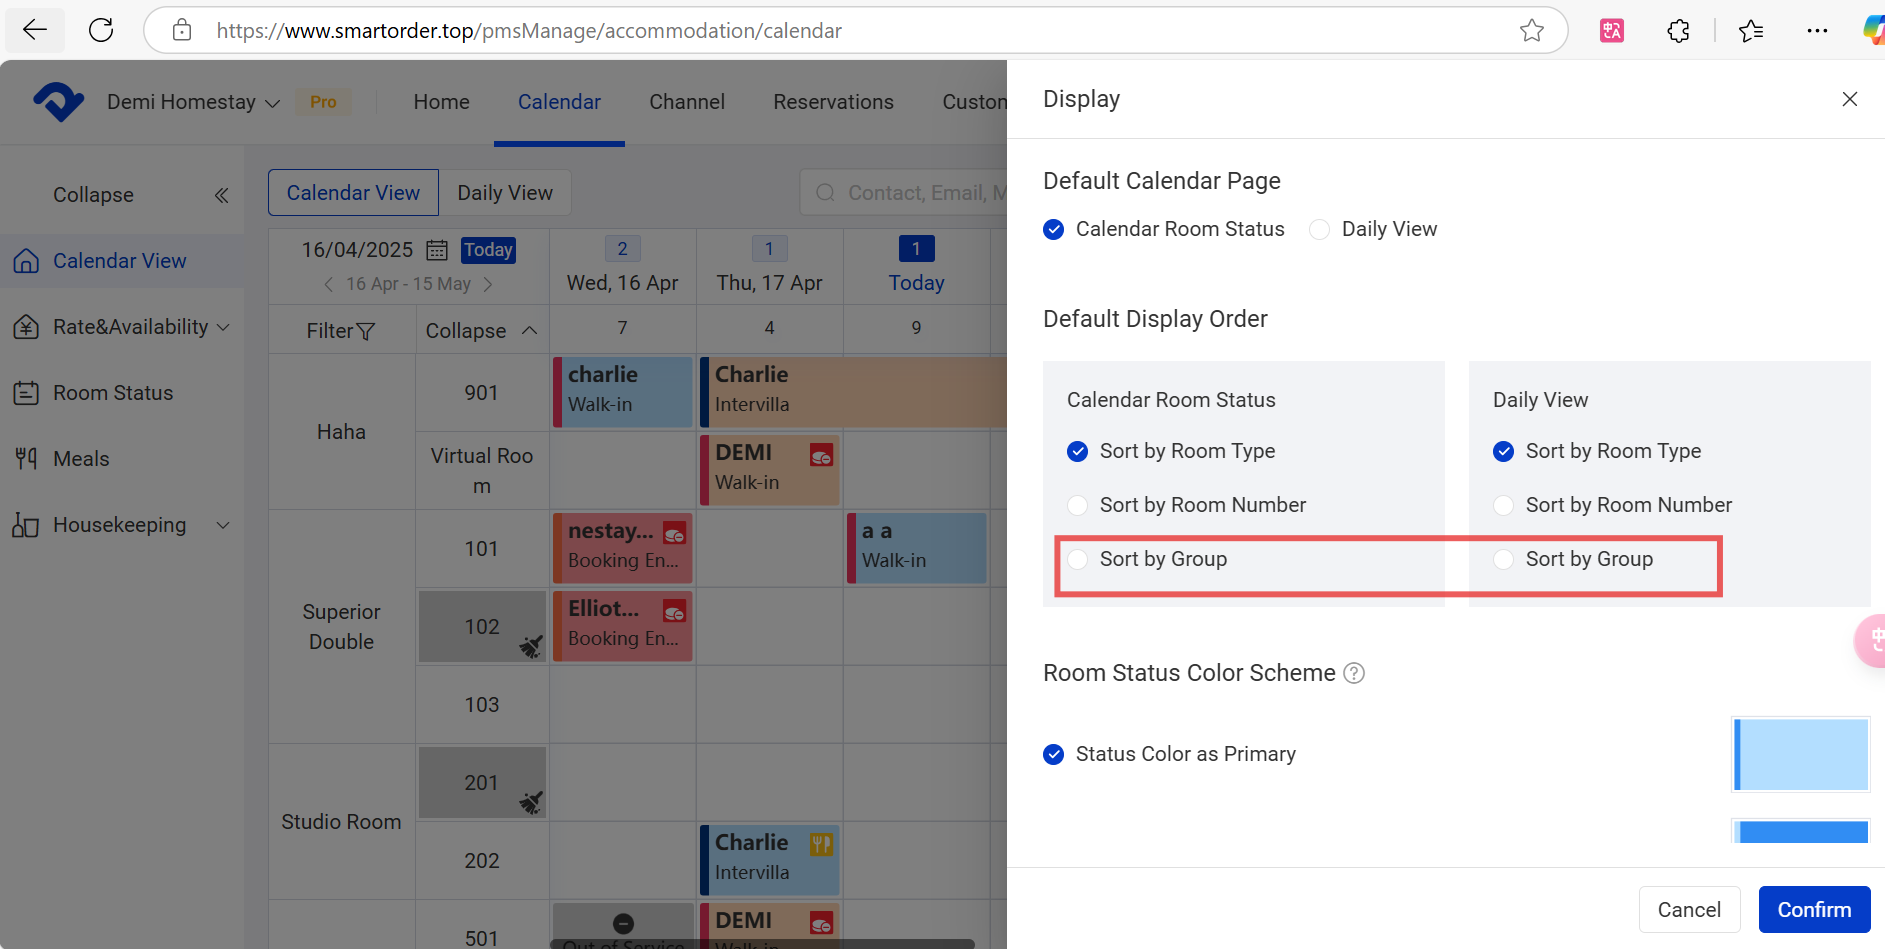
The Calendar View will show you the sequence according to the above settings. Go to the Calendar > Calendar View. Click the plus symbol. Select Display, and you will see the sequence. You can see the Sort by Group option from the Default Display Order.
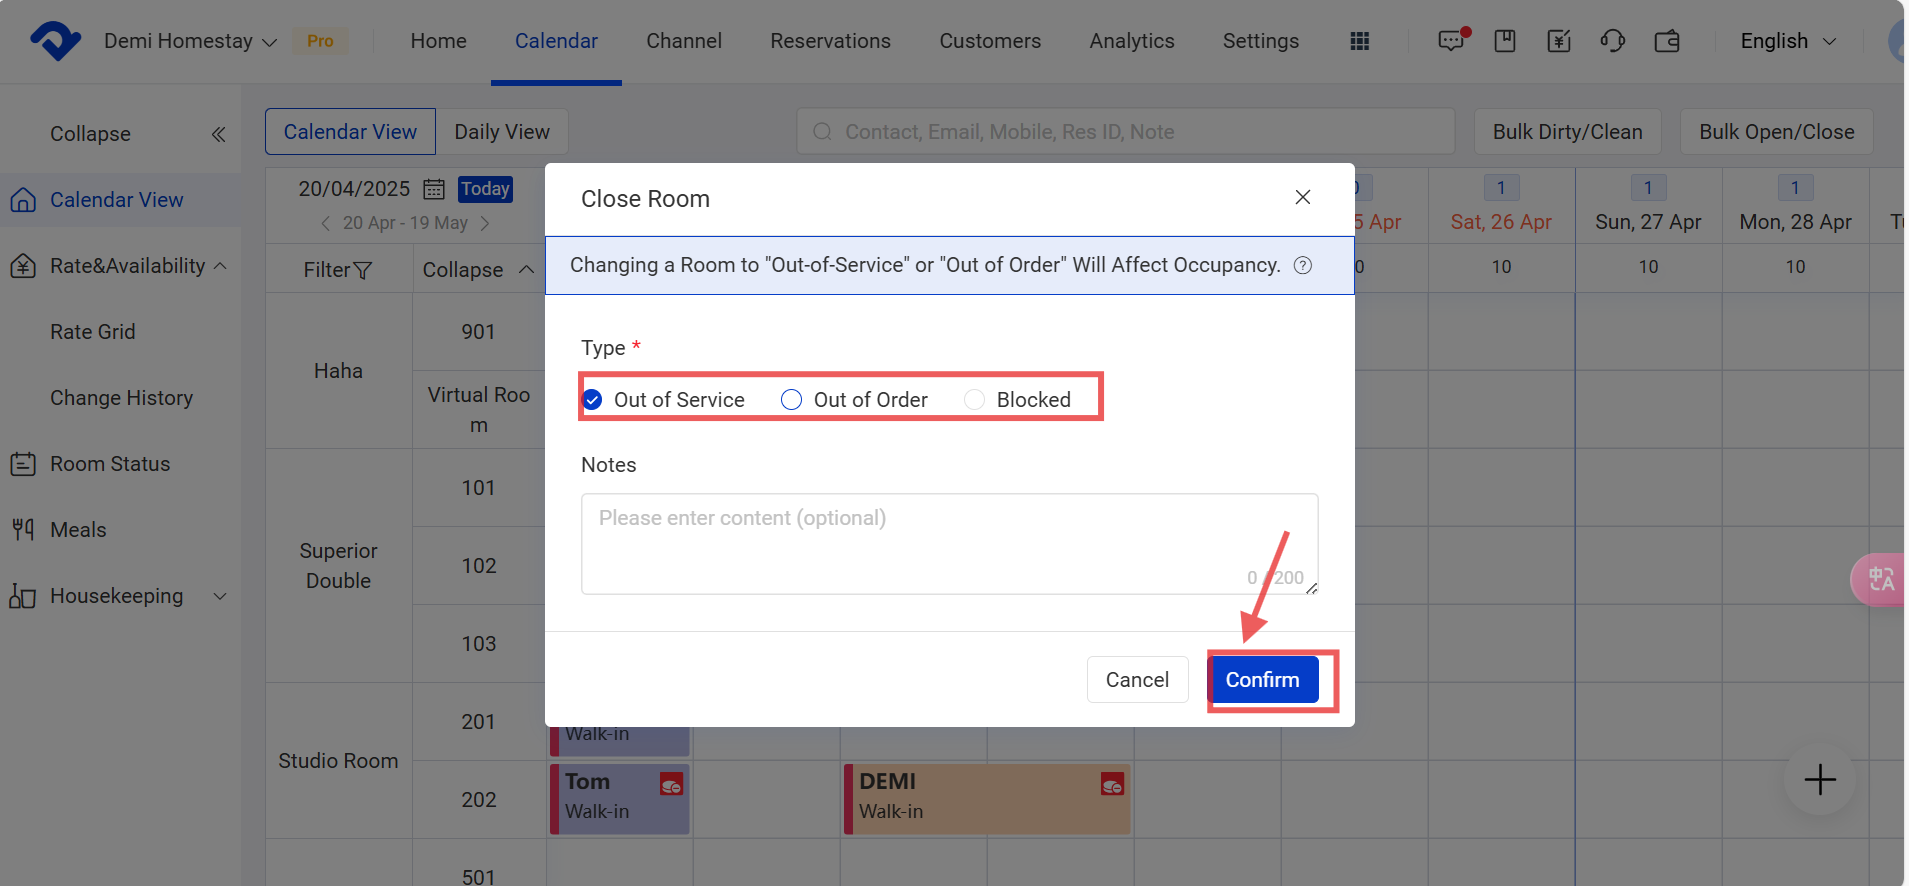
Close A Room in the Calendar View:
If there is a room out of service/ out of order/ blocked, you may close the room in the Calendar View. Once the room is closed, it can not be reserved.
Step1: Go to the Calendar page. Select Calendar View and click the room you want to close. Select Close Room.
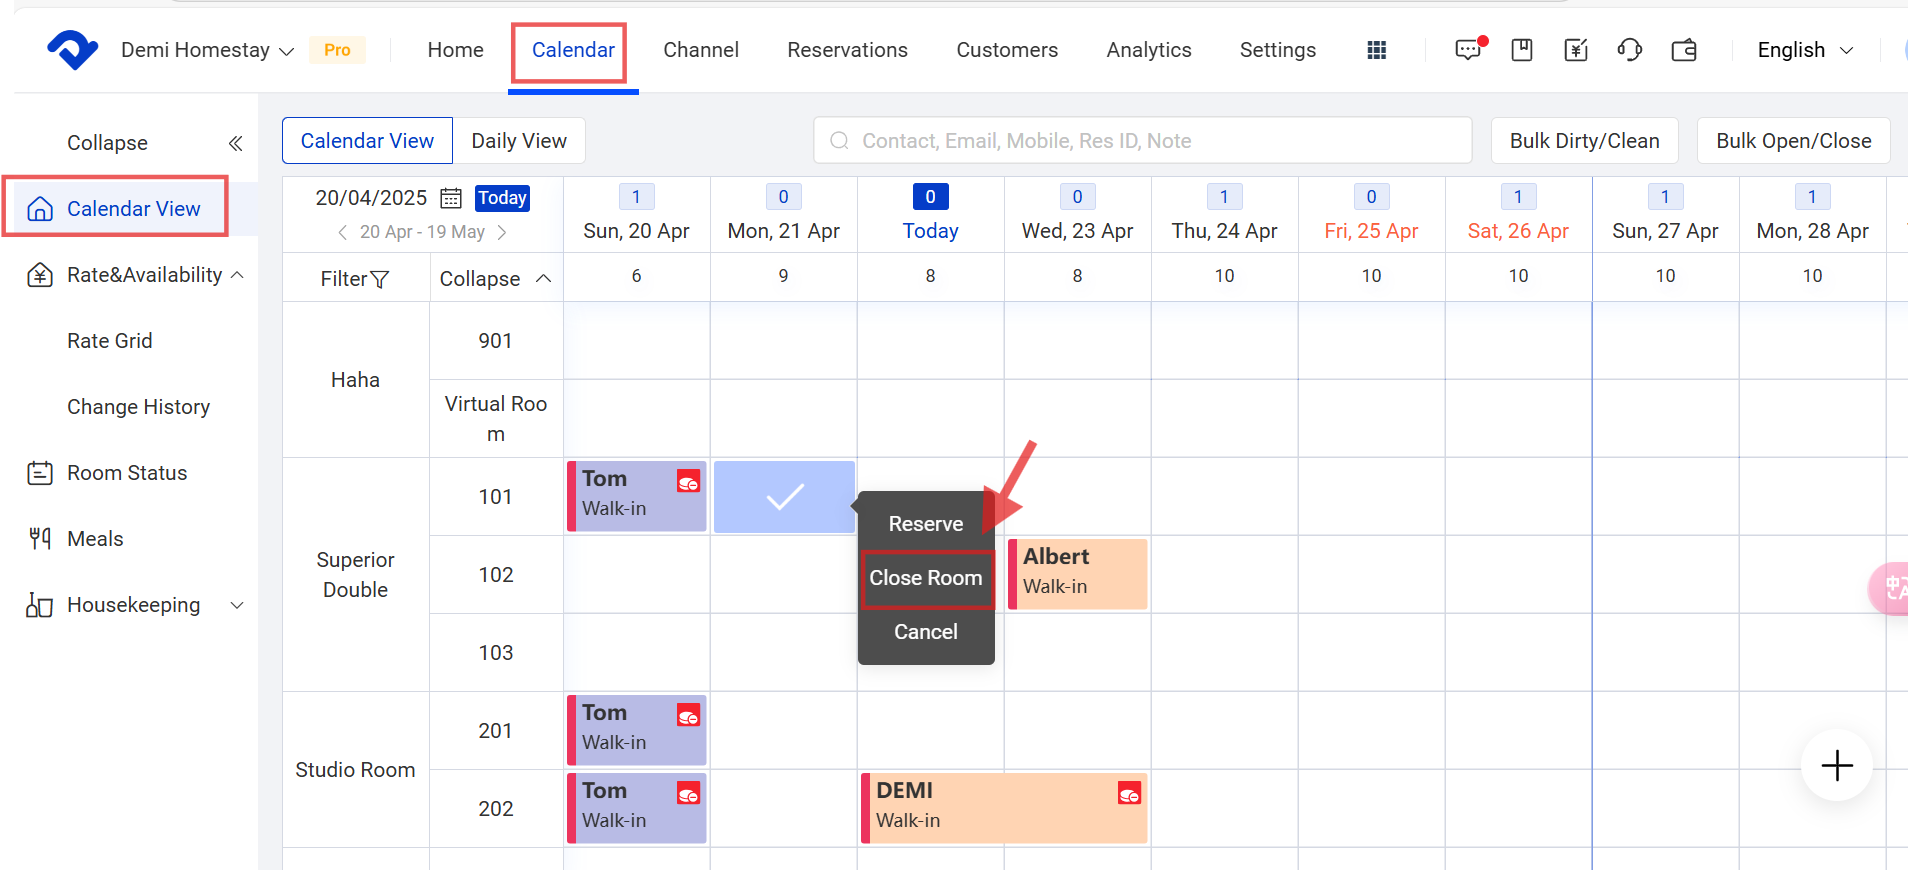
Step2: Choose the right reason and click Confirm. If you want to reopen the room, you may click the room and open it by selecting Open Room.

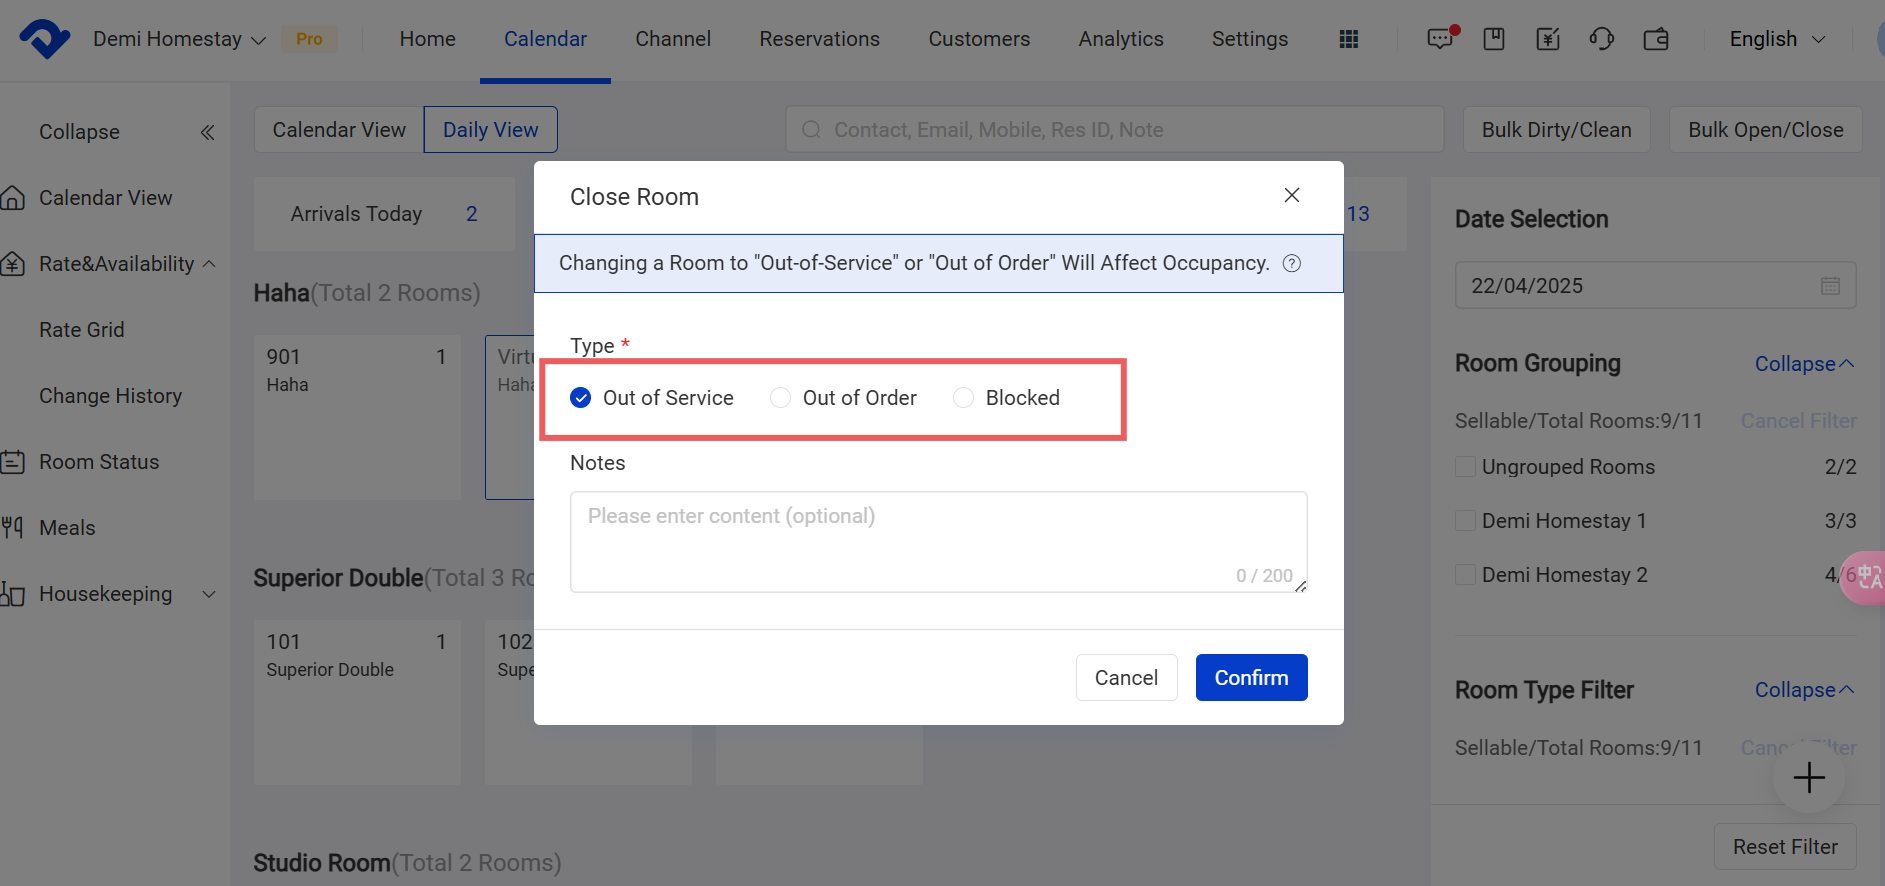
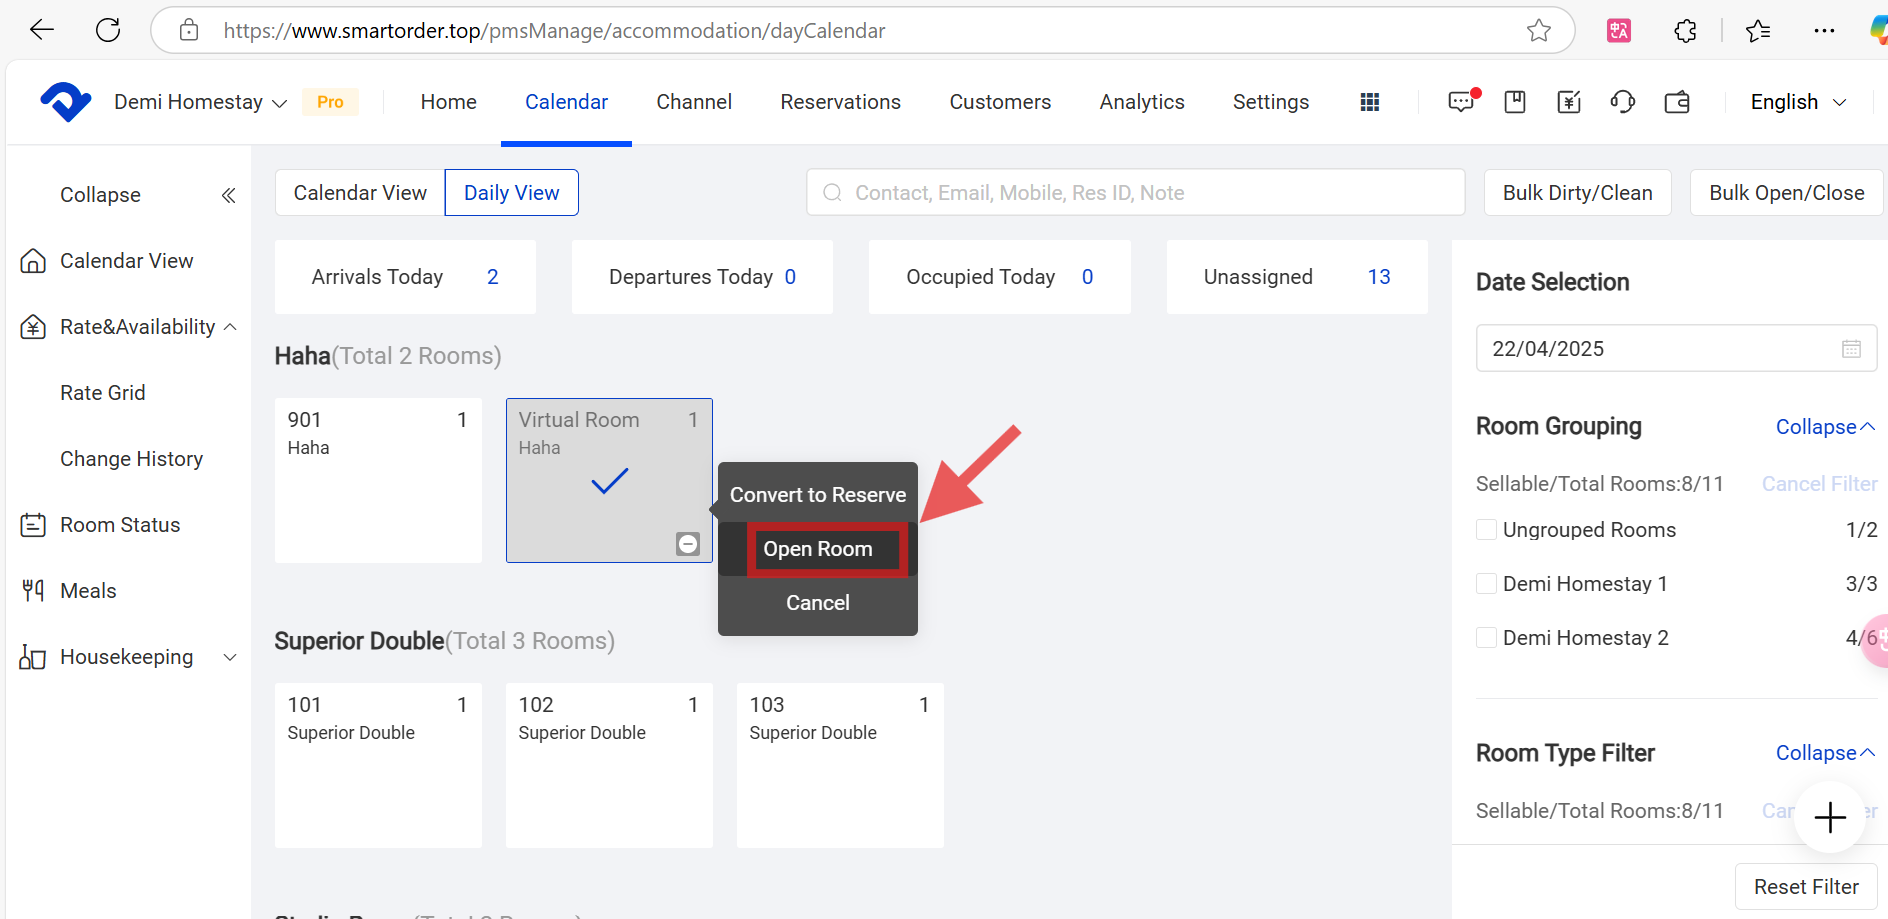
Close A Room in the Daily View:
Step1: Click the room you want to close in the Daily View and select Close.

Step 2: Choose the reason and select Confirm. After clicking the room, you can select Open to open it.
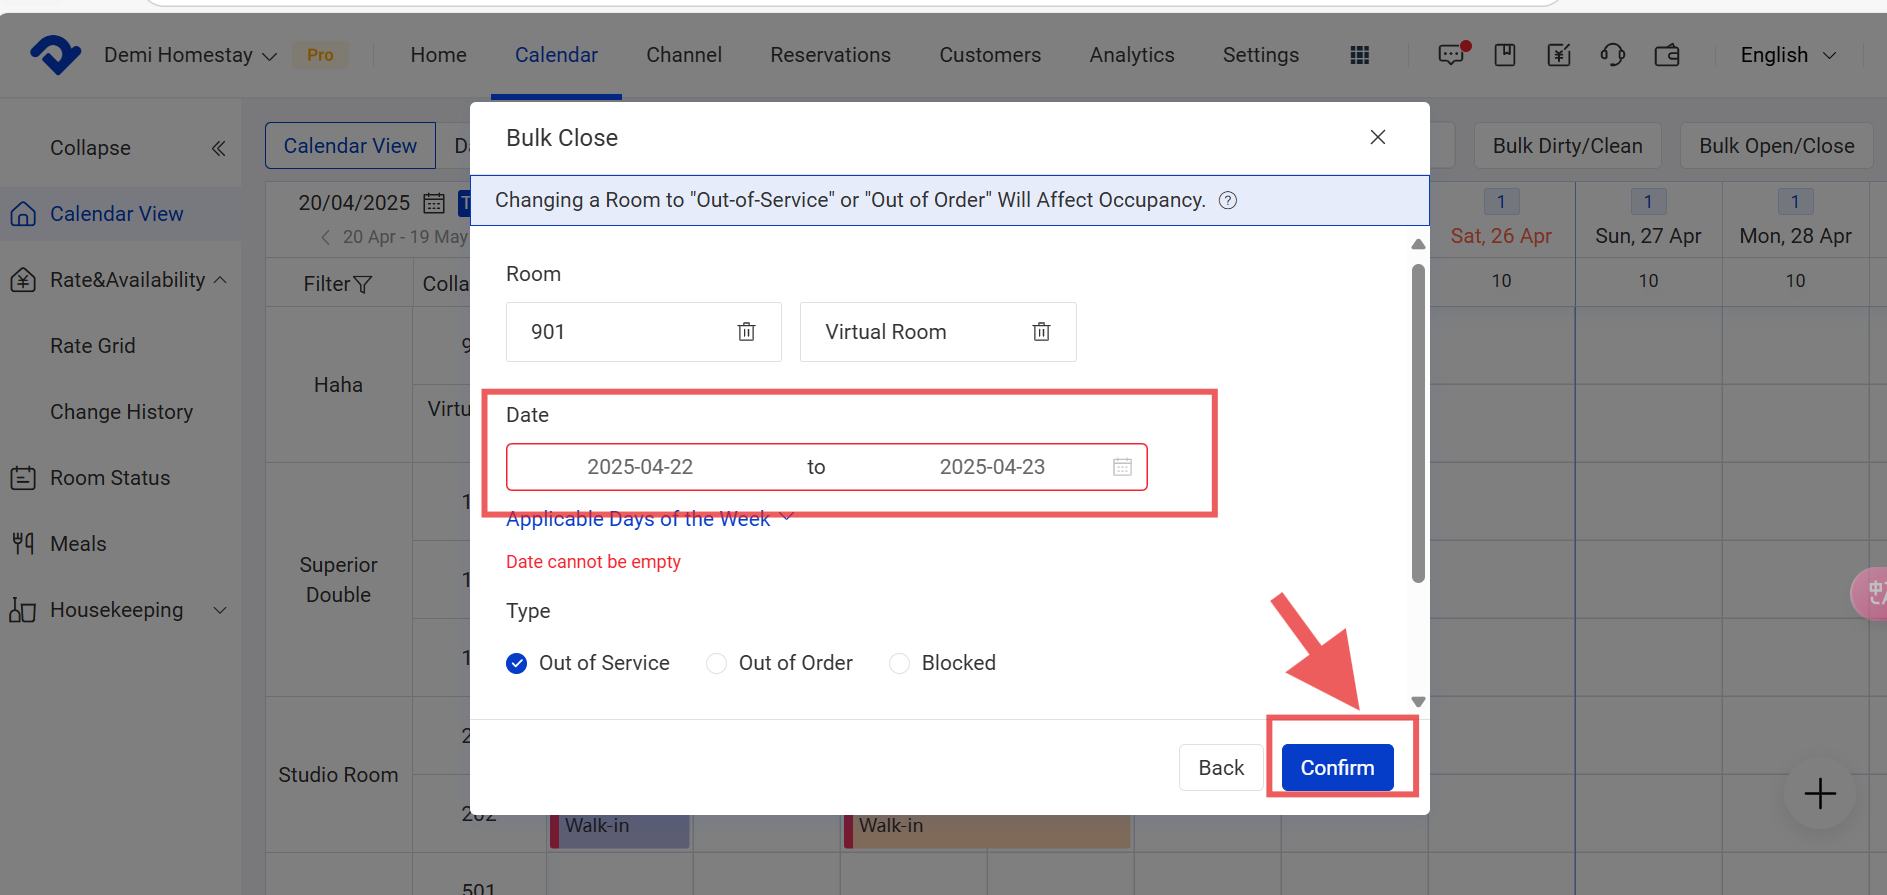
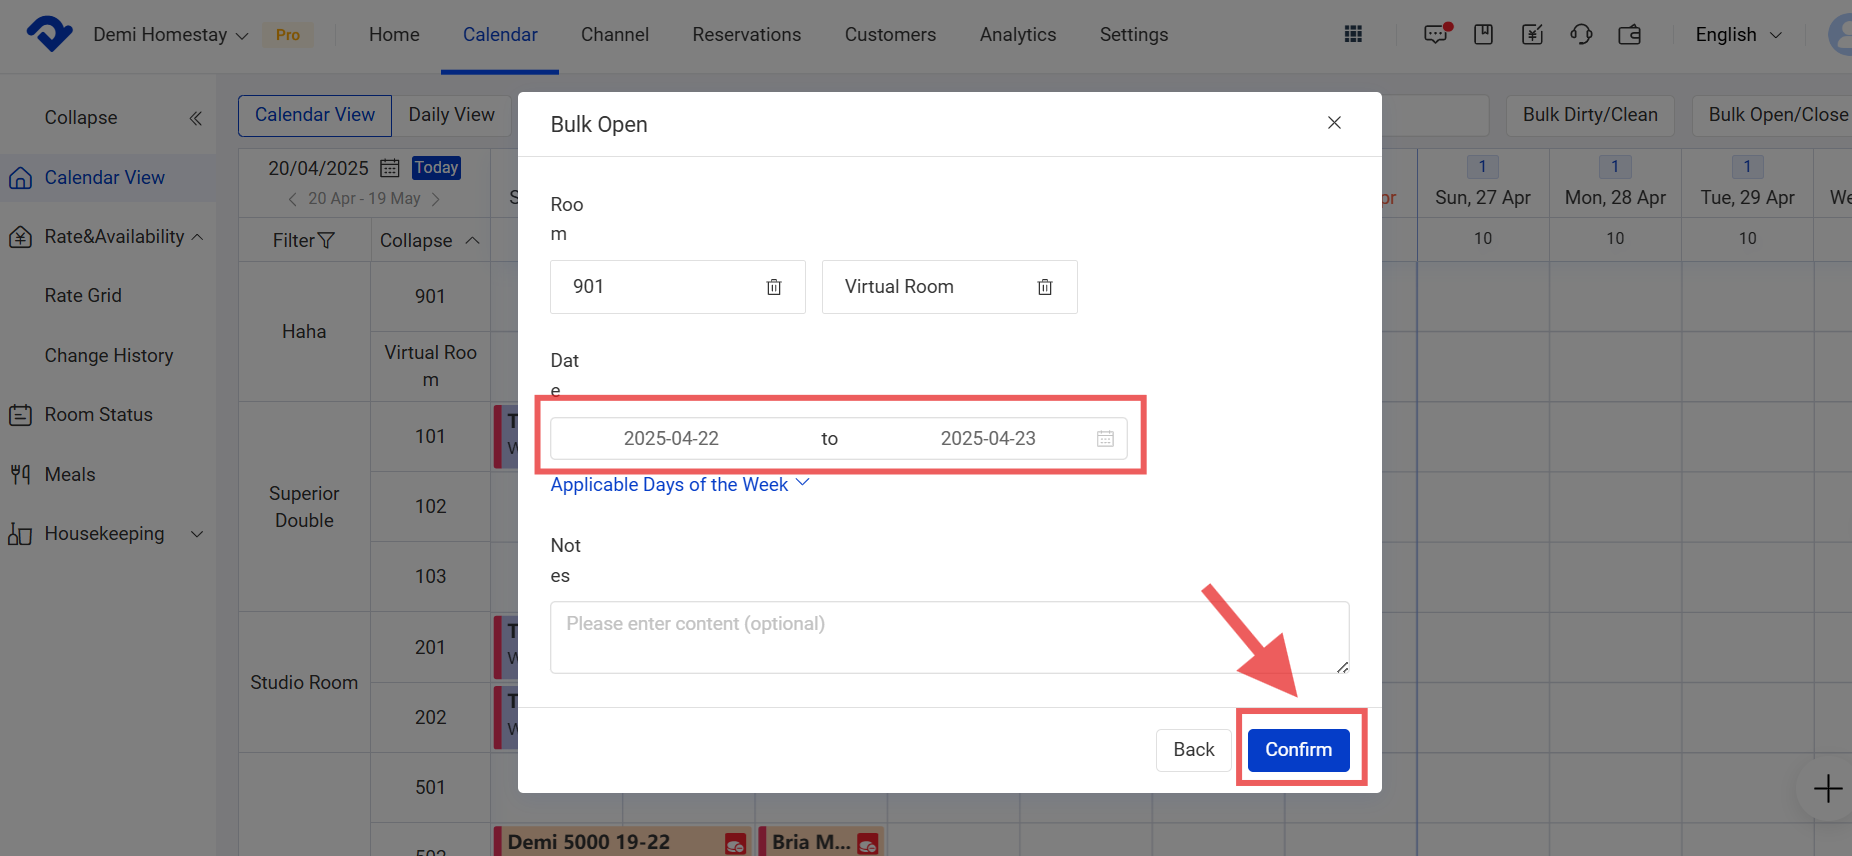
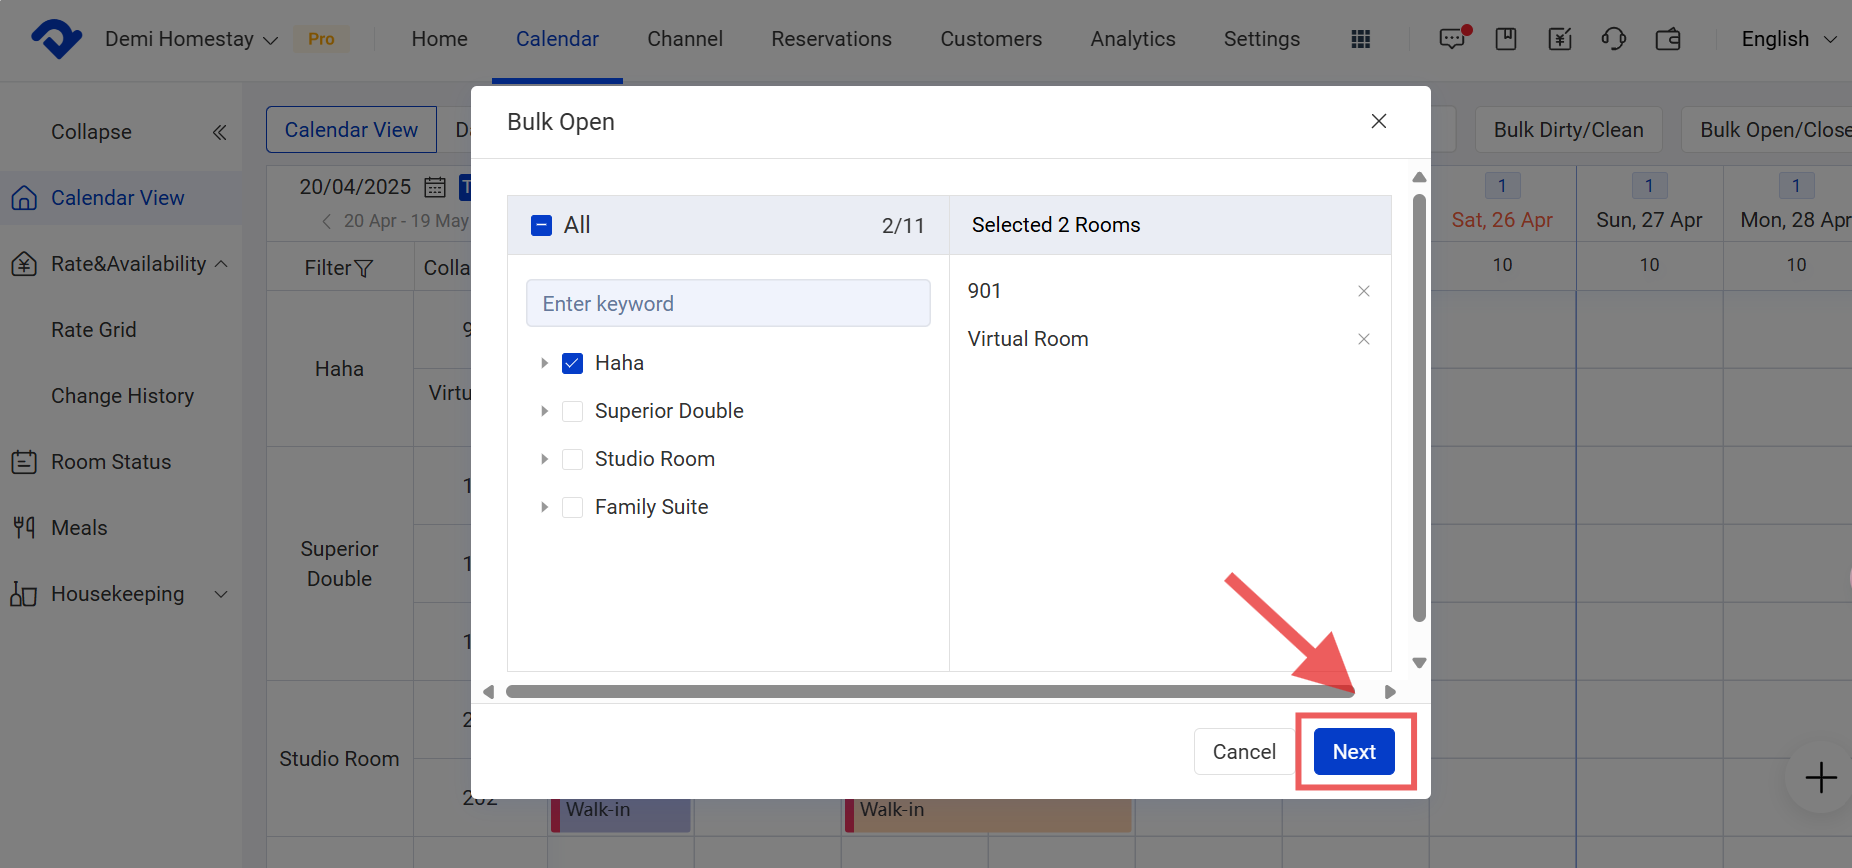
Set Up Bulk Open/Close:
Step1: Go to Calendar and select Calendar View. Click Bulk Close/ Bulk Open.

Step2: In the Bulk Close/ Bulk Open pop-up box, choose the rooms you want to close/ open from the room type, and select Next.
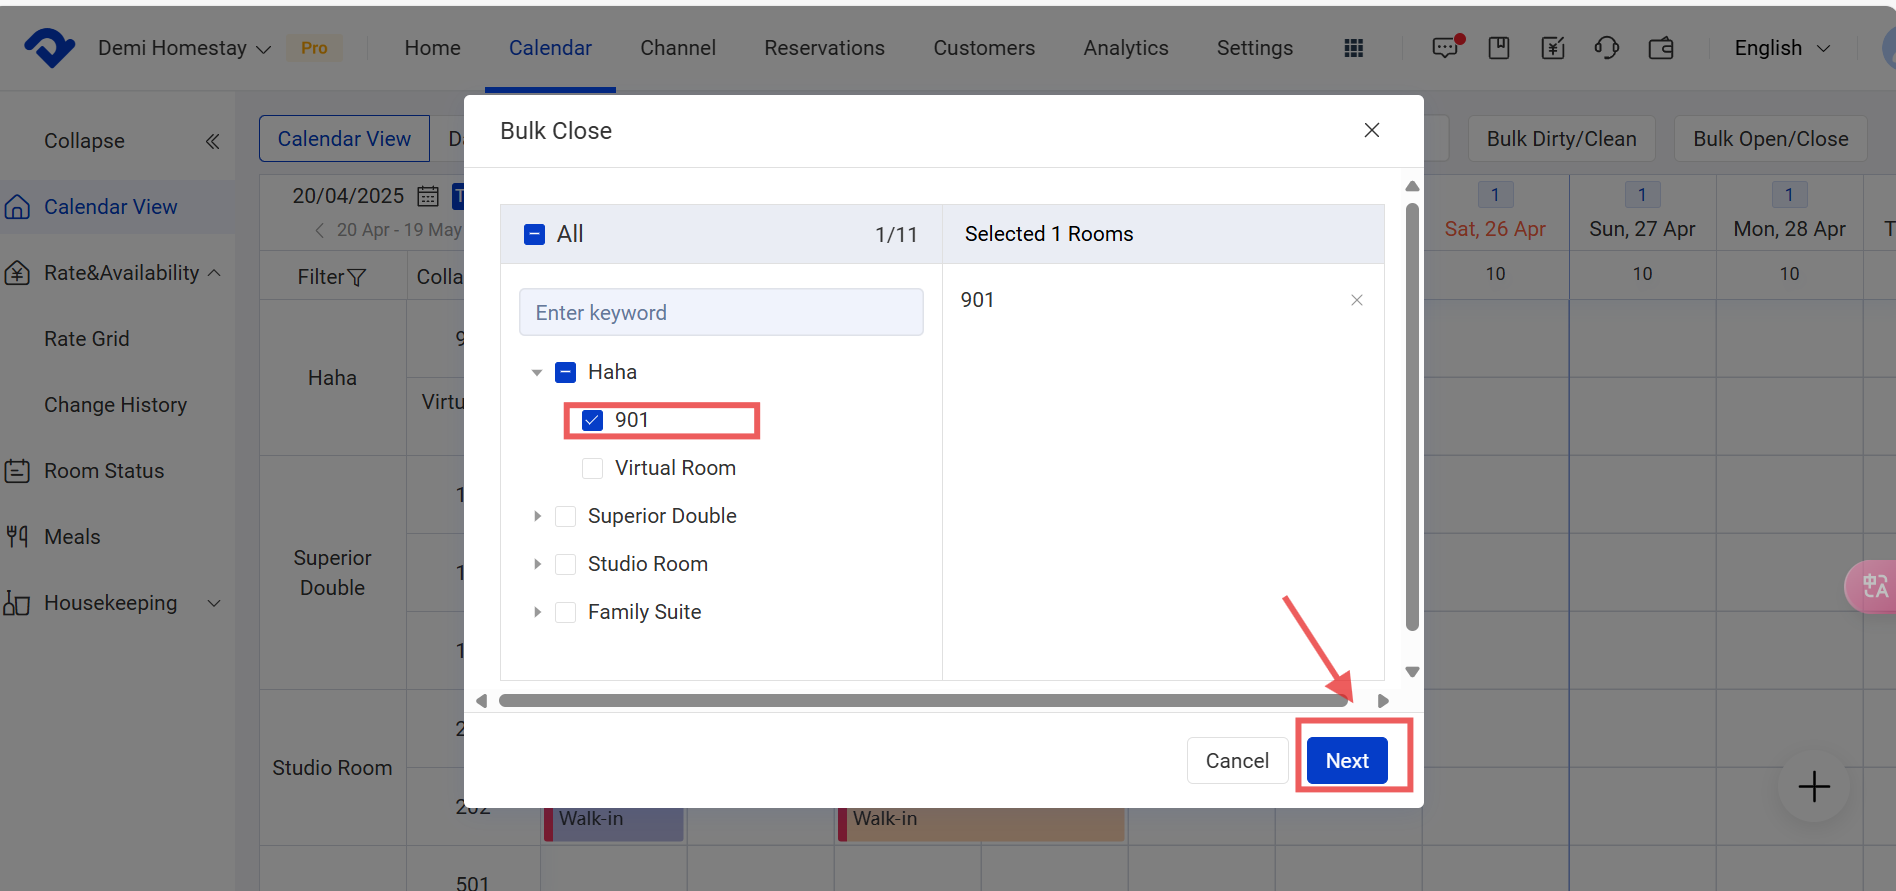
Step3: After finishing the Date, click Confirm.