Overview
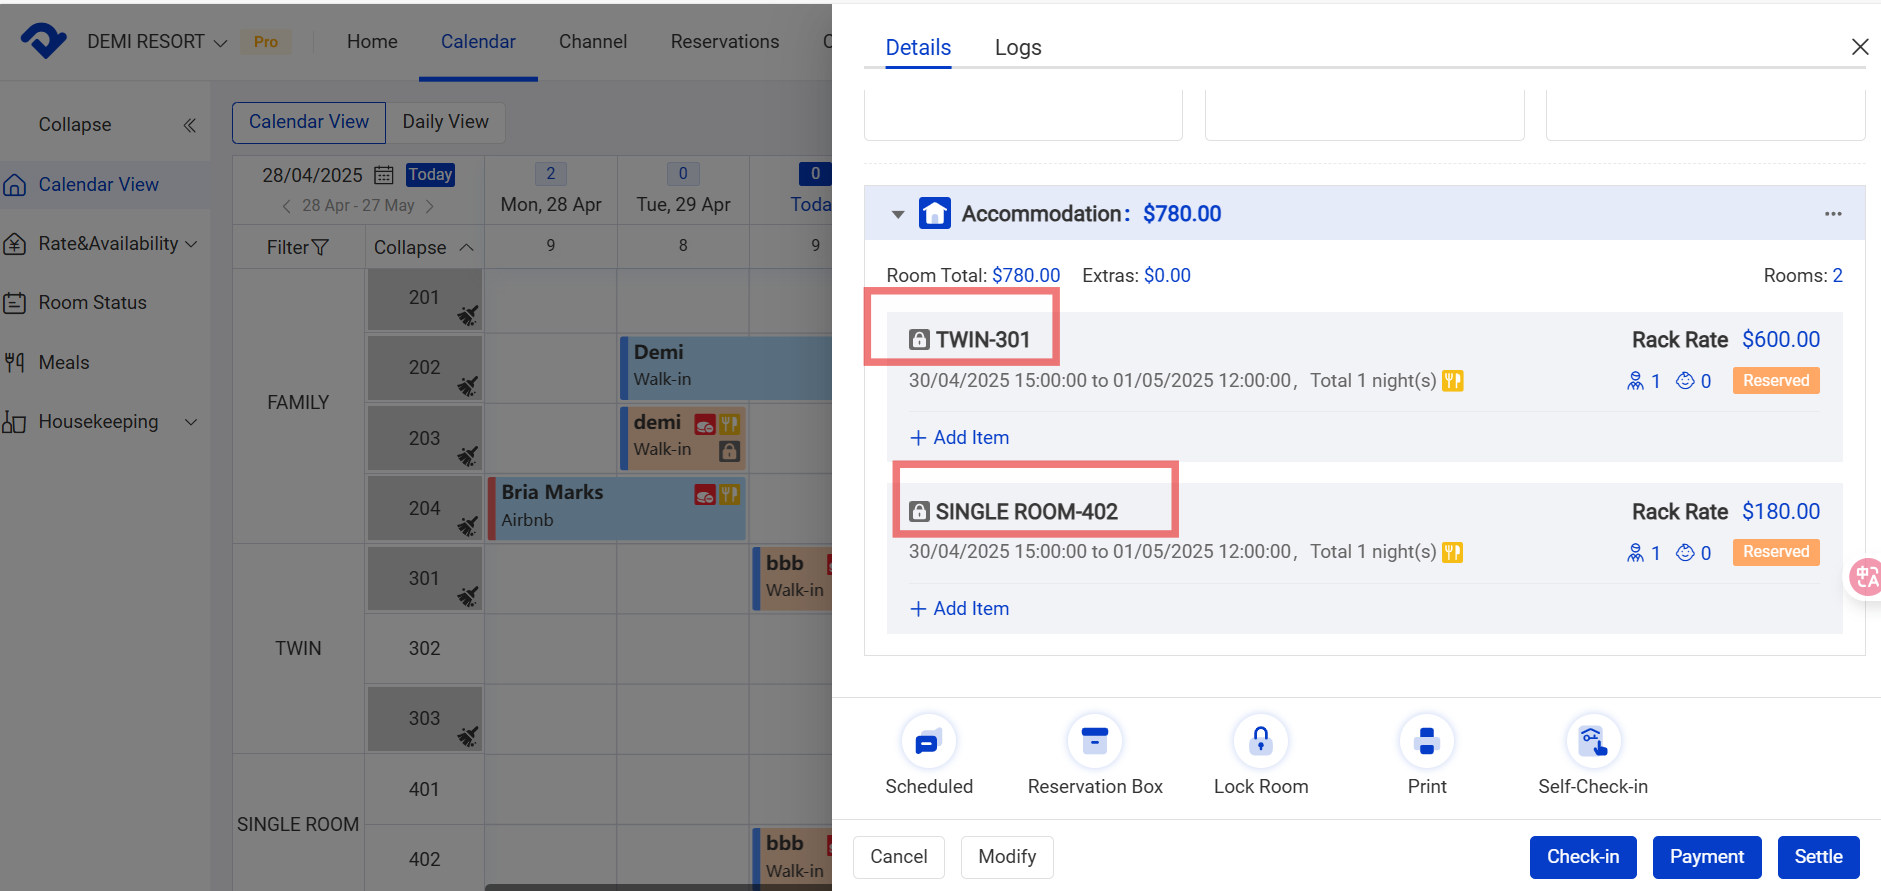
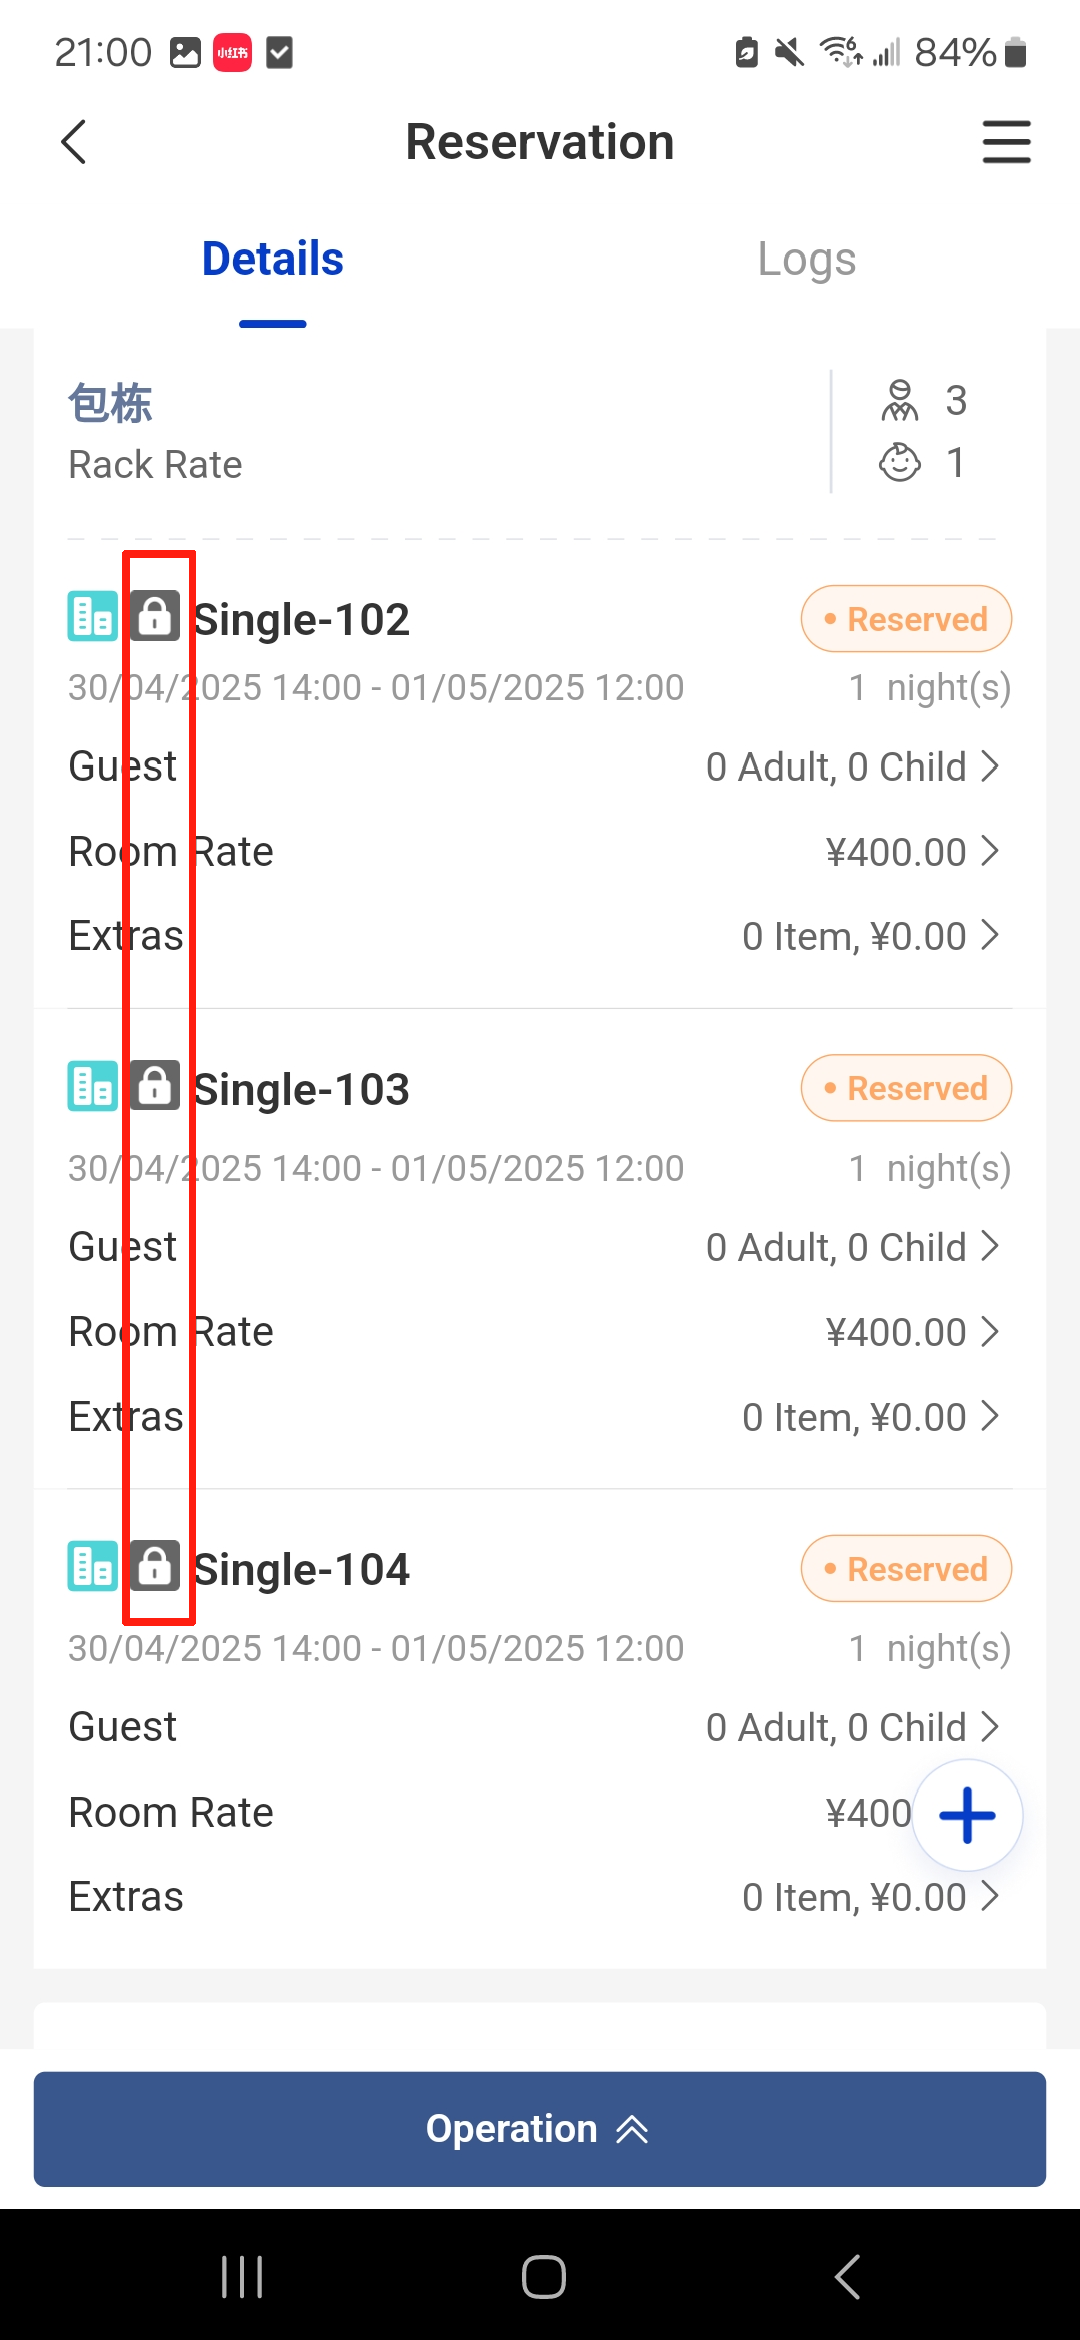
When you reserve a room for a VIP, you can lock the room in advance to prevent it from being dragged or changed. After locking the room, a lock icon will be displayed in the bottom-right corner.
Steps on PC:
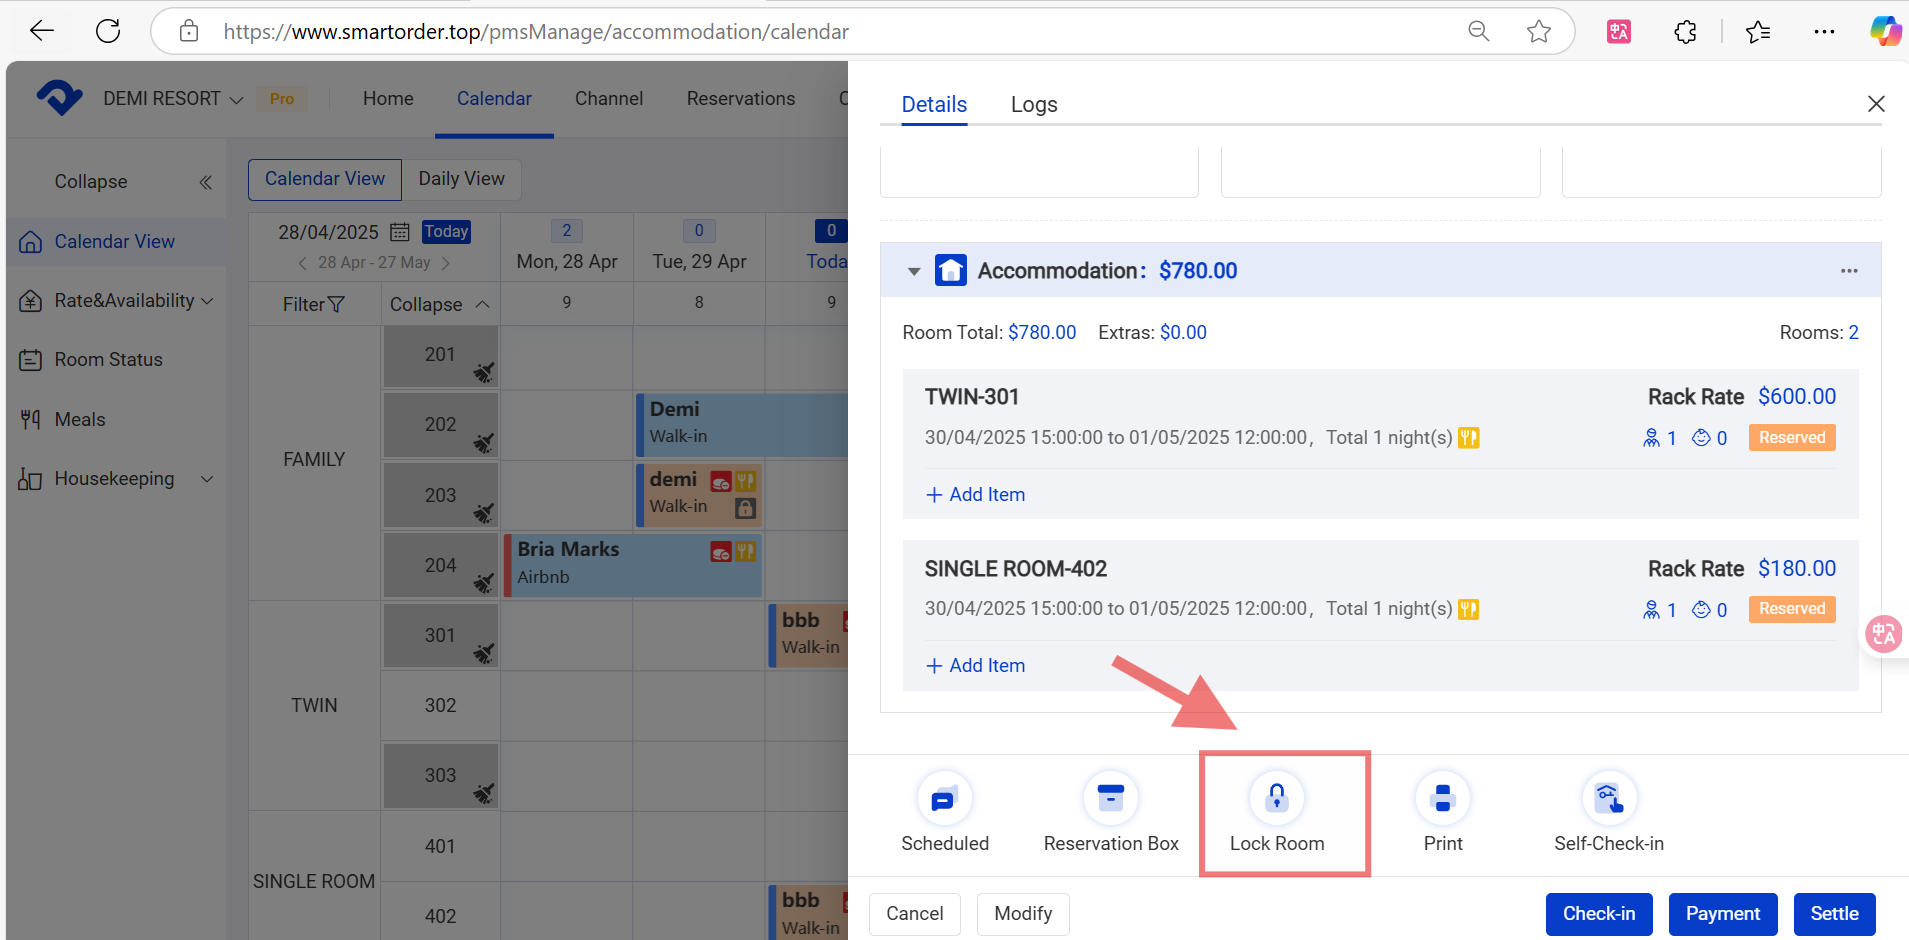
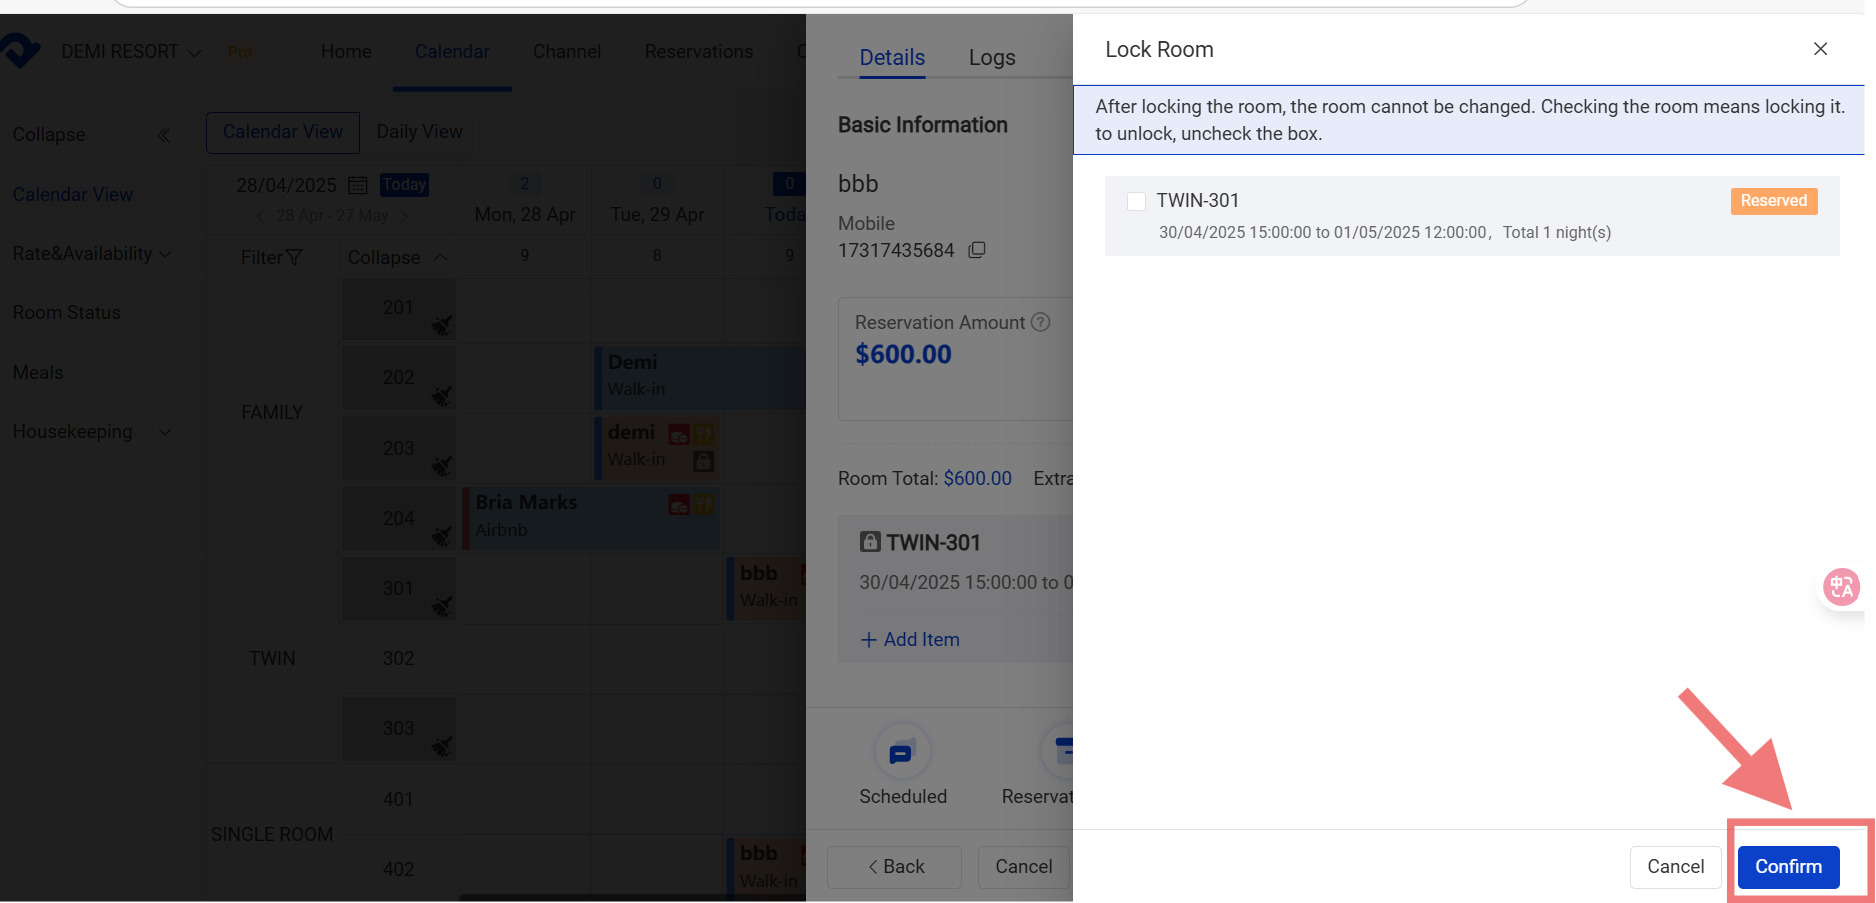
Step1: Go to the reservation Details page and click Lock Room in the bottom-right corner.
Step2: Select the room you want to lock.
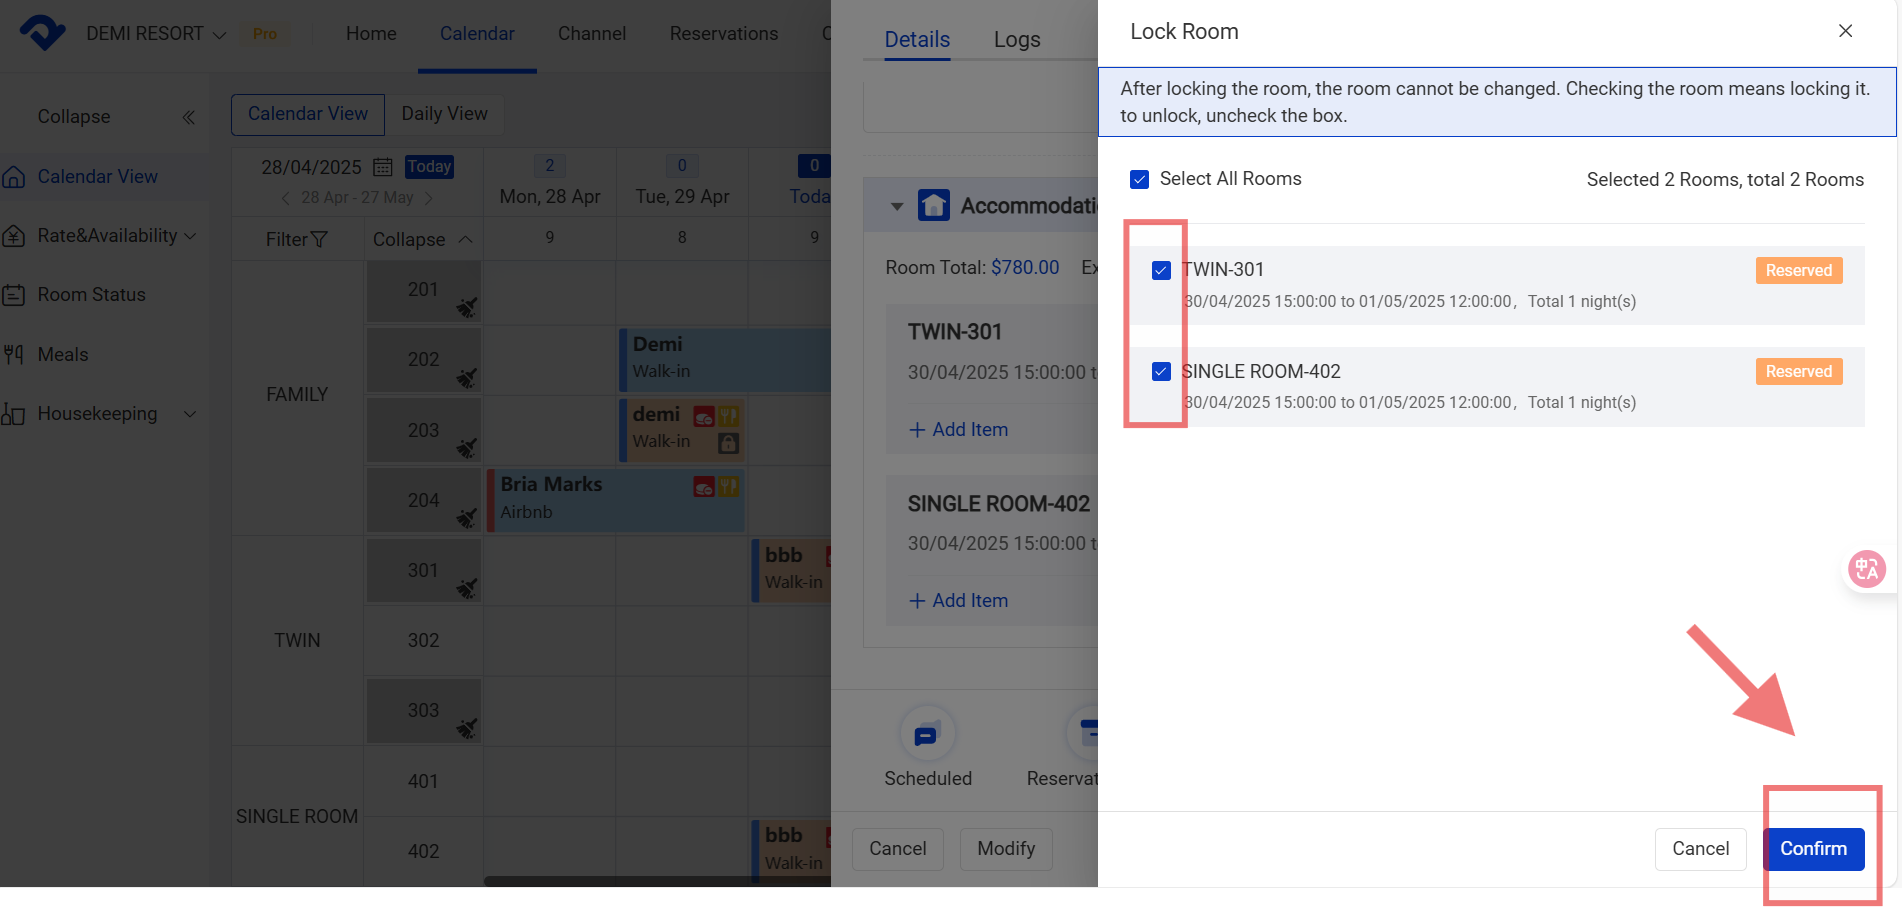
Step3: If you lock it, there will be a lock icon.
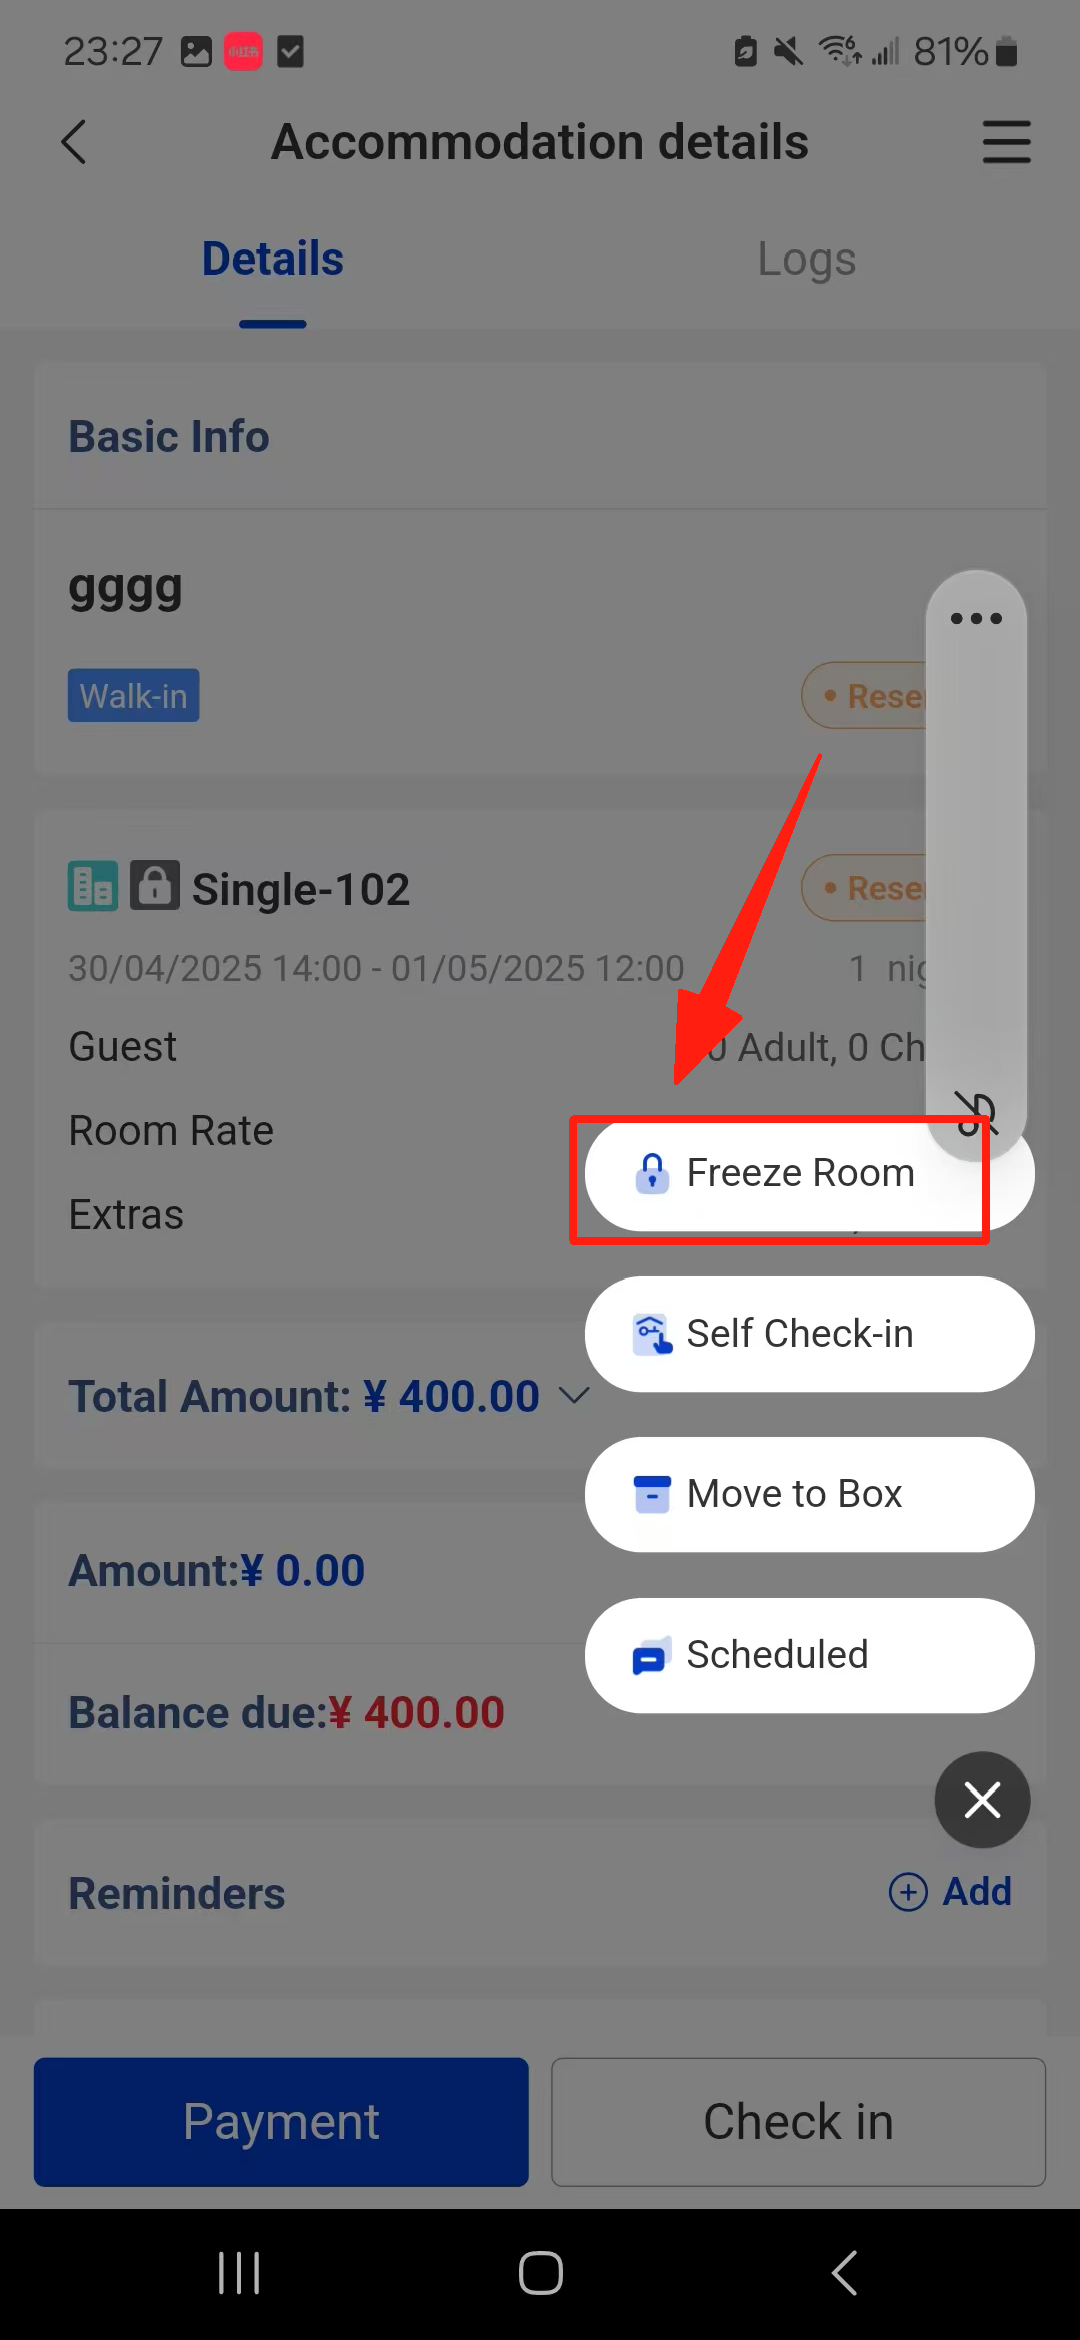
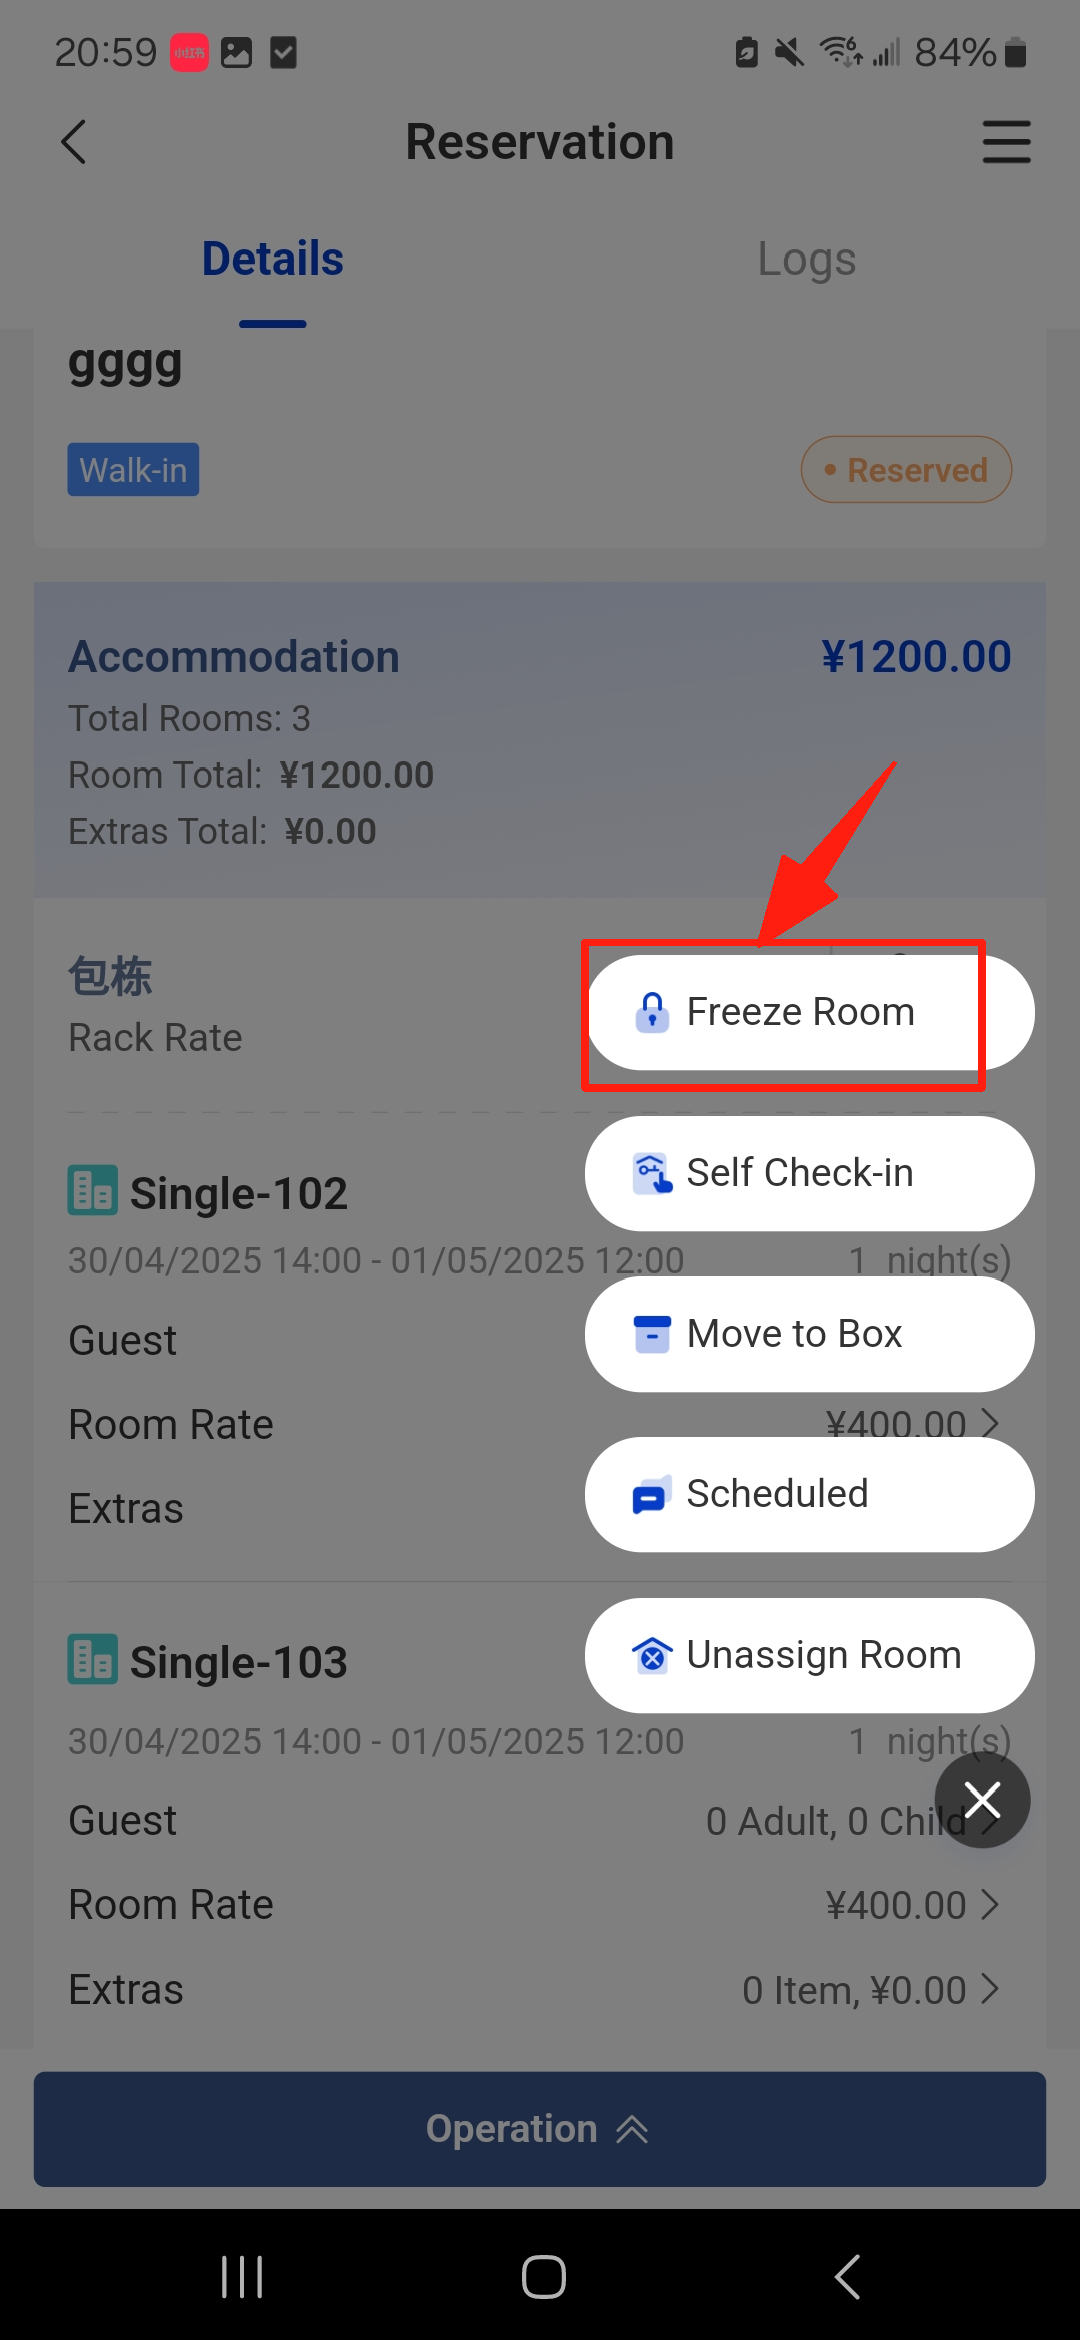
Steps on APP:
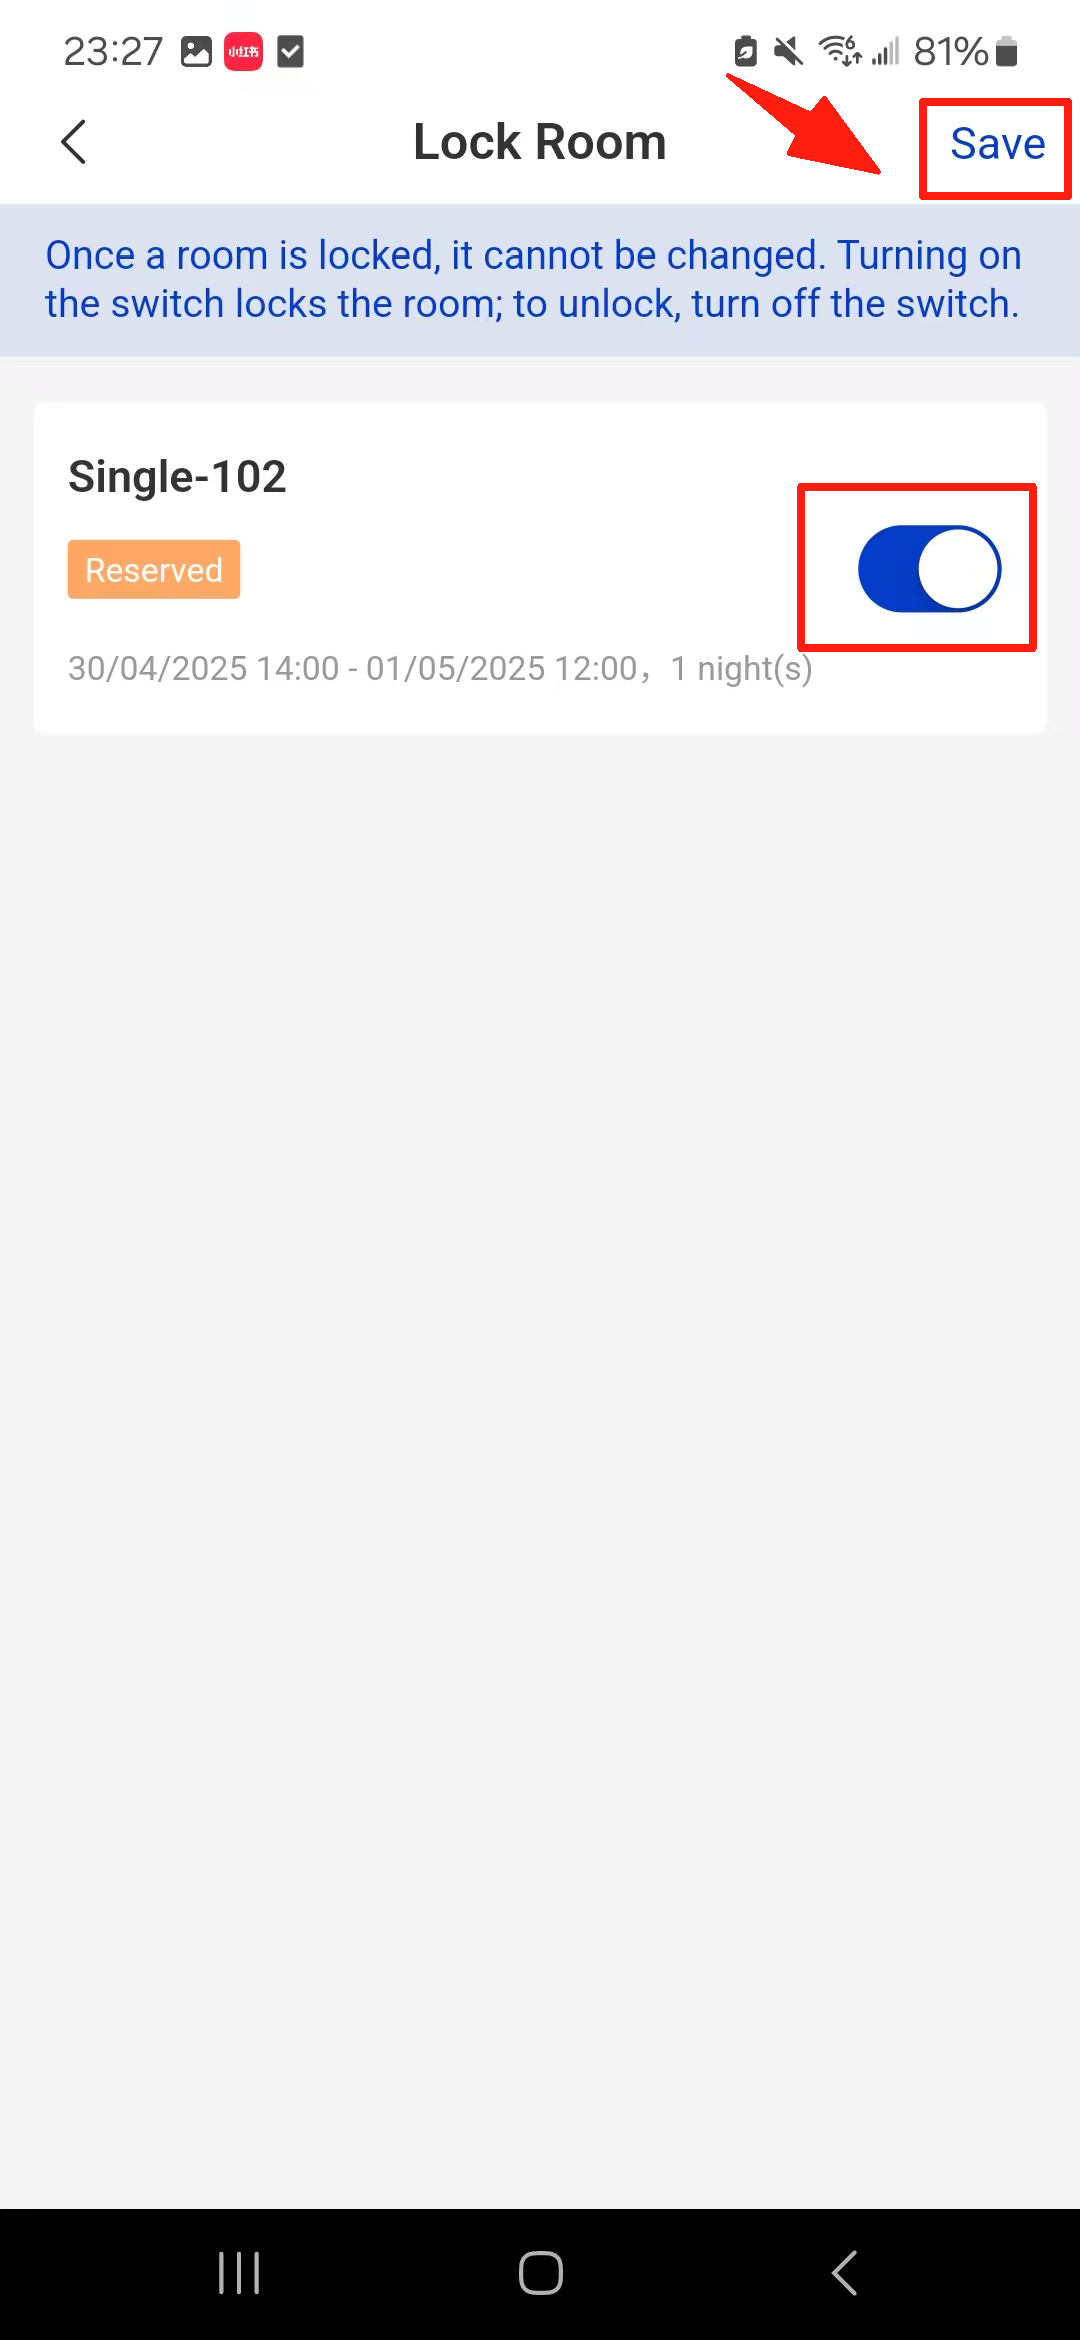
Select the plus icon in the bottom-right corner. And click Freeze Room. Click the open status button and save.

Note:
To unlock a room, you can go to the Details page and click Lock Room. Uncheck the room and select Confirm. The room will be unlocked.
Click Freeze Room and uncheck the room. Select Save.