Step-by-Step Guide to Creating a Successful Airbnb Listing
Listing your property on Airbnb opens the door to earning income from your home, vacation property, or extra room. Whether you're hosting full-time or just occasionally, this guide will walk you through everything you need to get started. From signing up to setting up a compelling Airbnb listing, here’s what you need to know.
Part 1: Registering Your Airbnb Account
1. Visit the Airbnb Website
Go to www.airbnb.com and click “Become a Host” at the top right corner.
2. Sign Up or Log In
Create an account using your phone number, email address, Google, Apple ID, or Facebook. If you already have an Airbnb account as a guest, you can use the same login to become a host.
3. Verify Your Identity
Airbnb requires hosts to complete identity verification. You’ll be asked to provide:
- A government-issued photo ID (passport, driver’s license, etc.)
- A valid email address and phone number
- Profile photo and personal bio (optional but recommended)
Having a complete profile builds trust with potential guests and increases the chances of receiving bookings.
4. Set Up Payout Details
Before you can receive earnings, you must add a payout method. Airbnb supports:
- Bank transfers
- PayPal (in some regions)
- Other local options depending on your country
You can edit or update your payout method anytime in the host dashboard.
Part 2: Creating and Optimizing Your Airbnb Listing
1. Add Property Details
Airbnb will guide you through a step-by-step form to input:
- Type of space (Entire place, private room, shared room)
- Number of guests your property can accommodate
- Location (Auto-filled based on address)
- Bedrooms, beds, and bathrooms
- Property features (apartment, house, guesthouse, etc.)
Be accurate with this information—it helps match your listing with the right guests.
2. Write a Catchy Title and Clear Description
A great title grabs attention in search results. Highlight what makes your space unique, such as:
- “Modern Loft Near Riverwalk”
- “Cozy Cabin with Hot Tub and Forest Views”
In the description, provide details guests care about:
- Layout and size
- Special amenities (Wi-Fi, air conditioning, workspace)
- Who your place is best for (remote workers, families, solo travelers)
- Neighborhood tips or nearby attractions
Avoid vague wording and focus on clarity and honesty.
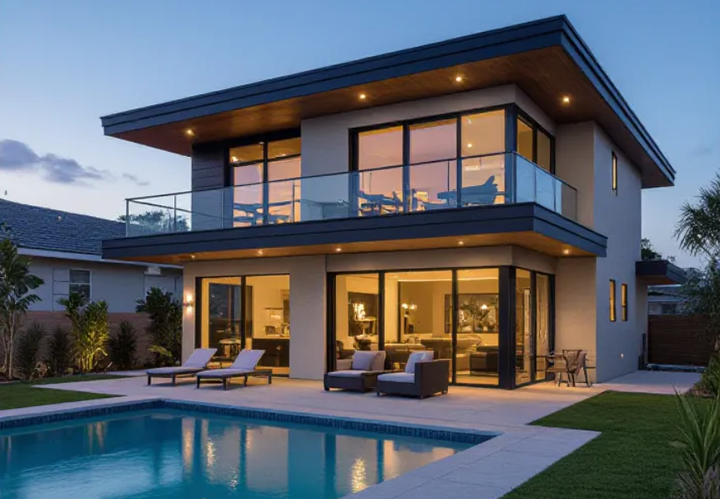
3. Upload High-Quality Photos
Good photos dramatically improve the performance of your Airbnb listing. Follow these tips:
- Use natural daylight whenever possible
- Take wide-angle shots of each room
- Include images of bedrooms, kitchen, bathroom, and entryway
- Showcase standout features like a balcony, garden, or home office
- Minimum 10 photos recommended
Make sure the space is clean and tidy before shooting. Guests are drawn to spaces that look clean, bright, and welcoming.
4. Choose Amenities
Select all amenities available in your space. Some of the most searched-for items include:
- Free Wi-Fi
- Air conditioning or heating
- Washer and dryer
- Free parking
- Pet-friendly
- Fully equipped kitchen
The more complete your amenity list, the more visible your listing becomes in guest searches.
5. Set Your Price
You control your nightly rate. Airbnb provides a pricing suggestion based on location and demand, but you can set your own.
Other pricing options include:
- Cleaning fee
- Discounts for weekly/monthly stays
- Custom prices for holidays or weekends
To attract your first bookings, consider setting a competitive rate for the first few weeks.
If you're listing your property on Airbnb and other platforms like Booking.com, keeping prices and availability in sync can be challenging. A Property Management System (PMS) helps automate this process by syncing your calendars and rates across all channels in real time.
6. Define Availability and Booking Settings
Use the calendar to block unavailable dates and set:
- Minimum/maximum stay durations
- Advance notice requirements
- Check-in/check-out times
You can also choose between:
- Instant Book – allows guests to book without approval
- Reservation requests – lets you review guests before accepting
For new hosts, Instant Book may bring faster results, while request-based bookings offer more control.
7. Establish House Rules and Policies
Clearly communicate expectations. Common house rules include:
- No parties or events
- No smoking indoors
- No unregistered guests
- Quiet hours after 10 PM
You’ll also choose a cancellation policy (flexible, moderate, or strict). This affects how guests can cancel and whether you get paid for late cancellations.
8. Preview and Publish
Once your listing is complete, Airbnb gives you a preview. Double-check photos, descriptions, and pricing. When you're ready, click “Publish”.
Your Airbnb listing is now live. Guests can find and book your space immediately. New listings often get a visibility boost to help you start strong.
Tips
- Respond quickly to messages—Airbnb prioritizes responsive hosts in search results
- Keep your calendar accurate to avoid cancellations
- Update photos and descriptions regularly if your space changes
- After each stay, leave honest reviews and encourage guests to do the same
- Use the Airbnb app to manage your listing on the go
Creating a professional Airbnb listing helps you attract the right guests, reduce misunderstandings, and increase your chances of getting 5-star reviews. With the right preparation and clear communication, anyone can become a successful Airbnb host.
