Add Reservation Notification Email and Account Roles

Overview

The Frontdesk settings and Account settings should be operated on the computer. To receive the reservation notifications conveniently, you can add your email address in the Reservation Notification Email. To add the account list conveniently, you can add the account role first and assign the role to the account.

Steps on PC to Add Reservation Notification Email:

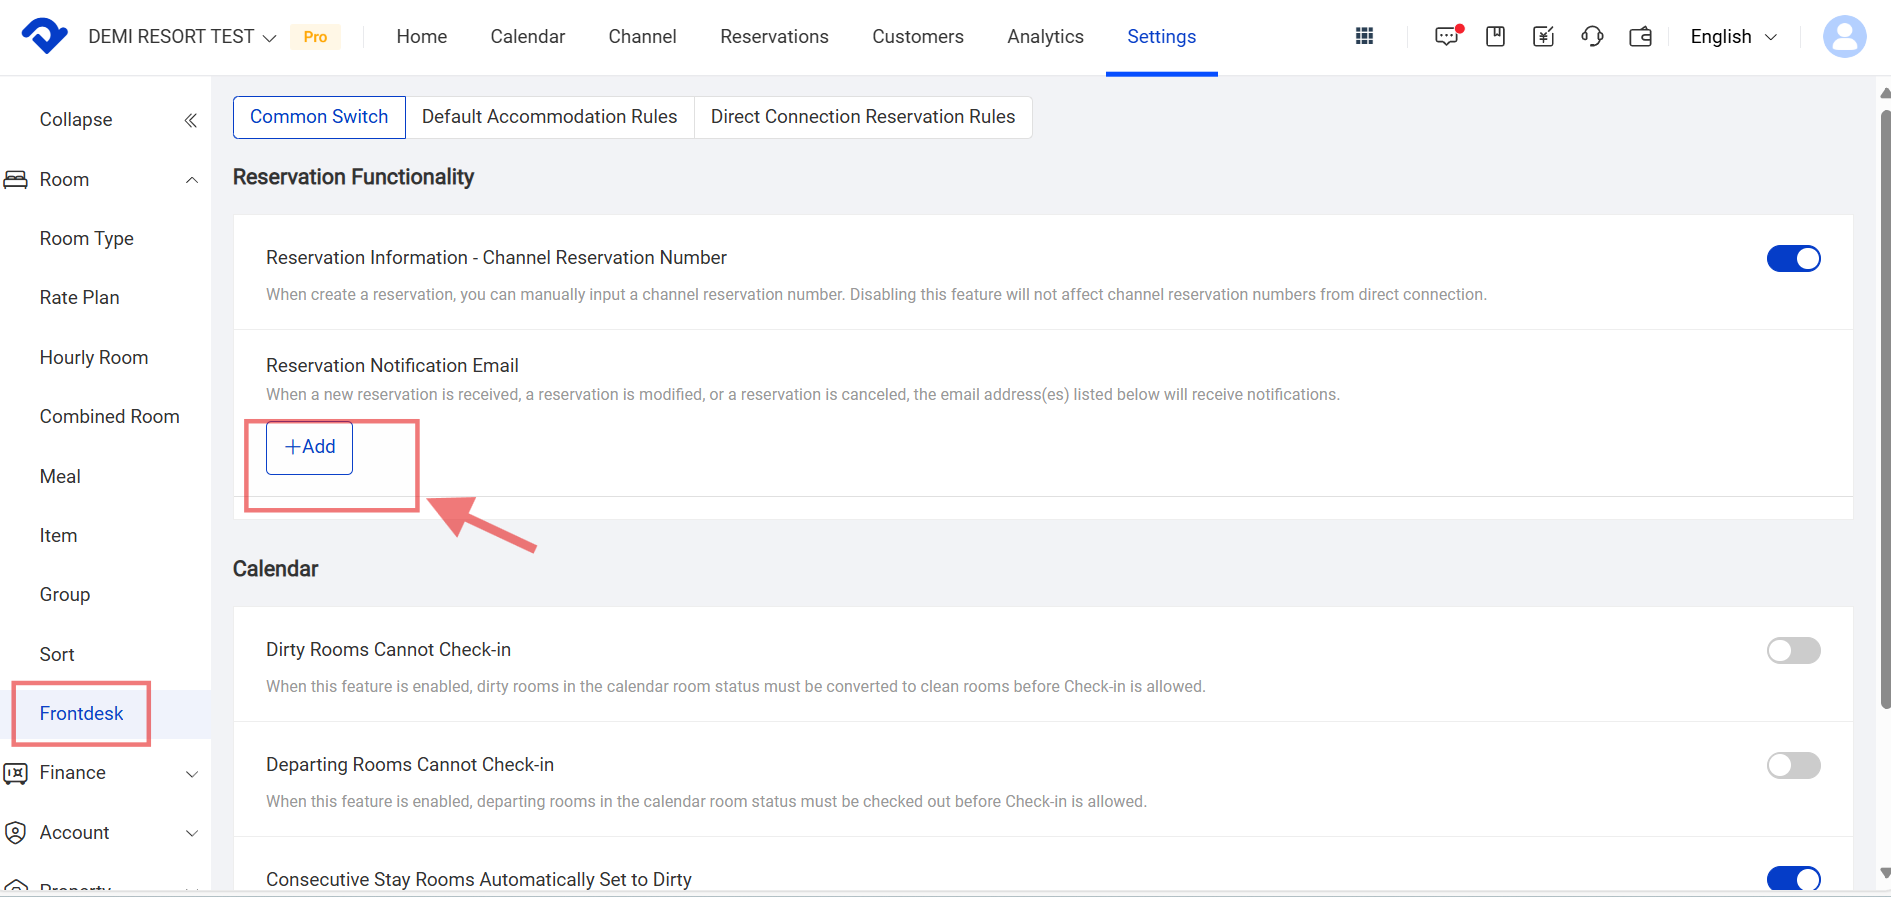
Go to the Settings page, and click Frontdesk. Add the email address in the Reservation Notification Email settings.

Add the email address

Steps on PC to Add Account Roles:

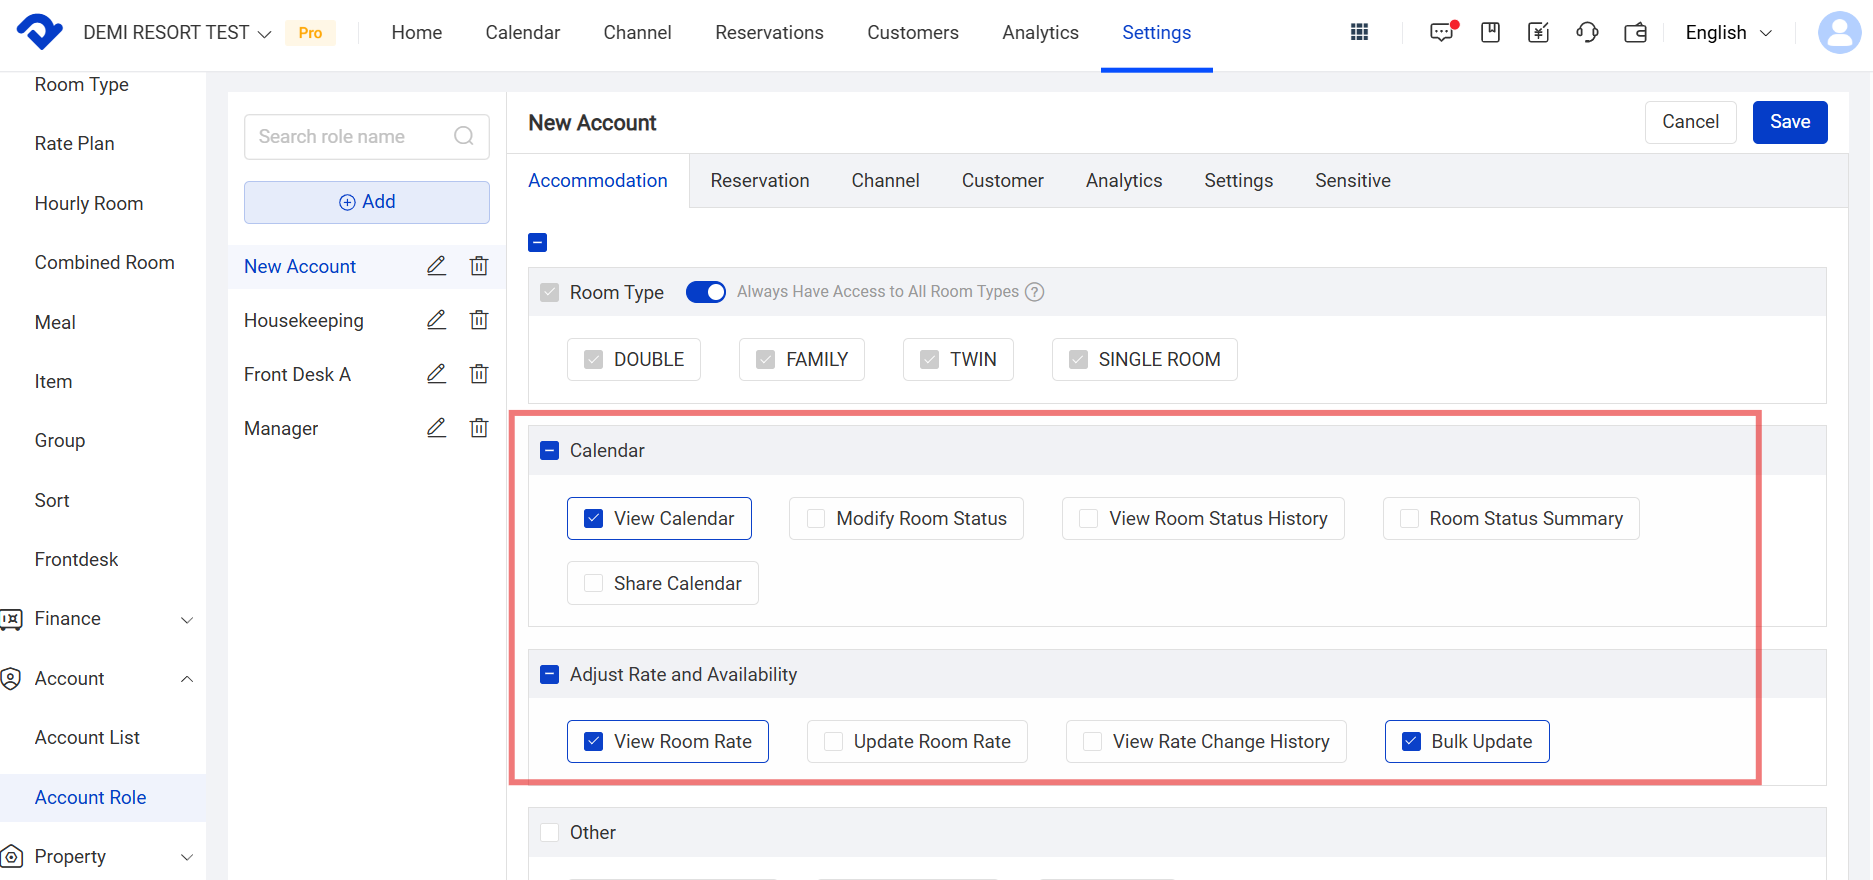
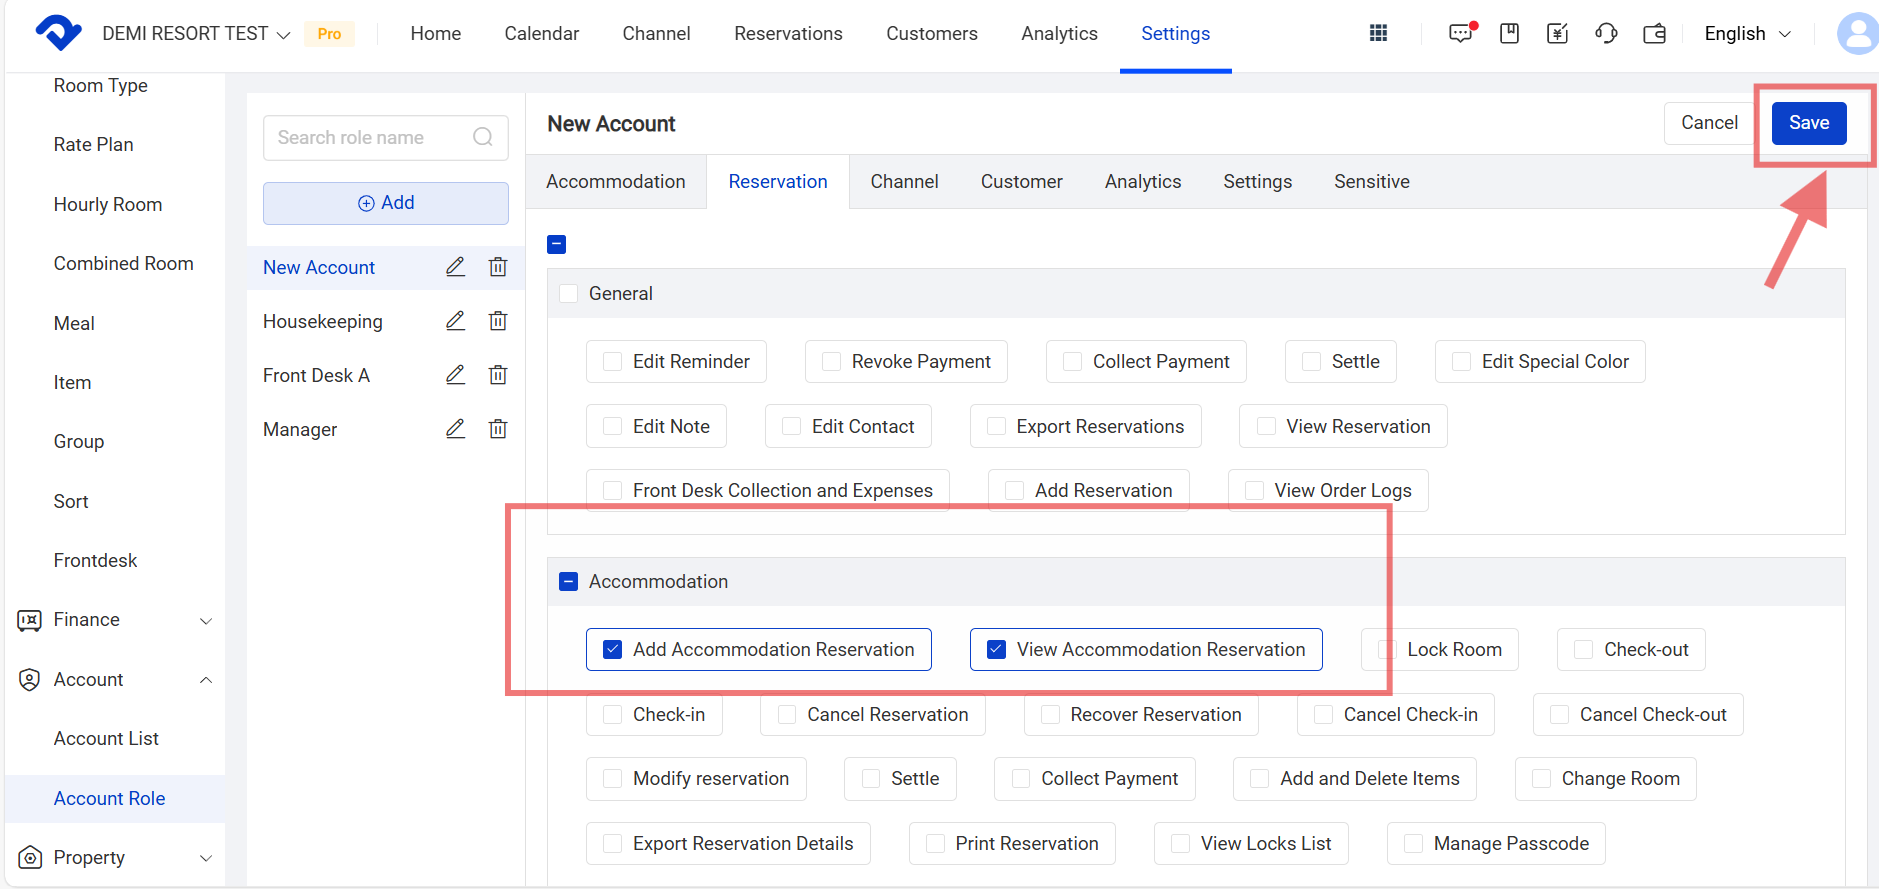
Step1: Go to the Settings page and click Account Role in the Account drop-down list. Click Add and edit the permissions for the account. Click Save.

Add and edit the permissions
setting
save

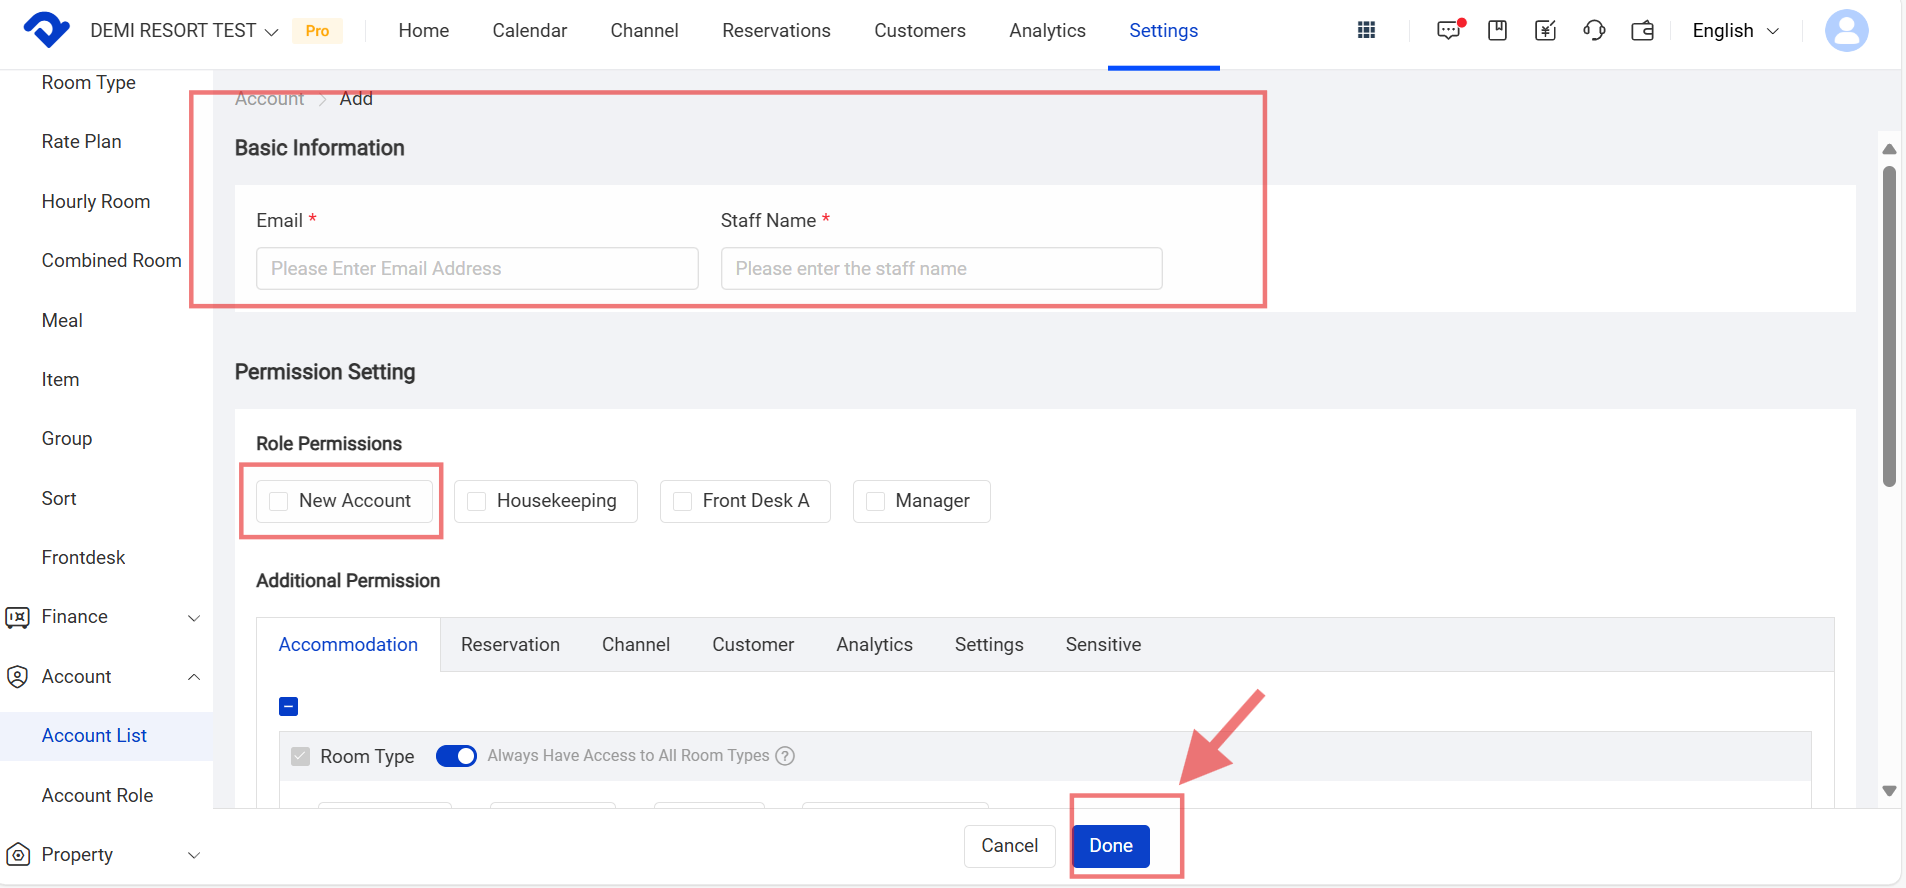
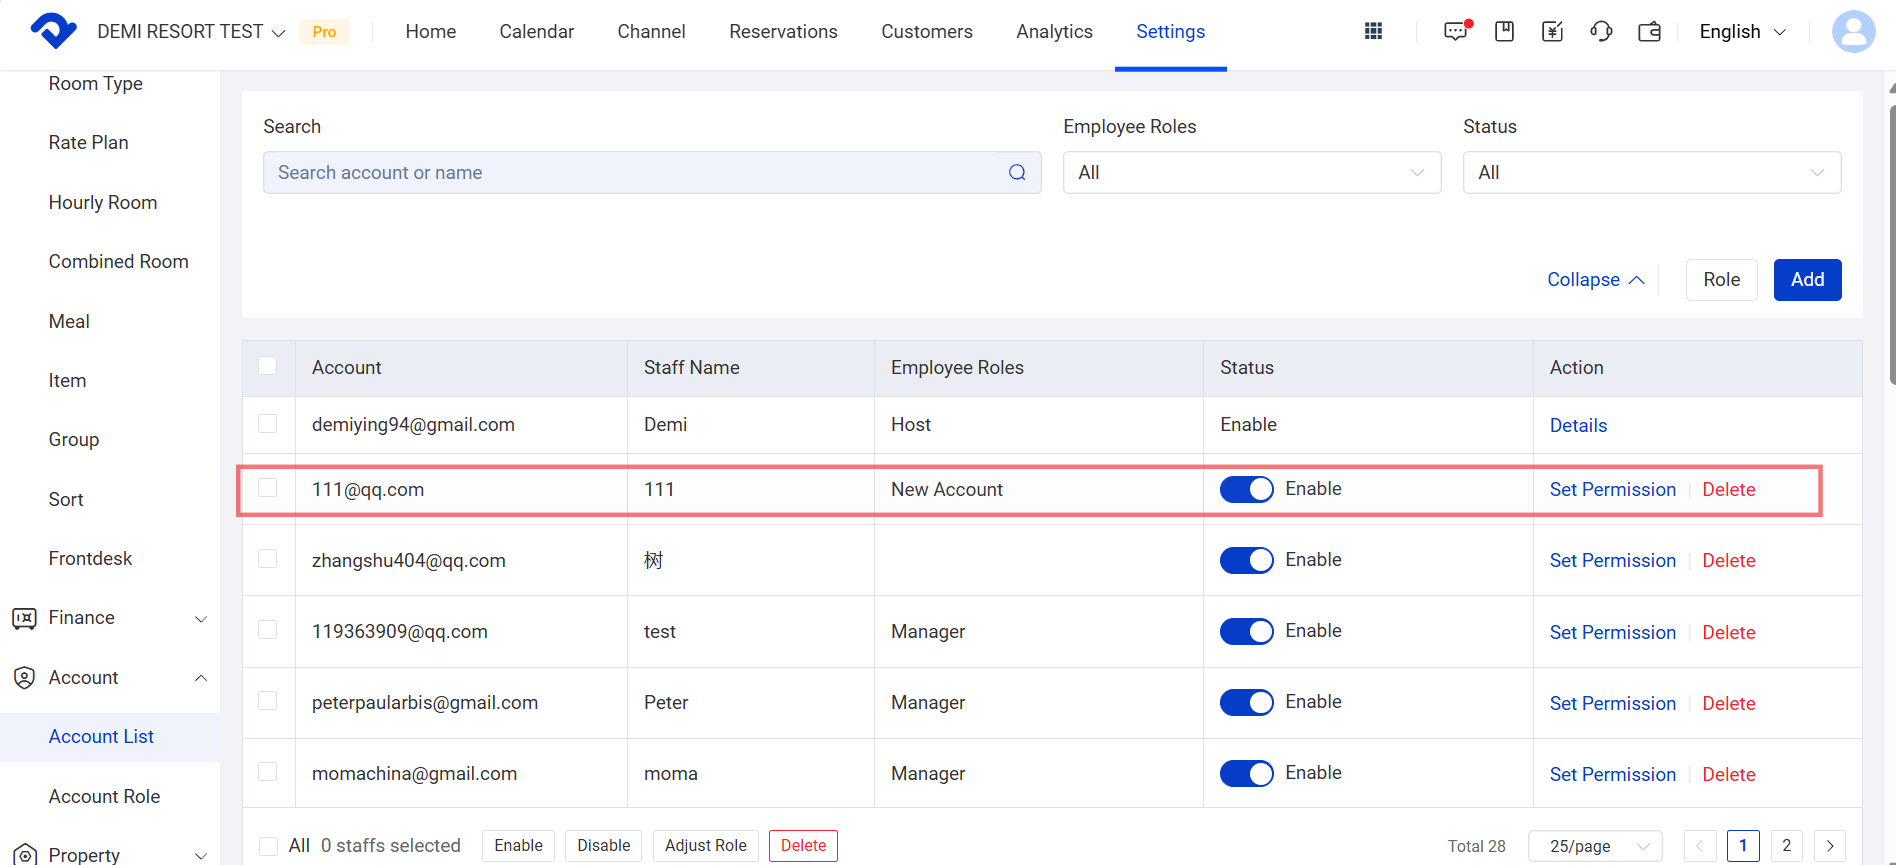
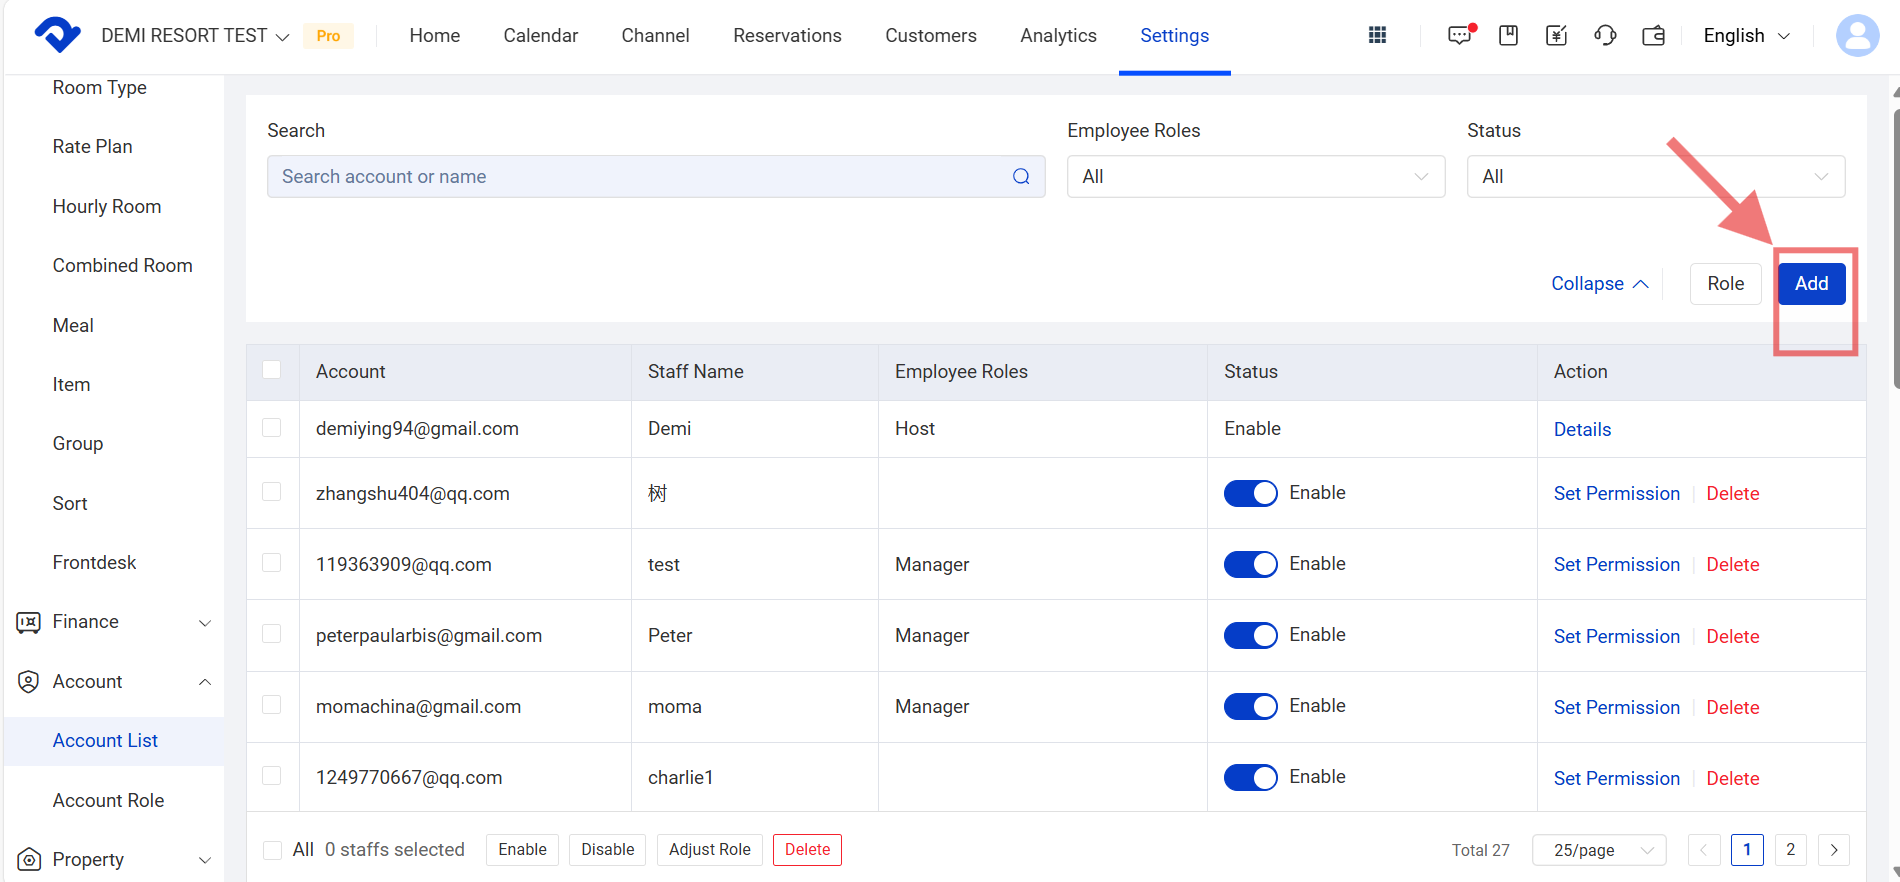
Step2: Go to the Settings page. Click Account List in the Account drop-down list. Click Add.

Account List

Step3: Fill in the Basic Information and assign the role to the newly created account. Click Done. The account will have the related permissions.

Basic Information
account

Related Articles

Convert the Dirty Room to Clean Room

Overview Once the reservation has been settled, the room will be made dirty. After the housekeeping task has been completed, you need to convert the dirty room to a clean room. Steps in Calendar View to convert to a clean room: Go to the Calendar View and move to the

Set up Calendar Display Settings

To satisfy your idea calendar view, you may set up the calendar display settings. You can set up the view by room type, room number, or group. You may view the daily calendar by Daily View settings. You may also change the color to display. Steps to Set up the

Set Up An Hourly Room and Its Night Count

Overview We support hourly room set-up if you need it. The hourly room night count can be set at your convenience. Let's set up the proper design to match your preference. Set Up An Hourly Room: Step1: Go to the Settings page. Select Hourly Room from the Room

Add/Delete A Room Type and Change the Room Assignment

Overview There must be various room types for every owner. And to add room types is the first step to manage the reservations. We need to learn to add/delete room types. If there are some changes in the room assignment, we can also make it. Add A Room Type:

Set Up Combined Rooms and the Rate Allocation

Overview To satisfy a multi-room reservation for an entire villa or multiple rooms, we support combined room settings. Owners can distribute the combined rooms' value to the total. Set Up Combined Rooms: Step1: Go to the Settings page. Select Combined Room from the Room drop-down list. Click Add. Step2:

Change the Room Assignment for A Reservation

Overview We can change the room assignment for a reserved or checked-in reservation. Change the Room Assignment for A Reserved one: Step1: Go to the Calendar page and find the reservation you want to change the room assignment for. Step2: Click the reservation and go to the Details page. Select