Set Up Combined Rooms and the Rate Allocation

Overview

To satisfy a multi-room reservation for an entire villa or multiple rooms, we support combined room settings. Owners can distribute the combined rooms' value to the total.

Set Up Combined Rooms:

Step1: Go to the Settings page. Select Combined Room from the Room drop-down list. Click Add.
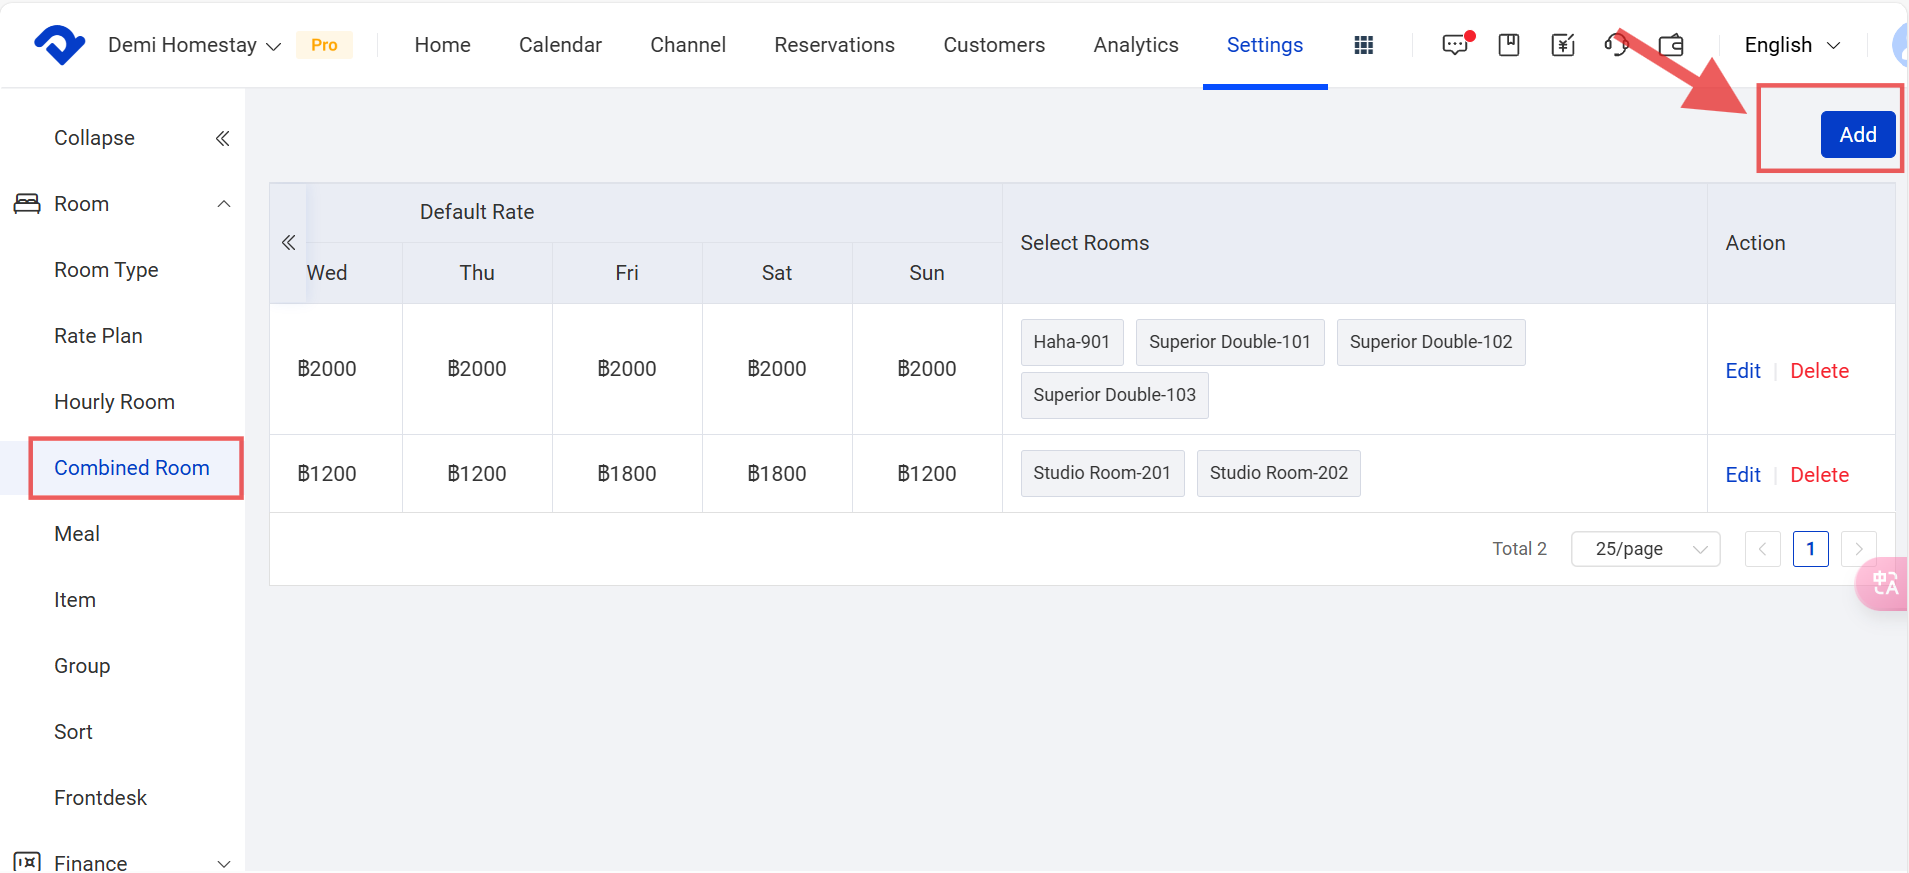
settings-combined room-add

Step2: After you finish filling in the Add pop-up box, click Done.
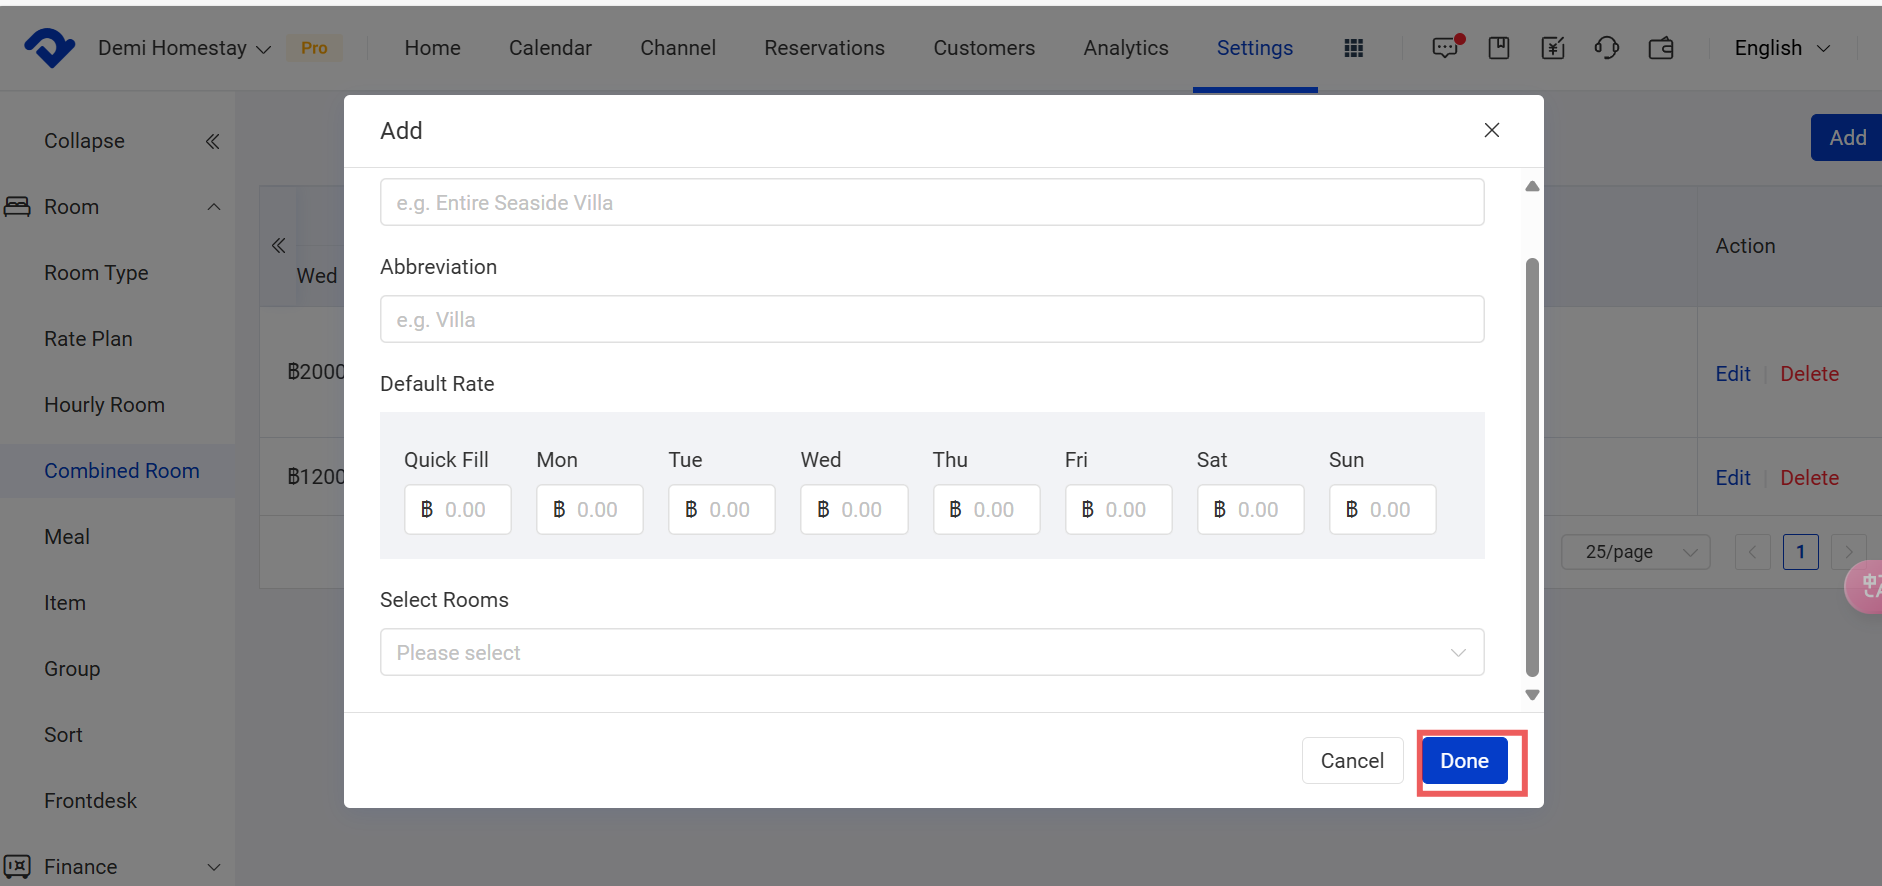
add pop-up box

Allocate Each Room's Rate for the Combined Room:

Step1: Go to the Settings page. Select Combined Room and go to the expected combined room to click the expansion symbol. Click Edit under the Action option.
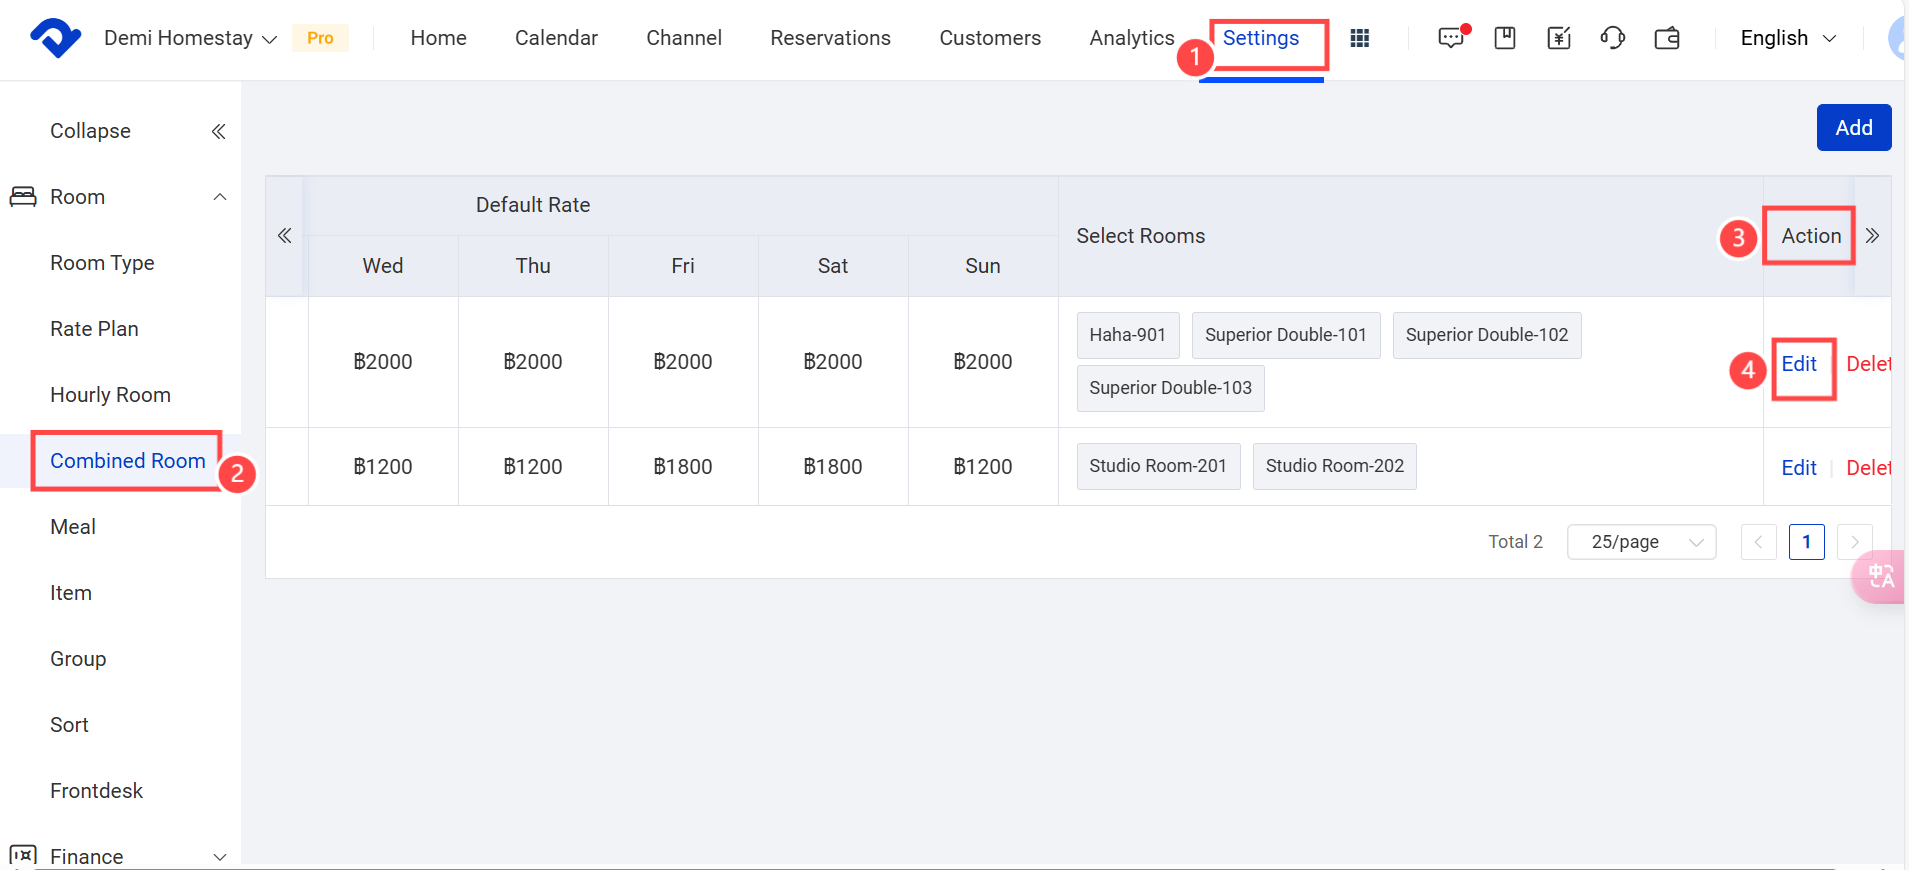
settings-combined room-action-edit

Step2: Fill in the Rate Allocation and click Save.
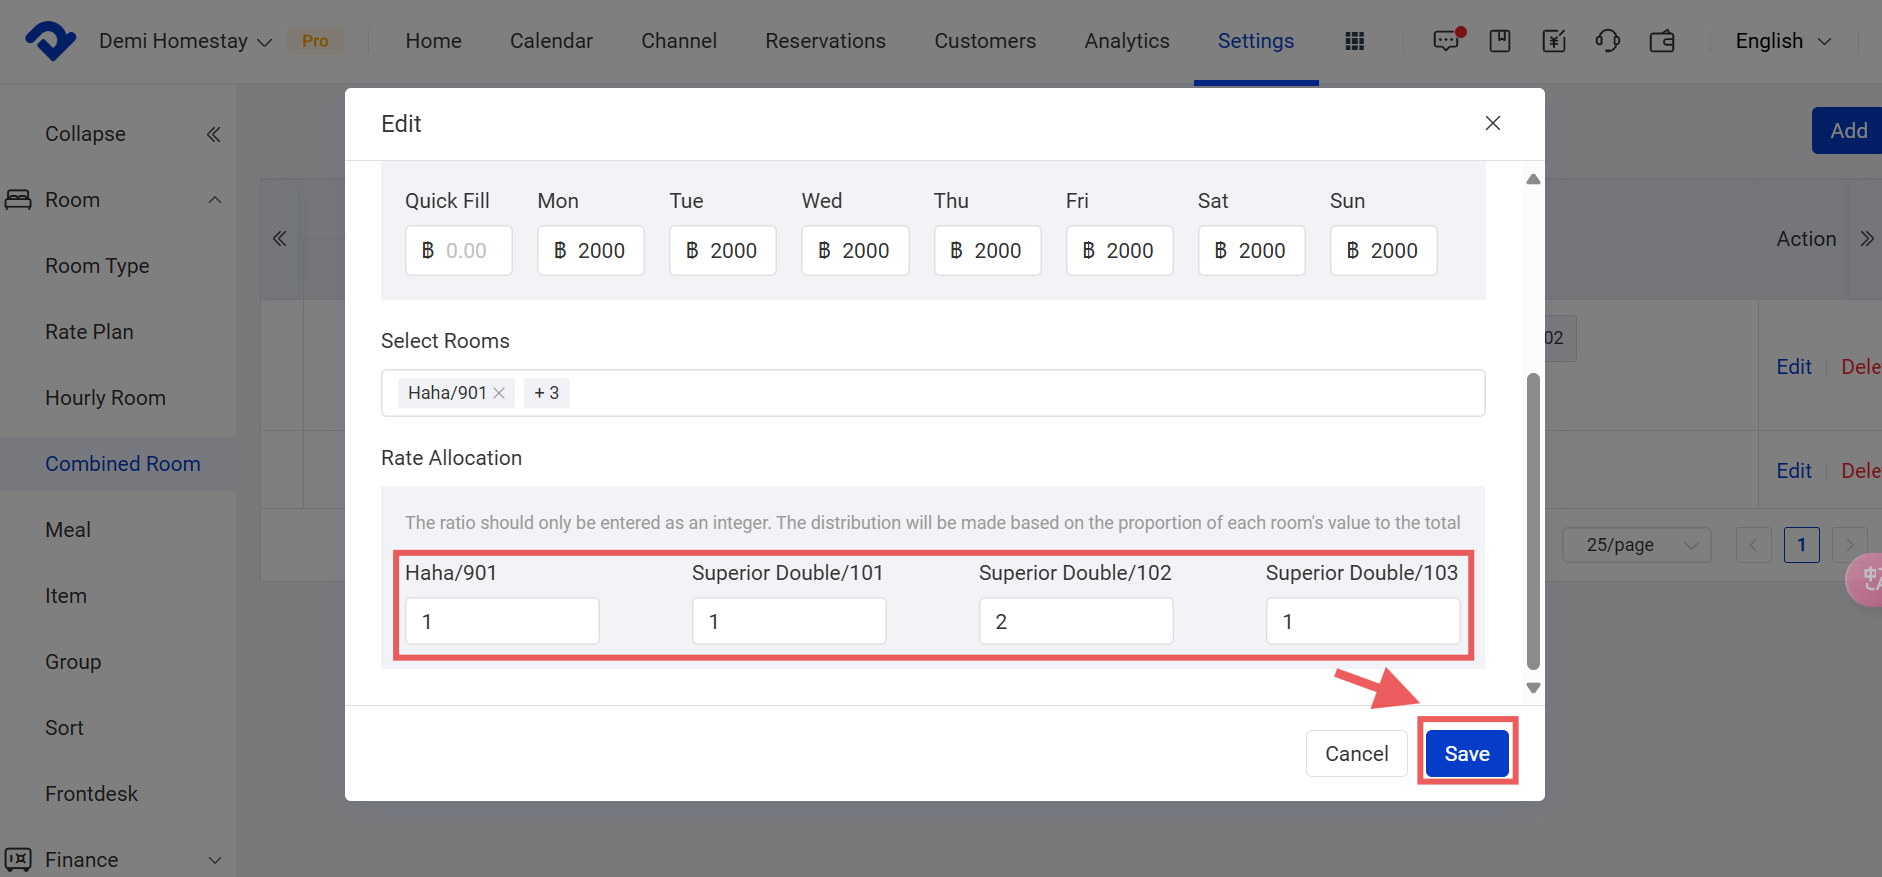
Rate Allocation

Note1:

The combined room types occupy the room value when each combined room type is created.

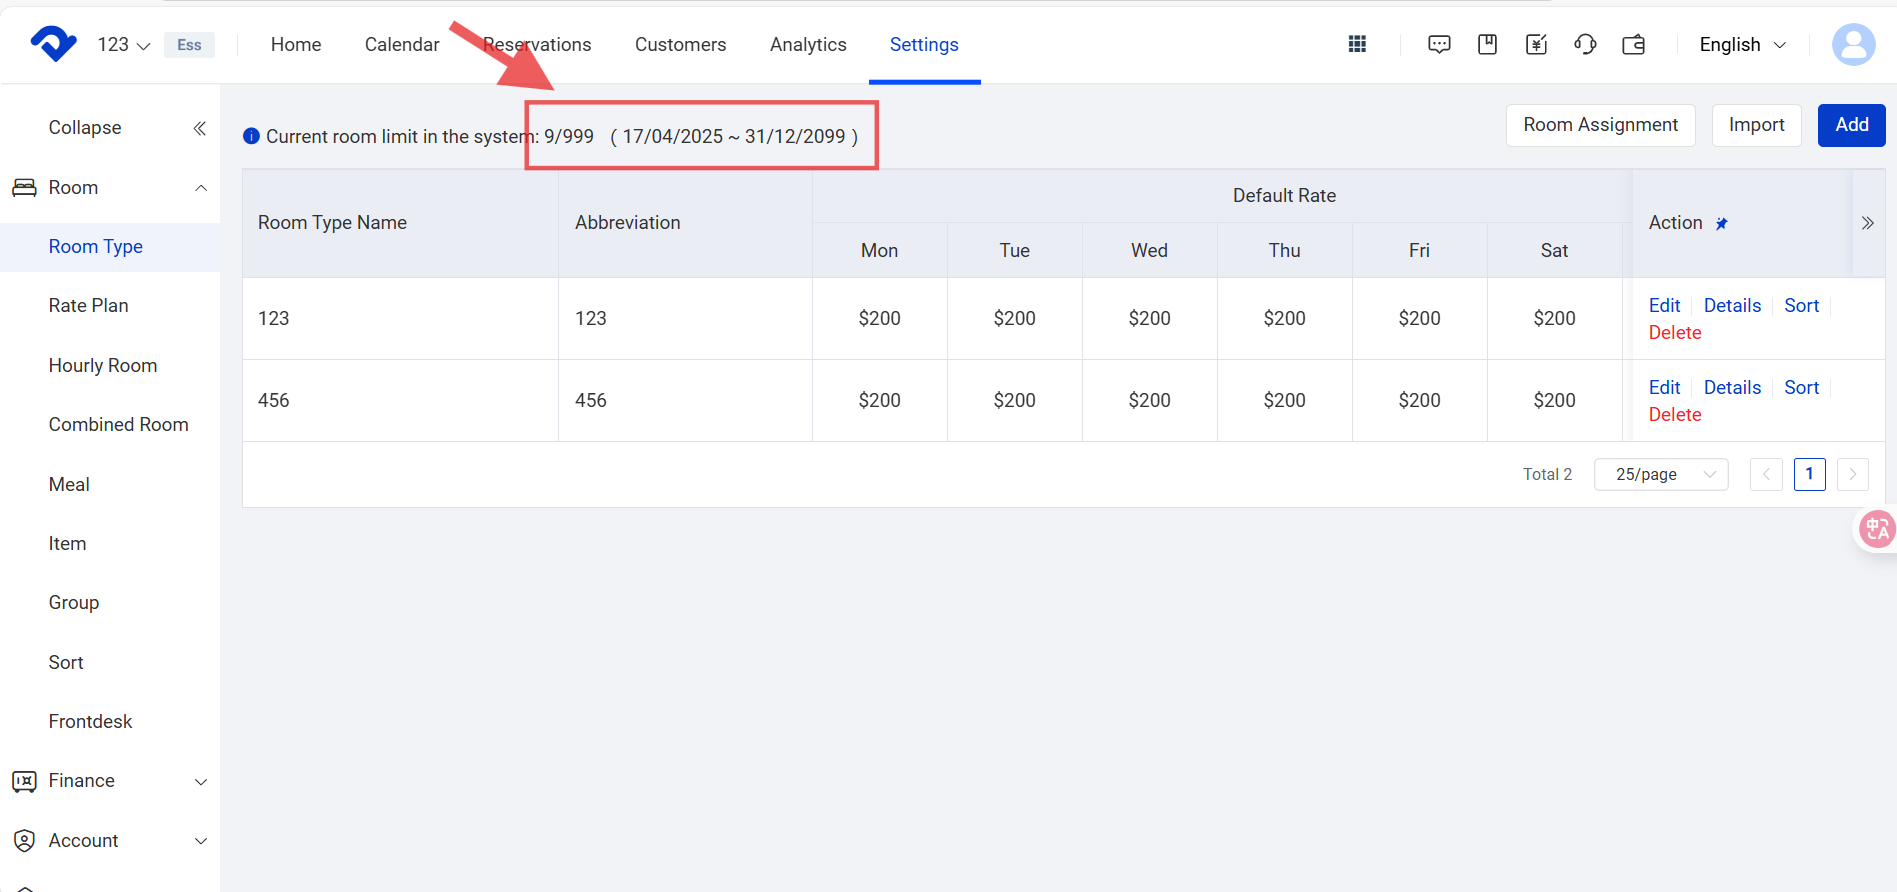
Step1: You can see the room value is "8/999" at first.
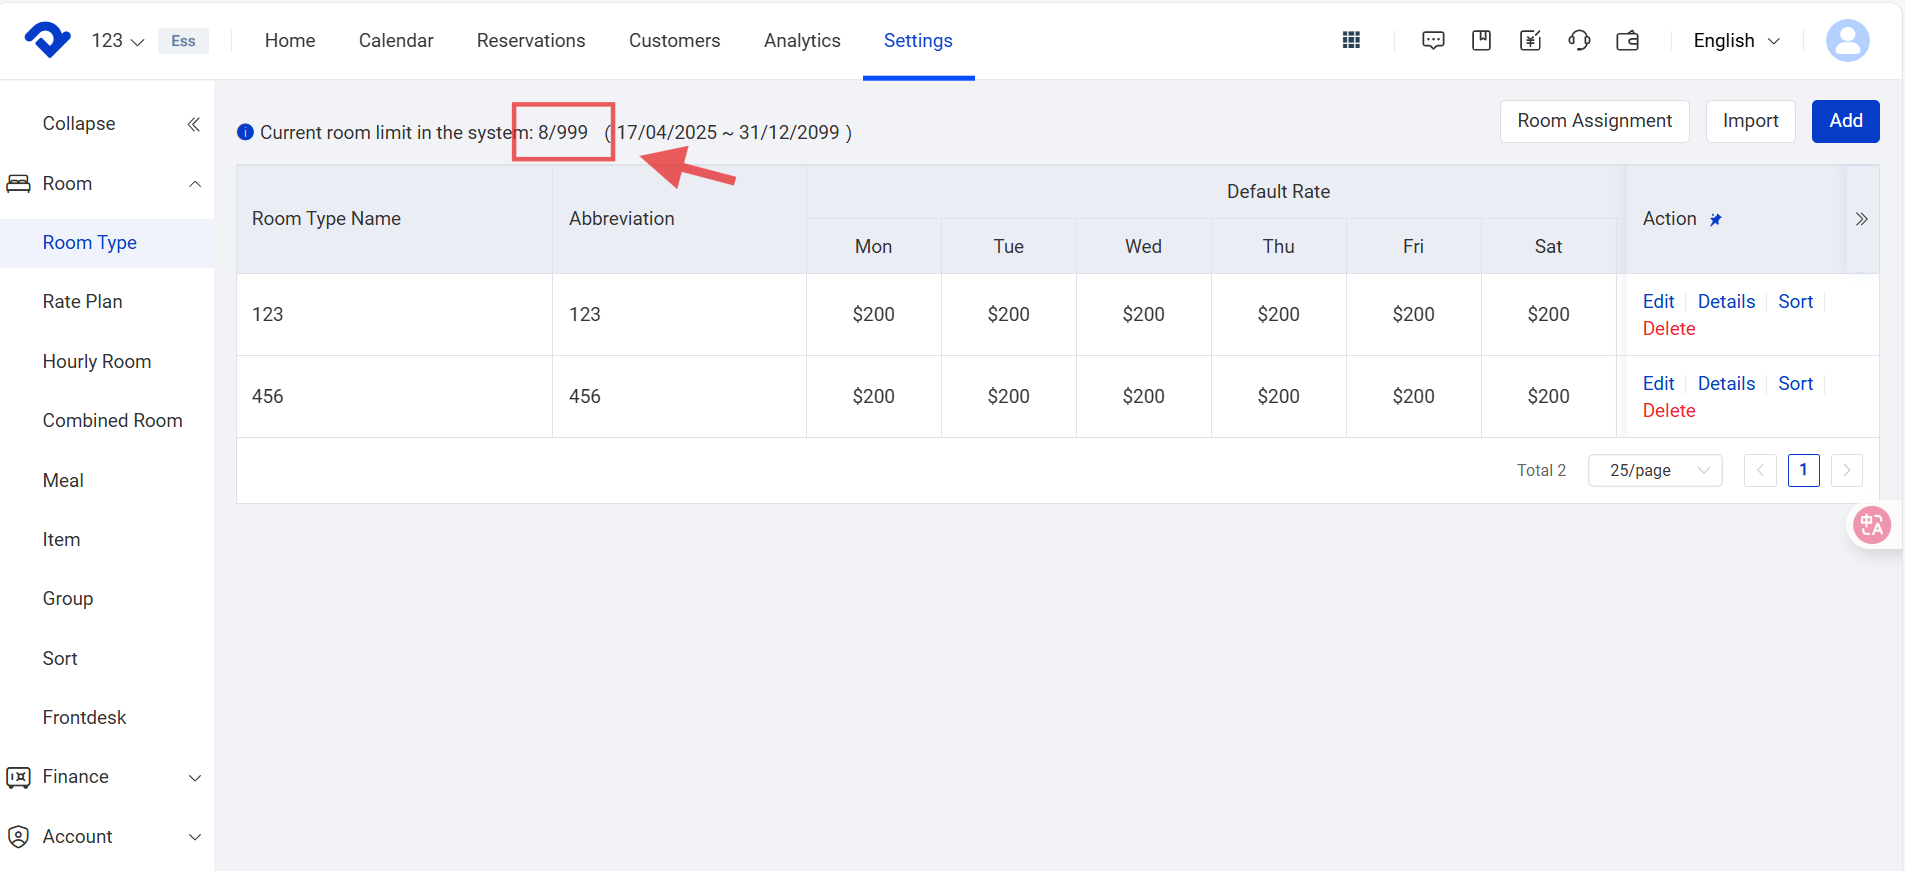
You can see the room value is "8/999" at first

Step2: When you create a new combined room type, the value is "9/999".
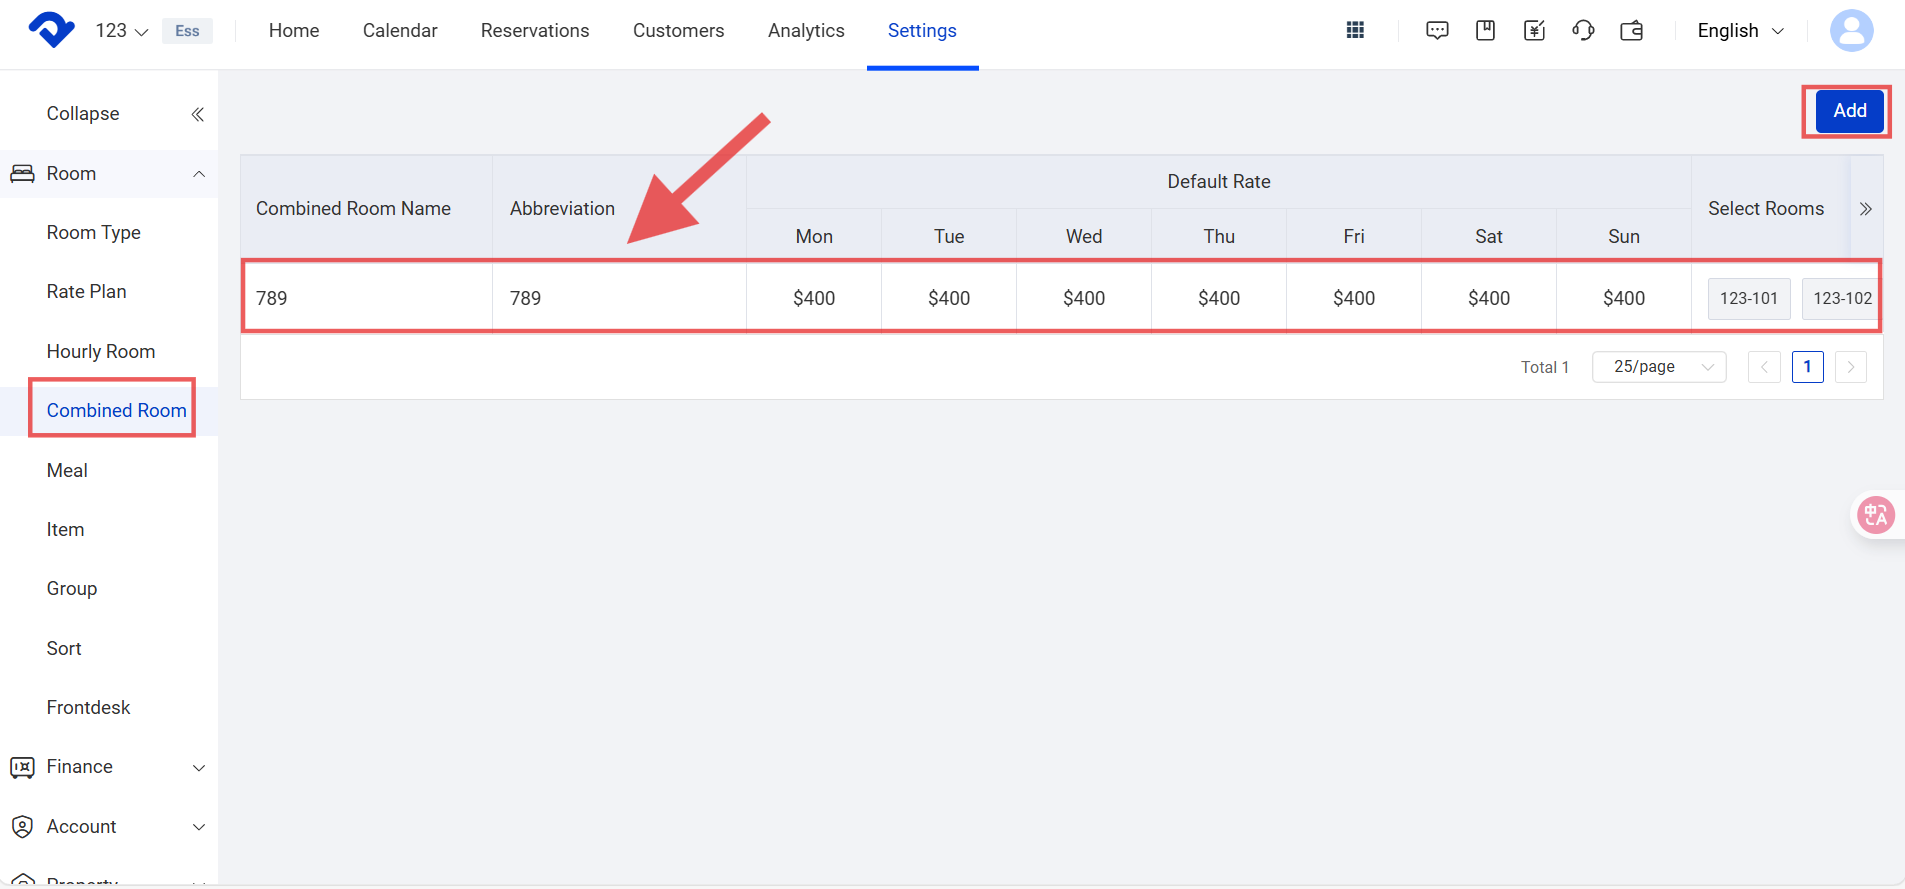
add combined room
When you create a new combined room type, the value is "9/999"

Note2:

The combined room type can be connected to the OTA channels. While the hourly room type can not.
Related Articles

Subscribe to the Professional Plan

Steps 1. Log in to your Smart Order account. ※If you were invited to join a property, you do not need to register an account. On your first login, select Log in with verification code or click Forgot Password to set a password, then log in to the property. Log

Agoda Direct Connect

After direct connection, the current PMS room status and rates will be pushed immediately to each connected channel. Please review the notes below and make sure the PMS pre-setup is completed before connecting. Pre-Connection Checklist – PMS Initial Setup | Smart OrderComplete the pre-connection checklist for PMS initial setup to ensure accurate

Holiday Settings Feature Guide

The Holiday Settings feature displays national holidays, source market holidays, custom holidays, and events in the PMS calendar. This helps businesses identify special dates in advance and check pricing, inventory, channel sales, and staffing arrangements based on actual operations. This feature is only used for calendar labels and reminders. It

Add New Staff Members

Path: Settings > Account > Account List > Add Steps 1. Click Settings. 2. Click Account 3. Click Account List. 4. Click Add. 5. Enter the employee’s email, name, and the required permissions, then click Save. A. Employee email B. Employee name C or D. Select a role directly,

How to Modify Role and Account Permissions

Use Role Management to preset multiple roles with different permissions, such as housekeeping, Property A staff, or administrators, and then assign those roles to different accounts in batches. I.Modify Role Permissions You can add or remove permissions for all accounts assigned to the same role at once. 1. Navigate

Role Management / Add Employees

Path: Settings - - Account - Account Role I. Role Management Role Management lets you preset multiple roles with different permissions, such as housekeeping, Property A staff, or administrators, and then assign those roles to different accounts in batches. 1. Navigate to Settings - - Account - Account Role 2.