Set Up An Hourly Room and Its Night Count

Overview

We support hourly room set-up if you need it. The hourly room night count can be set at your convenience. Let's set up the proper design to match your preference.

Set Up An Hourly Room:

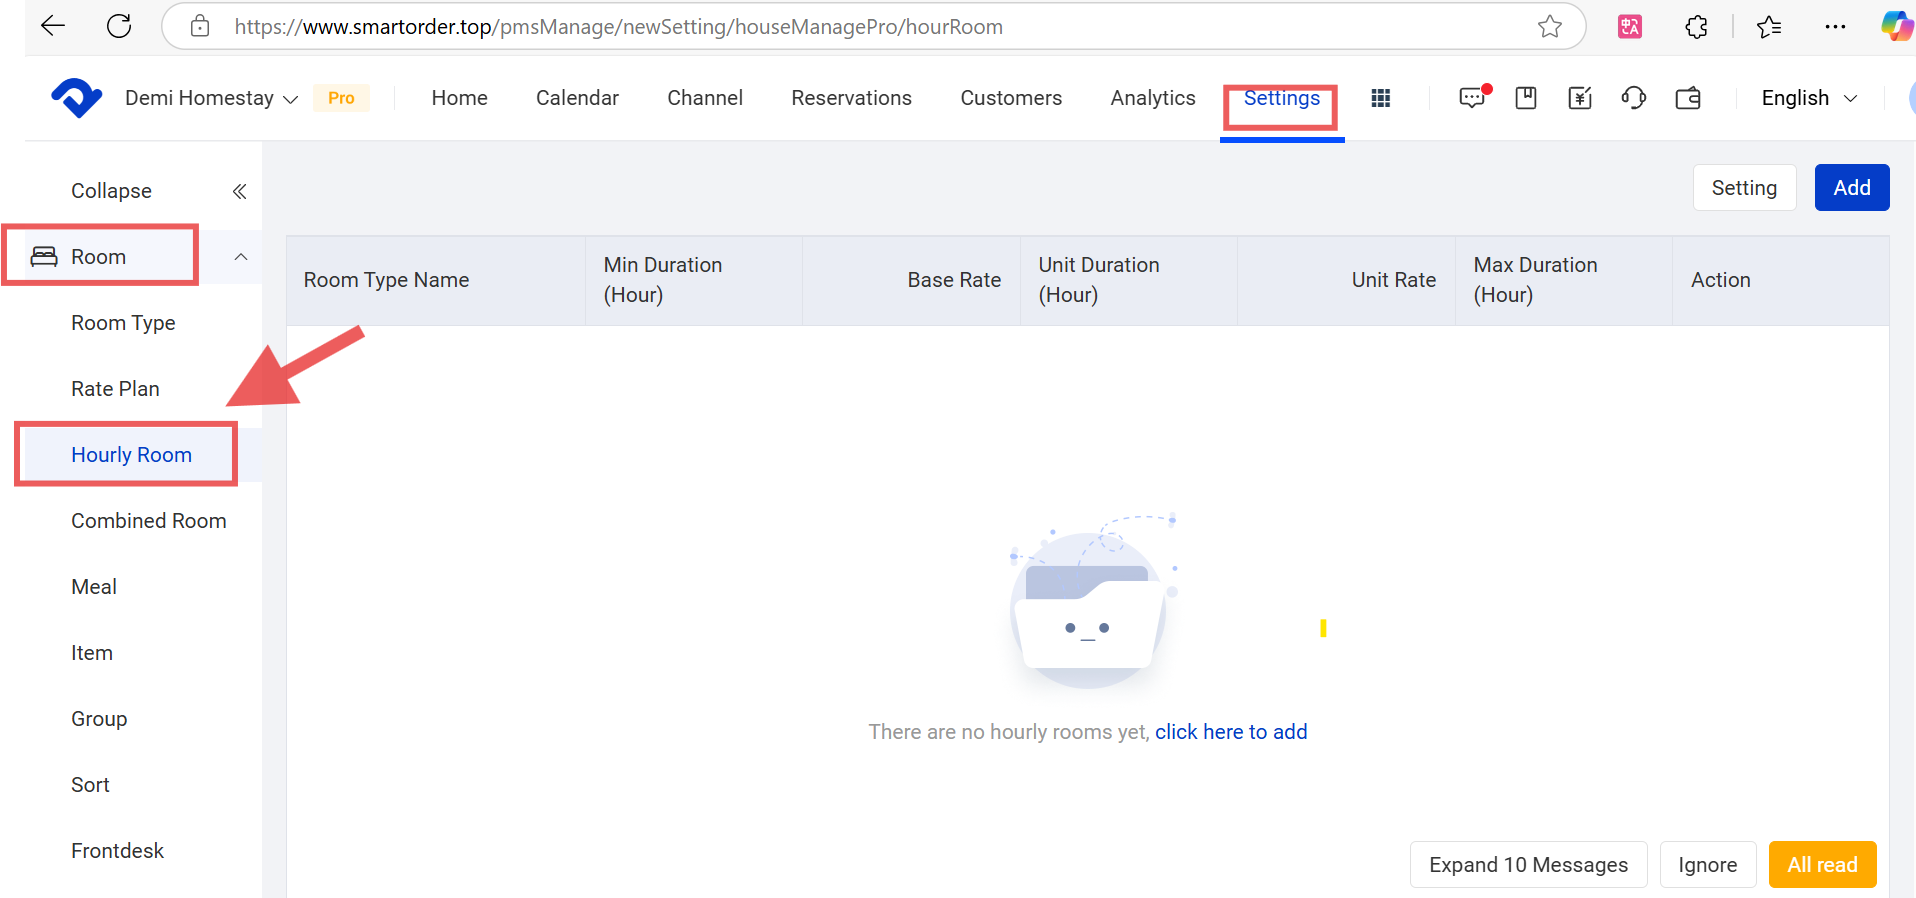
Step1: Go to the Settings page. Select Hourly Room from the Room drop-down list.

Hourly Room

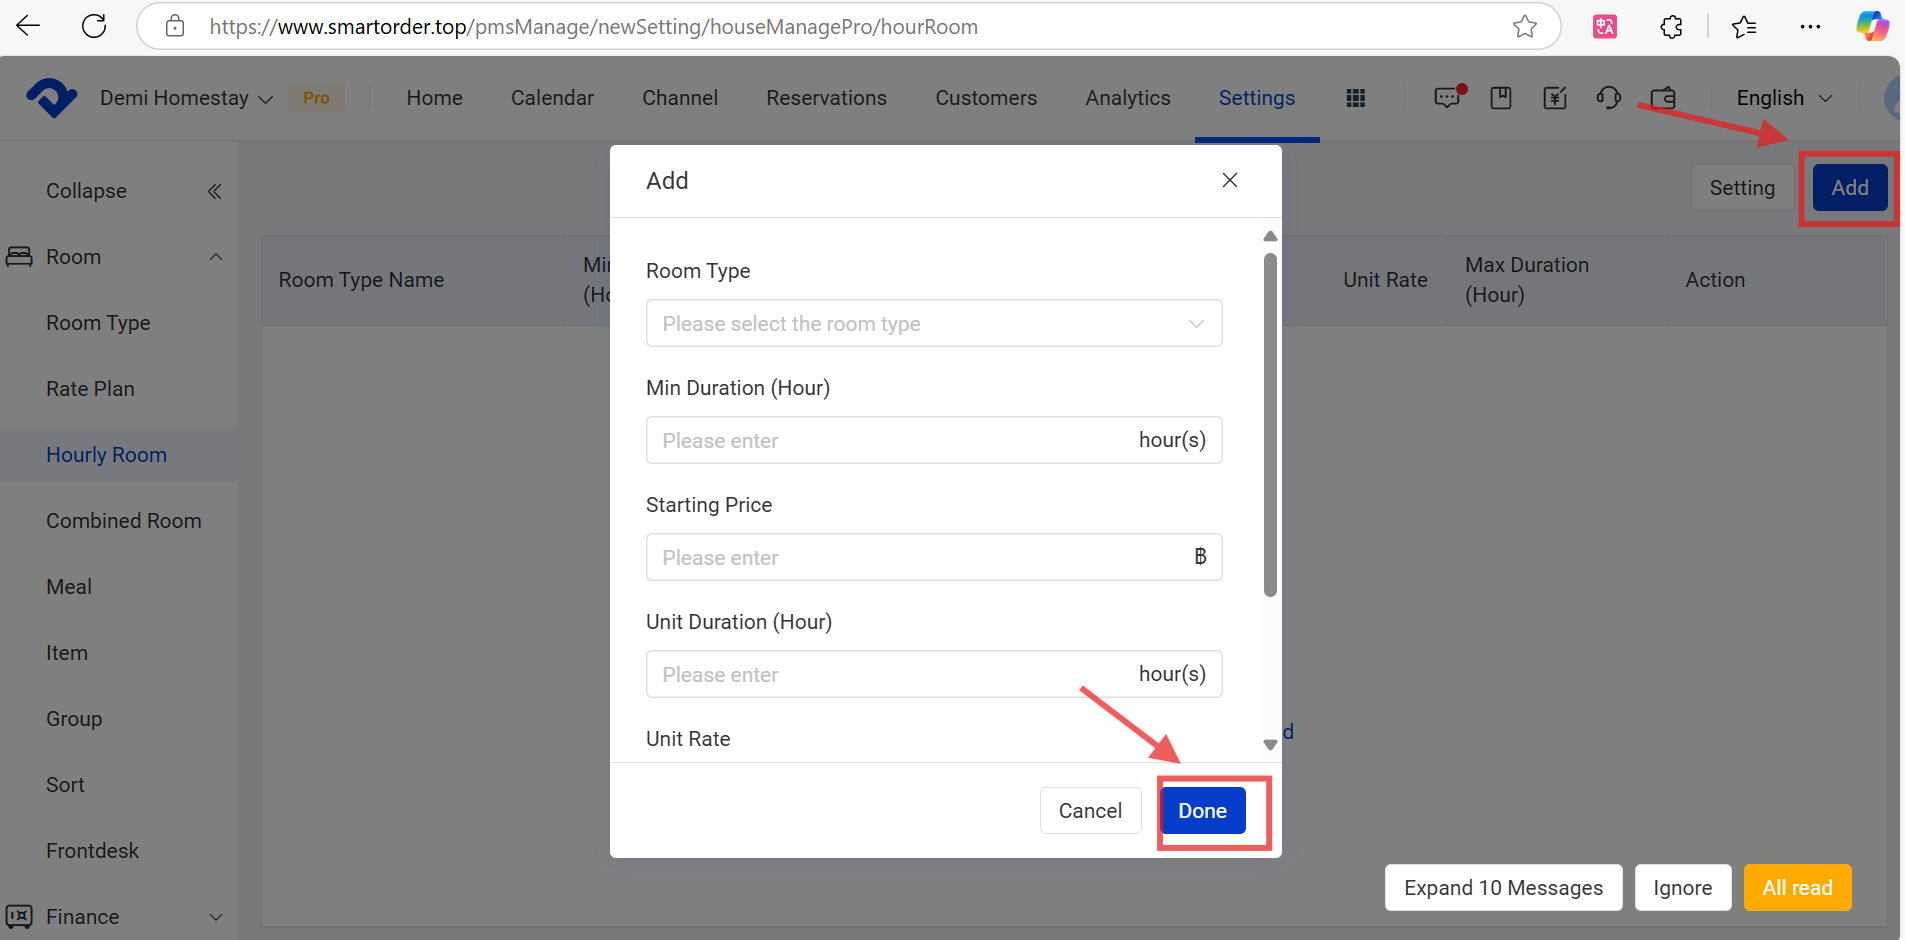
Step2: Click Add, and there will be an Add pop-up box. Fill in the blanks and click Done.

Add pop-up box

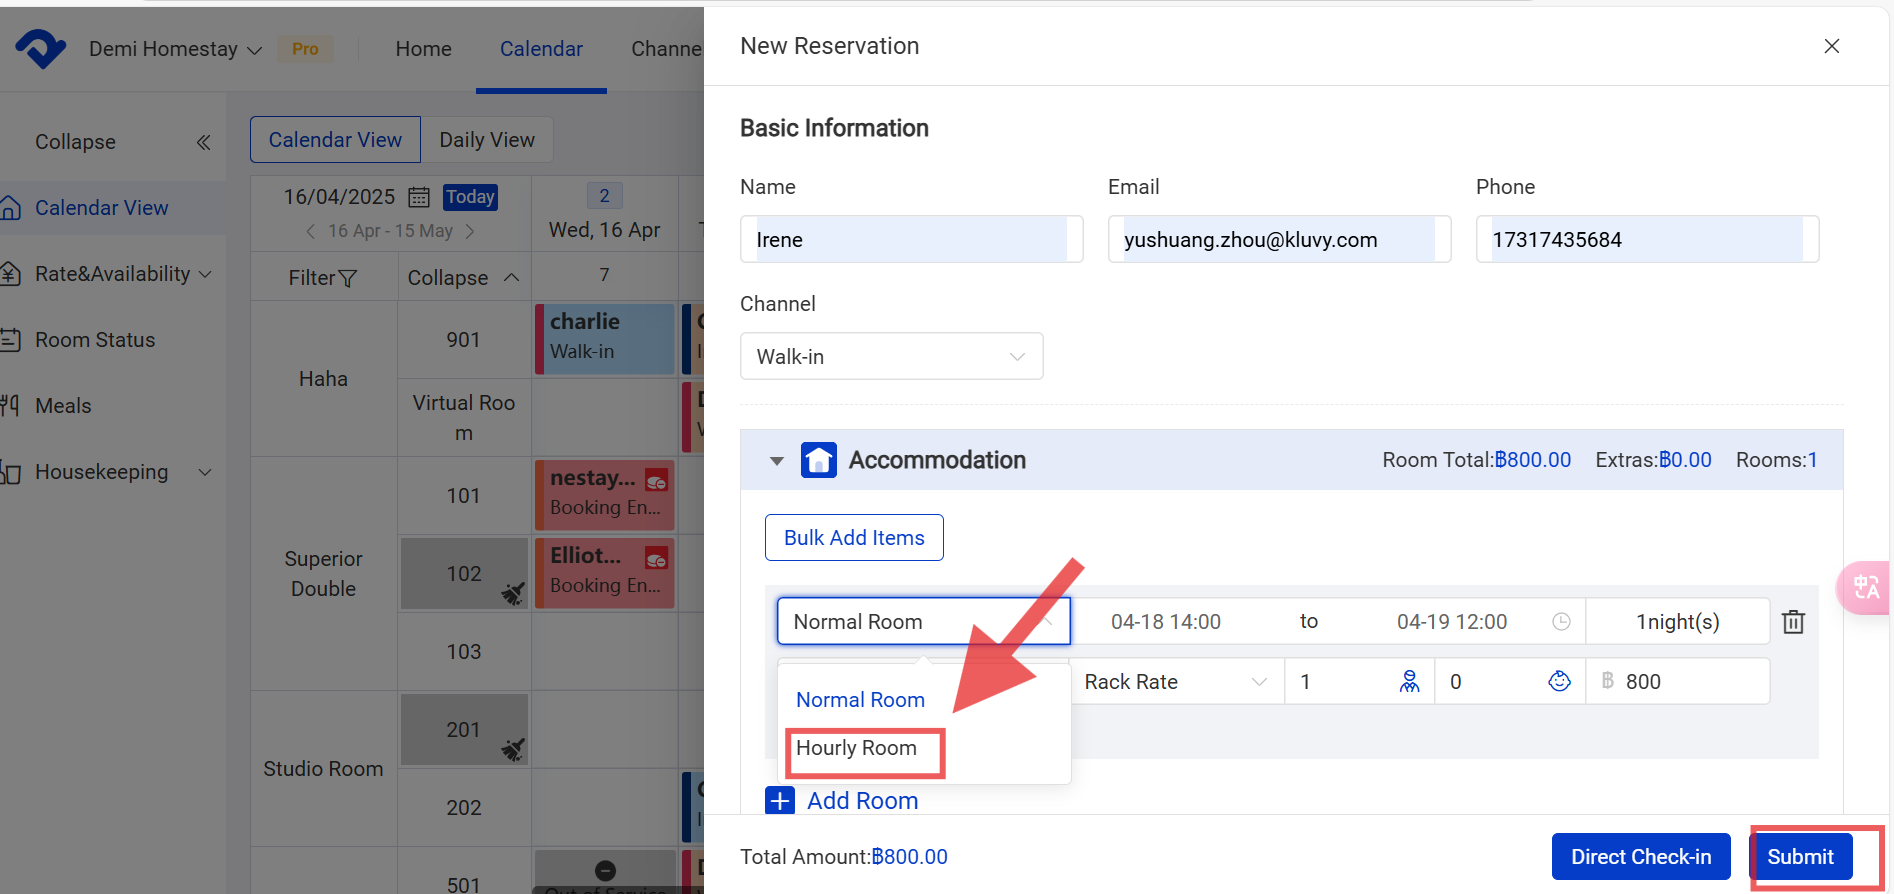
Step3: If you want to create an hourly order or change a reservation to an hourly room type, you can create or modify the reservation and choose Hourly Room. Click Submit.

choose hourly room and submit

Set Up An Hourly Room Night Count:

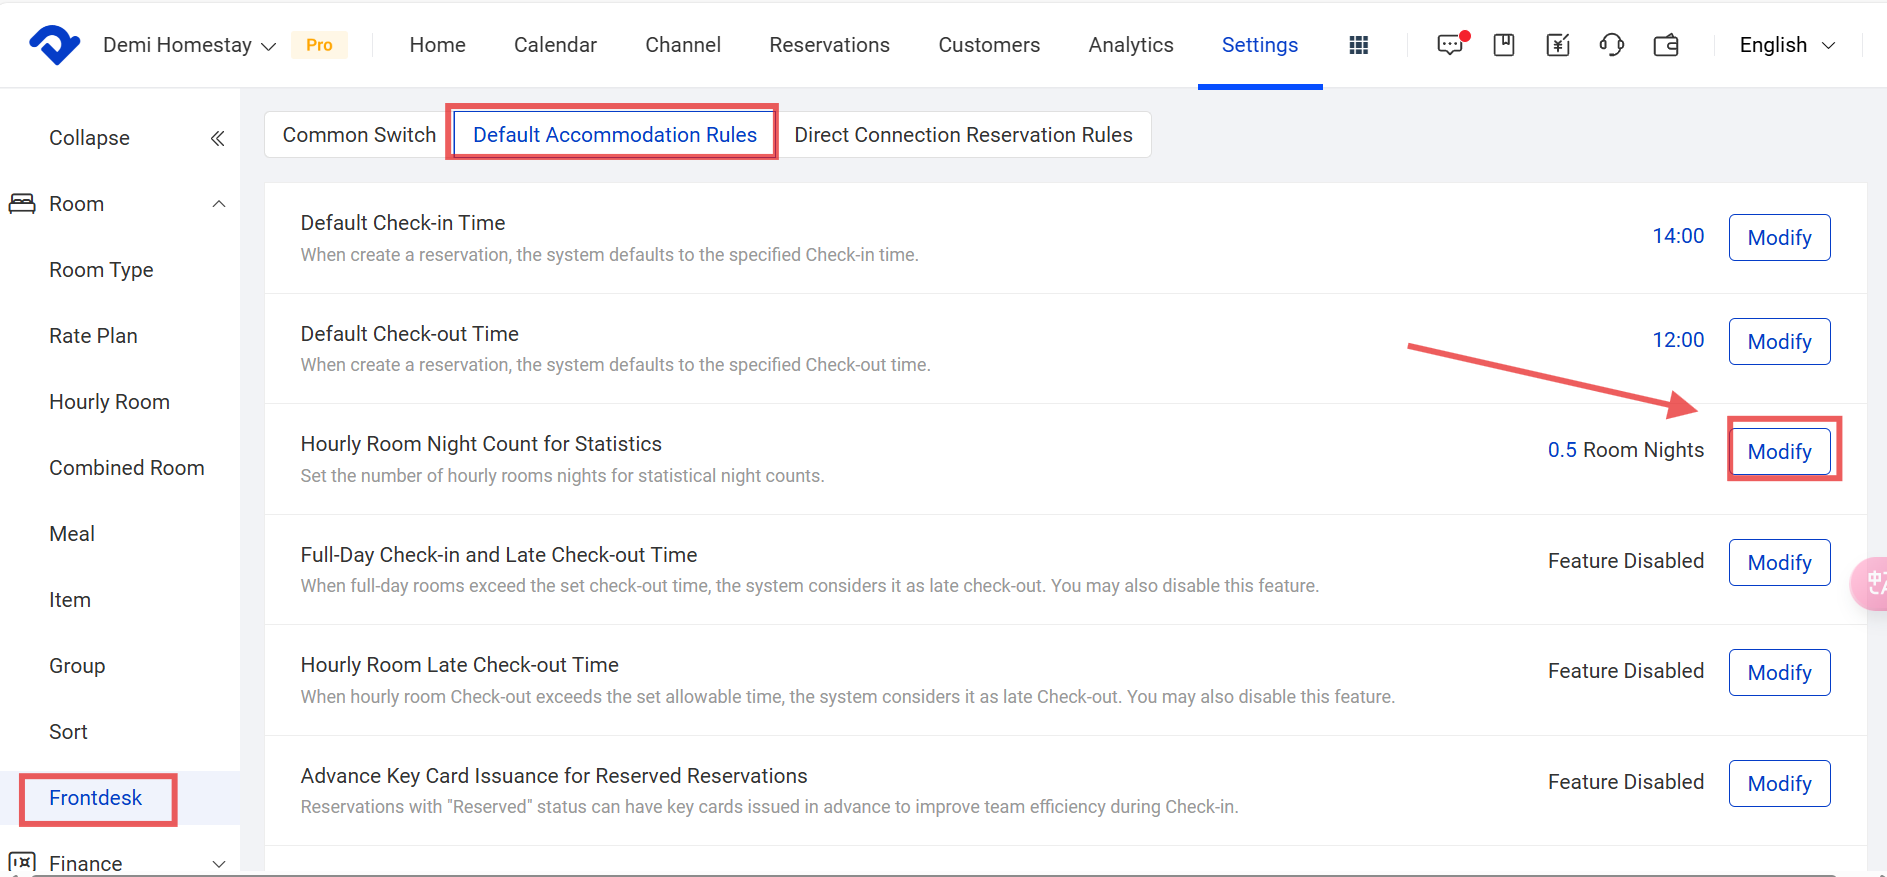
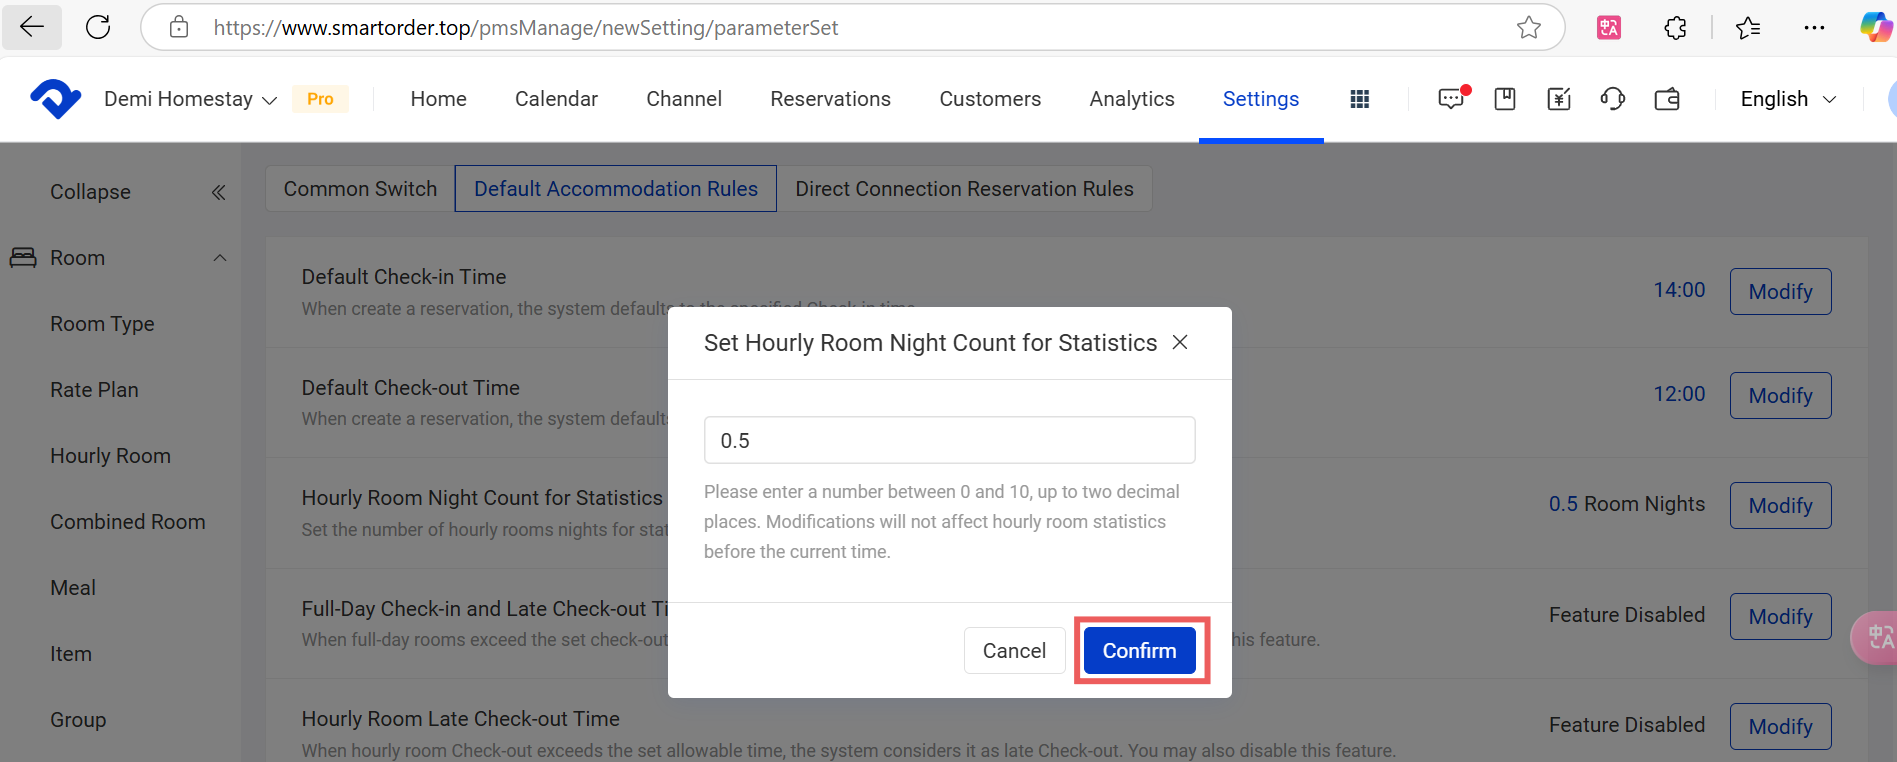
Way1: Go to the Settings page. Select Frontdesk from the Room drop-down list. Select Hourly Room Night Count for Statistics and click Modify. After you finish setting up the count, click Confirm.

Settings-Room-Frontdesk-Default Accommodation-Hourly Room Night Count for Statistics-Modify
Confirm

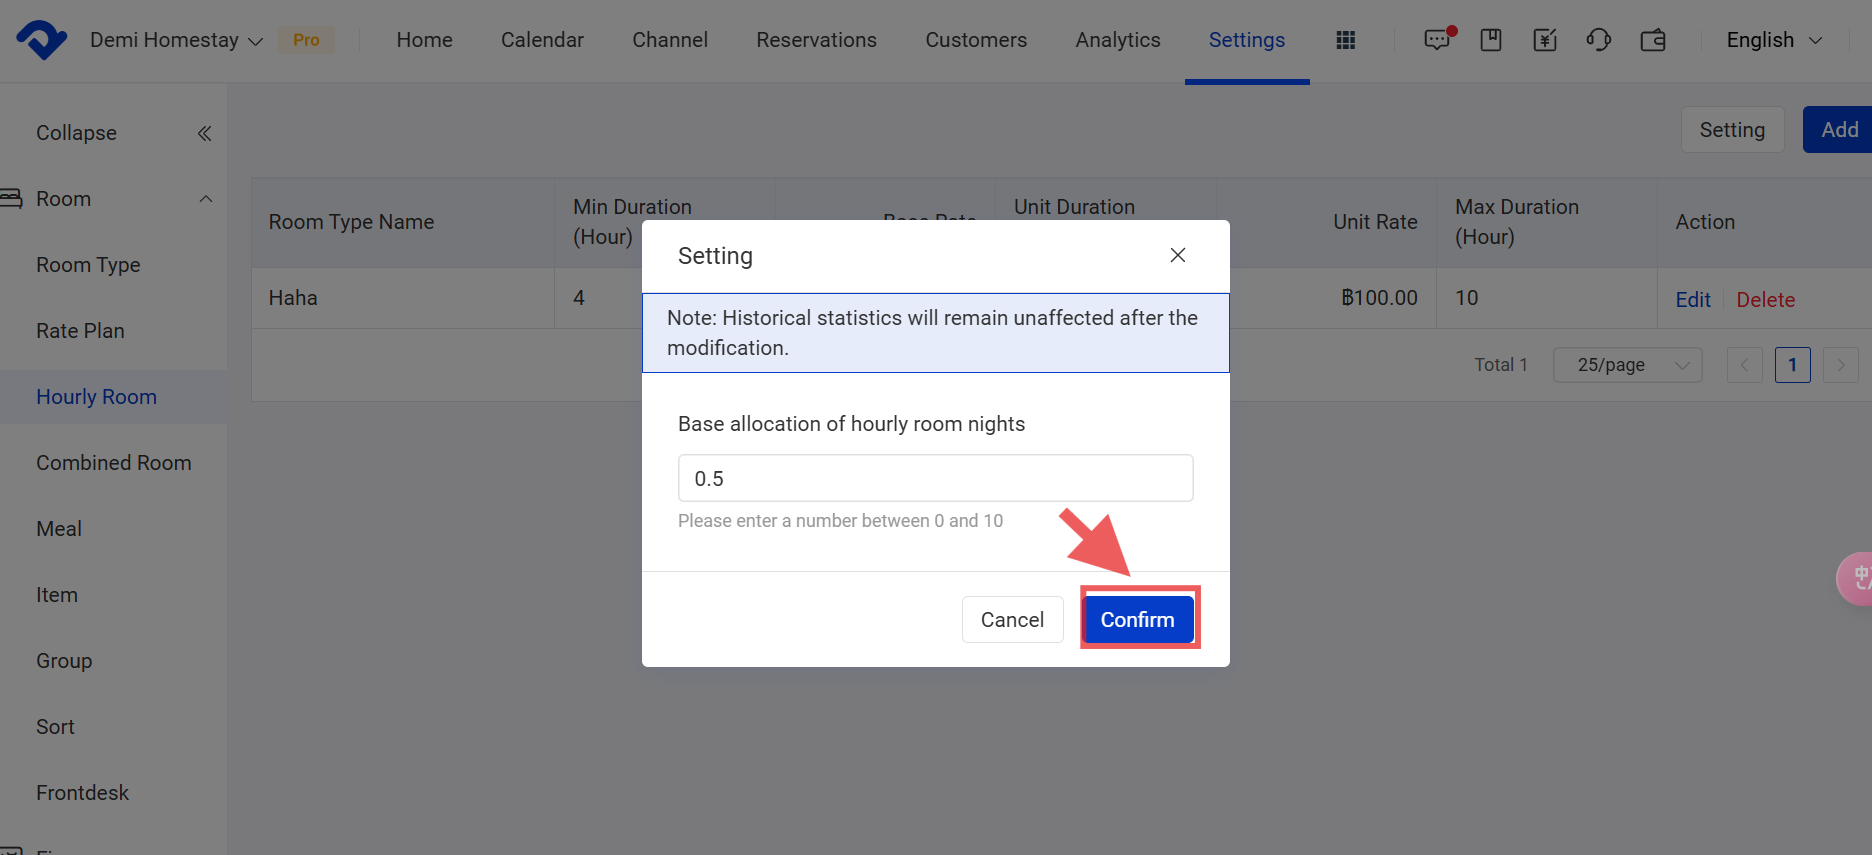
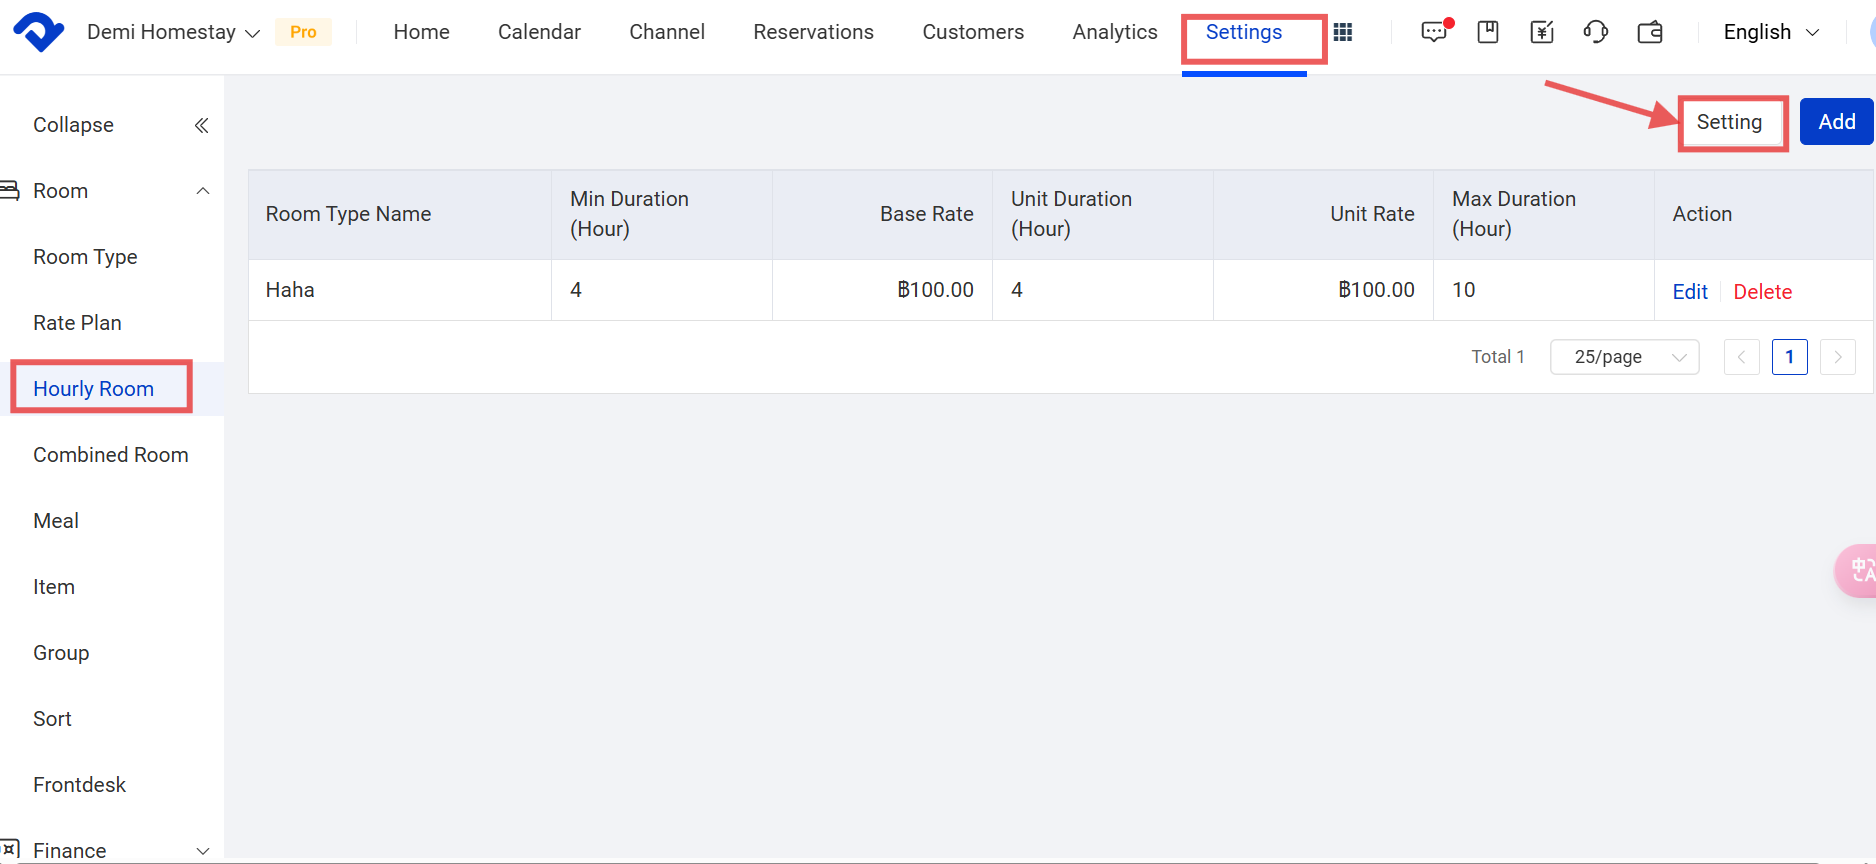
Way2: Go to the Settings page. Select Hourly Room from the Room drop-down list. Click Setting. After filling in the count, click Confirm.

Settings-Room-Hourly Room-Setting
Confirm

Note:

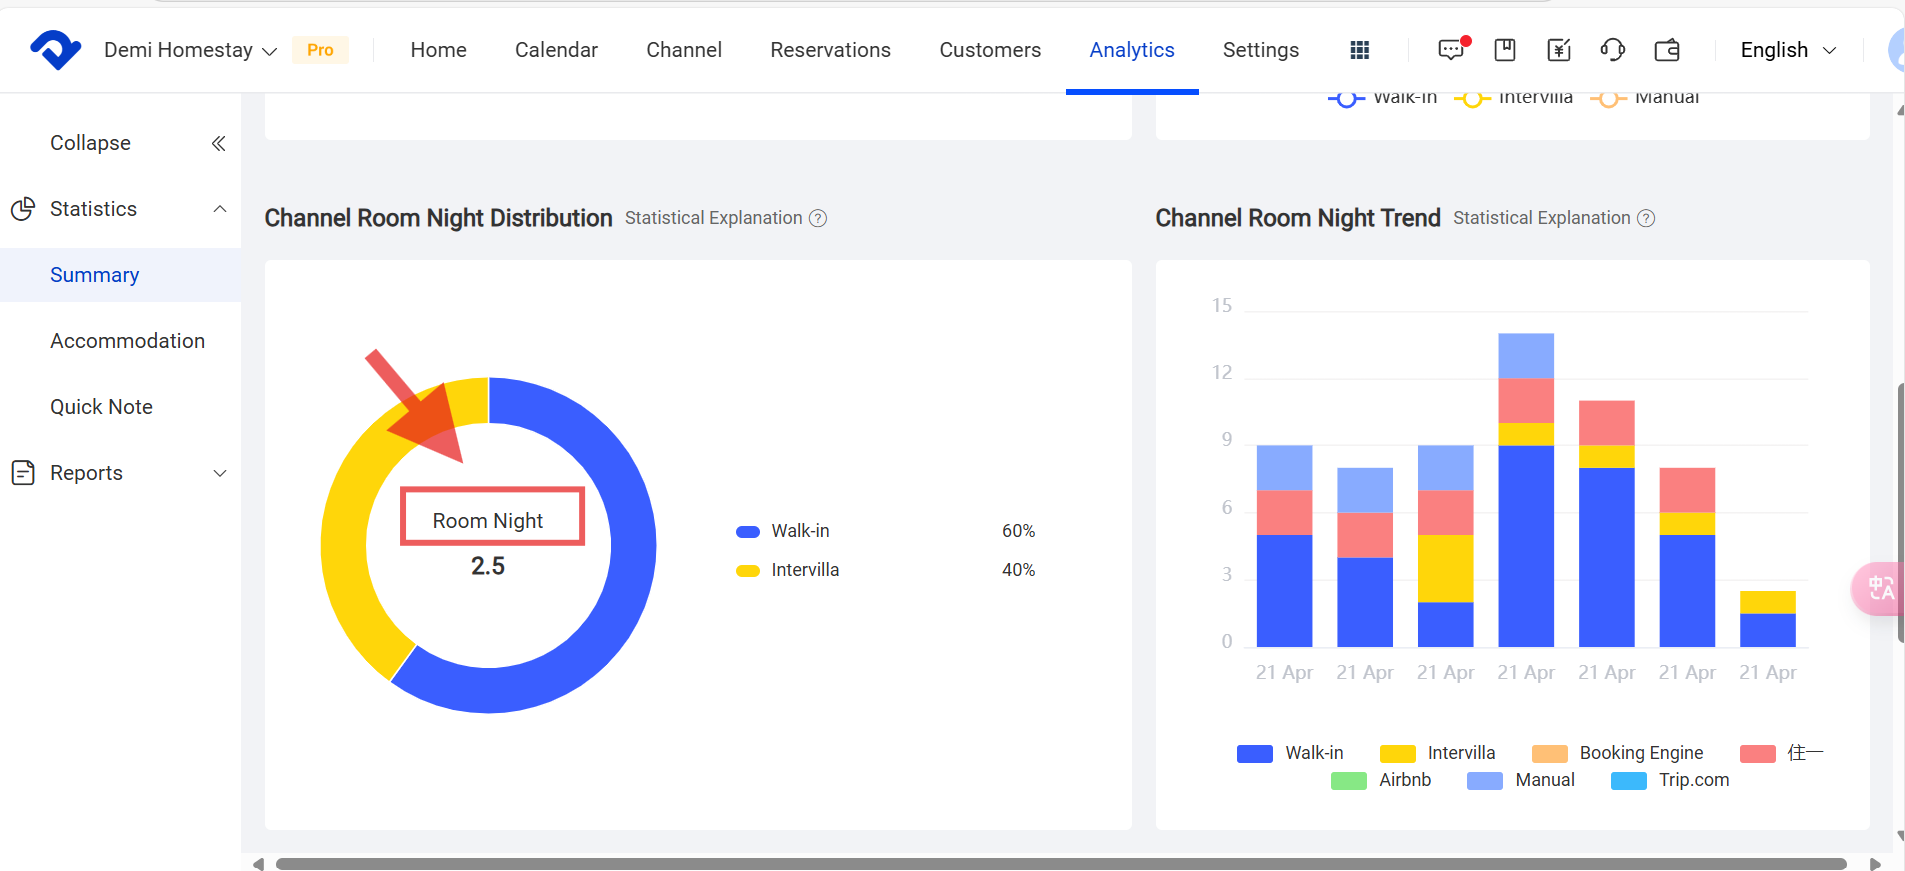
The Hourly Room Night Count for Statistics settings contributes to the analytics data. Each hourly room reservation will be counted as the room night according to your Base allocation of hourly room nights setting.

Base allocation of hourly room nights
Room Night

Related Articles

Convert the Dirty Room to Clean Room

Overview Once the reservation has been settled, the room will be made dirty. After the housekeeping task has been completed, you need to convert the dirty room to a clean room. Steps in Calendar View to convert to a clean room: Go to the Calendar View and move to the

Set up Calendar Display Settings

To satisfy your idea calendar view, you may set up the calendar display settings. You can set up the view by room type, room number, or group. You may view the daily calendar by Daily View settings. You may also change the color to display. Steps to Set up the

Add/Delete A Room Type and Change the Room Assignment

Overview There must be various room types for every owner. And to add room types is the first step to manage the reservations. We need to learn to add/delete room types. If there are some changes in the room assignment, we can also make it. Add A Room Type:

Set Up Combined Rooms and the Rate Allocation

Overview To satisfy a multi-room reservation for an entire villa or multiple rooms, we support combined room settings. Owners can distribute the combined rooms' value to the total. Set Up Combined Rooms: Step1: Go to the Settings page. Select Combined Room from the Room drop-down list. Click Add. Step2:

Change the Room Assignment for A Reservation

Overview We can change the room assignment for a reserved or checked-in reservation. Change the Room Assignment for A Reserved one: Step1: Go to the Calendar page and find the reservation you want to change the room assignment for. Step2: Click the reservation and go to the Details page. Select

Set Up the Default Check-in and Check-out Times

Overview The Frontdesk settings can only be set up on the computer. If you want to set up the default check-in and check-out times, you must operate on the computer. Step1 Go to the Settings page, and select Frontdesk under the Room. Step2 Click Default Accommodation Rules in the top