PriceLabs is a third-party dynamic pricing tool that helps you optimize your pricing strategy.
Once connected with Smart Order PMS, it can automatically sync prices, minimum stay rules, and other settings to your connected OTAs (Airbnb, Booking.com, Trip.com, etc.).
Note: PriceLabs integration is a third-party feature and is not included in the standard Professional plan. Please purchase the add-on if needed.
Step 1: Connect Smart Order in PriceLabs
Log into your PriceLabs account. https://hello.pricelabs.co/?ref=smartorder.ai
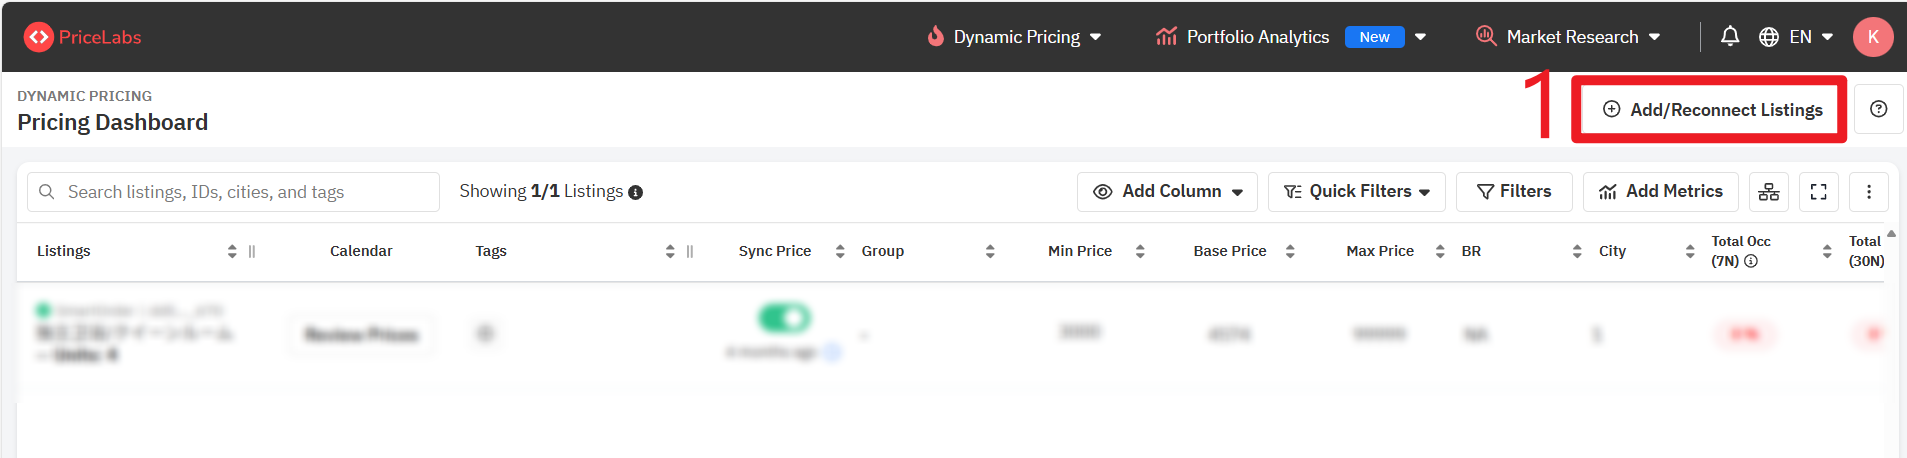
- On the dashboard, click Add/ Reconnect Listings.
- In the popup window:
Select PMS / Channel Manager.
Choose SmartOrder from the dropdown.
Check the box “Allow SmartOrder to add listings to your PriceLabs account”.
- Click Save.
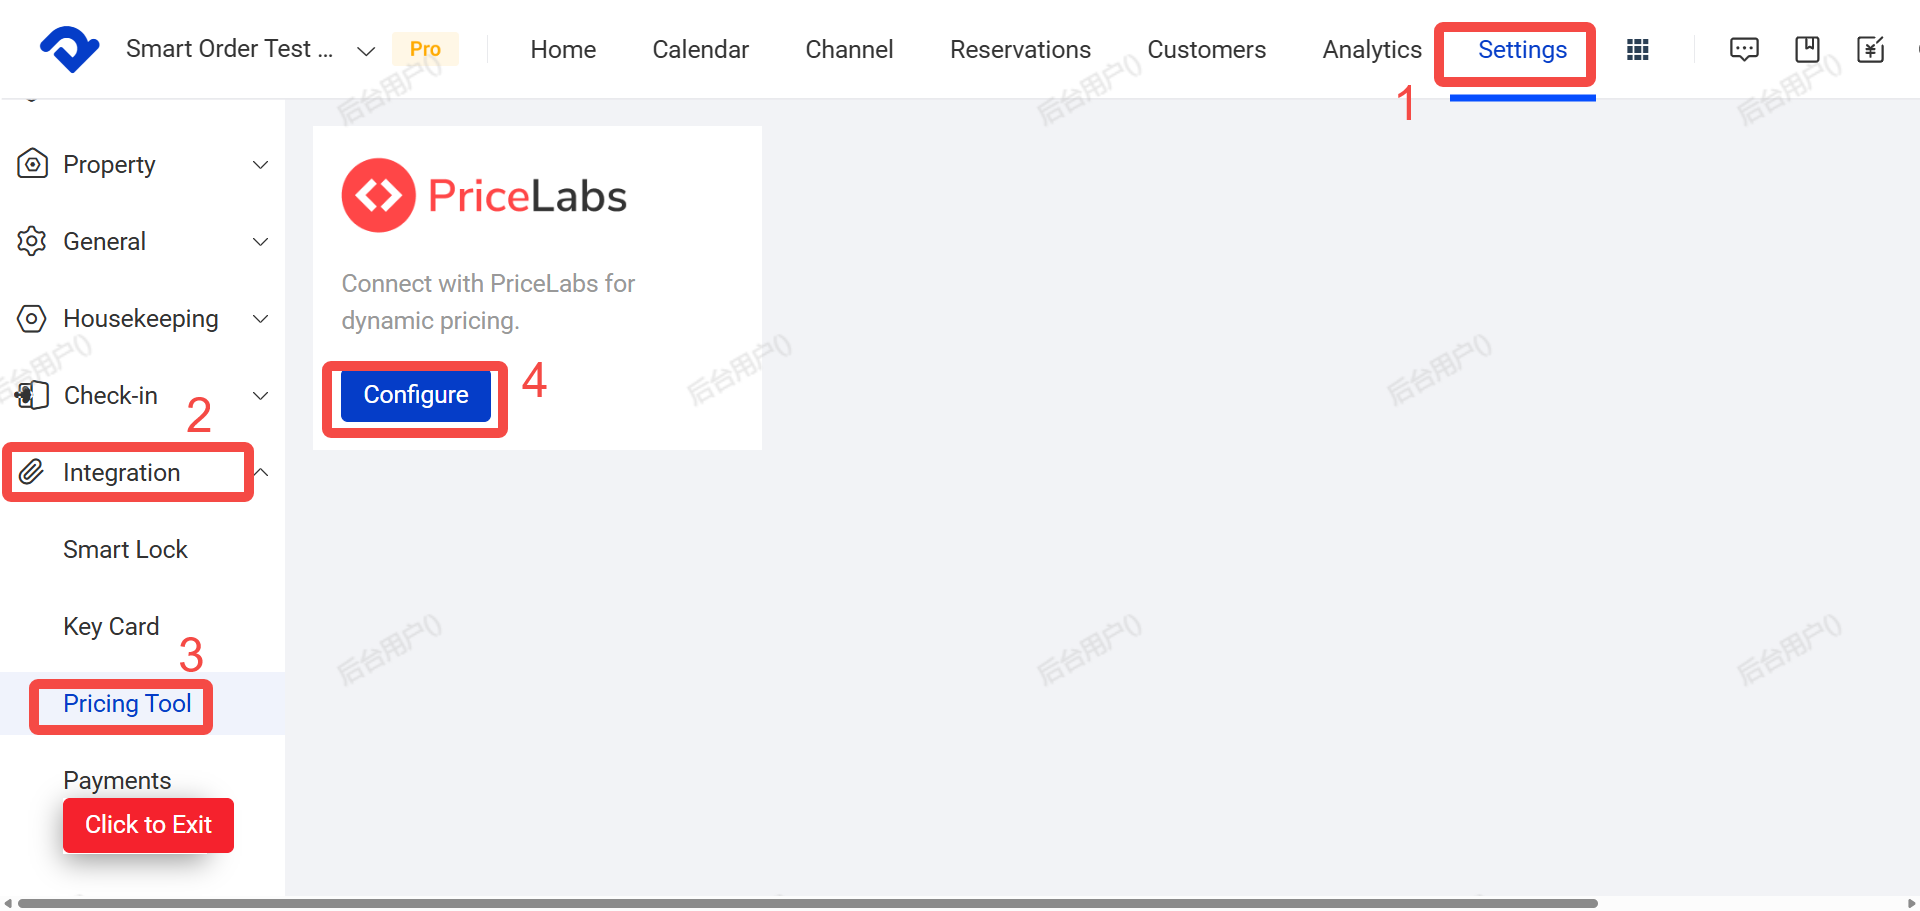
Step 2: Connect PriceLabs Account in Smart Order PMS
- Go to Settings.
- Click Third-Party Integrations.
- Click Pricing Tools.
- Click Configure.
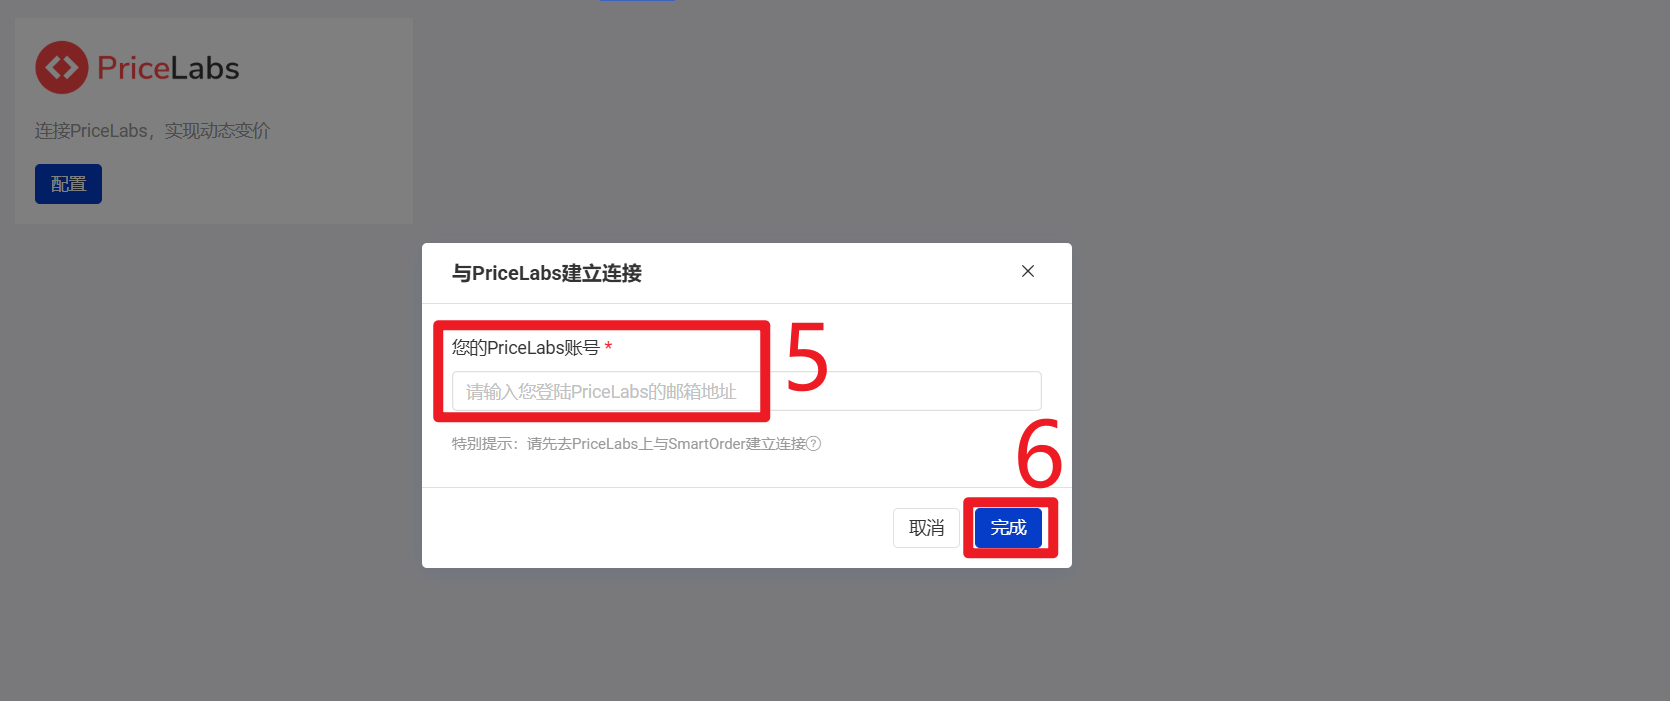
- Enter your PriceLabs account information.
- Click Complete.
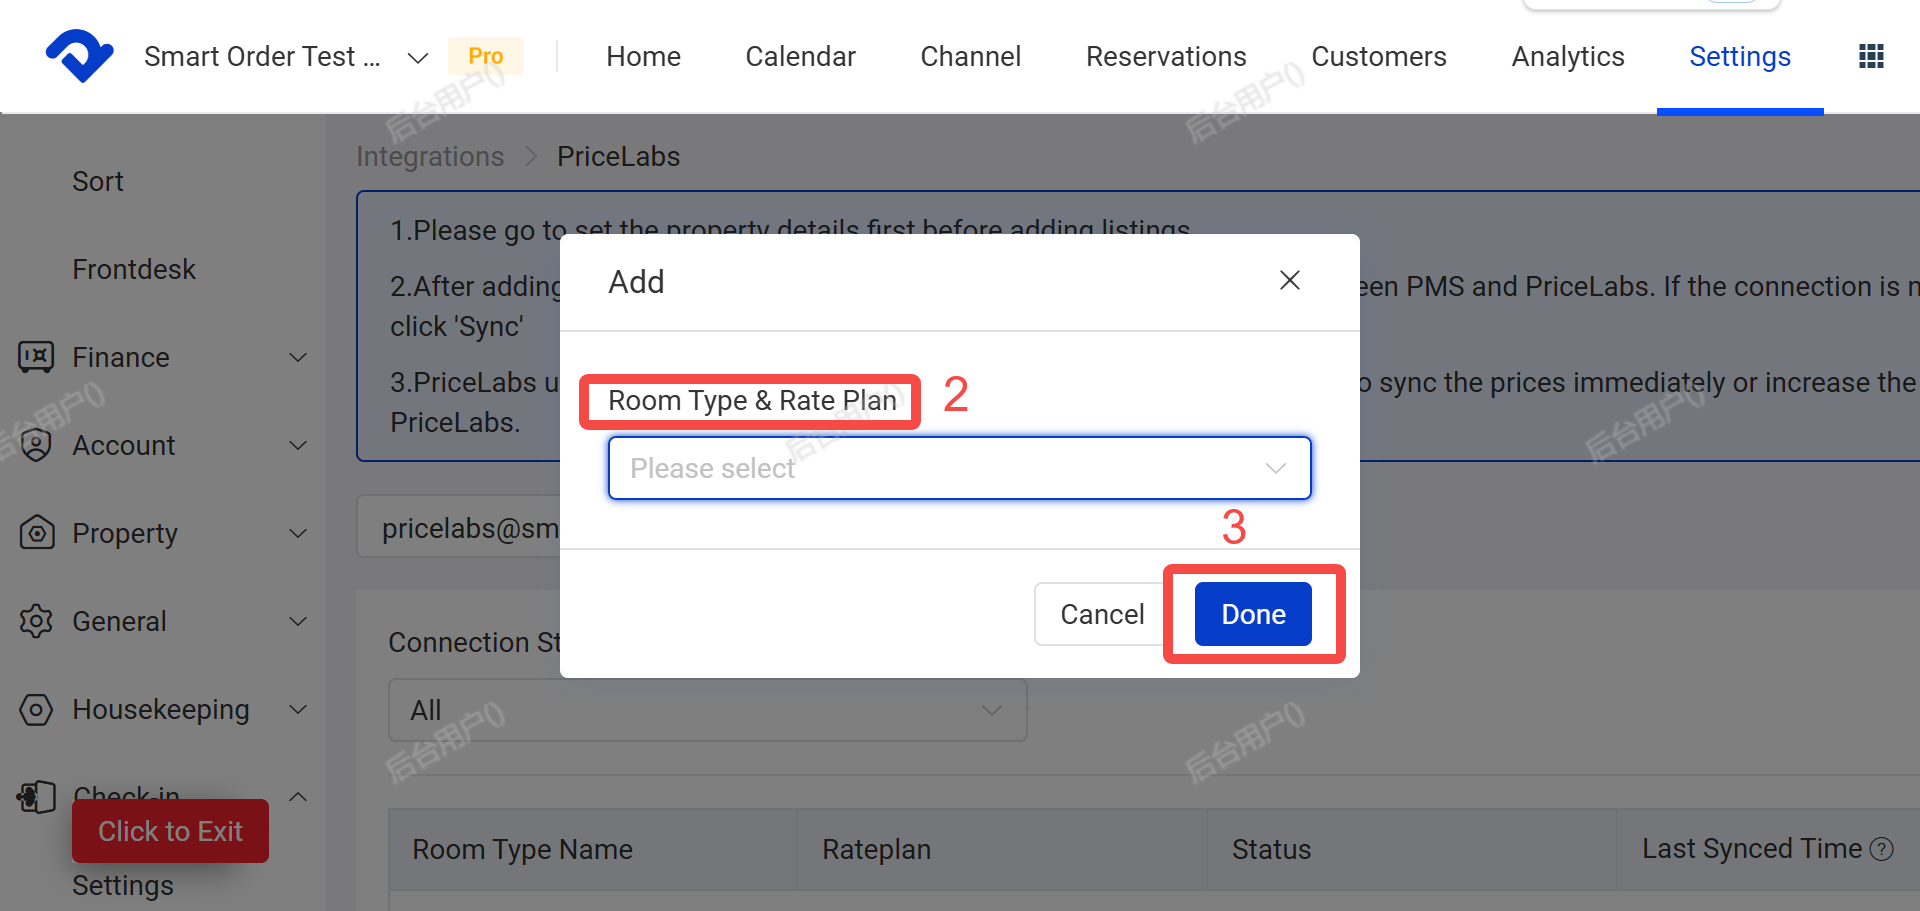
Step 3: Select Listings to Sync in Smart Order
- Click Add.
- Select the room types and rate plans you want to manage with PriceLabs.
- Click Done.
Important Note: PriceLabs needs accurate property location data to generate smart pricing. Please make sure you have filled in the full address in Settings → Property Details.
Step 4: Review and Sync Prices in PriceLabs
- Return to PriceLabs and go to the listing.
- Click Review Prices and complete the initial setup according to PriceLabs’ Getting Started guide.
- Check and confirm your price settings.
- Enable Sync Prices for automatic synchronization, or click Sync Now for immediate update.

Step 5: Confirm Synchronization in Smart Order
- Go back to Smart Order.
- Click Sync to ensure the latest prices from PriceLabs are updated in PMS and pushed to your OTAs.

PriceLabs Supported Rules
PriceLabs supports the following rules (set them directly in PriceLabs),for detailed instructions, please refer to the PriceLabs Help Center.
- Minimum / Maximum Length of Stay
- CTA / CTD (Closed to Arrival / Closed to Departure)
- Weekly / Monthly Discounts
- Extra Guest Fees
- PriceLabs and Smart Order synchronize periodically (usually every 24 hours). The frequency is controlled by PriceLabs and cannot be adjusted in PMS. If prices are not syncing, please contact PriceLabs support or Smart Order.
- In addition to the base price, it is recommended to set minimum and maximum prices in PriceLabs.
- Currently, the following settings can be synced from PriceLabs to PMS: Rate, CTA, CTD, Min LOS, Max LOS.
- Synchronization is one-way. Manual price changes made in PMS will not be sent to PriceLabs. They may be overwritten by PriceLabs during the next sync.
