How to Manually Create a Reservation

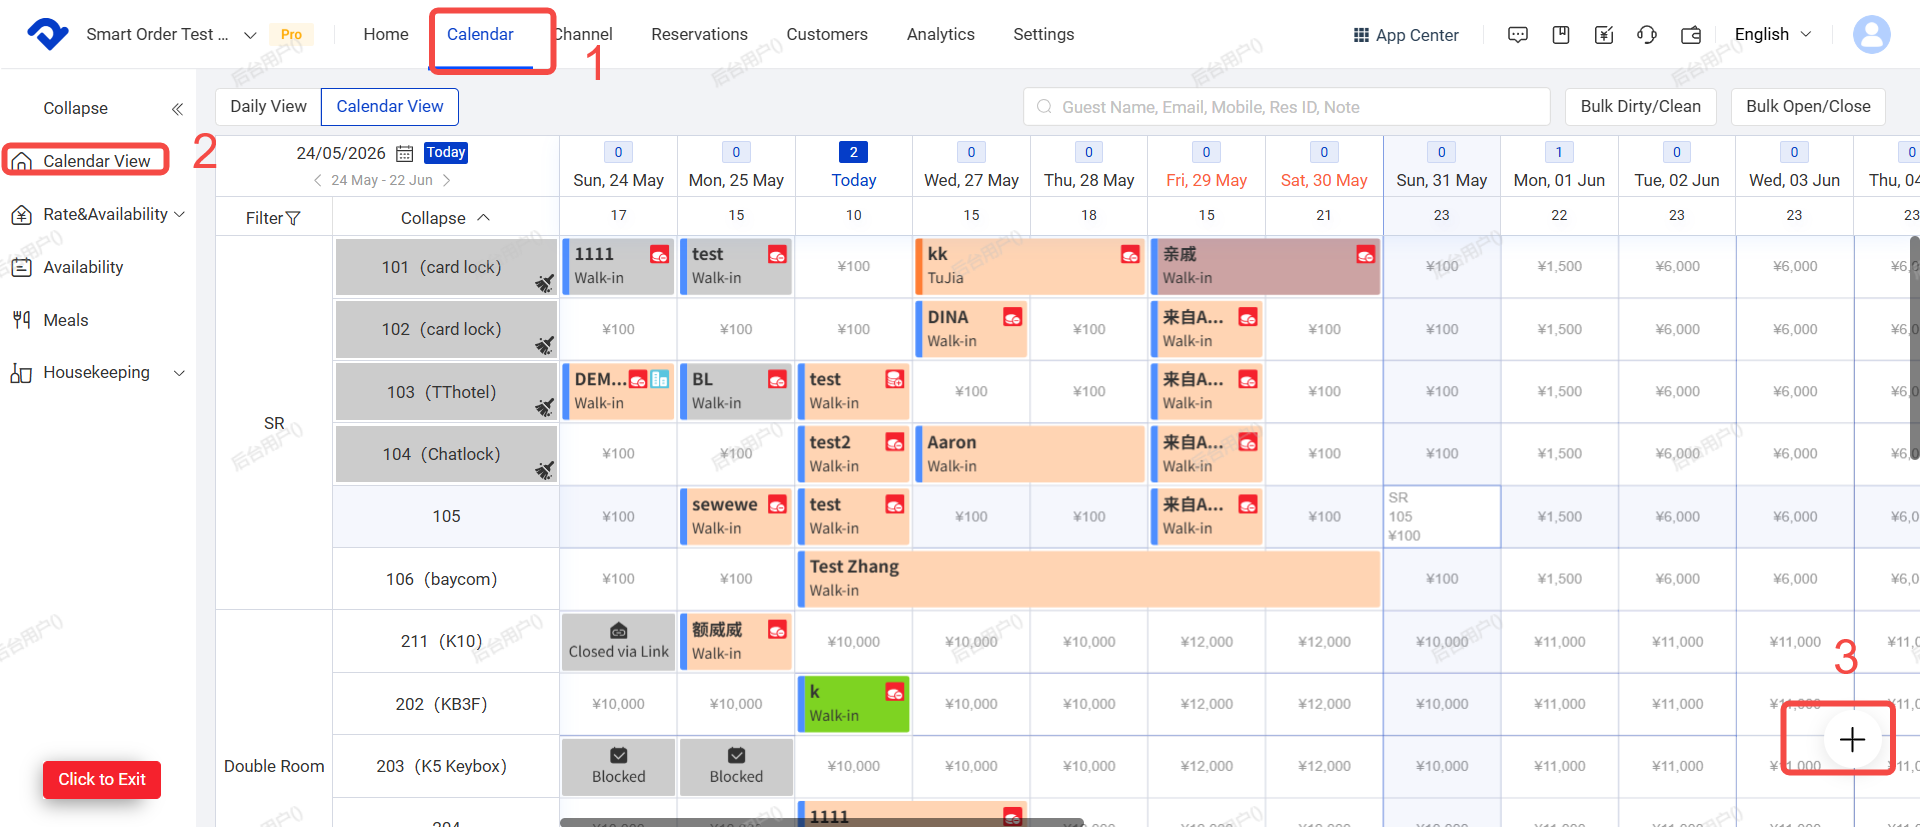
There are two methods to manually create bookings for Non-Channel / Offline Orders.

Method 1:

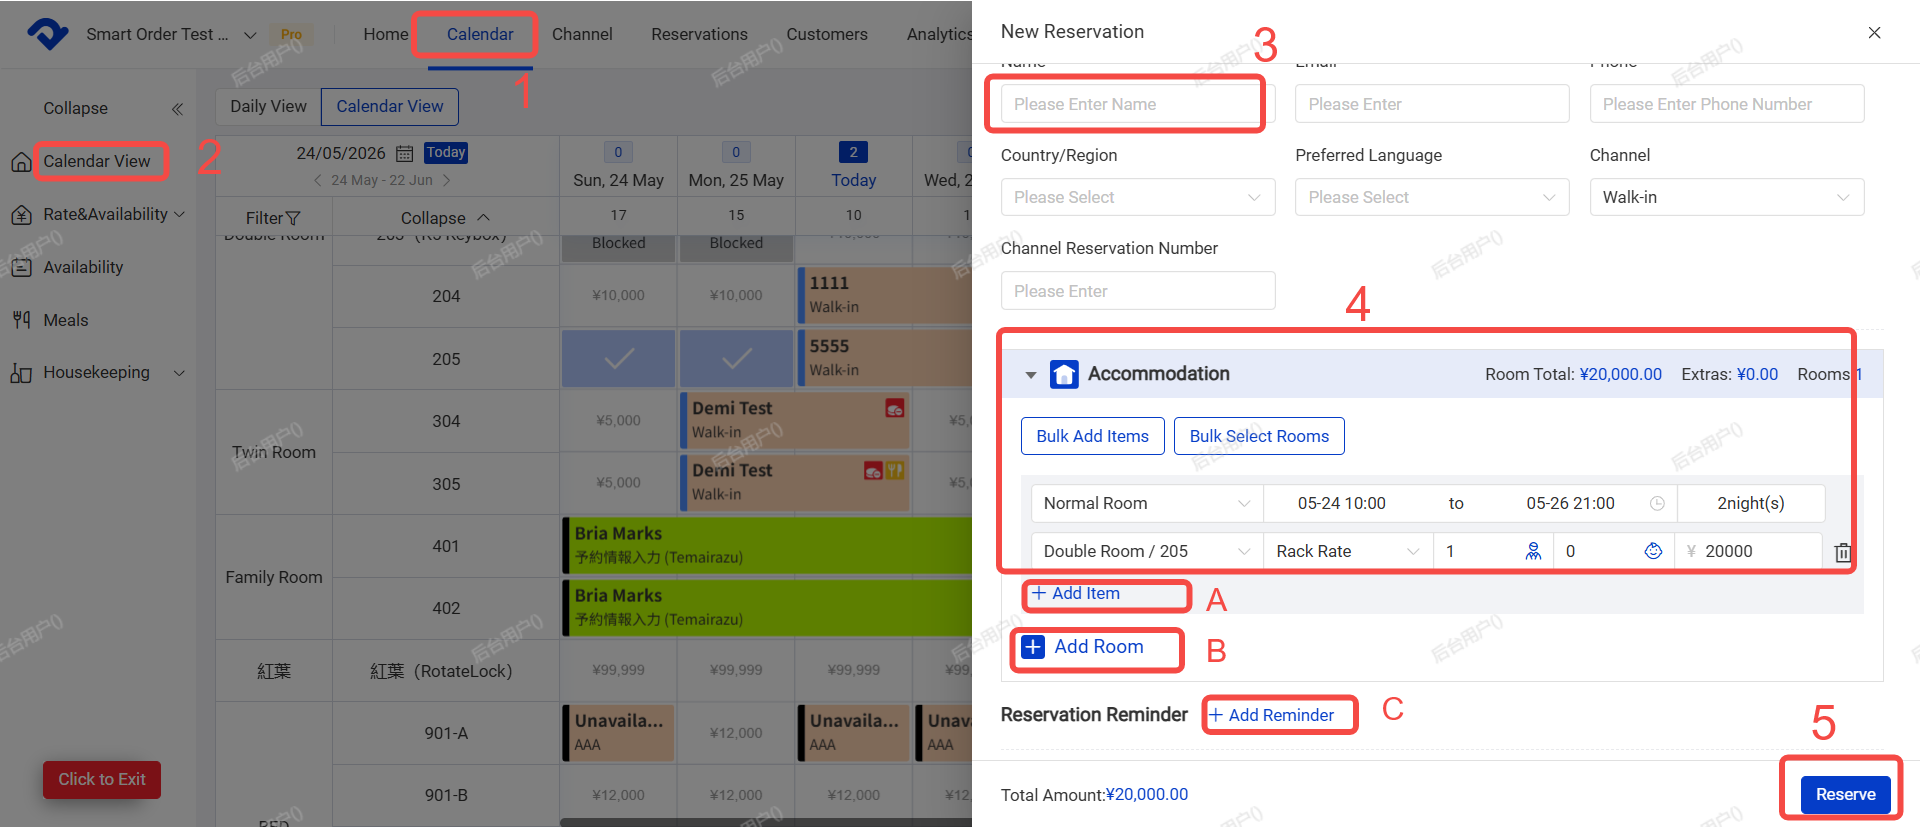
Path: Calendar → Click on an right empty blocks→ Reserve→ Submit

Steps:

  1. Go to Calendar page.
  2. Click on the empty blocks of the desired room and date.
    • To select multiple nights: Click and drag left to right.
    • To select multiple rooms: Click and drag top to bottom, or click each room individually.
  3. Enter the guest’s name (other fields are optional).
  4. Set Check-in and check-out dates & times/Room type and room number/Number of guests/Room rate

A. You can add extra charges (e.g. cleaning fee, breakfast, etc.)

B. For multi-room bookings, click "+ Add Room "to add more rooms

C. You can set a system reminder (a popup will appear at the scheduled time)

  1. Click Submit Reservation.

Tip: If you are creating a same-day reservation, a "Direct Check-in" button will appear. You can click it to check the guest in immediately.

Method 2:

Path: Calendar → Bottom right "+" → Reserve→ Submit

Steps:

  1. Click Calendar.
  2. Click the "+" button at the bottom right corner.
  3. Click Reserve
  4. Enter the booking details (same as Method 1 for next step)

This method is more convenient when the booking date is far in the future, as you don’t need to scroll the calendar.

Related Articles

Add or Remove Meals / Extra Items to Orders

After setting up items (refer to the article [Consumption Item Settings]), you can add the corresponding items to orders. Path: Calendar > Calendar View >Select an Order > Add Item Steps: 1. Open the order and click [Add item]. 2. Confirm the following information, then click [Done]: * A. Item

How to Connect PriceLabs

PriceLabs is a third-party dynamic pricing tool that helps you optimize your pricing strategy. Once connected with Smart Order PMS, it can automatically sync prices, minimum stay rules, and other settings to your connected OTAs (Airbnb, Booking.com, Trip.com, etc.). Note: PriceLabs integration is a third-party feature and is

How to Update Store and Property Information

Operation Path: Settings → Property→ Basic Information / Property Details → Edit 一. System Property Basic Information Follow these steps to update your store’s basic details: 1. Click Settings 2. Click Property 3. Click Basic Information 4. Click Edit 5. Update the information as needed, then click Save Key Fields: * A. Store

TT LOCK Door Lock connection

Door lock connection is a third-party feature and is not included in the standard Professional Edition. Please purchase the add-on if you need this function. I. Pre-Setup for TT LOCK 1. Add Locks in the TT LOCK App First Please add your locks in the TT LOCK App backend before

Self Check-in Setup Guide

Before setting up Self Check-in, please complete the property information first. I. Prepare the Self Check-in Email(Scheduled Msg) The foundation of Self Check-in is the message guests will receive. You should configure this first. 1. Go to Settings → General Settings → Scheduled Msg → Find Self Check-in Confirmation Email (it has

Payment Collection(Refund)/ Settle

Payment Collection (Refund) This function is used to record payments or refunds for room fees, extra charges, deposits, etc. Note: Orders that have not been fully paid will show a red mark in the top right corner. You can add payment or refund records to balance the order. Steps: 1.