Door lock connection is a third-party feature and is not included in the standard Professional Edition. Please purchase the add-on if you need this function.
I. Pre-Setup for TT LOCK
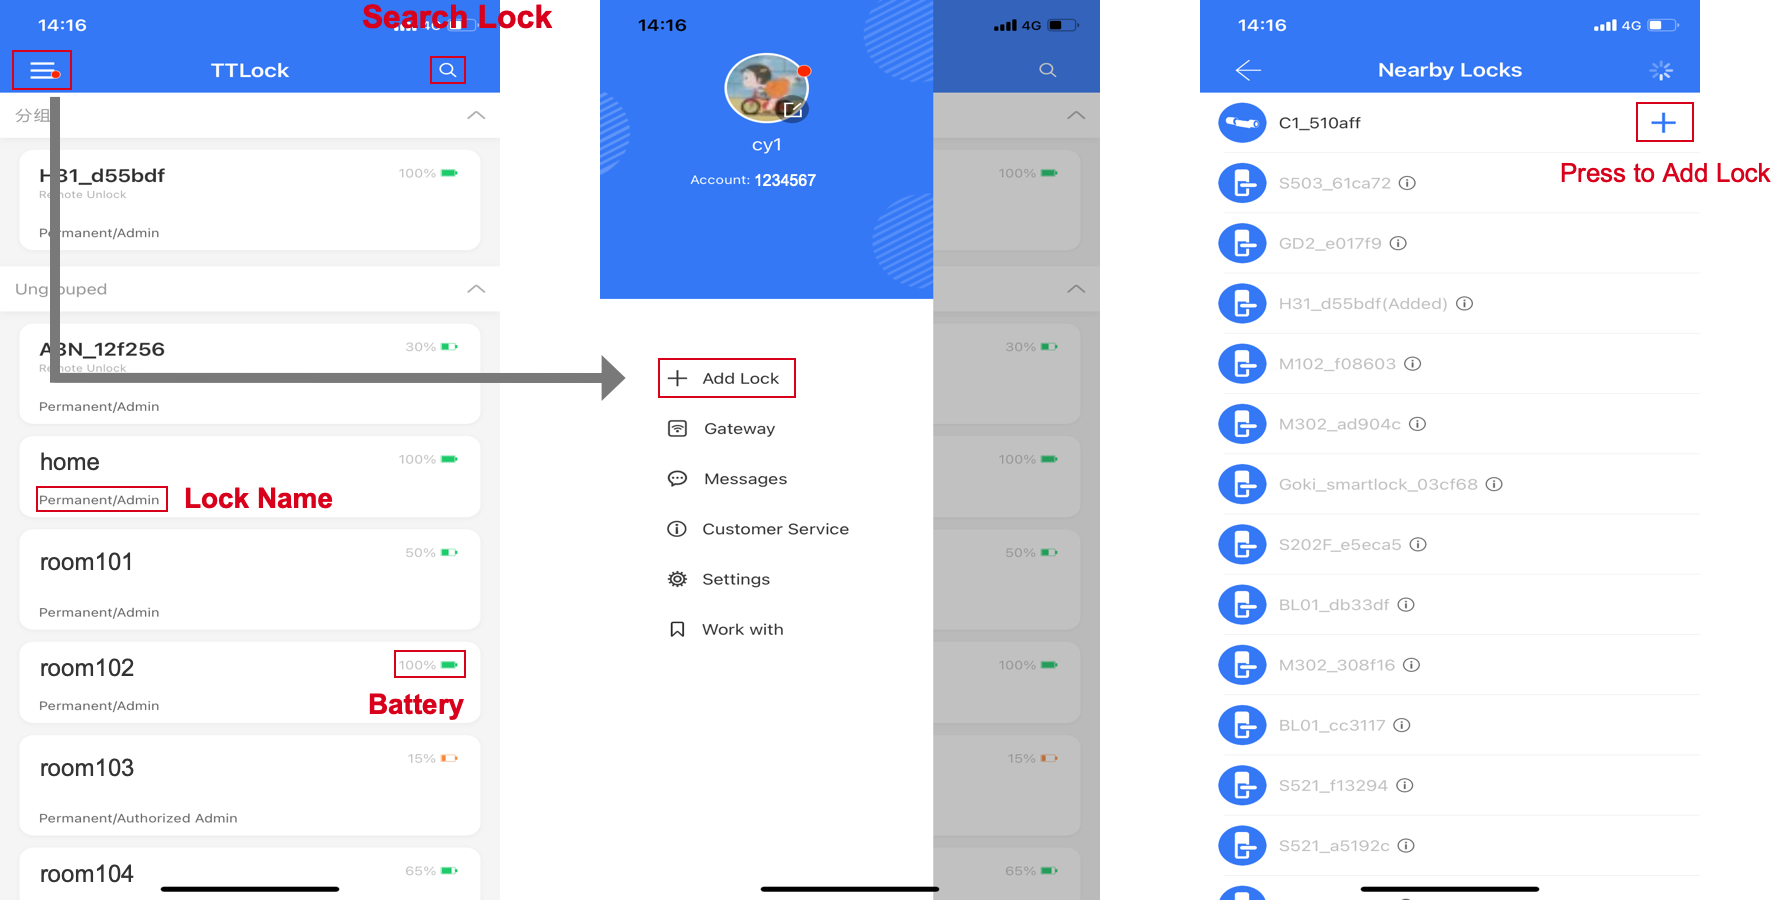
- Add Locks in the TT LOCK App First
Please add your locks in the TT LOCK App backend before connecting to PMS.
Reference Link:https://ttlockdoc.ttlock.com/en/docs/category/app
- Ensure the Door Lock is Working Properly
Before connecting to PMS, make sure the door lock is functioning normally.
II. Connect TT LOCK Account to PMS
- Go to Settings
- Click Integration → Smart Lock
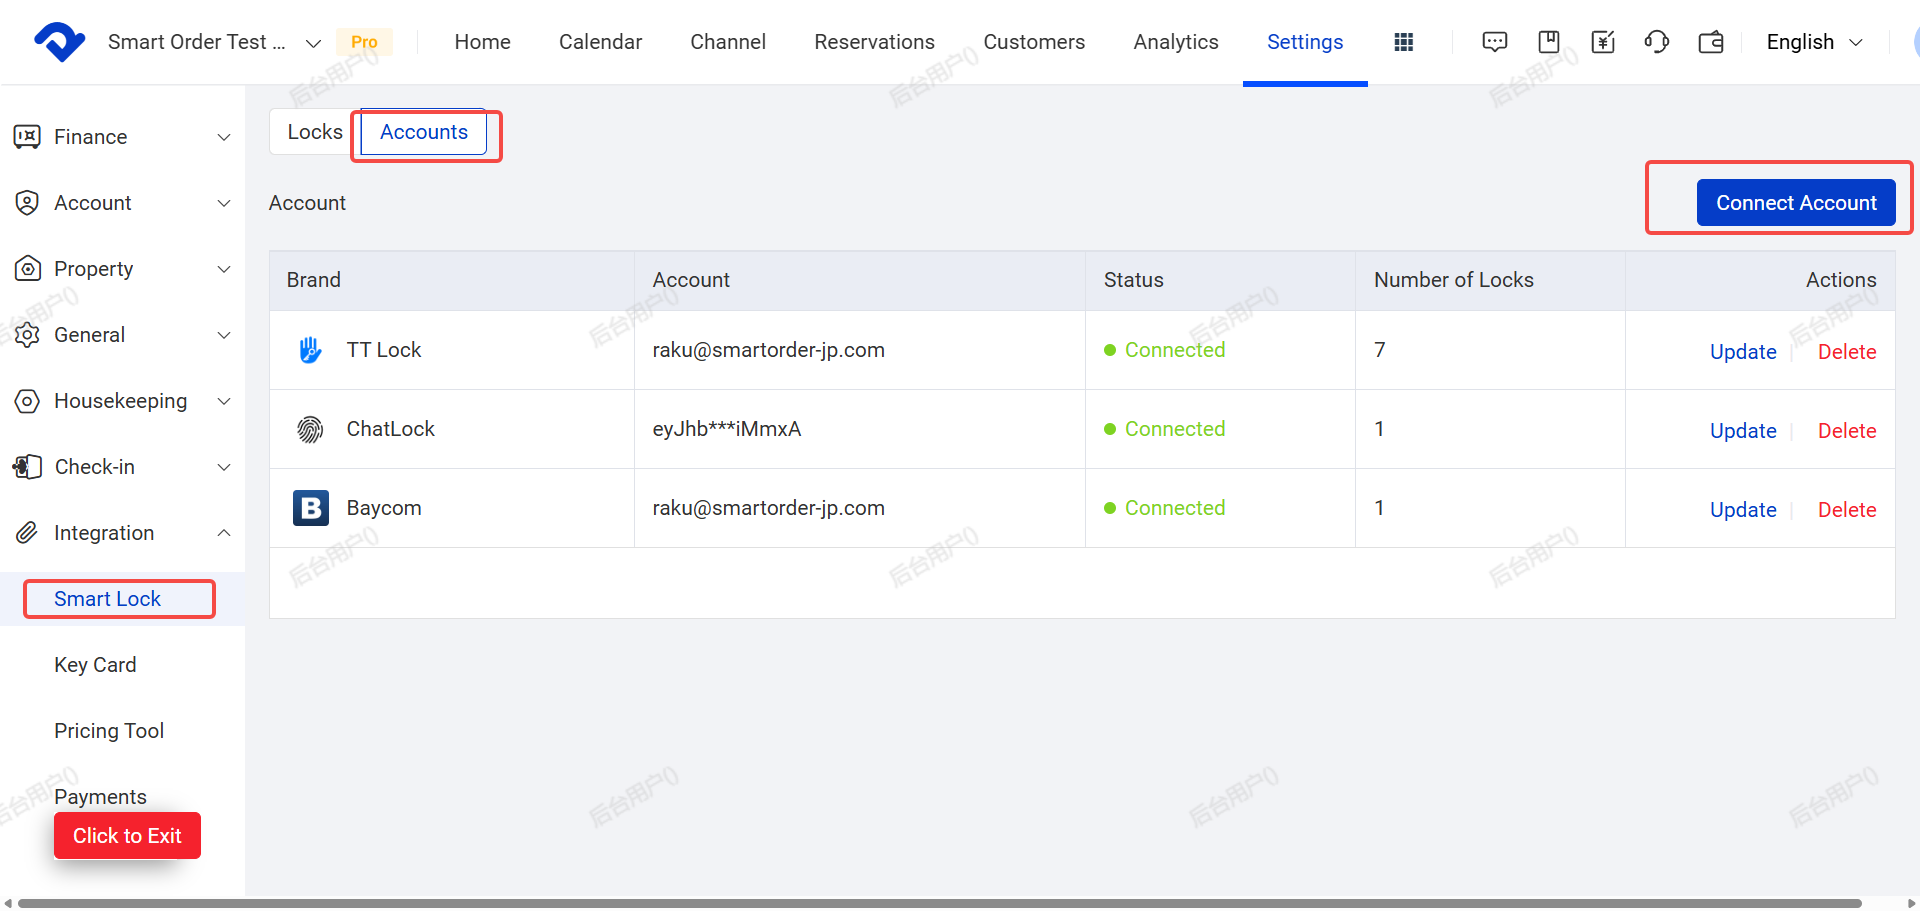
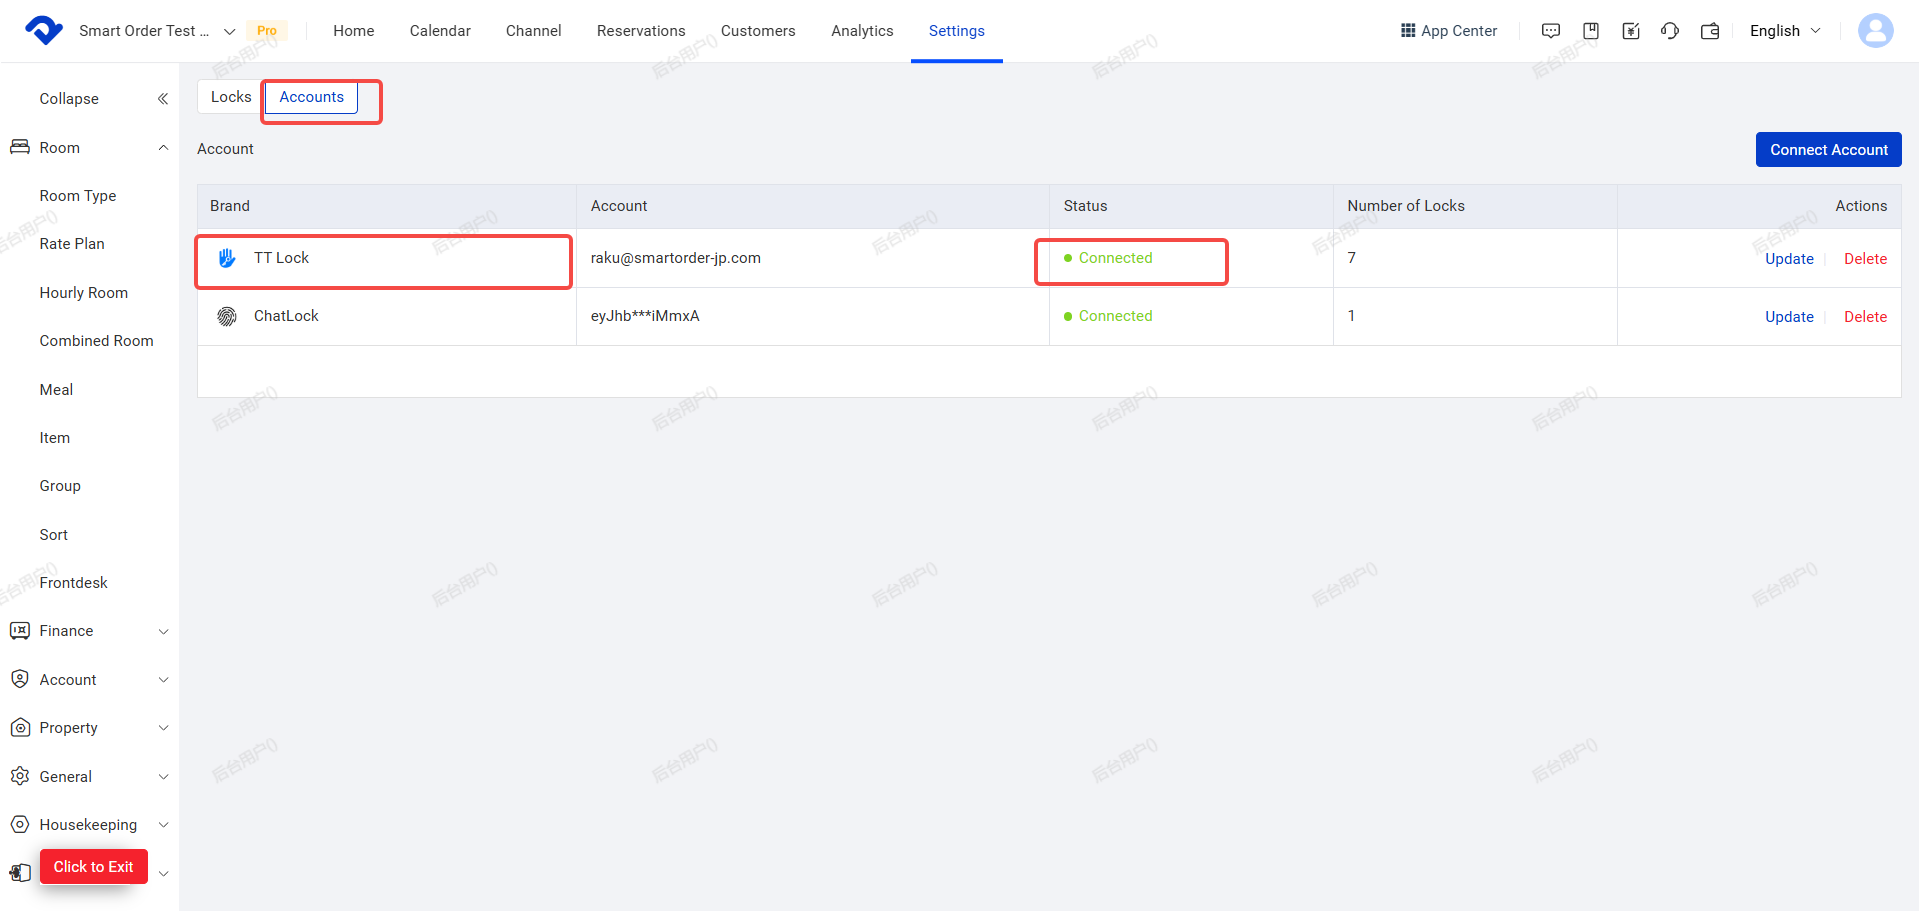
- Click Accounts
- Click Connect Account
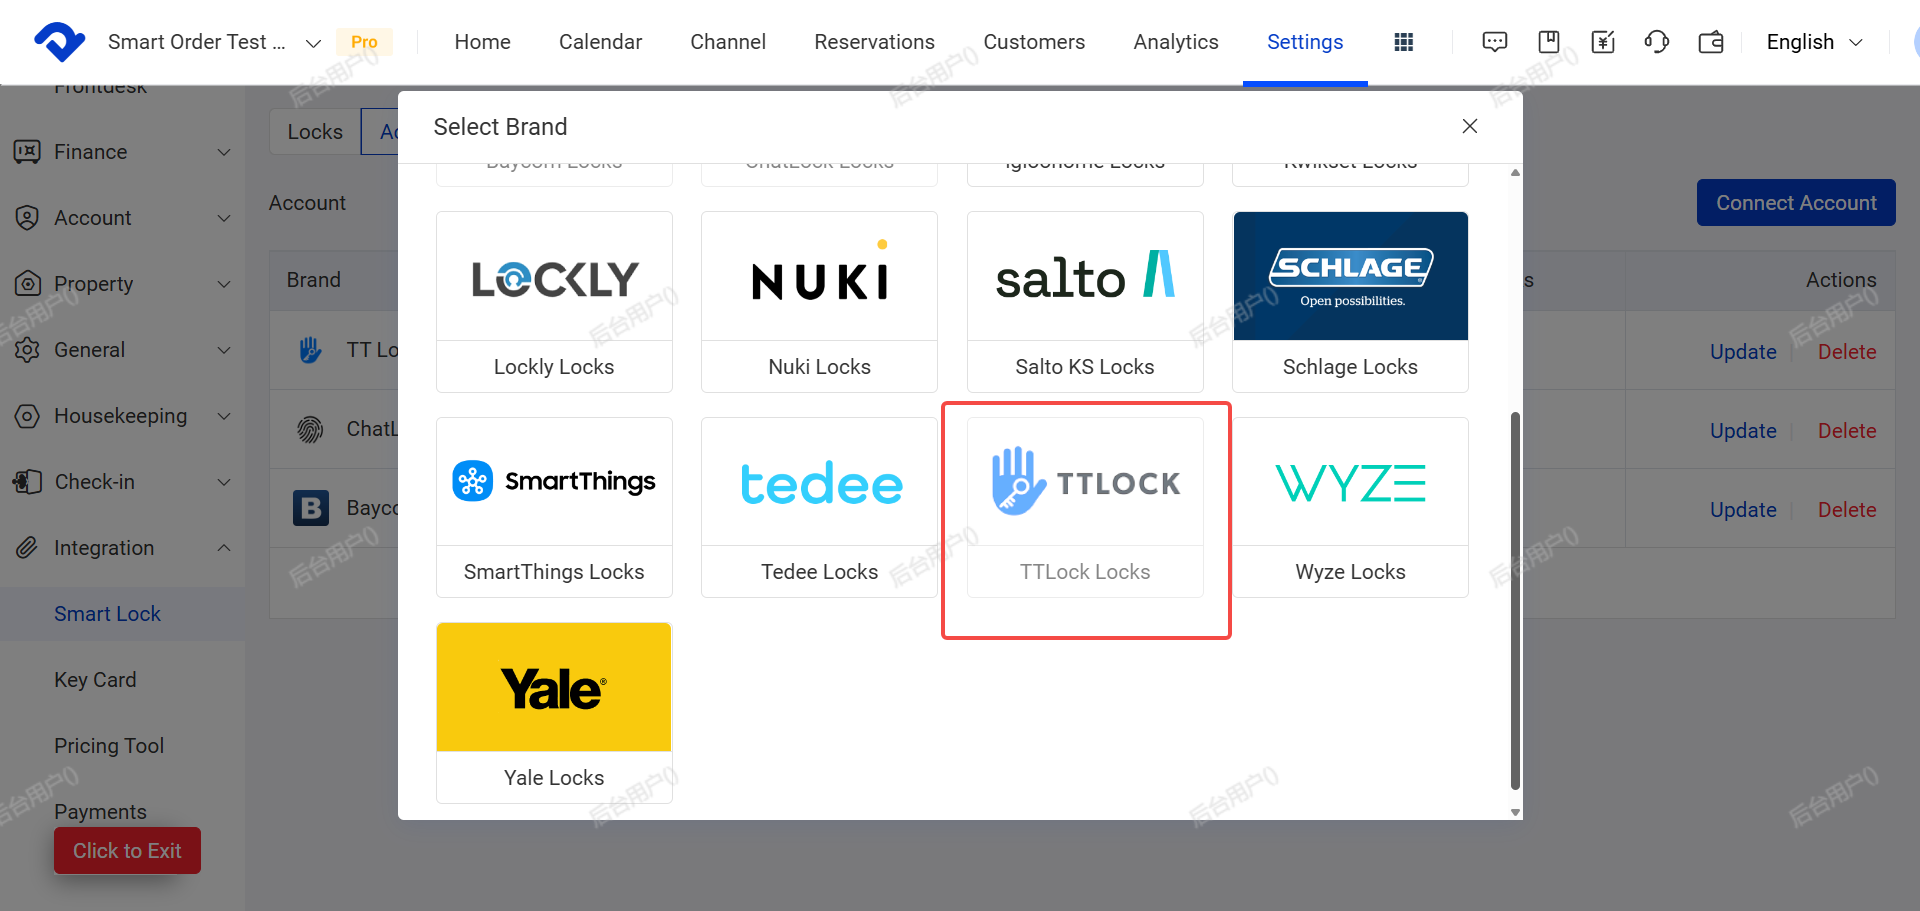
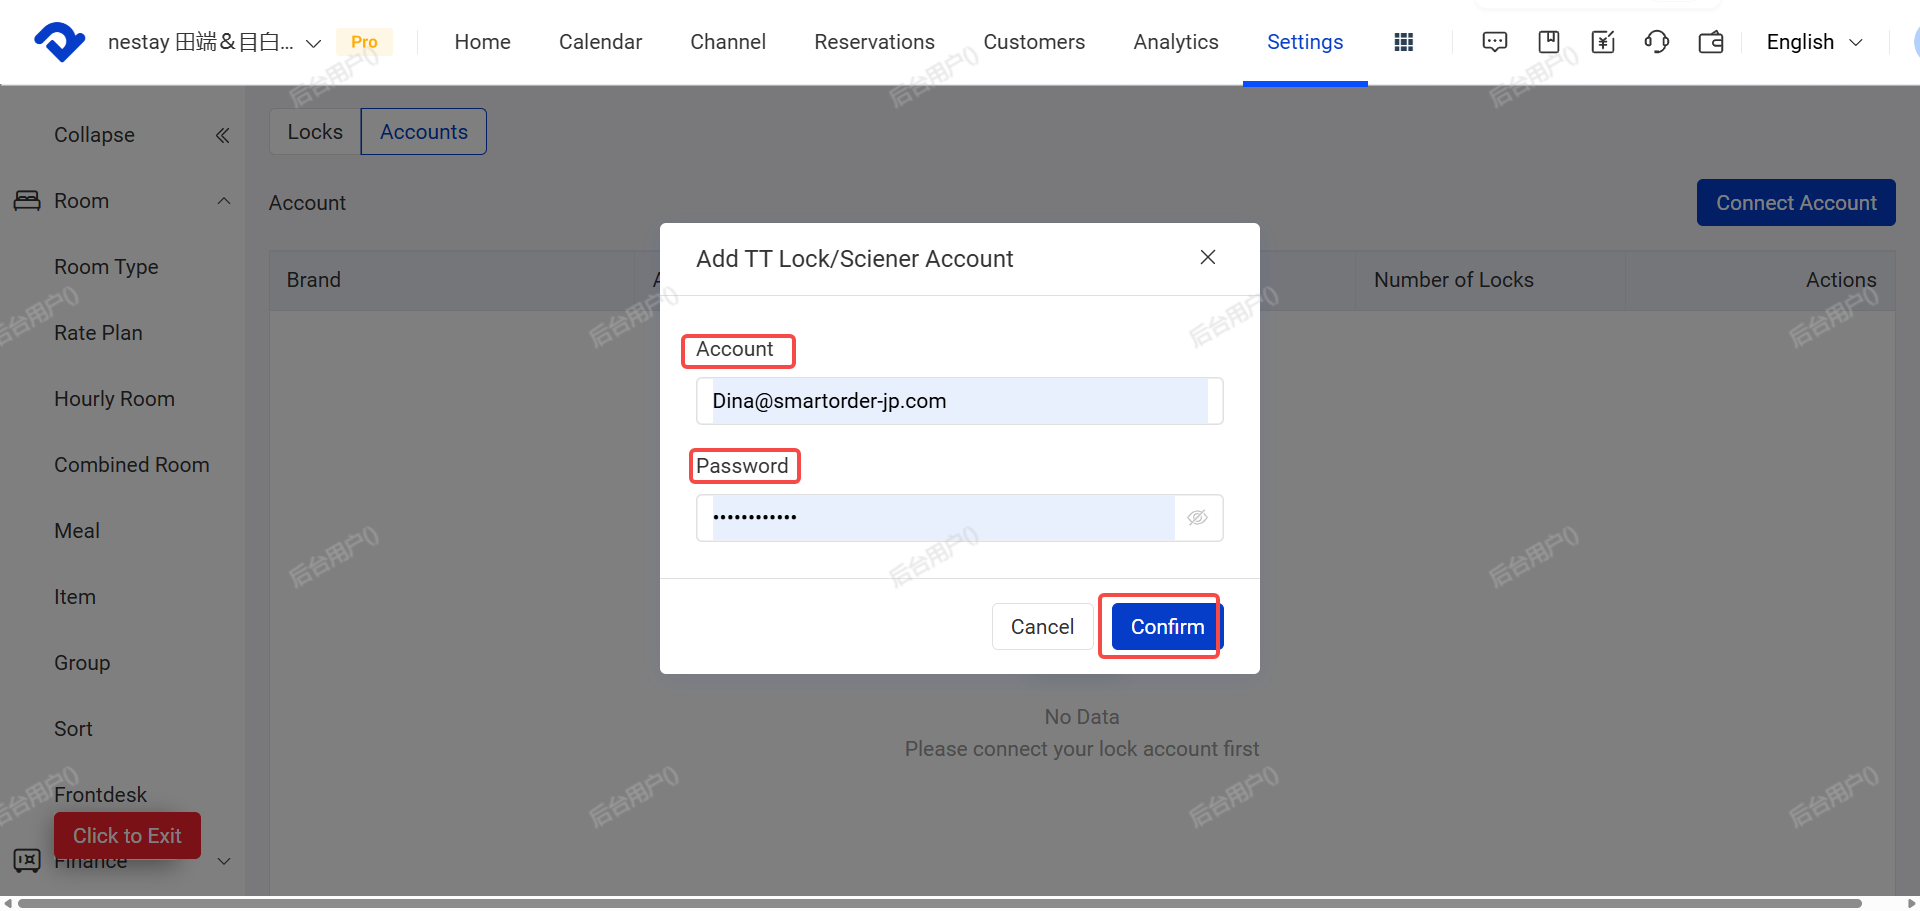
- Select TT LOCKS
- Enter your TT LOCKS account login information and click Confirm
Notes:
- After successful connection, the status will show “Connected”.
- One PMS property can only link to one TT LOCK account.
- Please use the main account to connect. Sub-administrator accounts cannot be used for PMS door lock integration.
III. Link TT LOCK to Corresponding Rooms in PMS
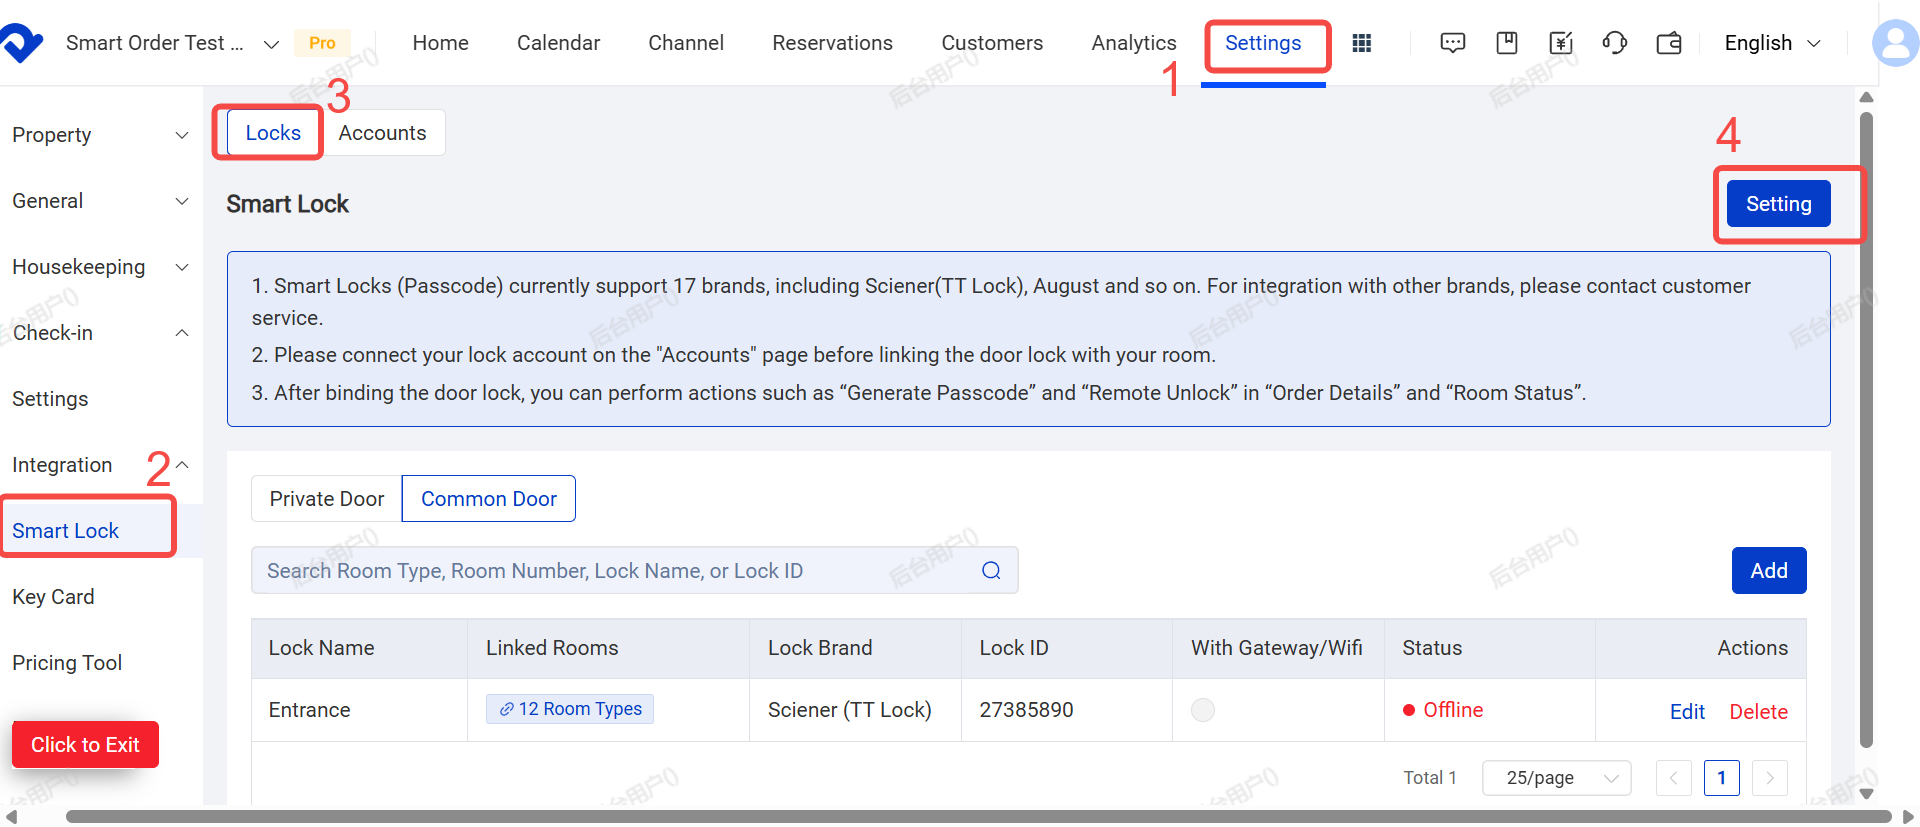
- Go to Settings
- Click Smart Lock → Locks→ Under Private Door, click Add for New Door Lock
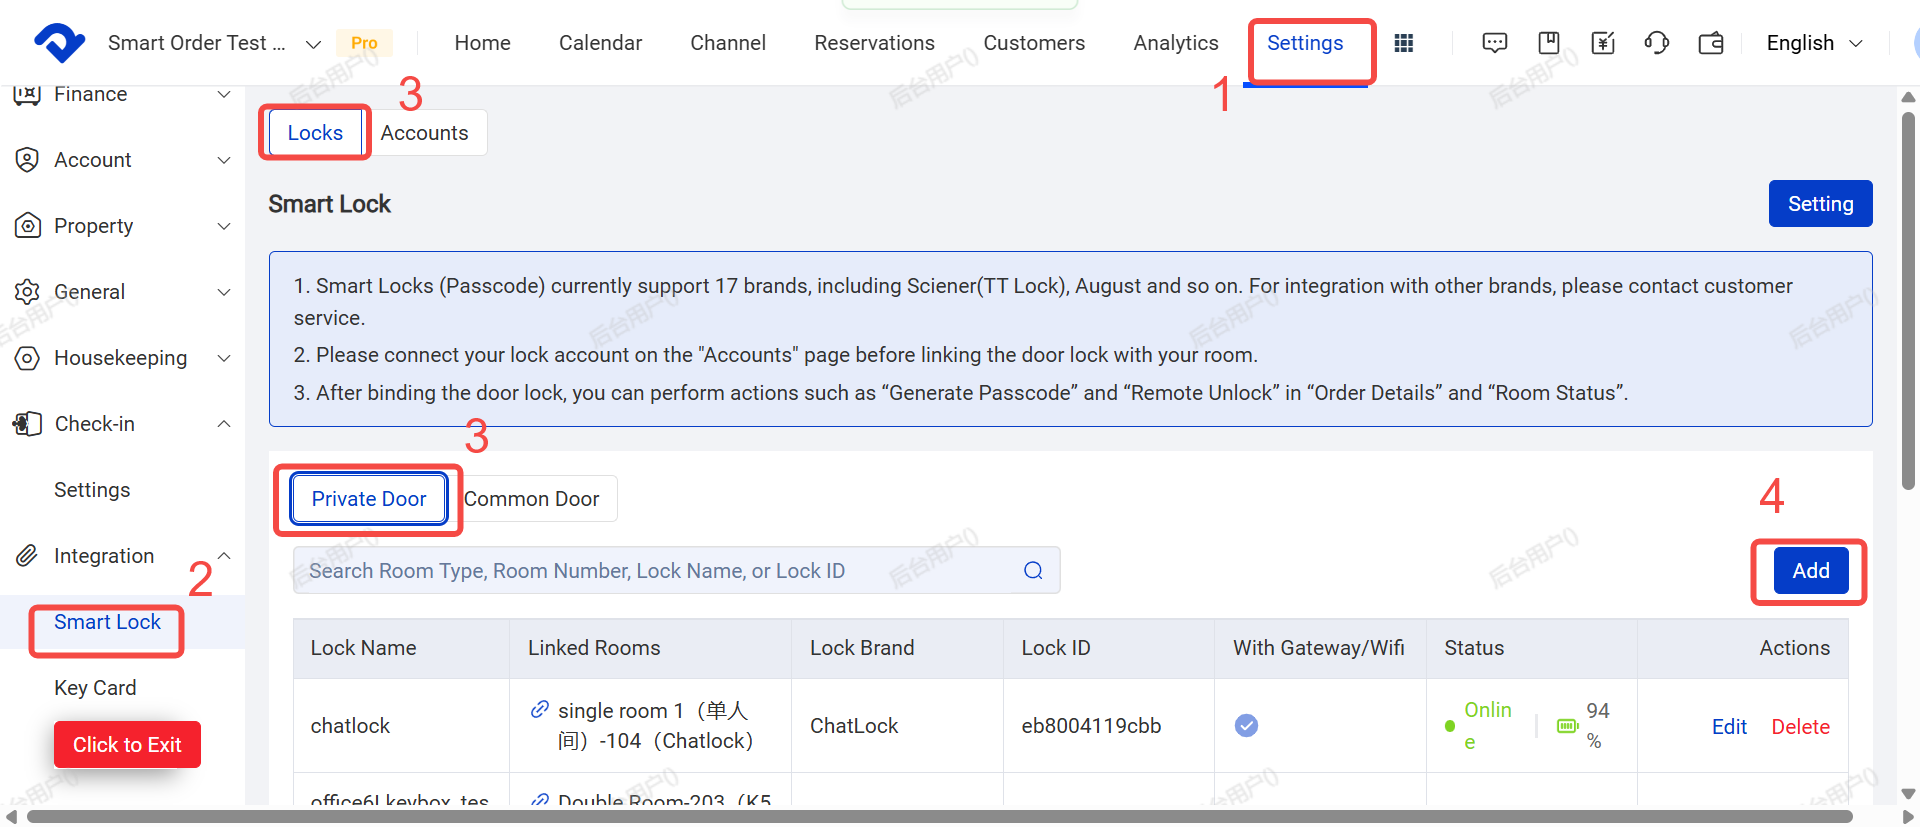
- Fill in the door lock information, and link it to the room(s), then save.
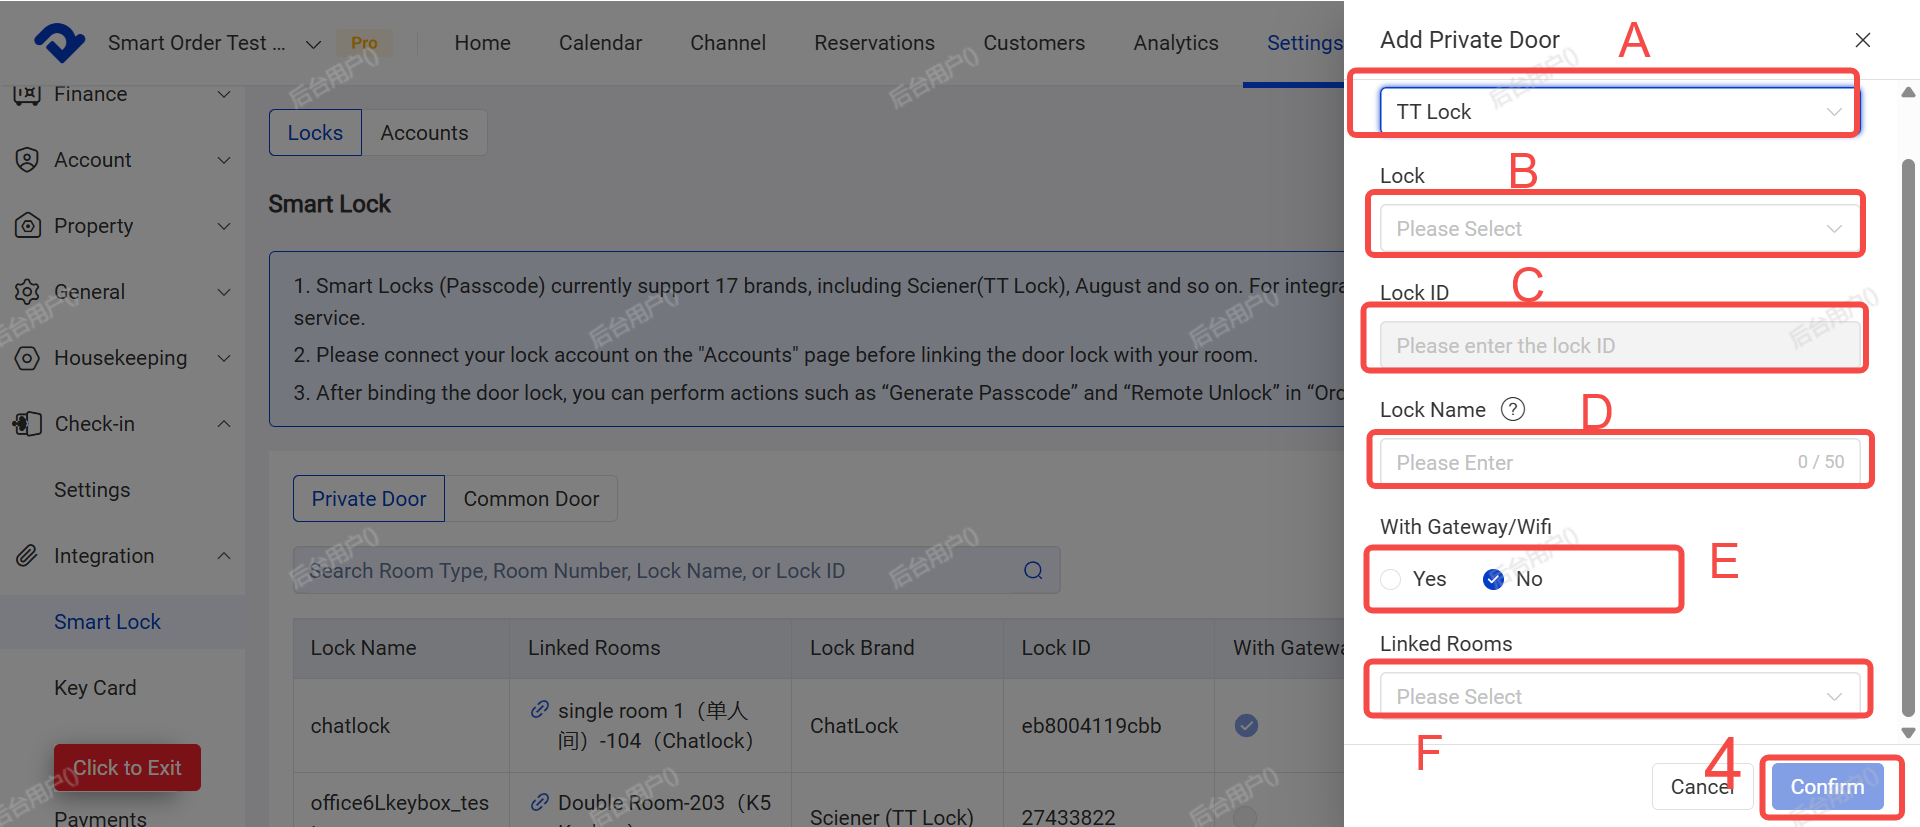
Field Explanations:
- A. Door Lock Brand: Select “ TT LOCK”
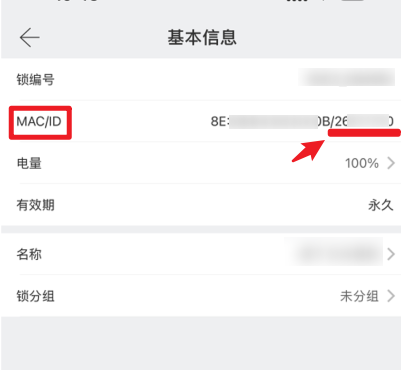
- B. Door Lock ID / Number: Check in the TT LOCK App under Basic Information → MAC/ID (the numbers after “/”)
- C. Lock Name: This name will be sent to guests along with the password
- D. Gateway: Choose whether your lock has a gateway or not
- E. Linked Room: e.g. Double Room - 101
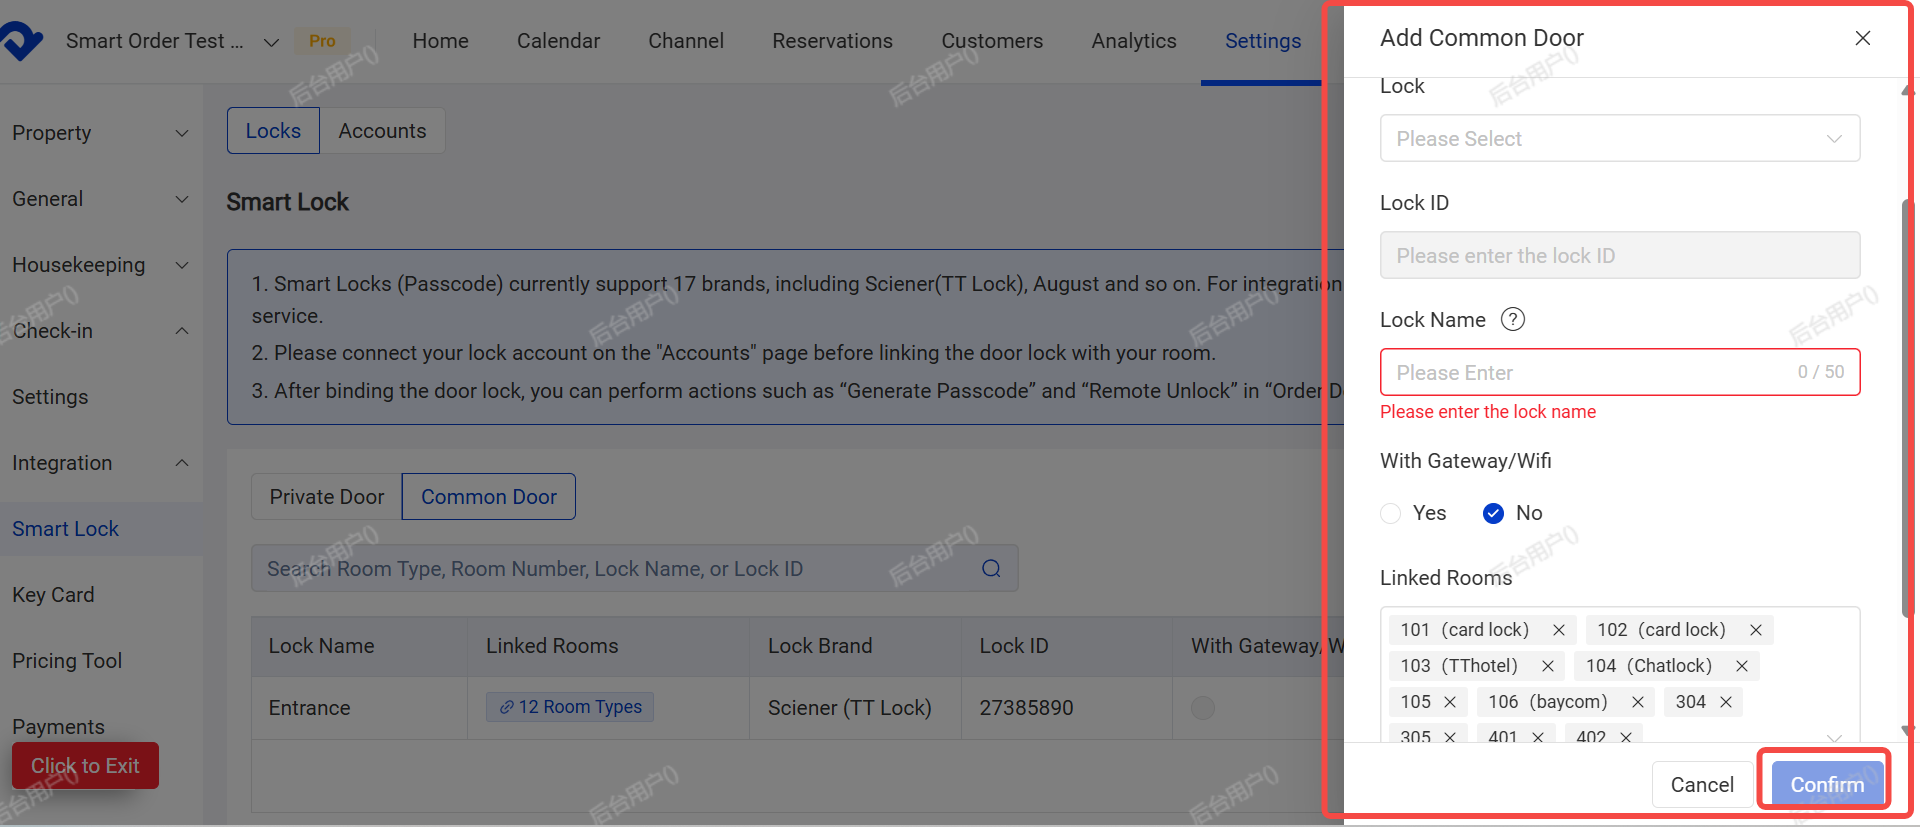
Note for Public Doors:
If it is a Common door, switch to the Public Doors tab, add the lock, and select all rooms that can be accessed using the Public Doors door’s password.

IV. Set Automatic Password Generation Rules
- Click the Settings button in the top right corner
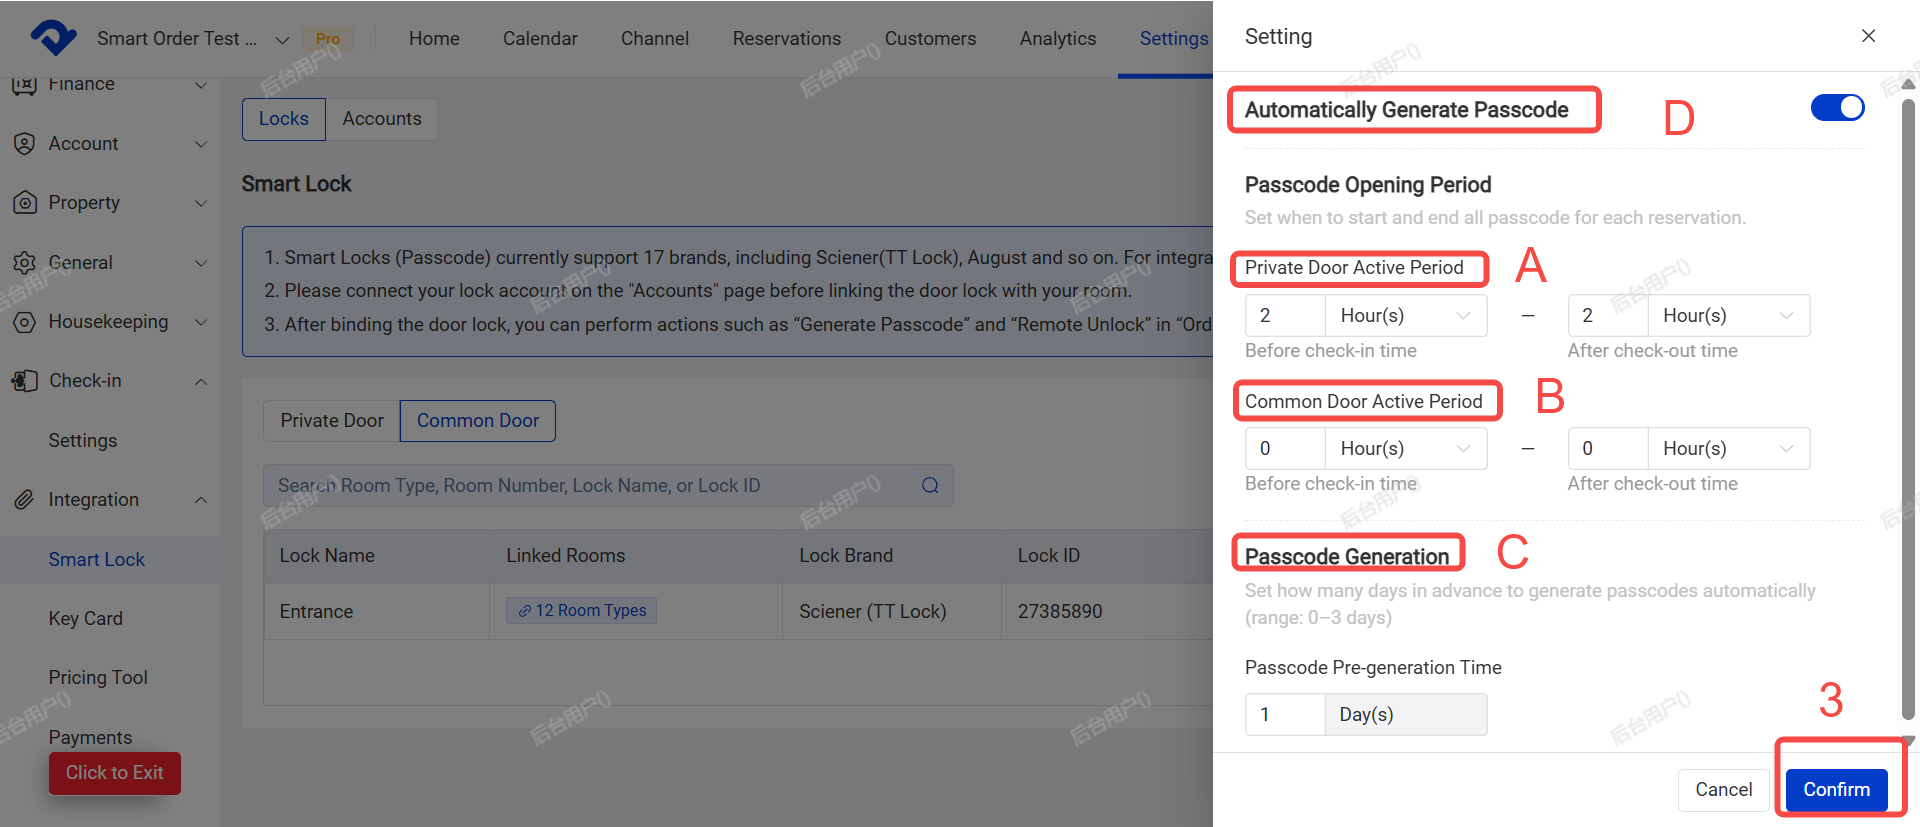
- Configure the following:
- A. Private Door Validity Period: e.g. 1 hour before check-in to 15 minutes after check-out
- B. Public Door Validity Period(For locks without a gateway , please set the password validity period in hours only. The system does not support minute-level precision.)
- C. Password Generation: Set how many days in advance passwords are generated (avaliable range:0–3 days)
- D. Enable Automatic Password Generation
- Click Confirm to save.
V. Door Lock Management
You can view passwords, add/delete passwords, check operation logs, remotely unlock doors, and modify passwords.
(1) Management Entry:
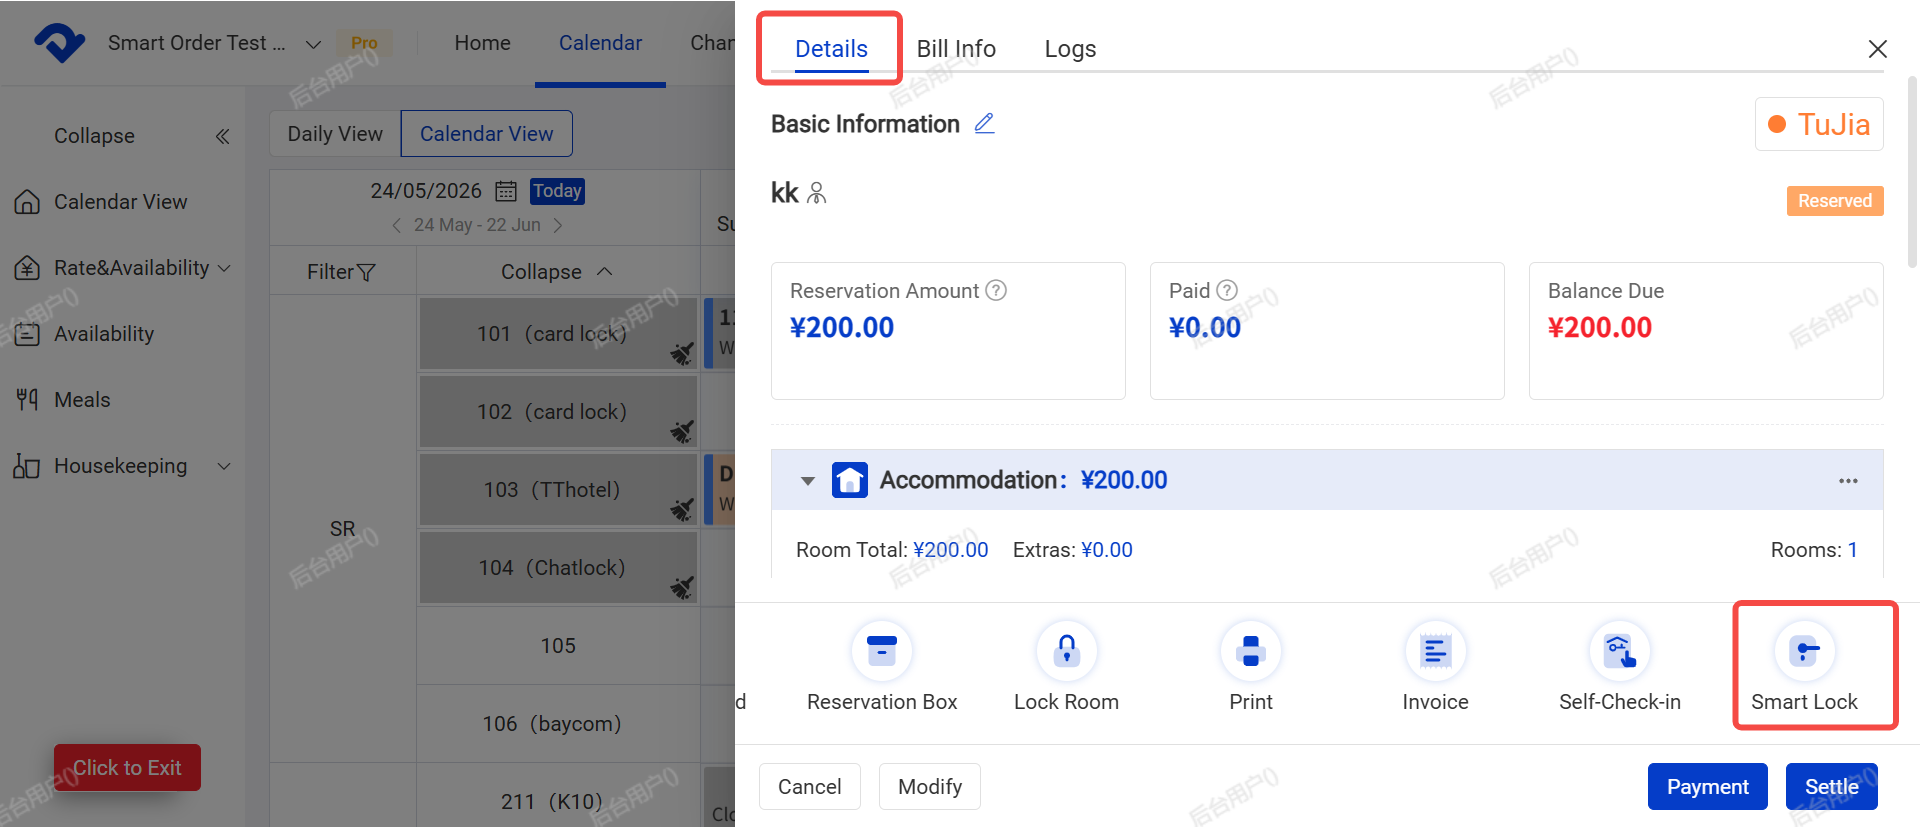
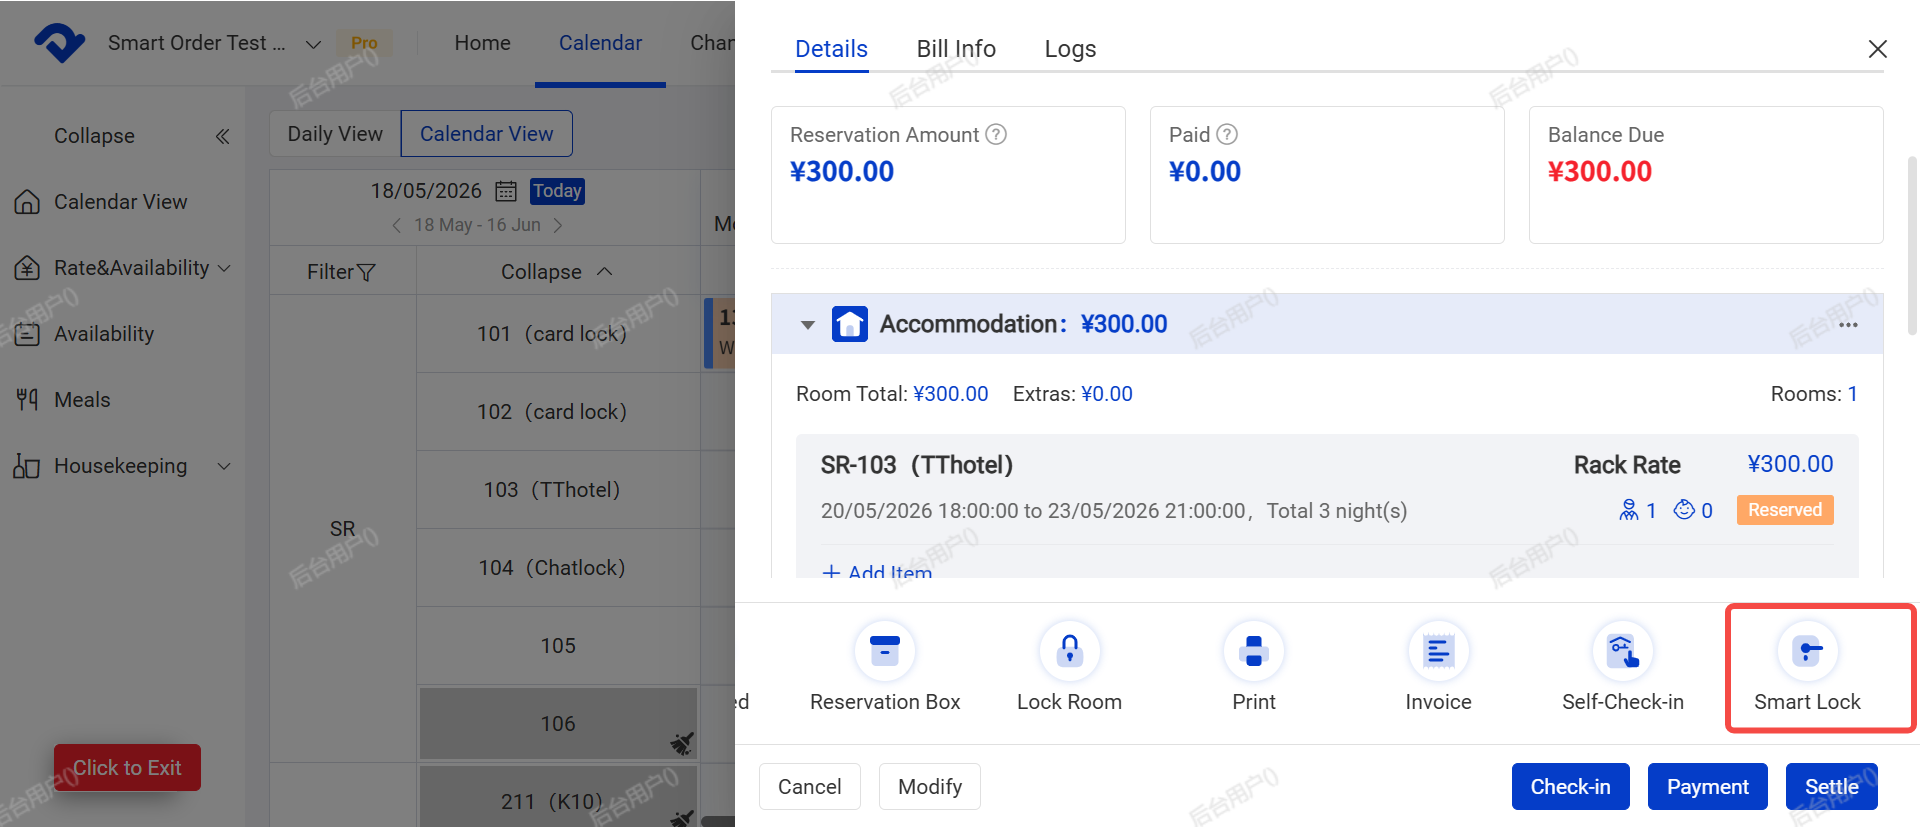
- Entry 1: Order Details Page → Bottom → Smart Lock
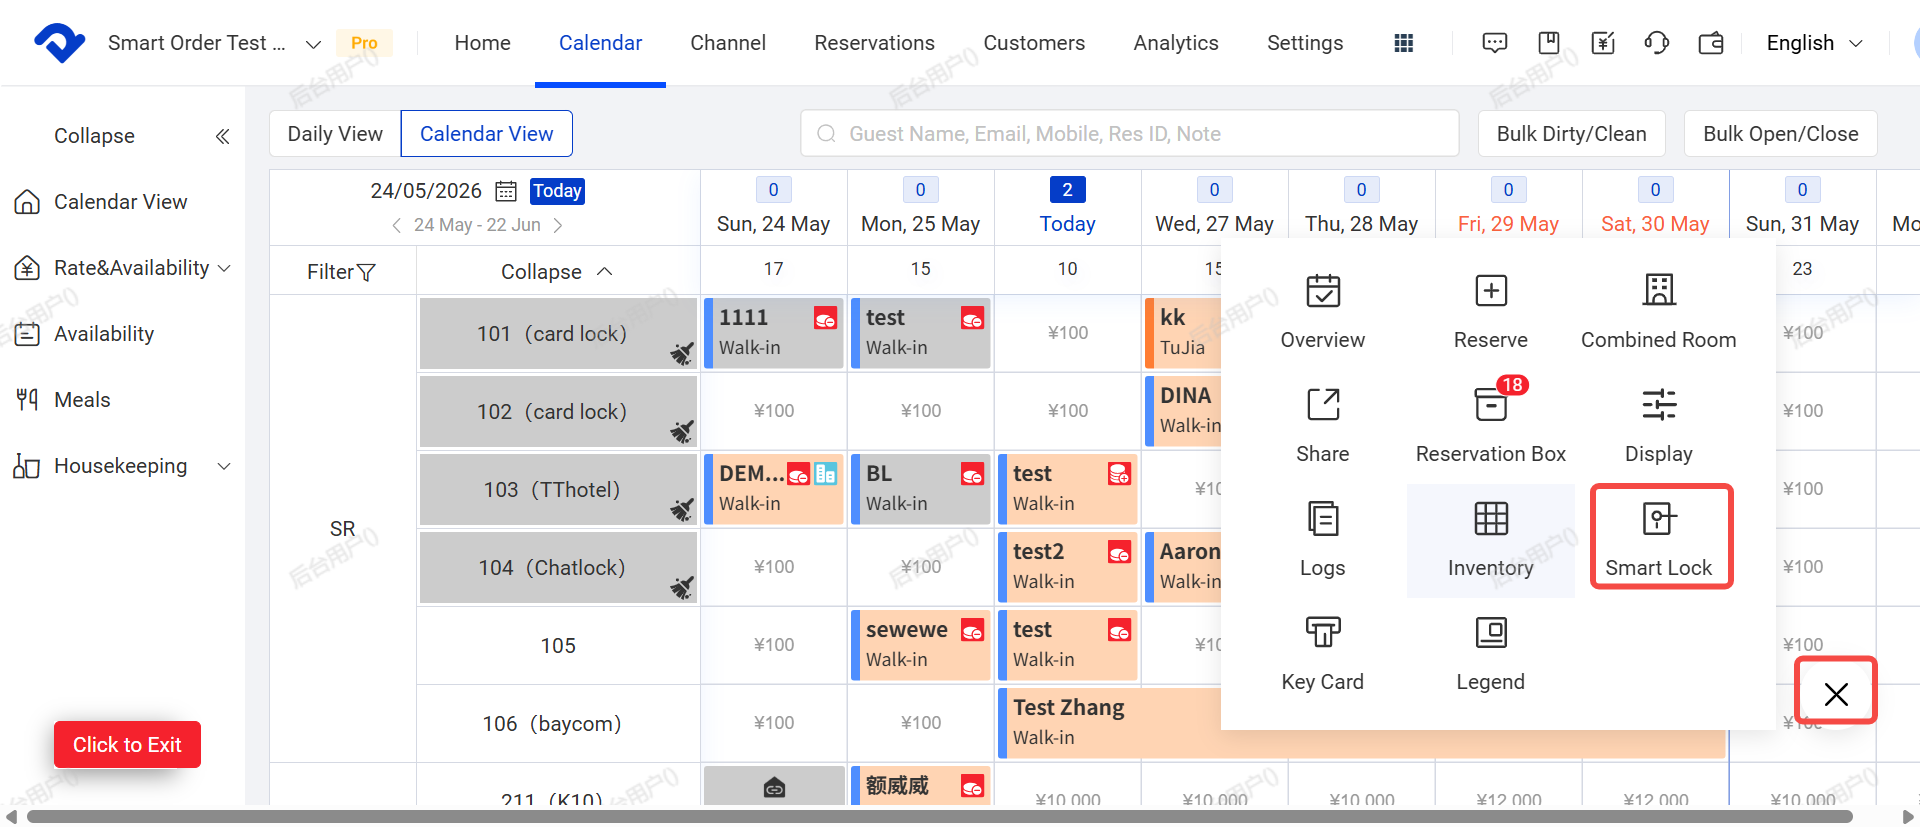
- Entry 2: Room Status Calendar → Bottom right “+” → Smart Lock
(2) View Passwords
- To view passwords for a specific order:
Go to Order Details →click Smart Lock. You can see the associated door lock name, password, current status (Active / Pending), validity period, and guest email information.
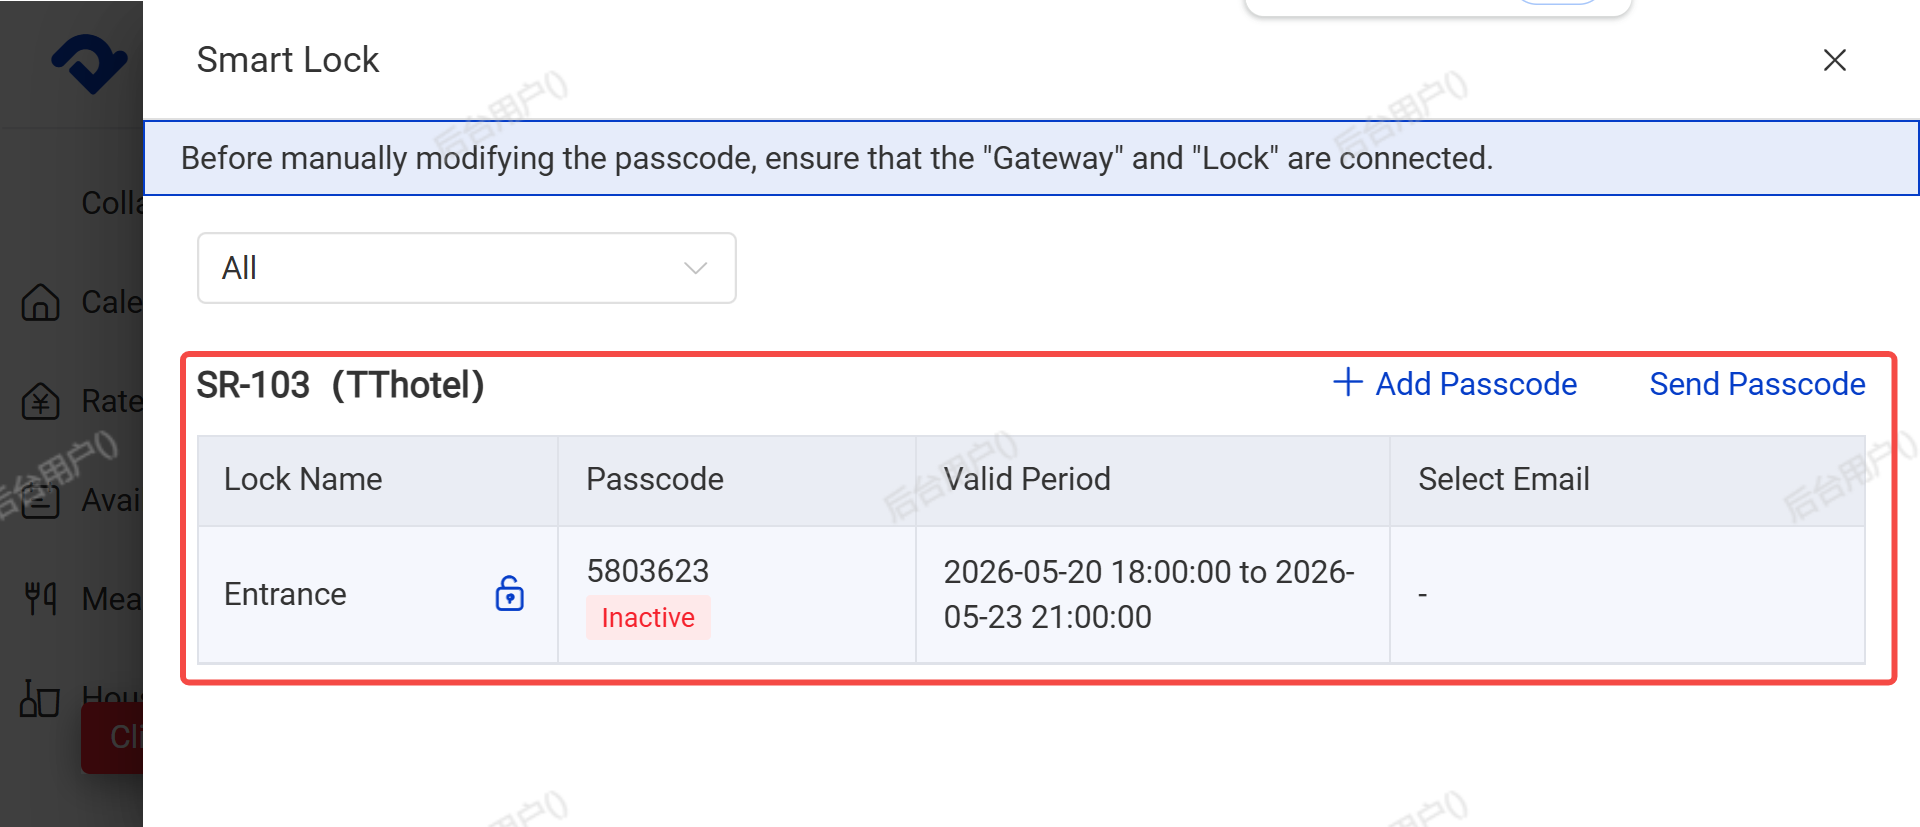
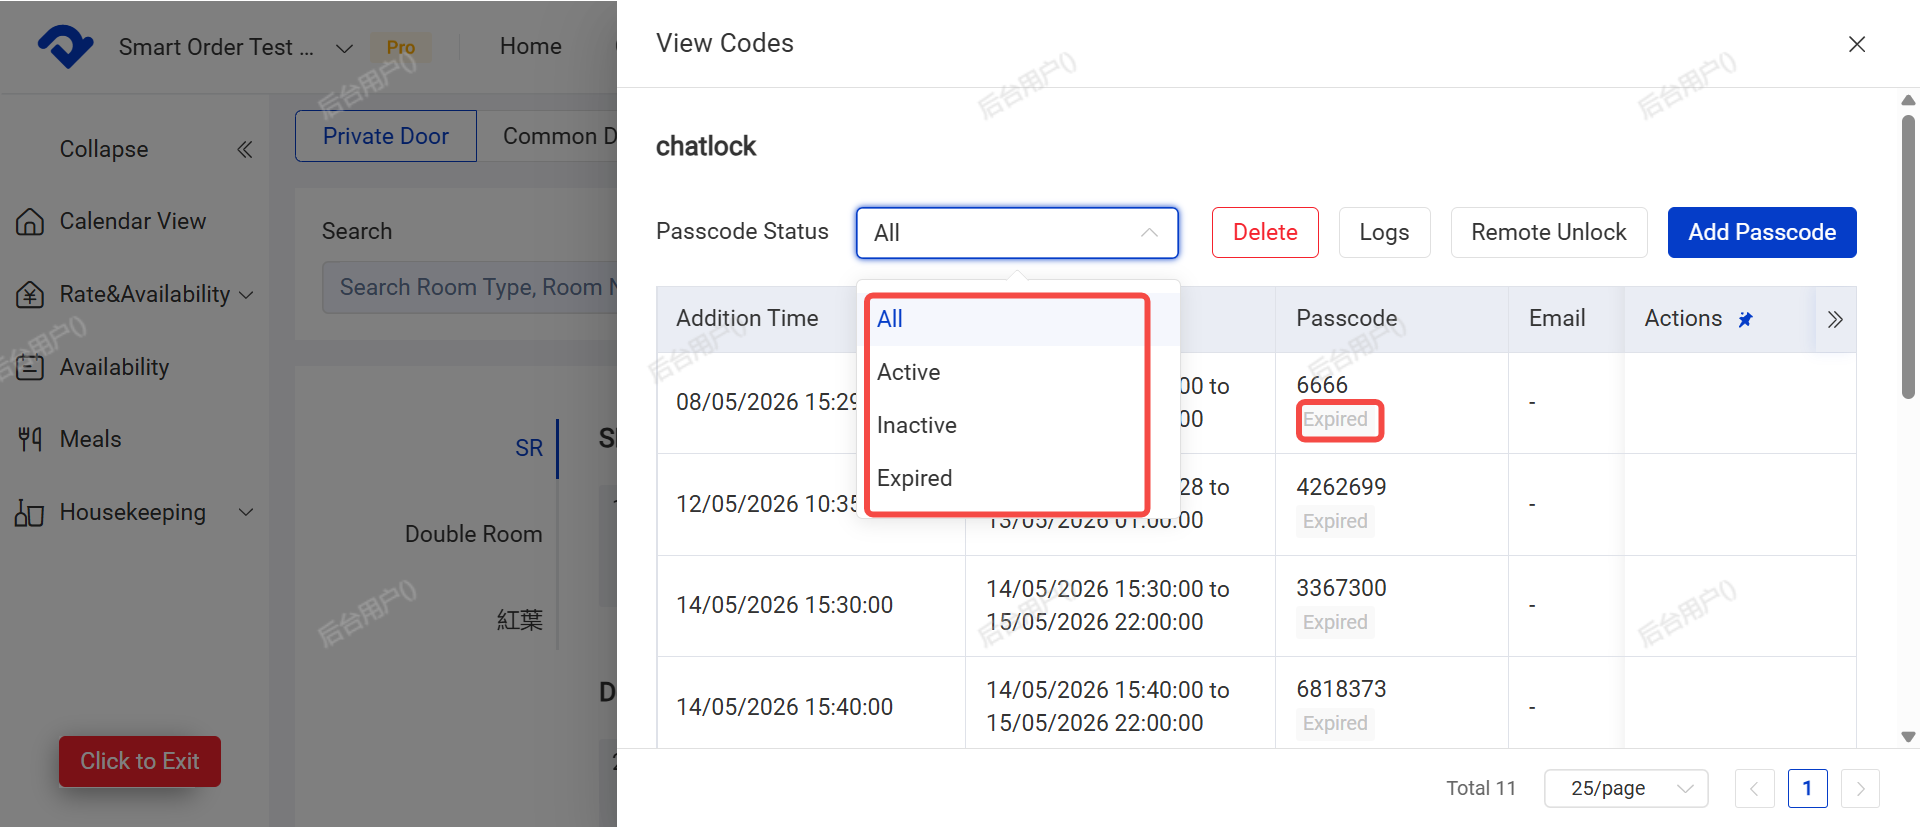
- To view all passwords for a specific lock:
Go to Calendar → Click the "+" button in the bottom right corner → Select Smart lock.
Click on the target door lock to view all passwords under that lock.
Search & Filter Options:
- A. You can search locks by room type, room number, lock name, or lock ID.
- B. System can display connected locks by room type, group, or lock name.
- C. Click on a lock to view all passwords associated with it.
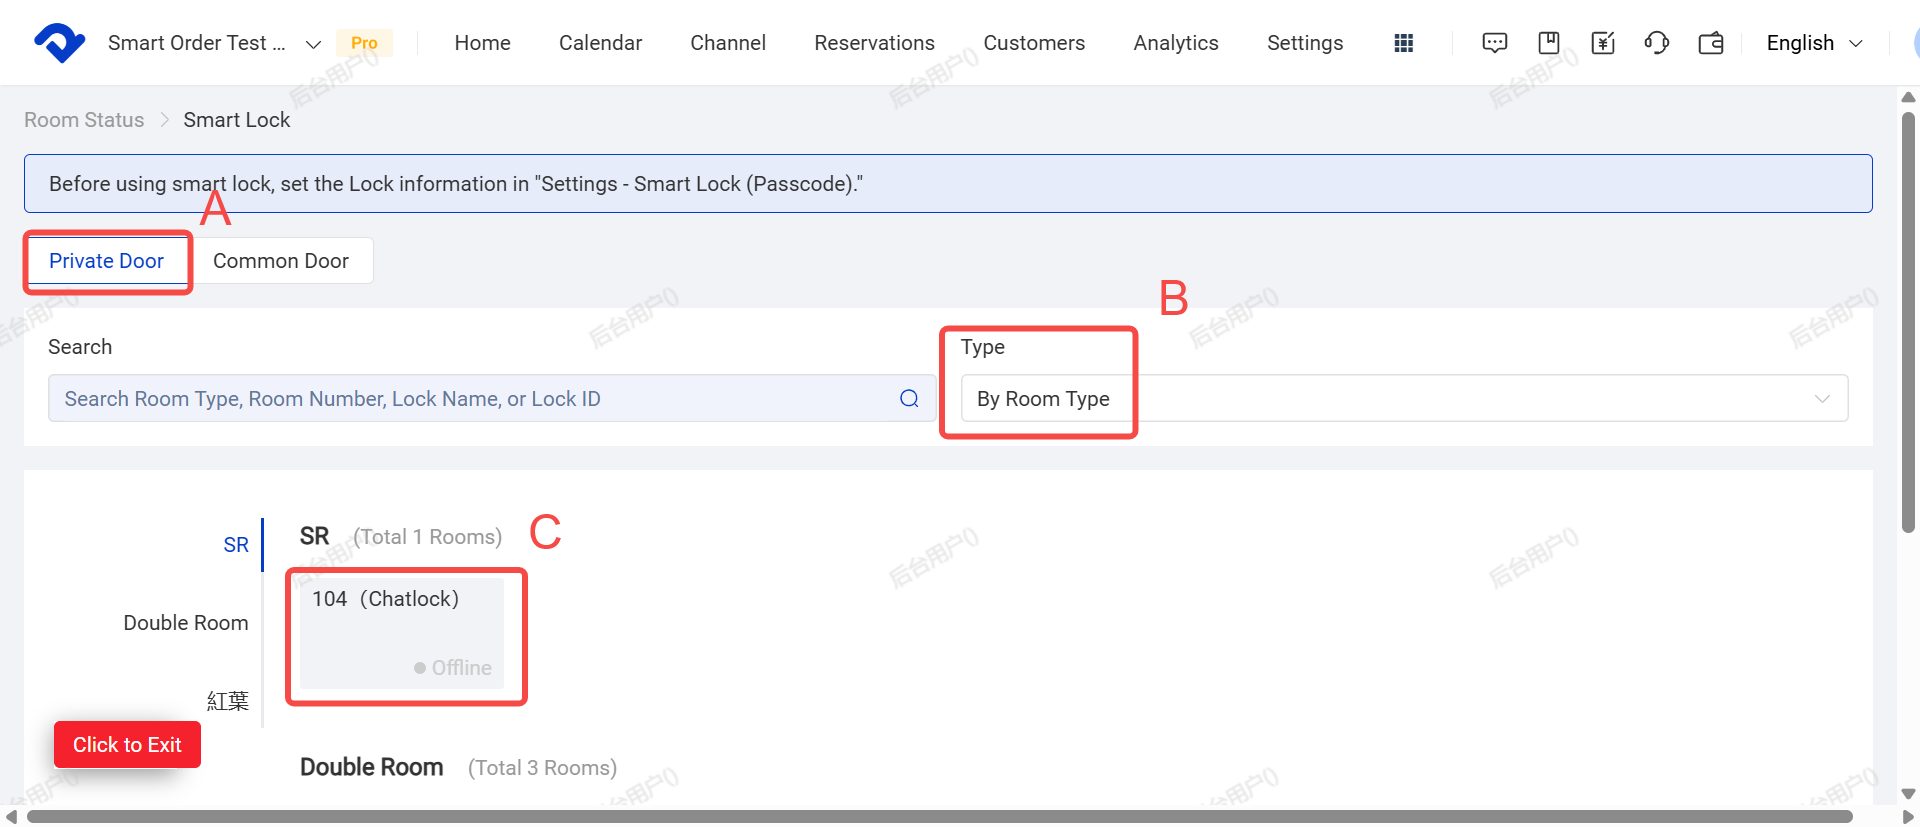
- You can filter passwords by status: Active, Pending, or Expired.
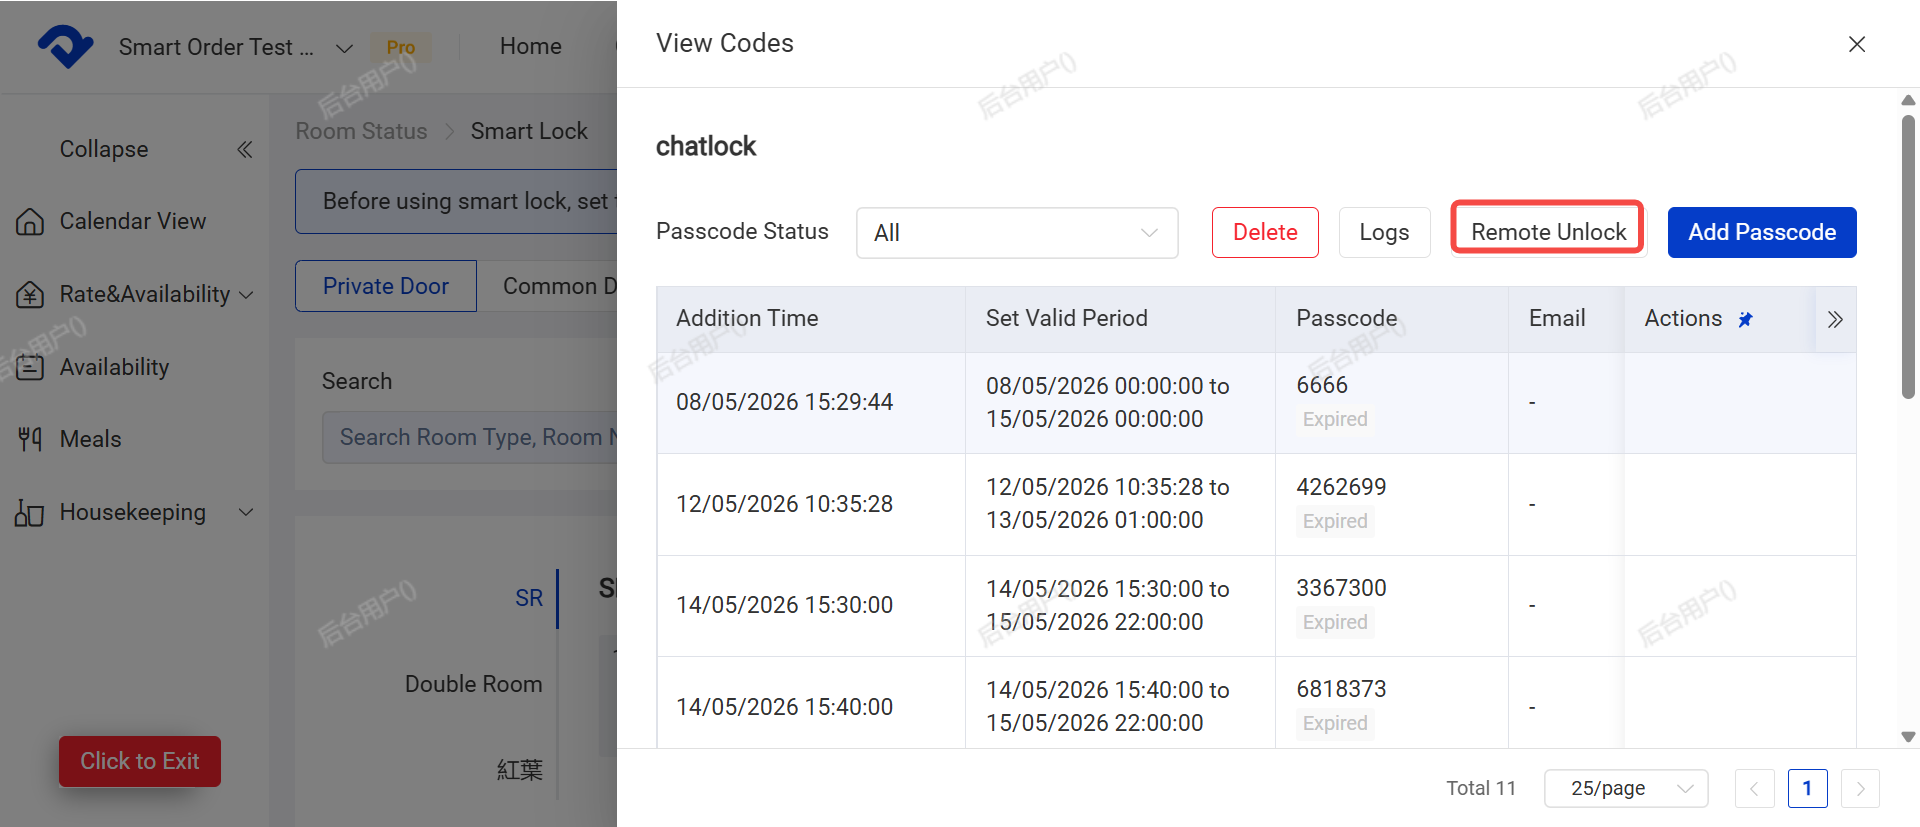
(3) Remote Unlock
※ Locks without a gateway do not support remote unlock.
- Entry 1 (from Order): Go to Order Details → Smart Lock → Click the door lock icon to remotely unlock the door for that guest immediately.
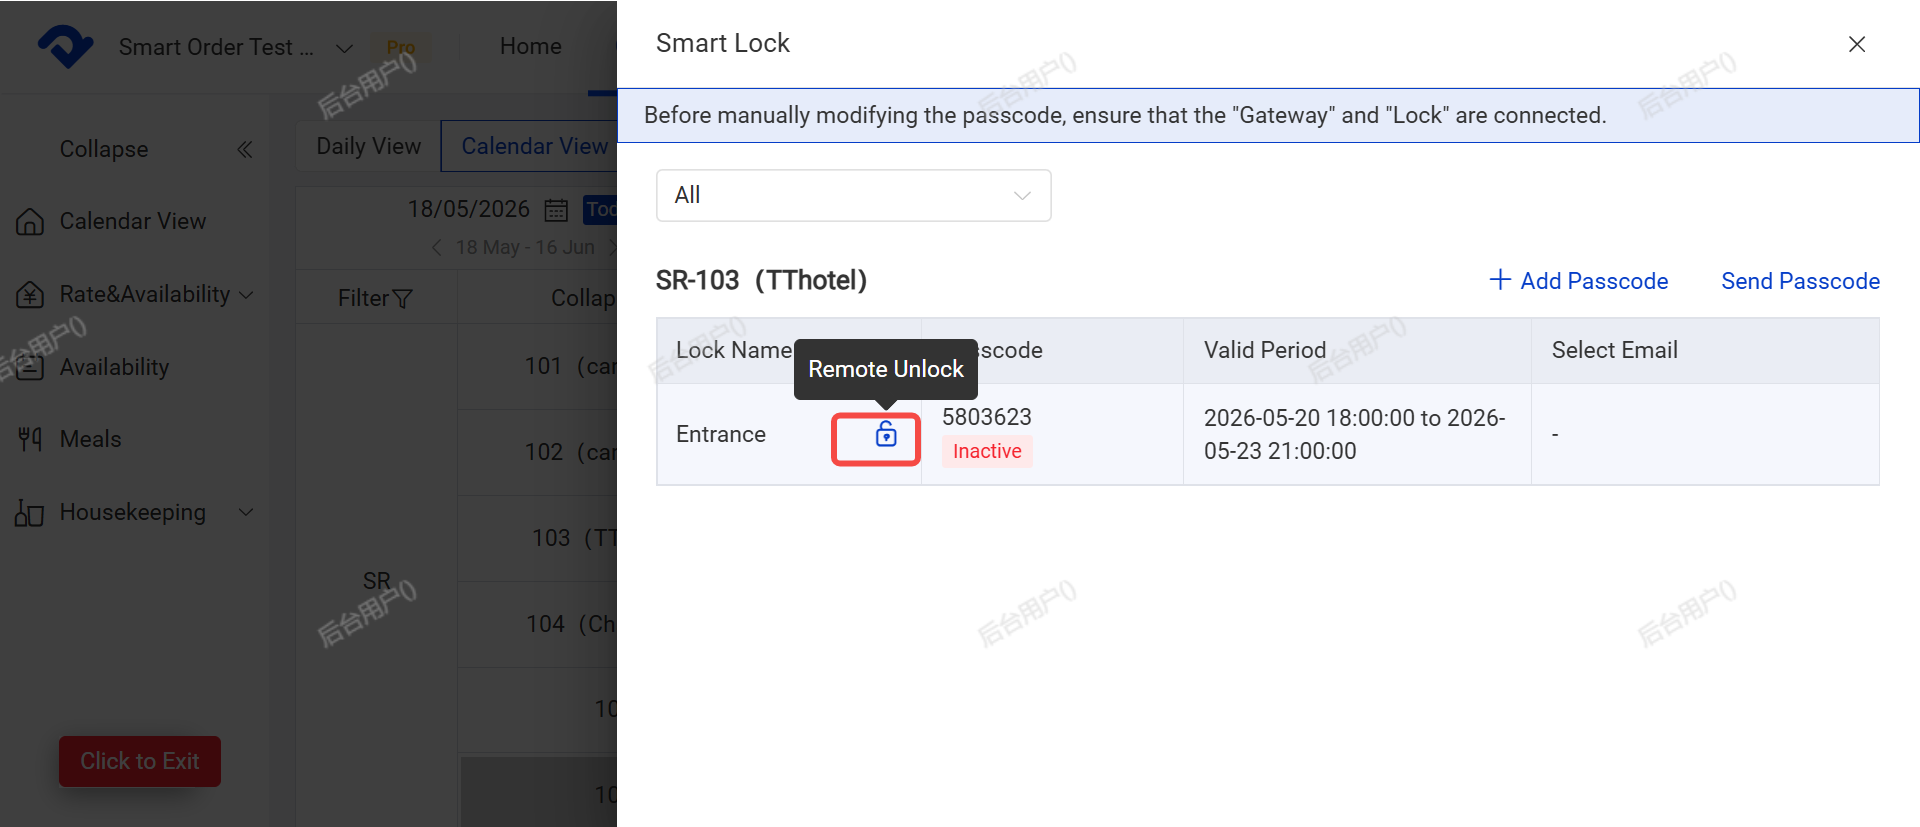
- Entry 2 (from Calendar): Go to Calendar → Click the "+" button in the bottom right → Smart order → Click Remote Unlock to open the selected lock immediately.
(4) Add Password
※ Locks without a gateway do not support custom passwords. The system will generate random passwords automatically.
- Add password for a specific order: Go to Order Details → Smart Lock → Click Add Password.
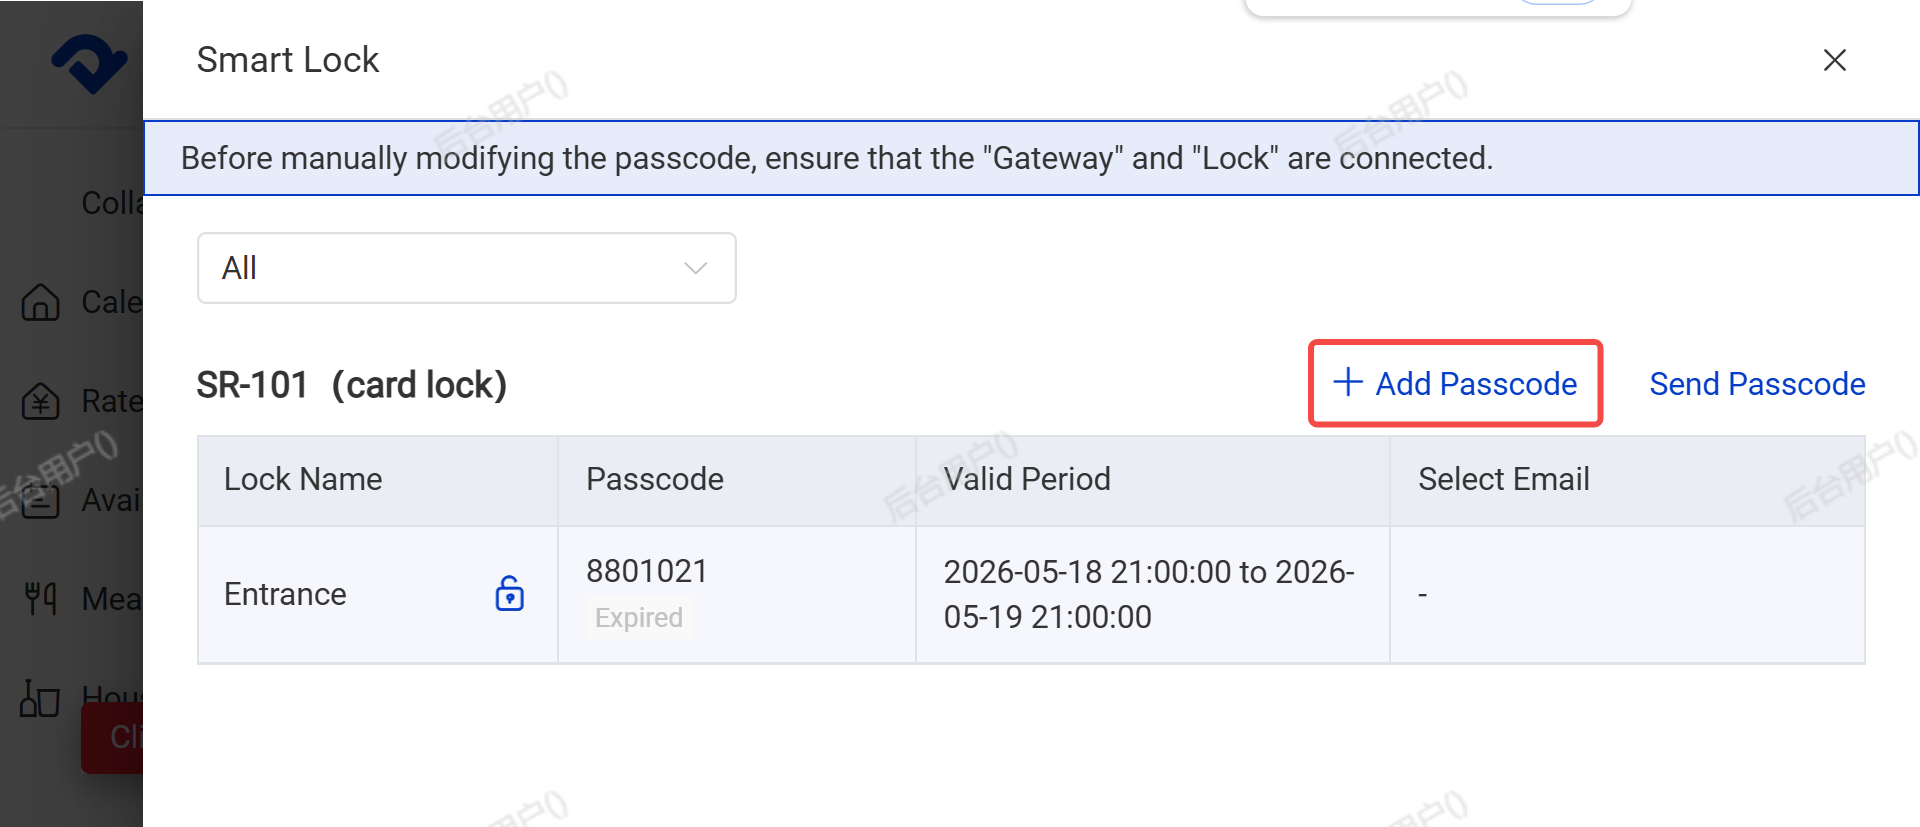
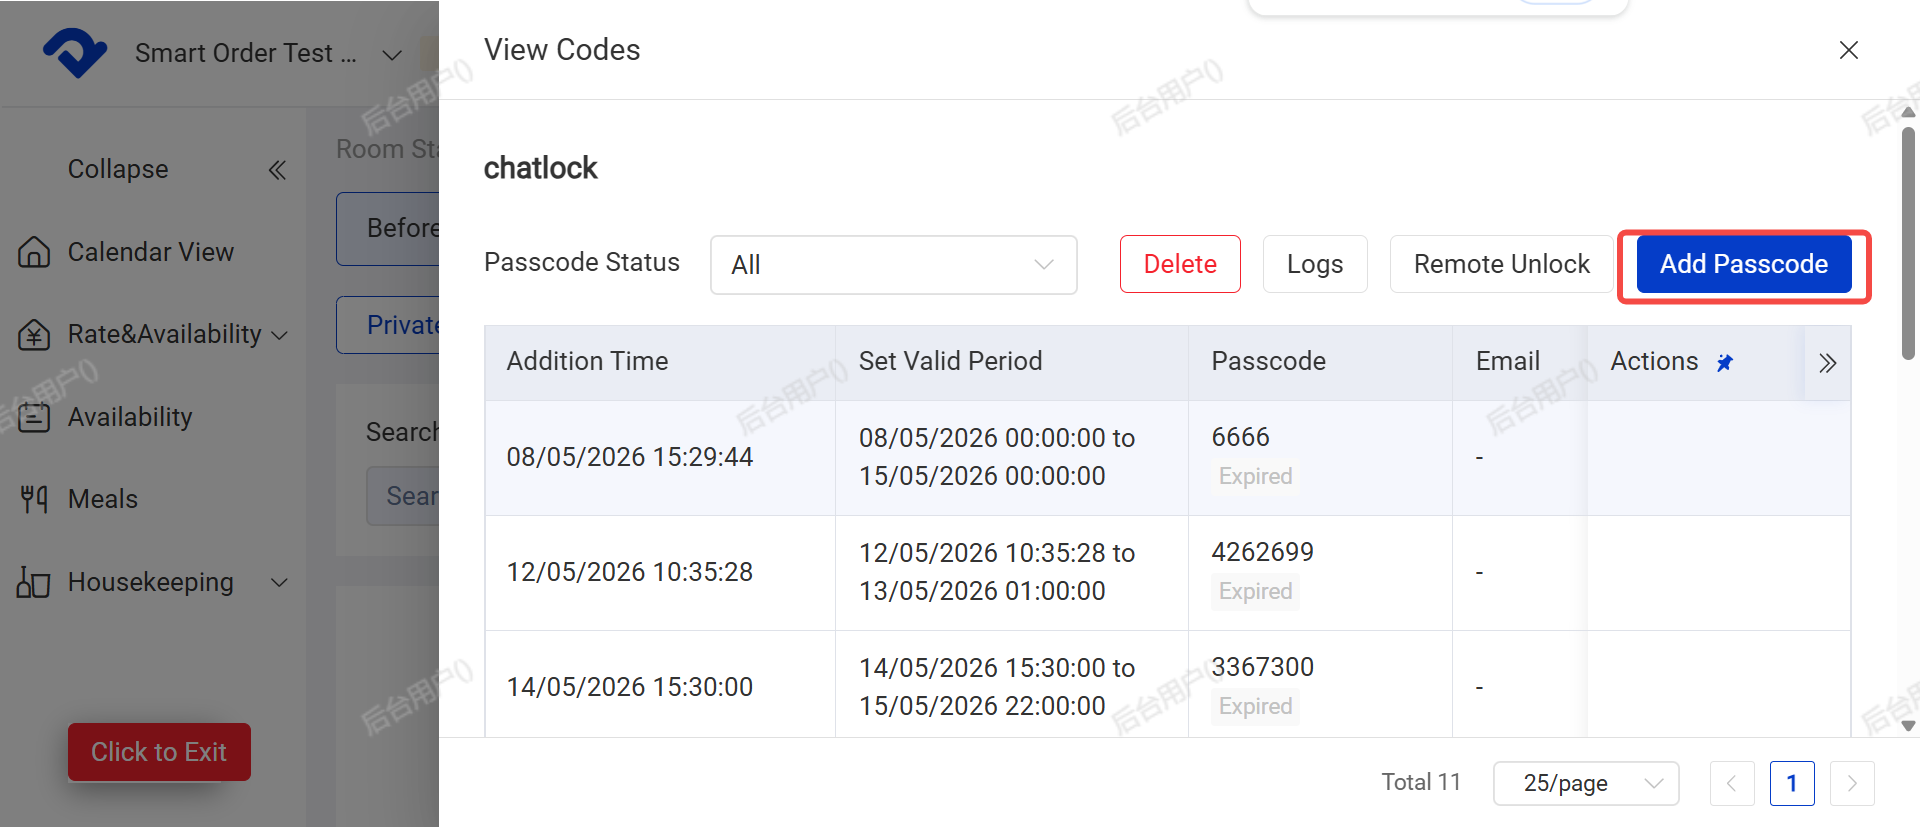
- Add password for a specific lock: Go to Calendar → Click the "+" button in the bottom right → Smart Lock → Click add Passcode
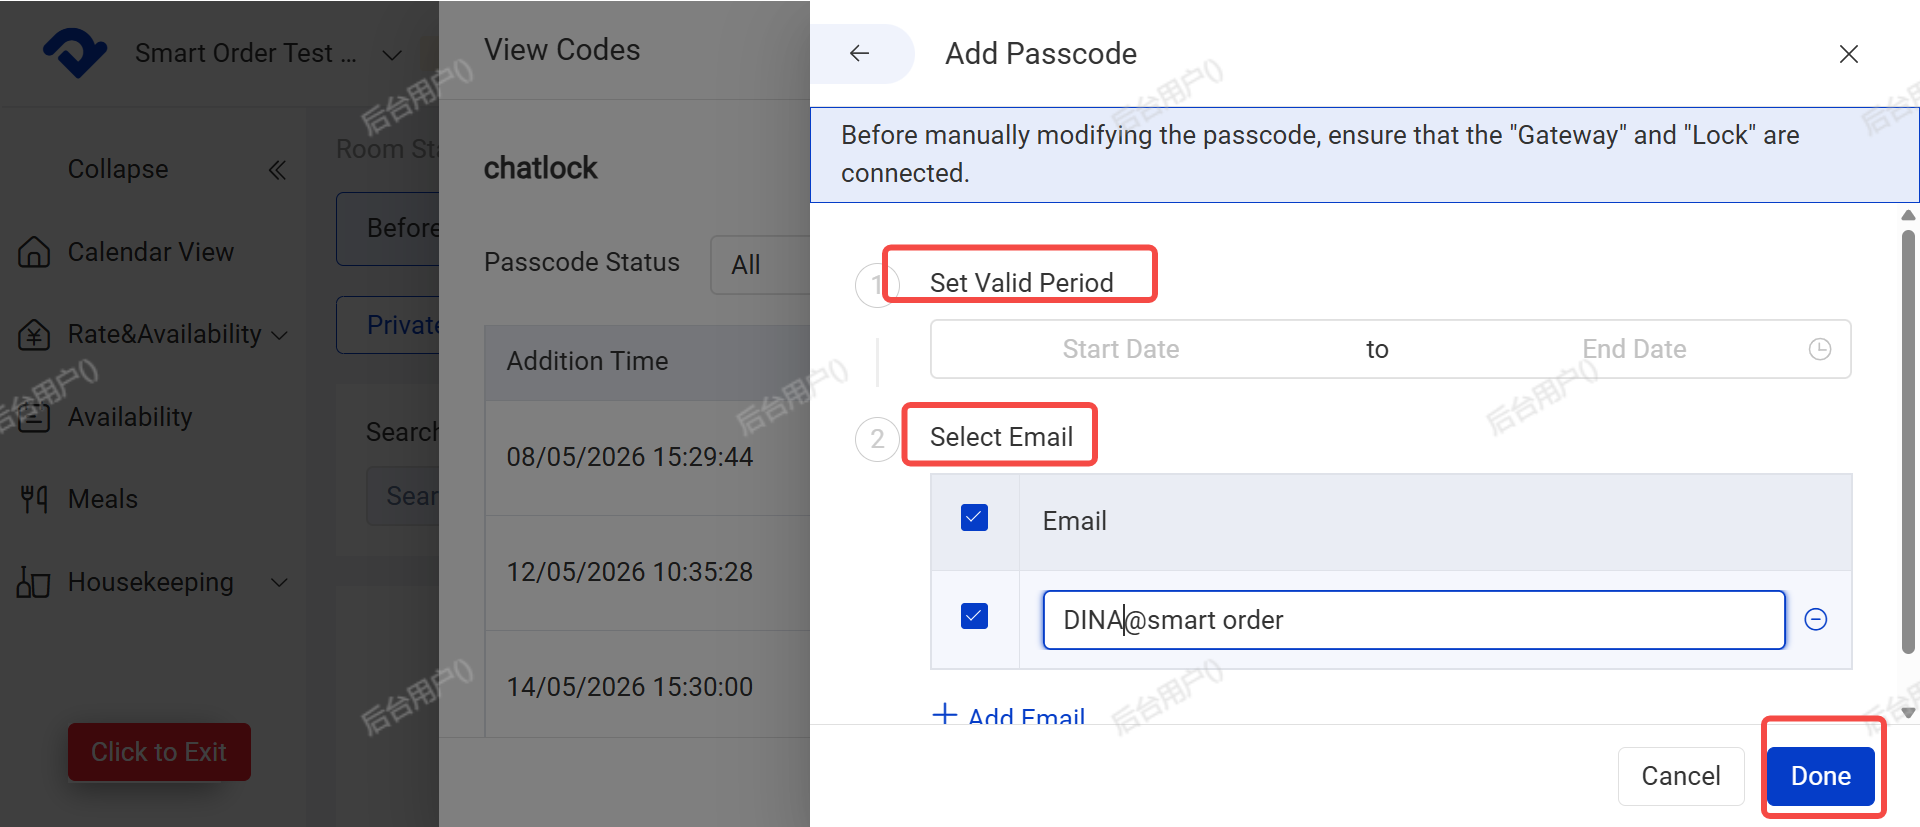
Enter the password validity period, then click Done to generate the password.
If you want to send the password to the guest, add their email address and tick the box.
(5) Send Password
From Order Details → Smart Lock → Click Send Password,
Select the password you want to send, add the guest’s email (if not already added), and click Confirm.
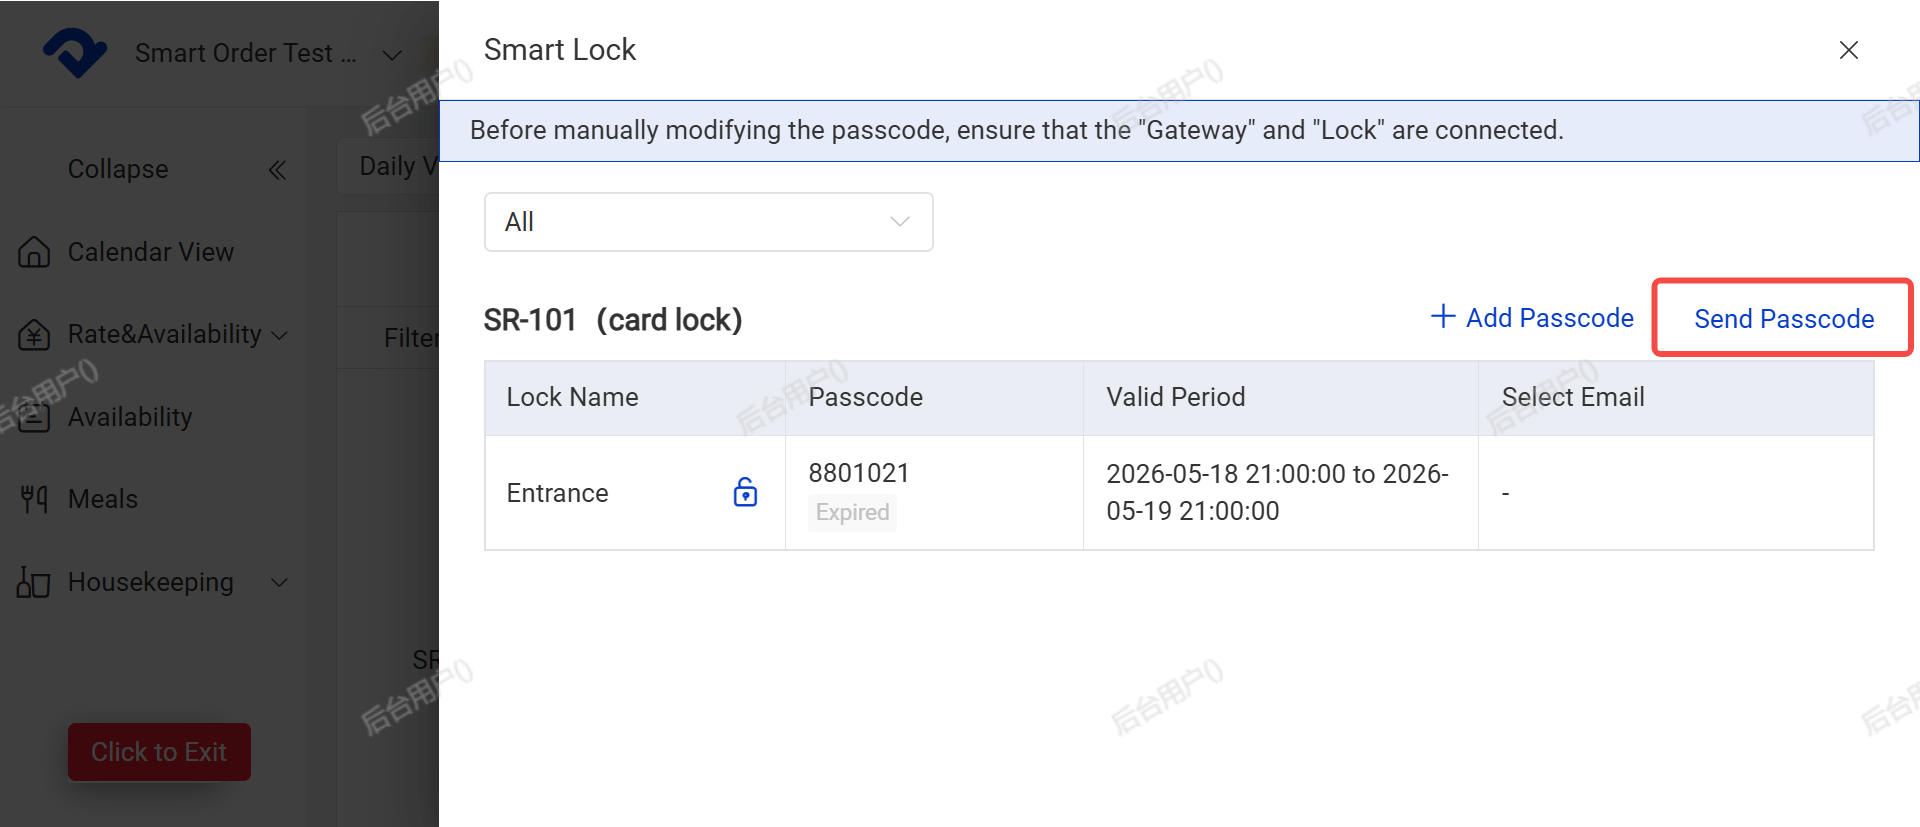
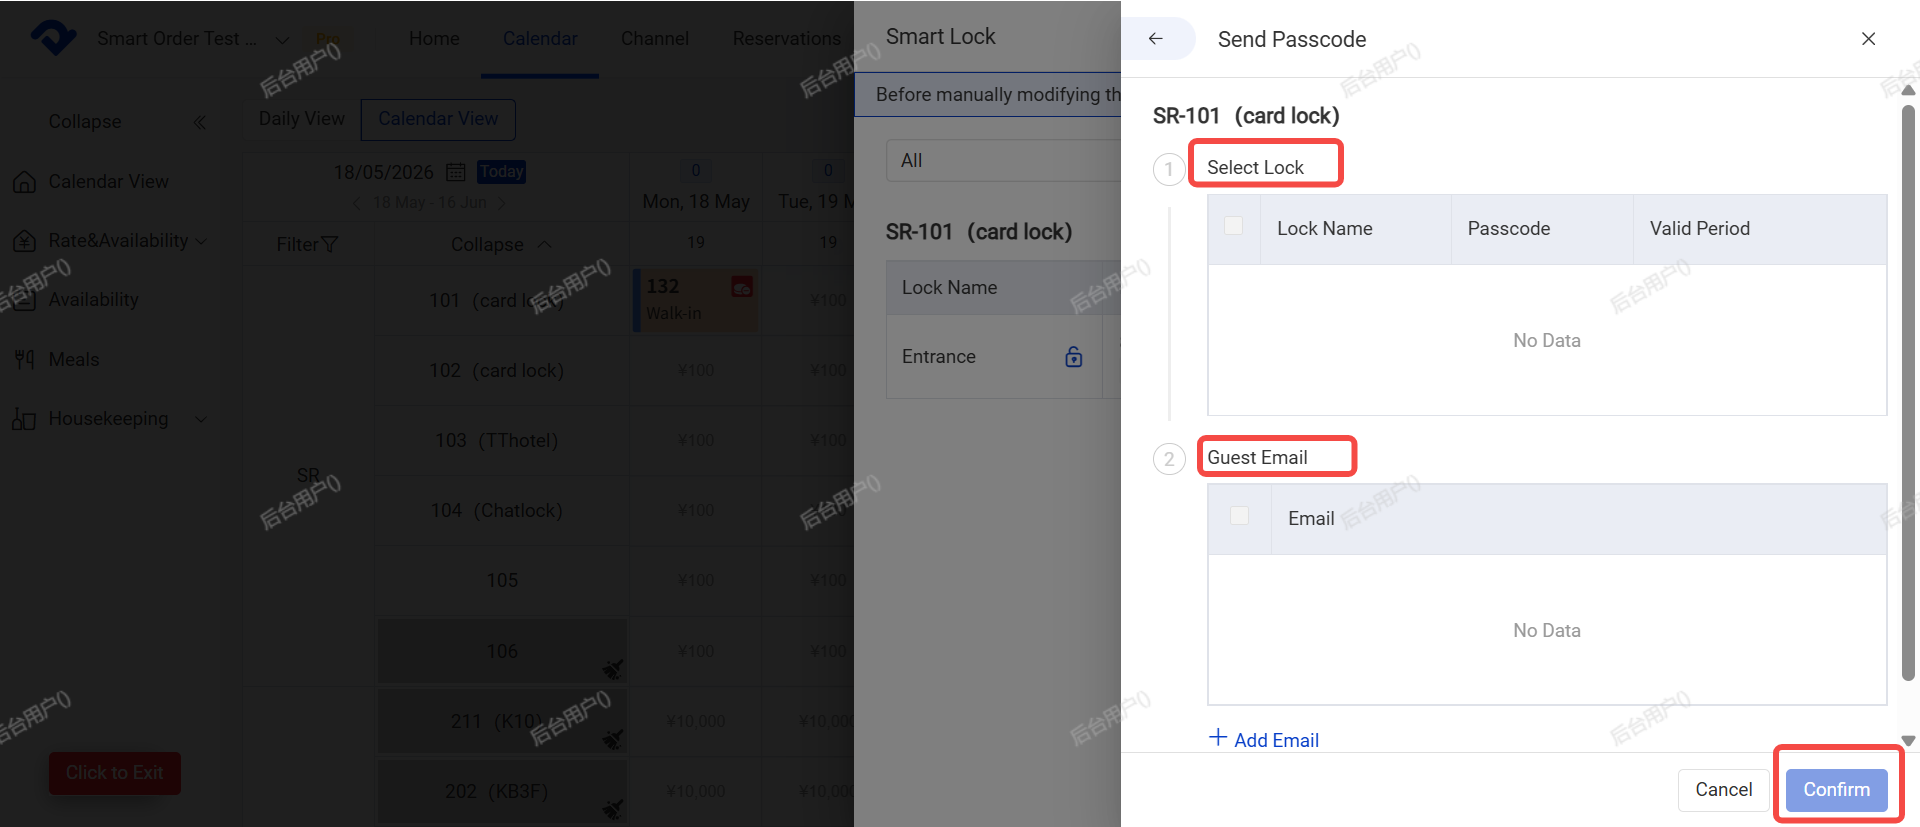
After clicking confirm, the password will be sent to the guest’s email. (Sample email content is shown below.)

(6) Delete Password
※ Locks without a gateway do not support deletion via PMS.
Entry: Calendar → Bottom right "+" button → Smart Lock → Delete
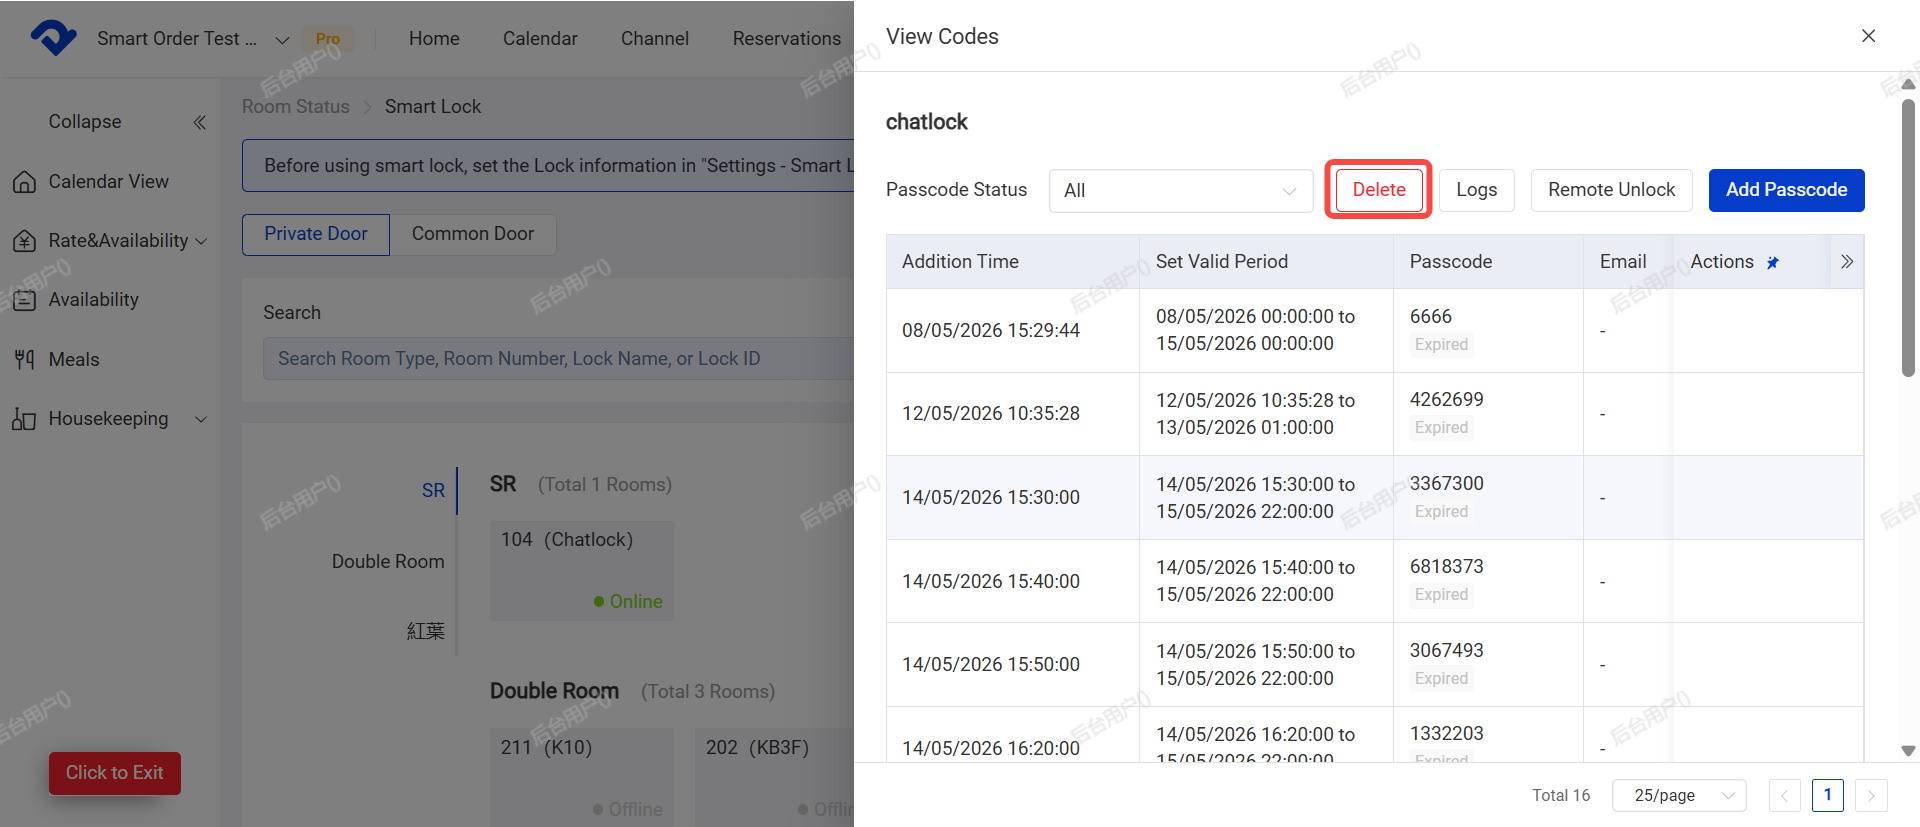
You can also delete passwords that are currently in Active status.
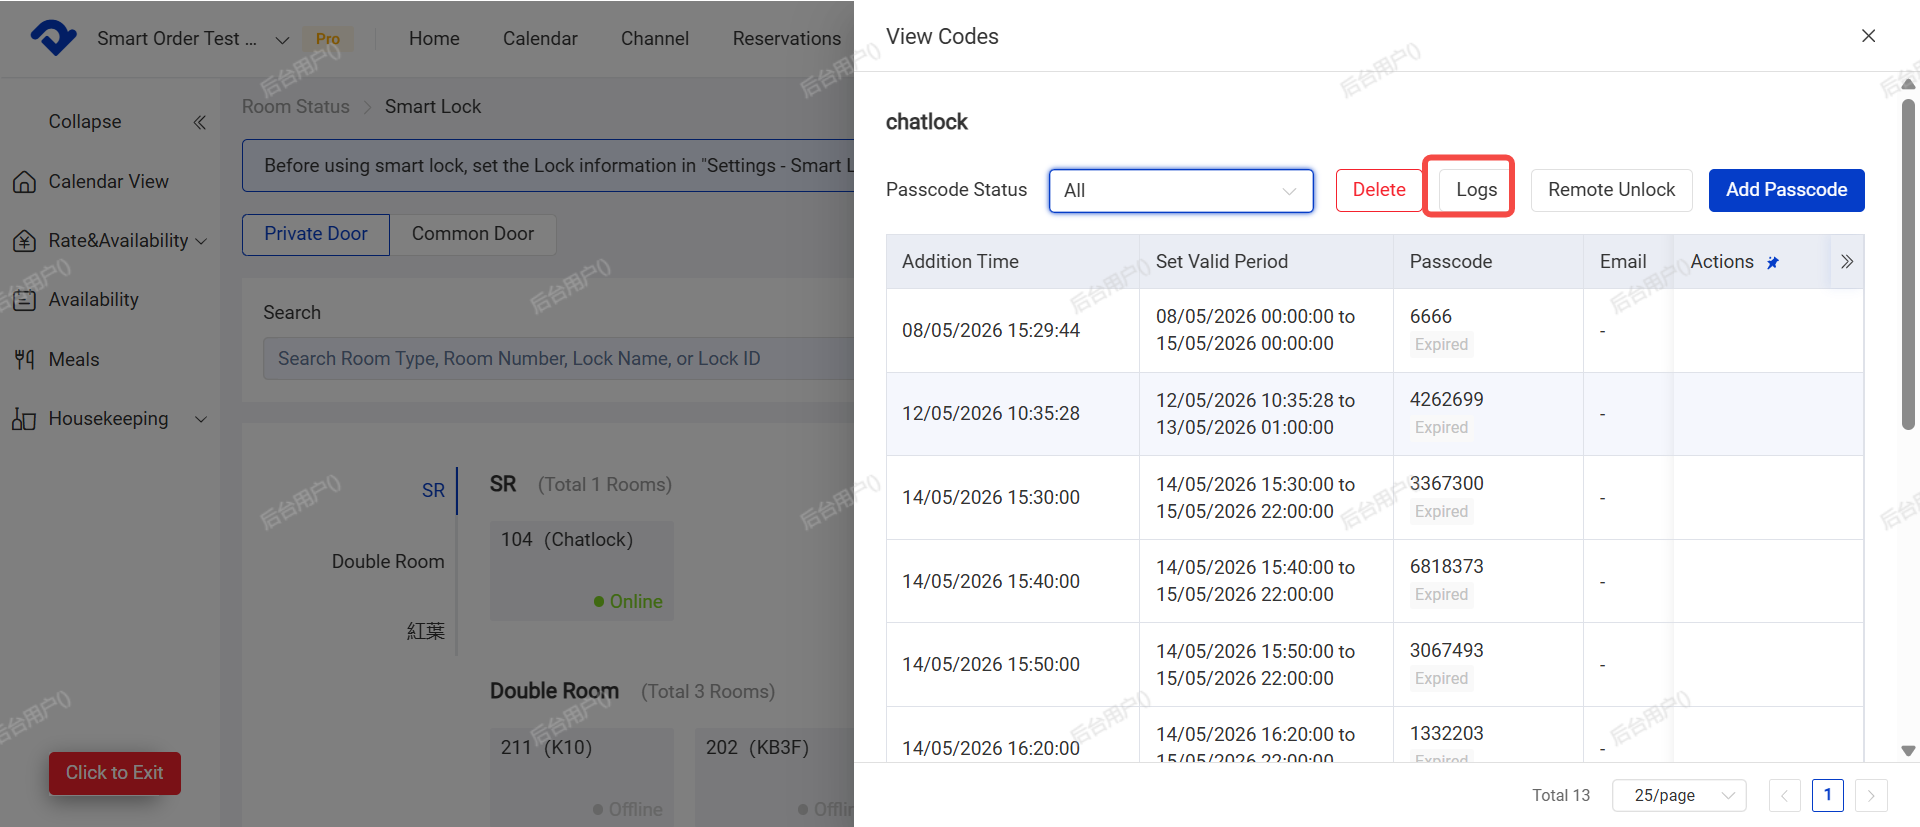
(7) View Password Log
Entry: Calendar → Bottom right "+" button → Smart Lock → Logs
You can view the operation history of passwords, including generation, modification, deletion, reset, and expiration records.
(8) Modify Password
The system-generated password can be updated by modifying the check-in and check-out time of the order.
If a guest requests a late checkout, early check-in, or any other change that requires adjusting original password validity period, you can simply modify the order’s check-in and check-out times. The system will then automatically generate a new password based on the updated dates.
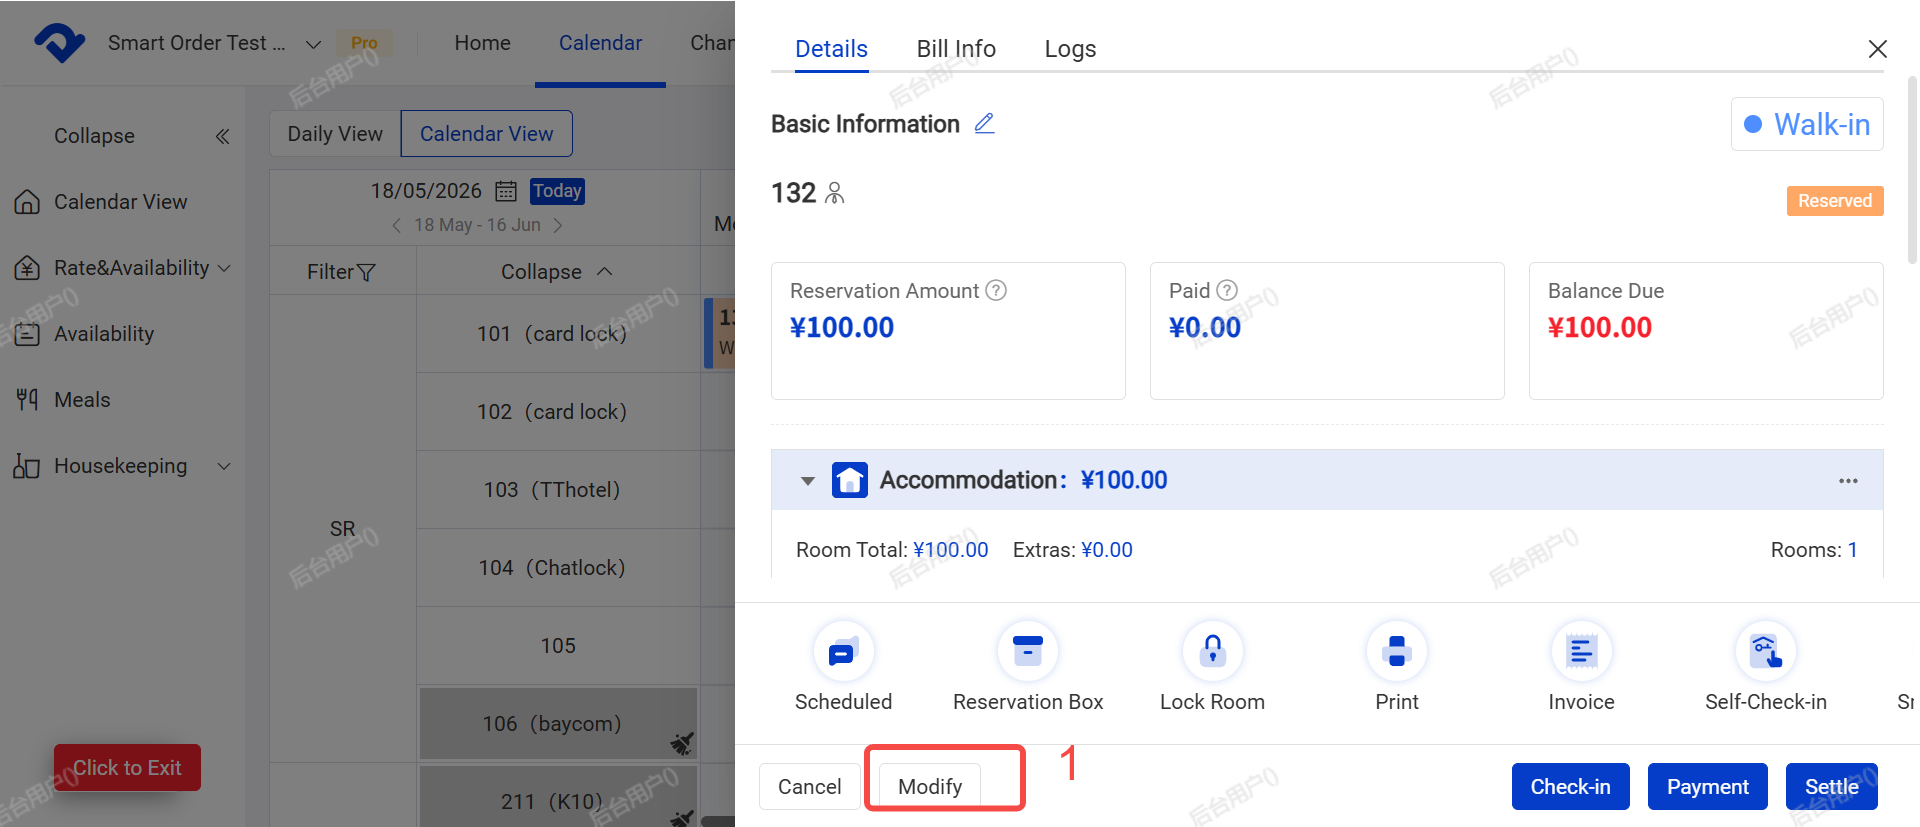
Steps to Modify Password:
- Click Modify at the bottom left of the order details.
- Modify the check-in and check-out time.
- Select the effective time period and click OK.
- Click Save.
- After modifying the dates, go back to View New Password (section (2)) to check whether the password and validity period have been updated.