Before setting up Self Check-in, please complete the property information first.
I. Prepare the Self Check-in Email(Scheduled Msg)
The foundation of Self Check-in is the message guests will receive. You should configure this first.
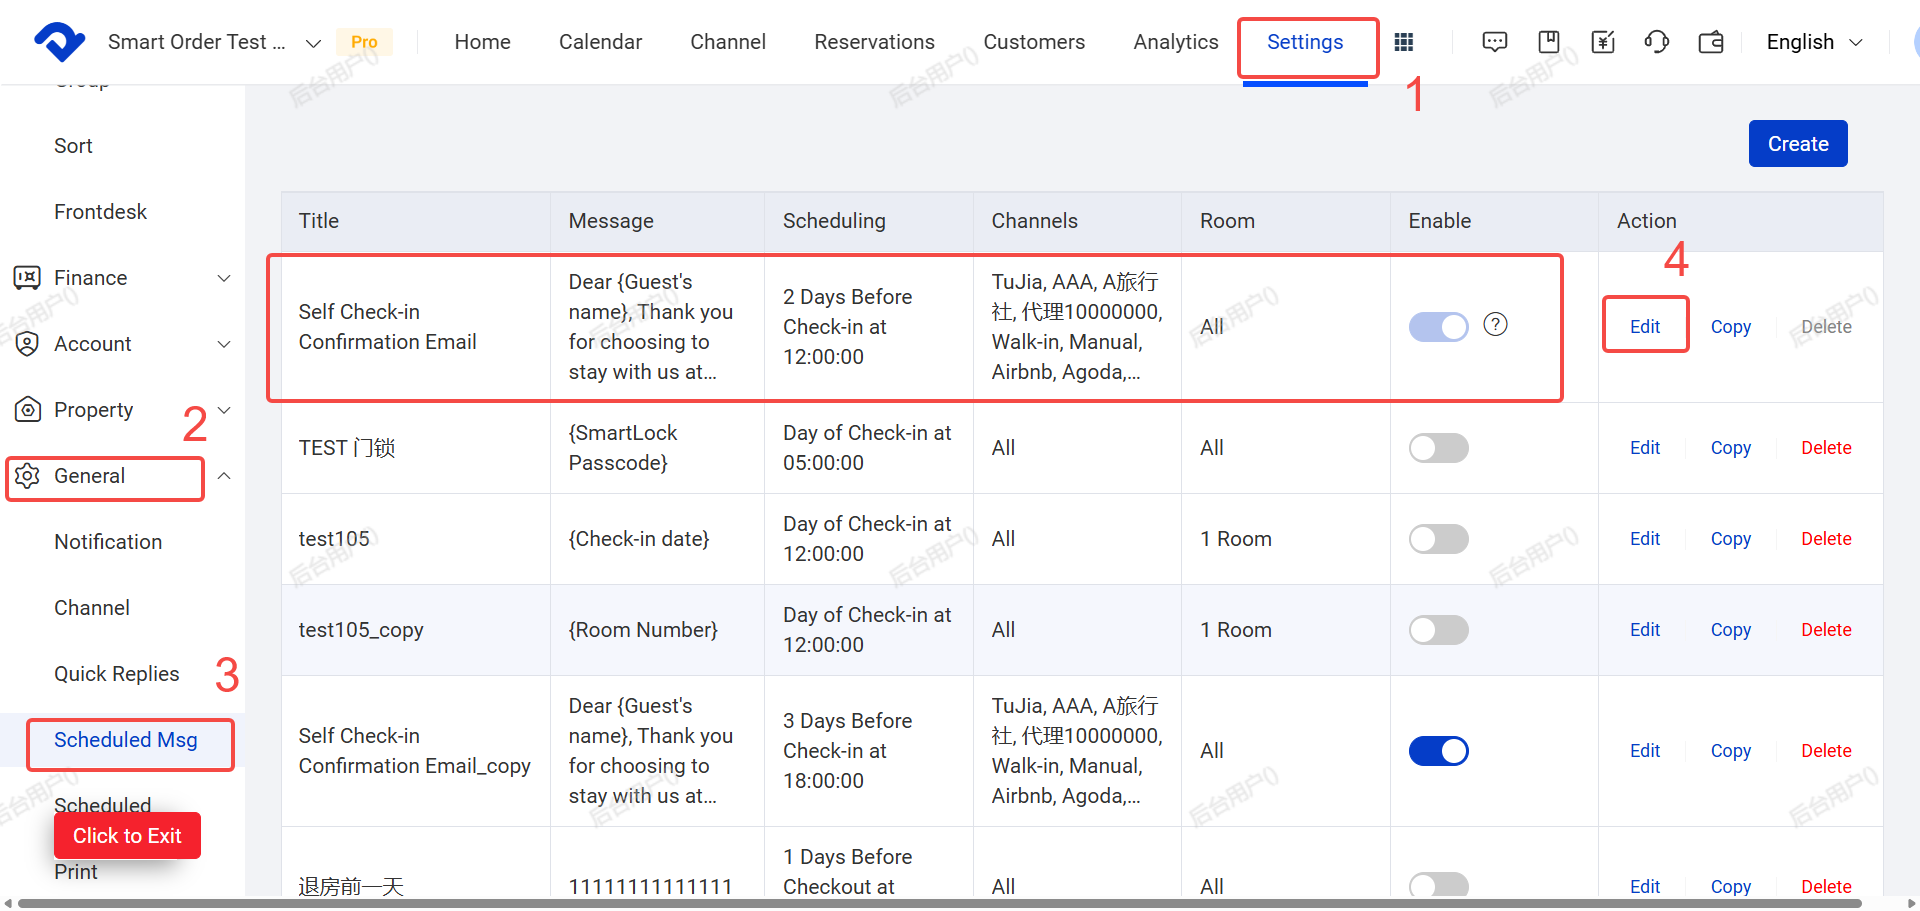
- Go to Settings → General Settings → Scheduled Msg → Find Self Check-in Confirmation Email (it has a "?" icon) and click Edit.
Alternative path:
Go to Settings → Settings under Check-in → Click “Click here” to go to Scheduled Msg.
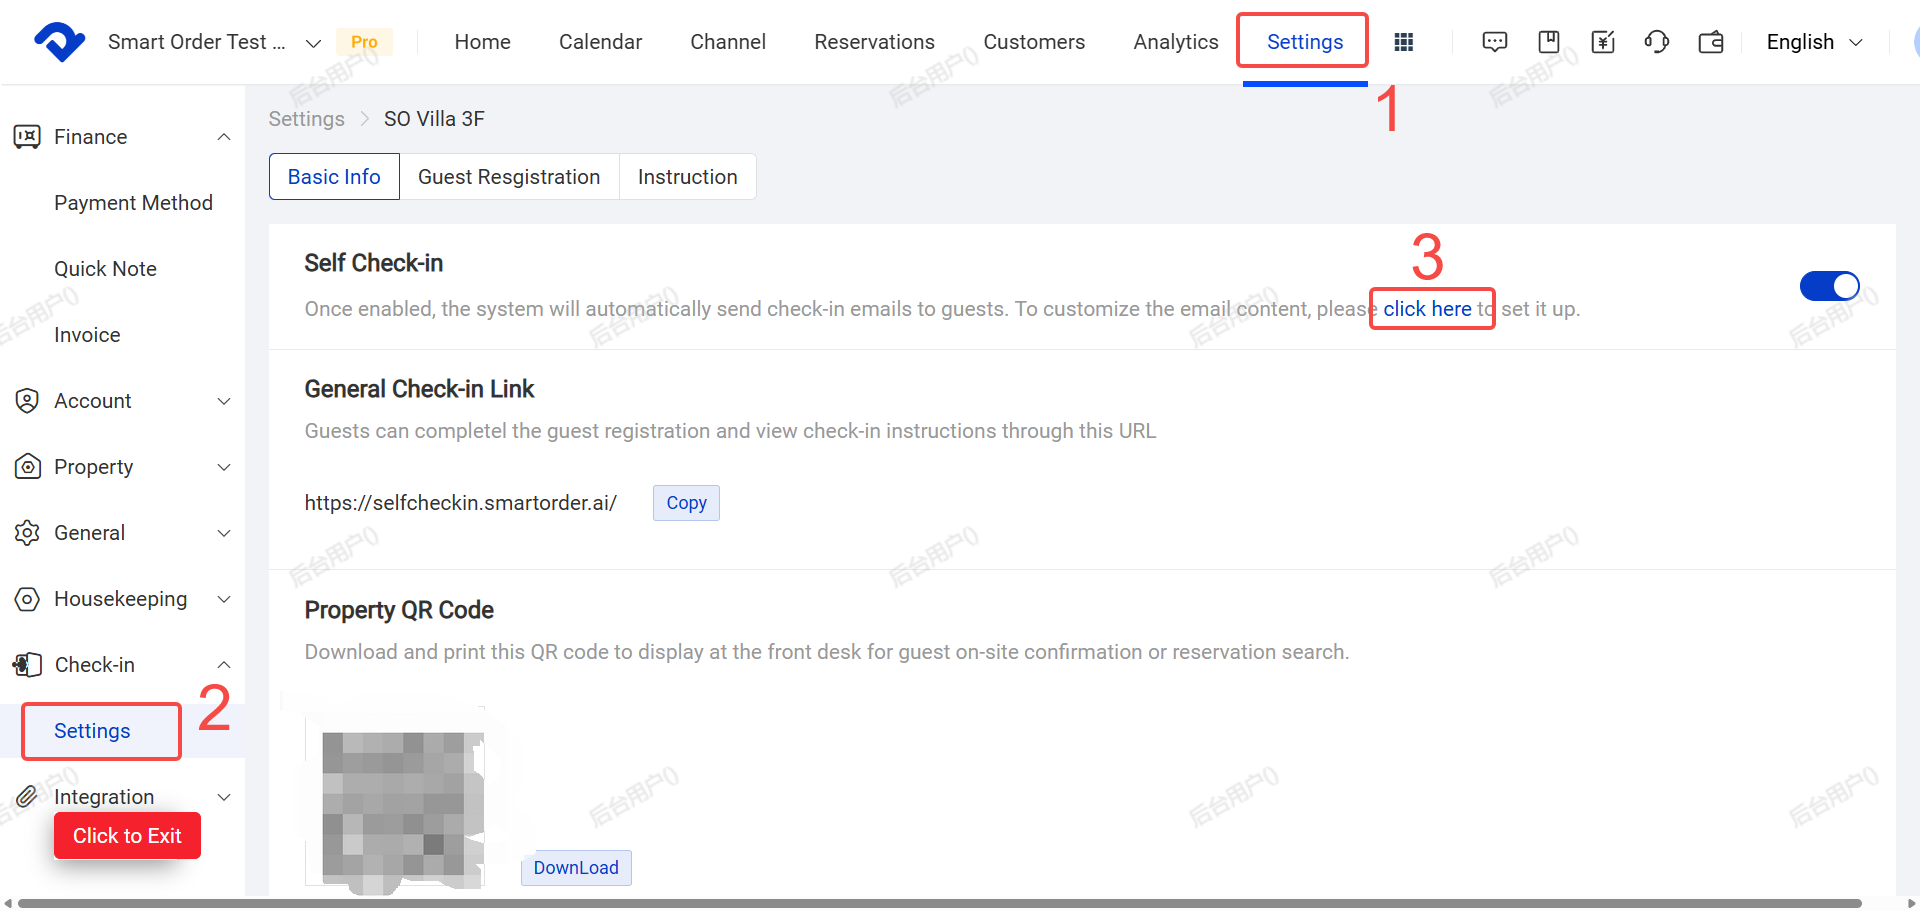
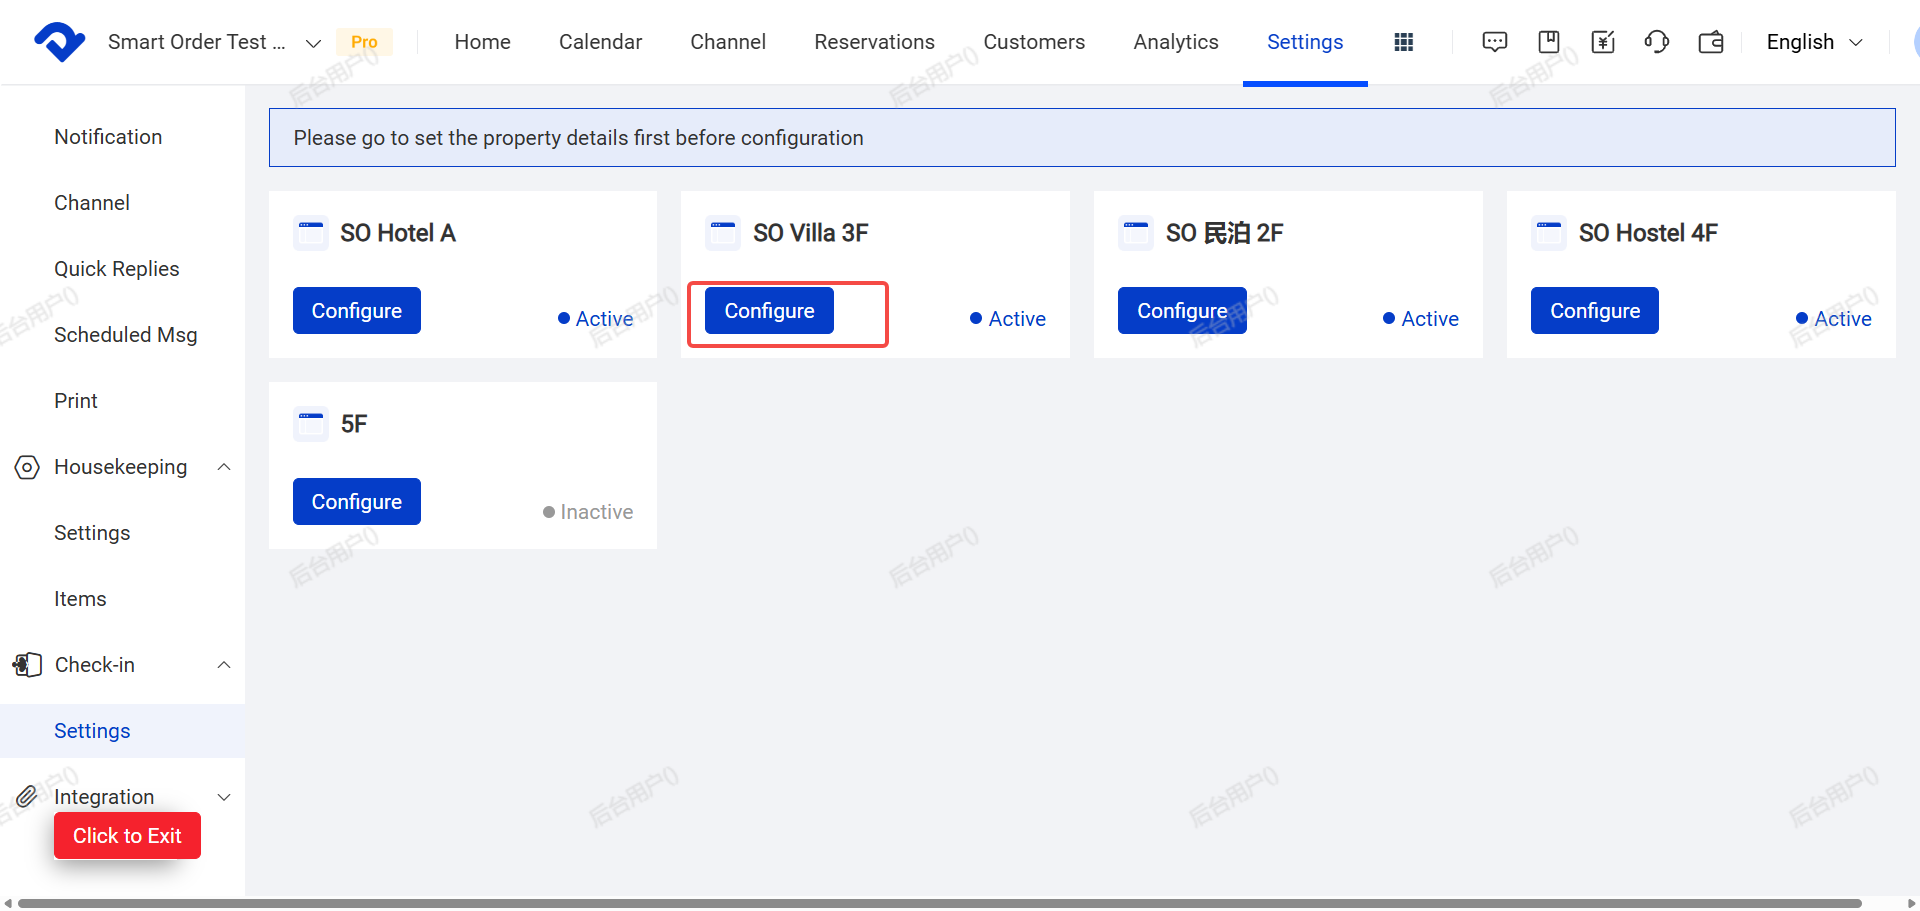
※Note for Multi-Property setup: click Configure on the corresponding property first to enter its Self Check-in settings.
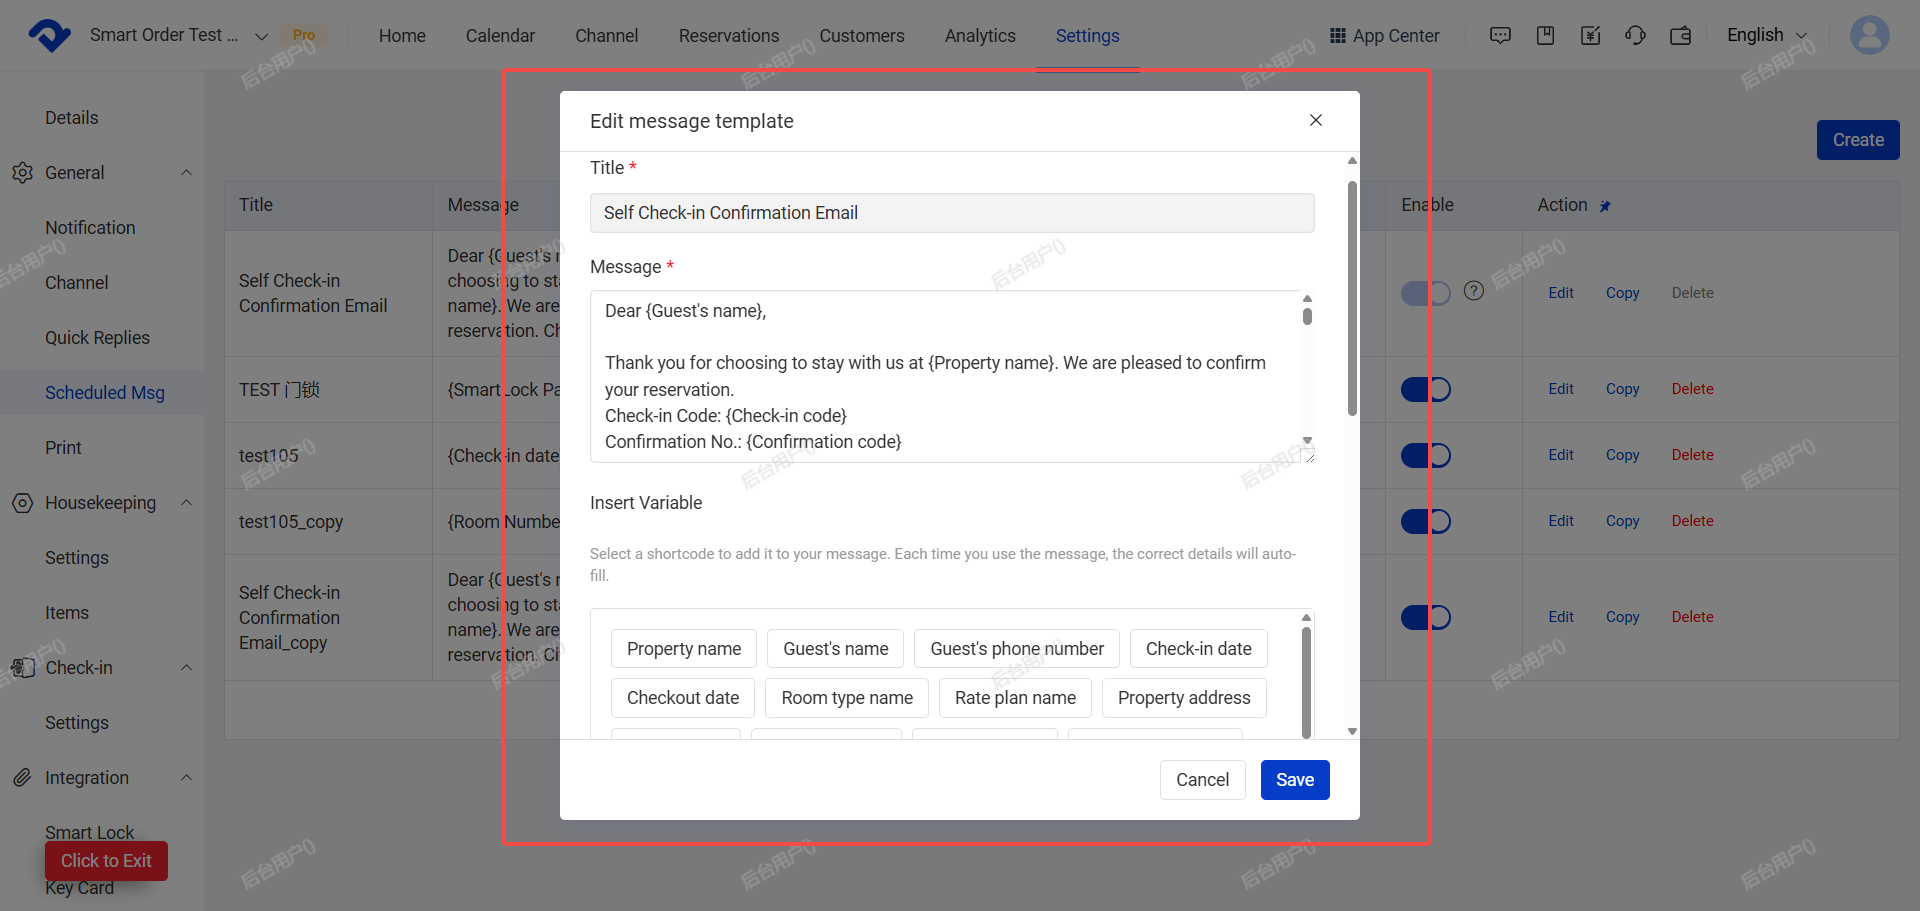
- You can edit the title, content, Insert variables, and sending rules etc for Self Check-in Confirmation Email.
The system has already provided default Self Check-in process instruction templates in Chinese, Japanese, and English.
You can also customize these messages and sending rules. Please refer to the Automated Messages(Scheduled Msg) section according to the Help Center guidance.

II. Configure Self Check-in Experience Settings
After setting up Self Check-in Confirmation Email, you can now configure the detailed guest experience.
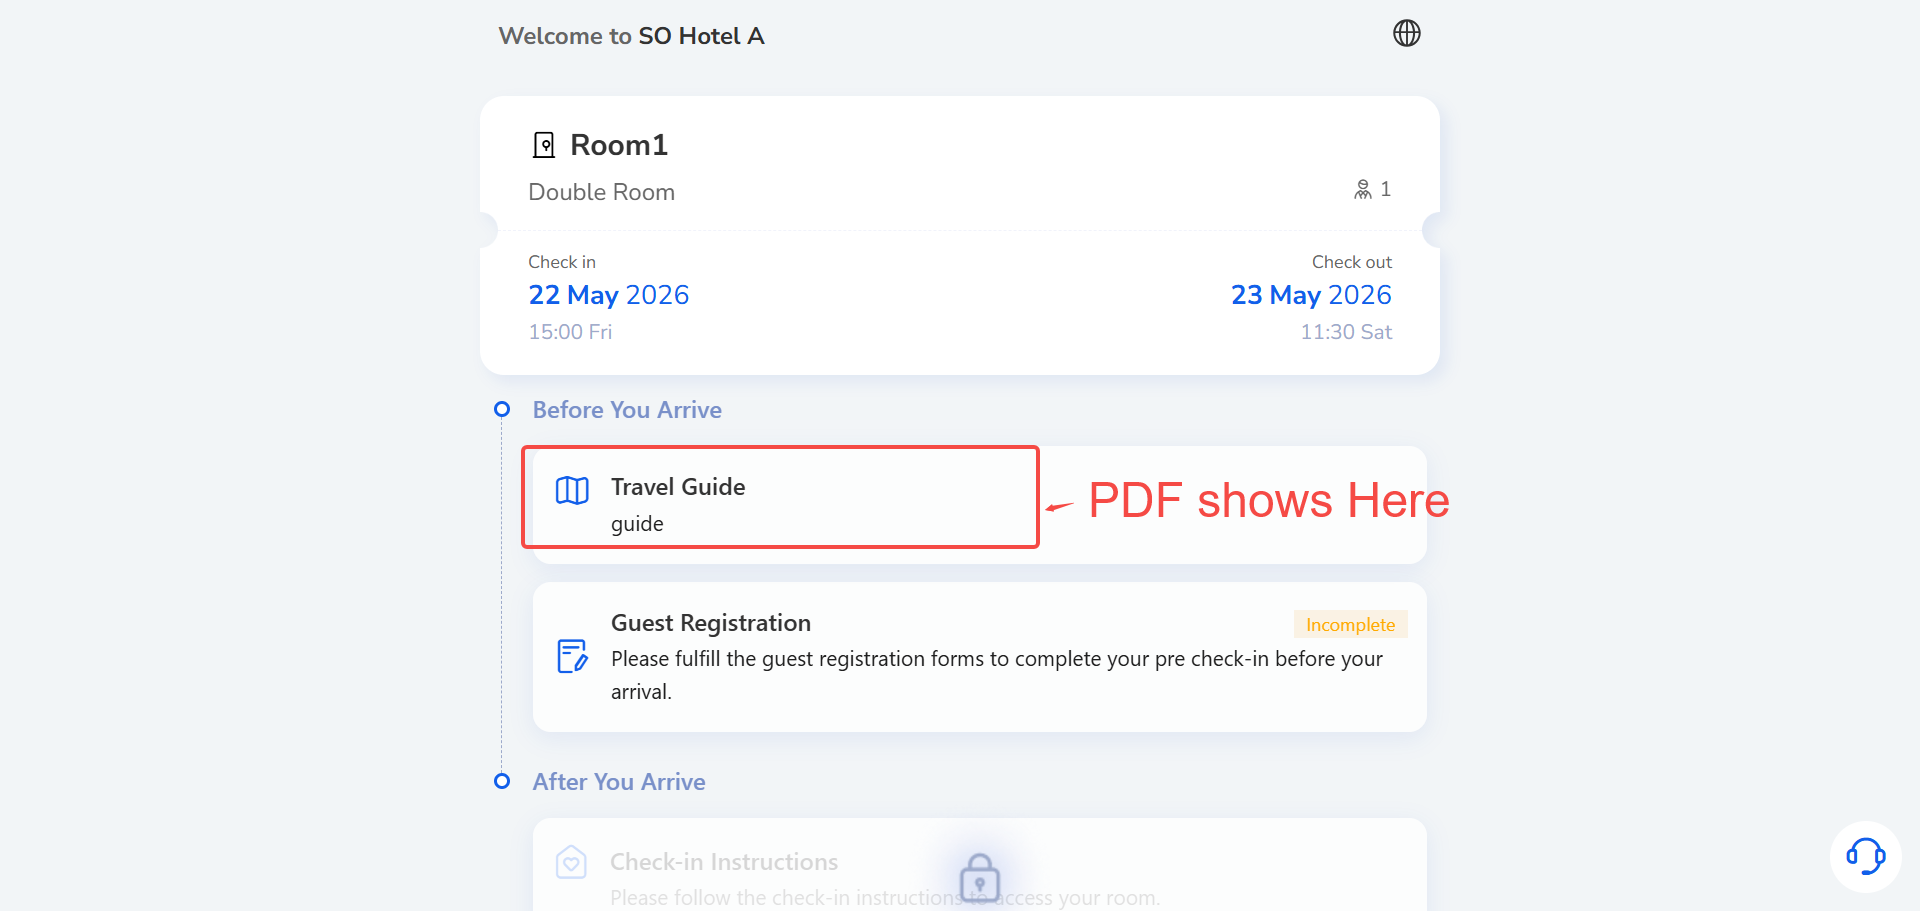
1. Upload Pre-check-in PDF Files (Optional)
Go to Settings → Self Check-in → Self Check-in Settings → In the Files section, click Upload.
You can upload PDF documents for guests to view before arrival after made a booking (e.g. hotel location map, property introduction, house rules, etc.).
File format: PDF only, max size 10 MB.
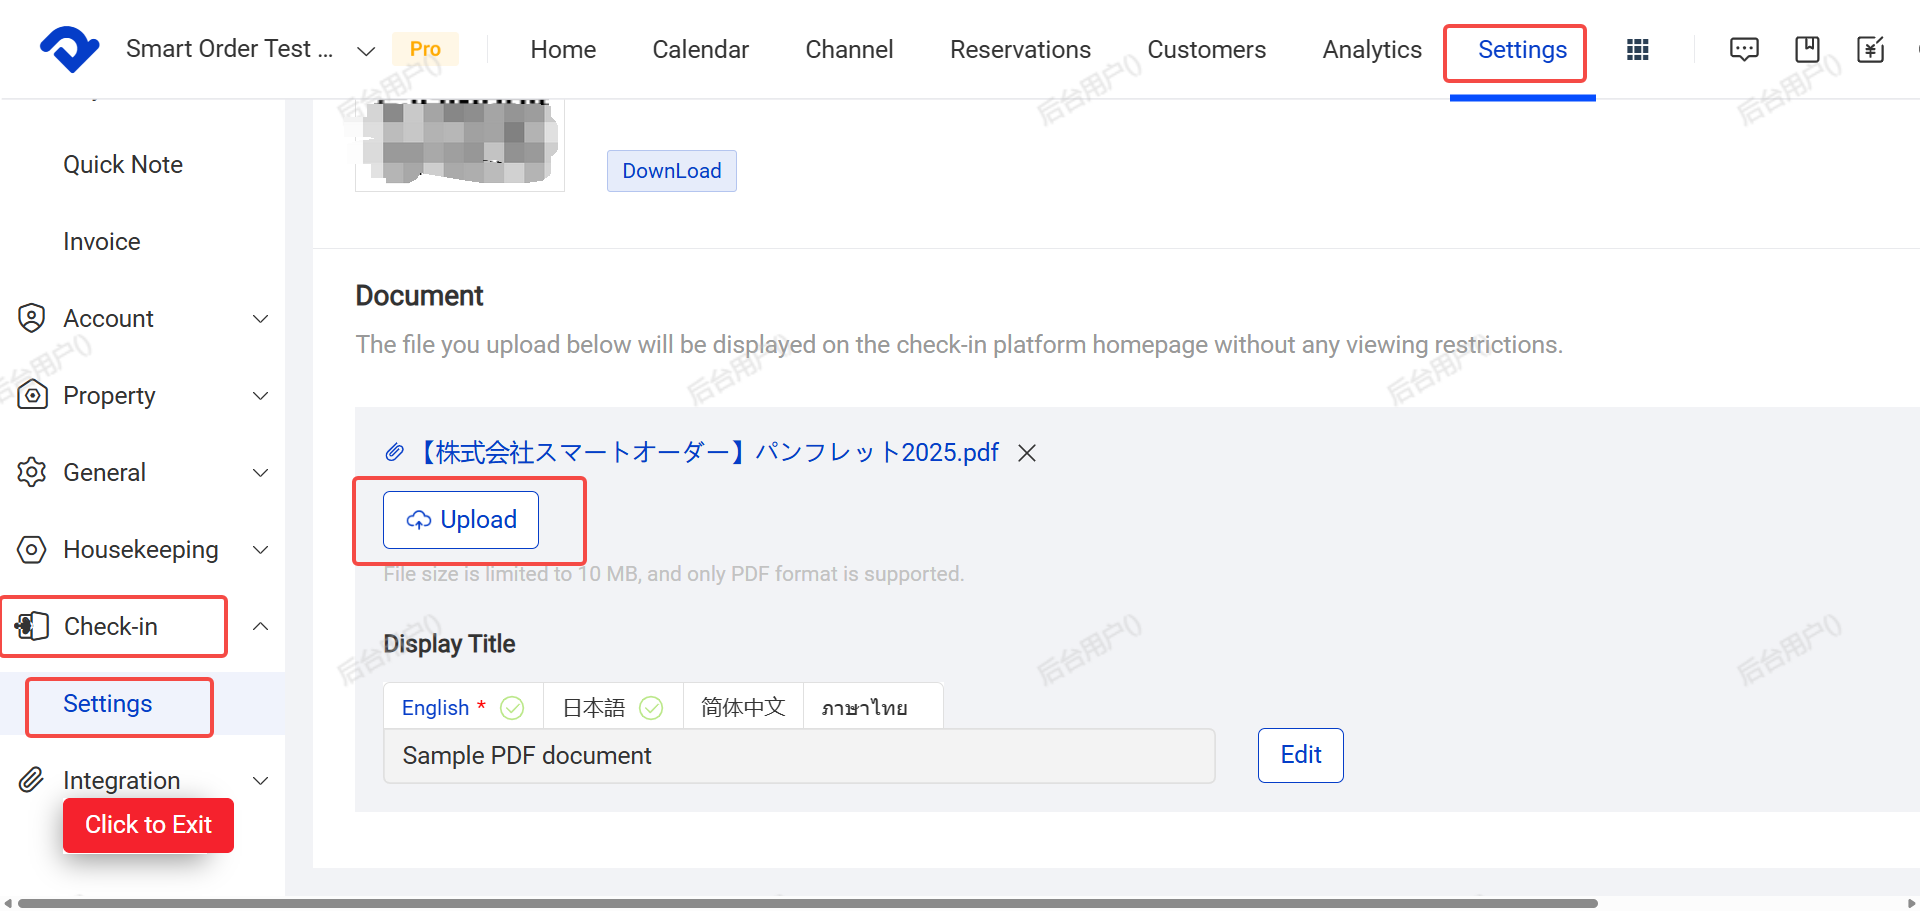
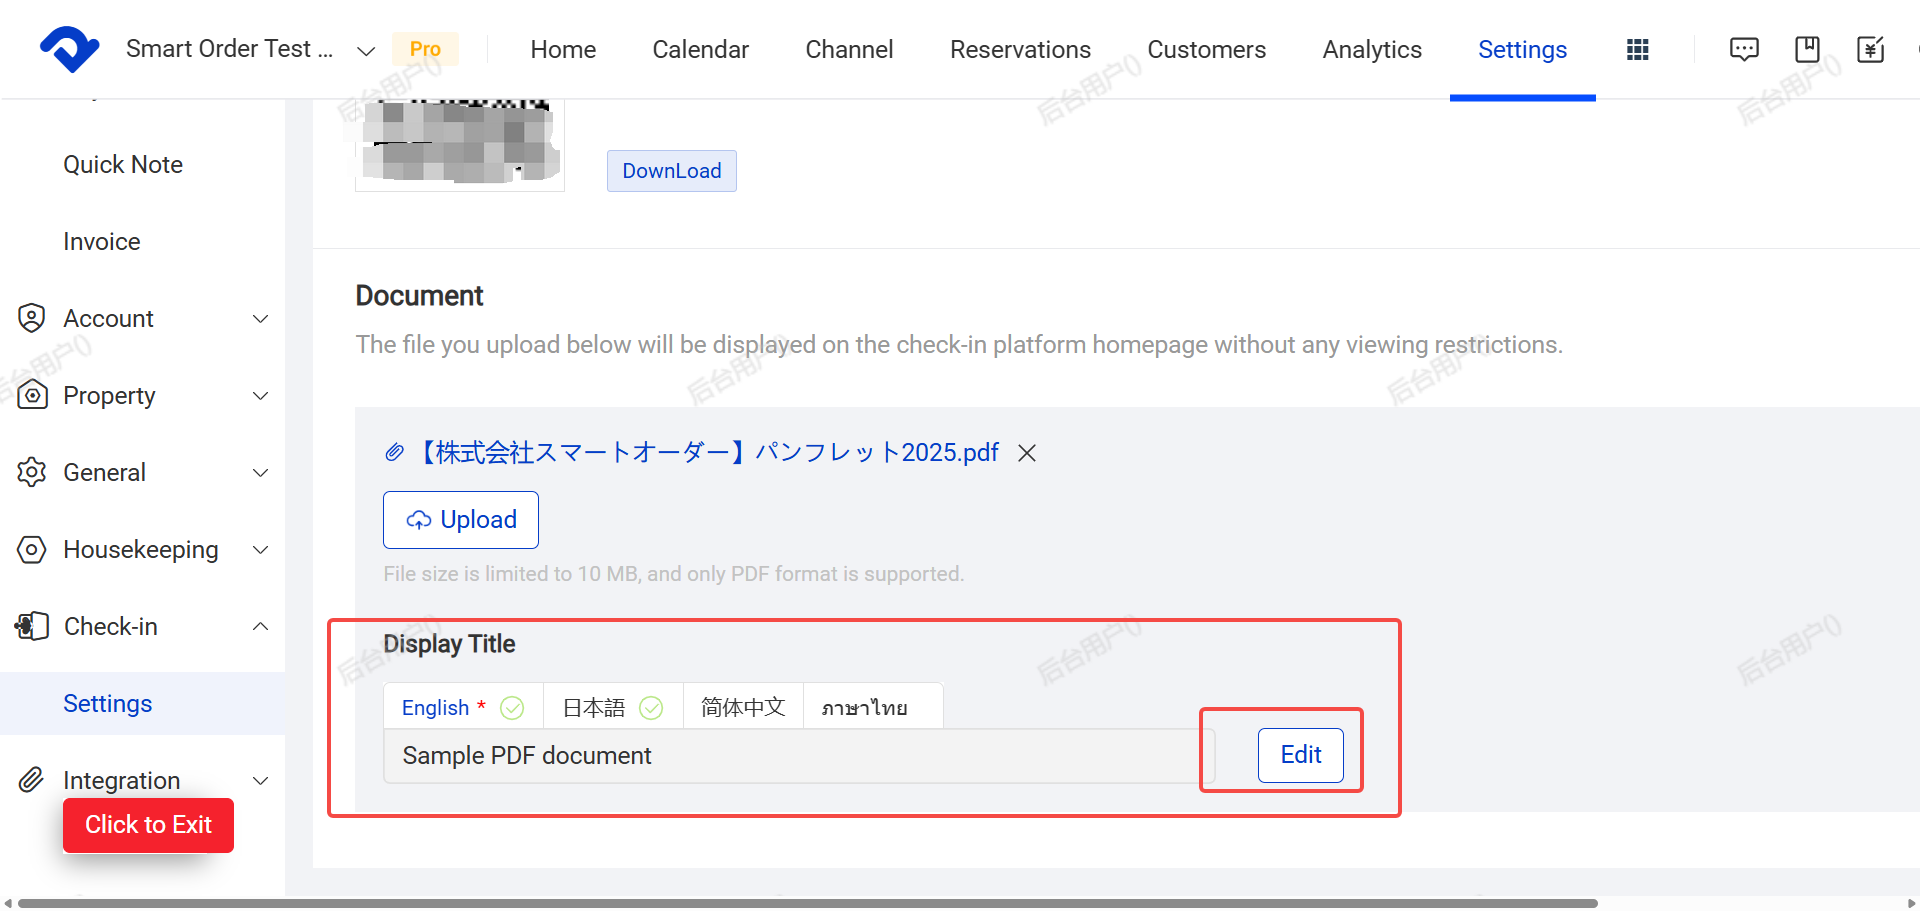
1.1 Edit the display name of the document (supports multiple languages: English, Japanese, Chinese, Thai)
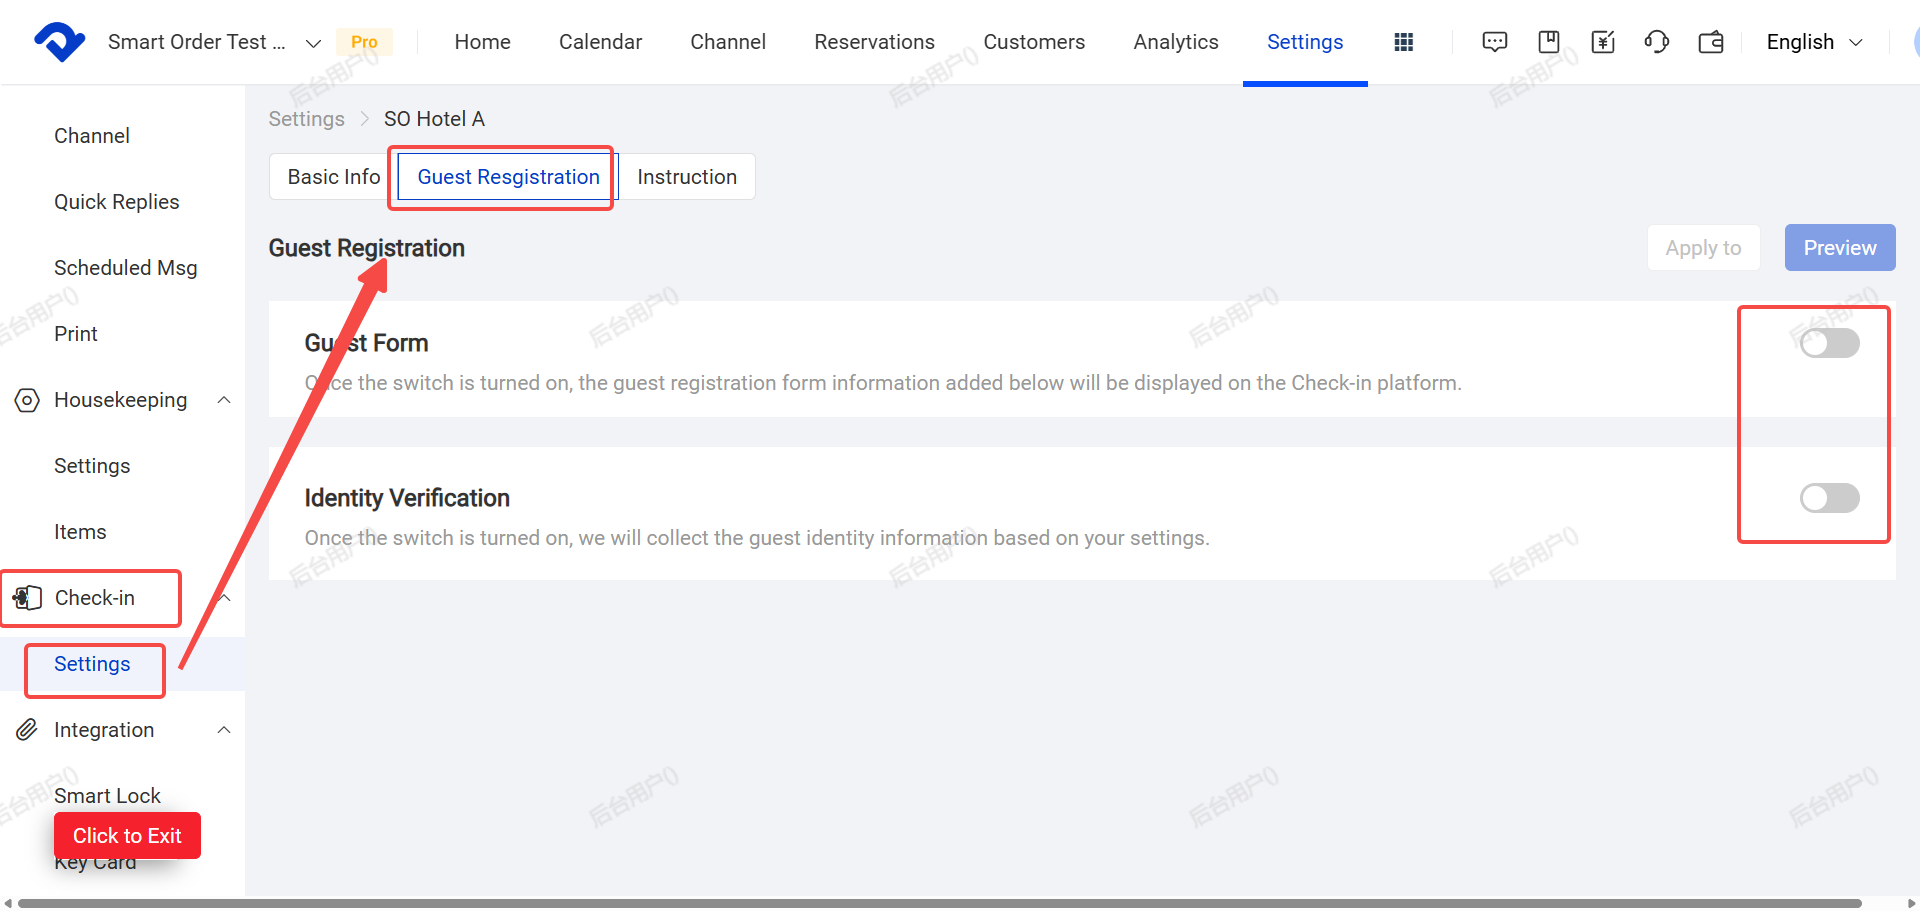
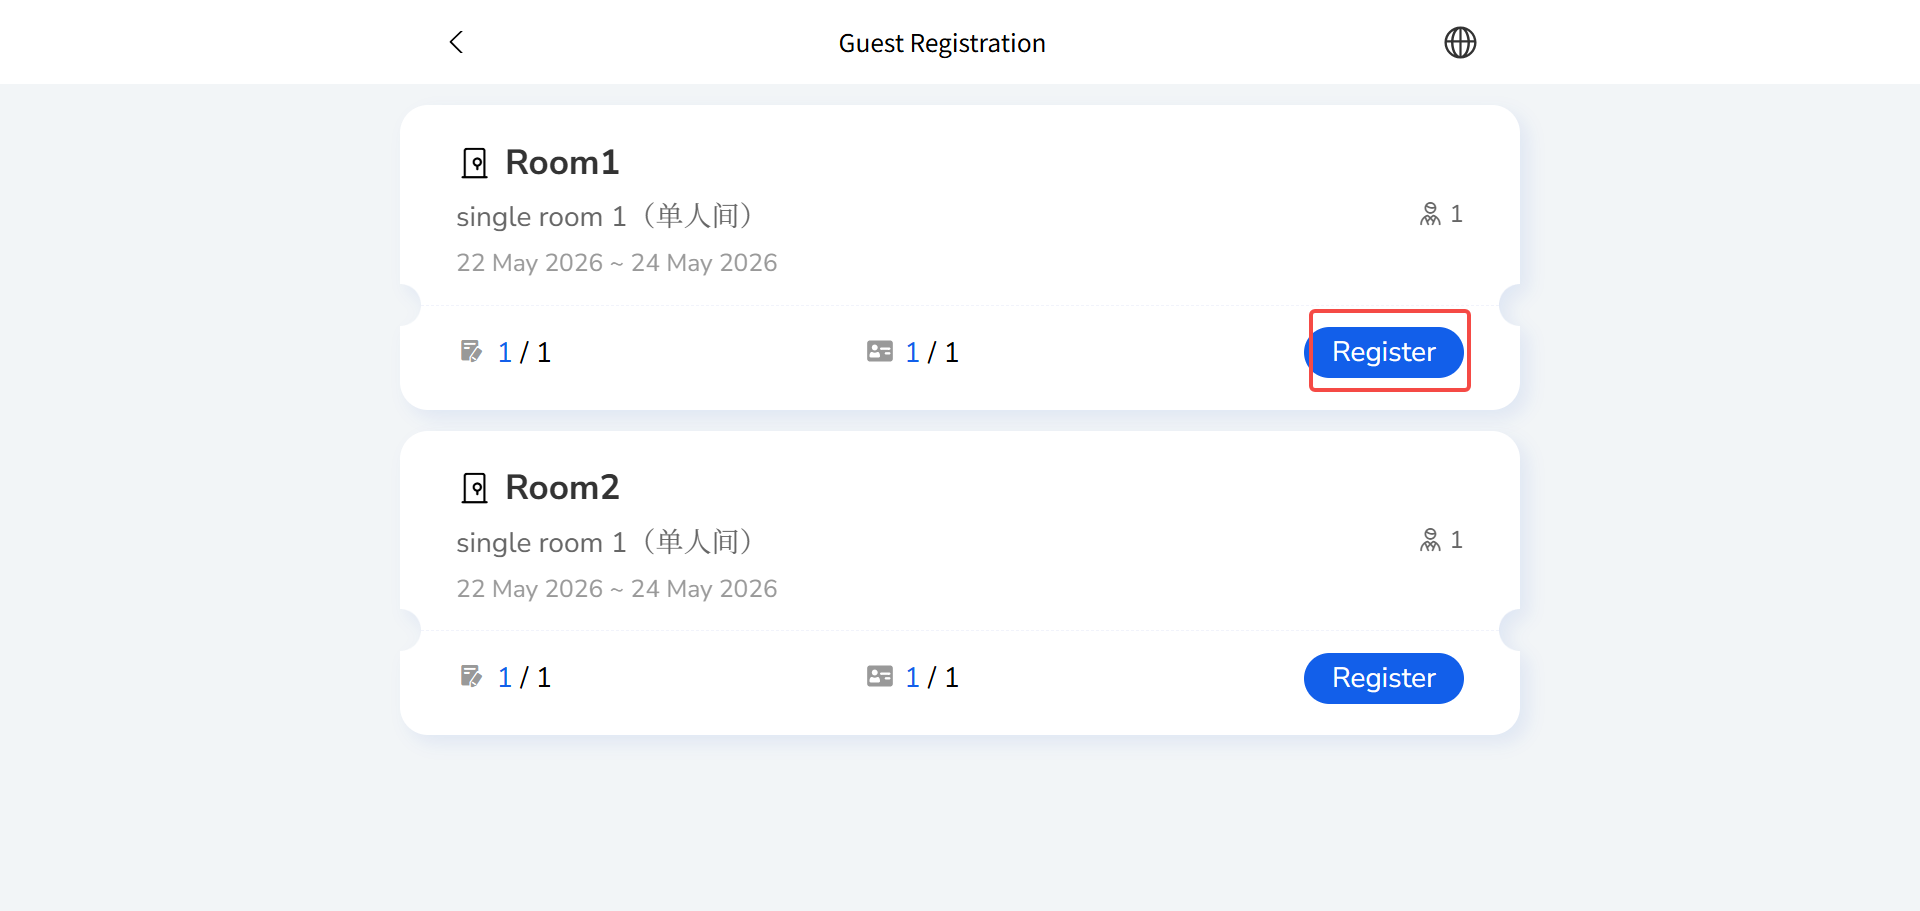
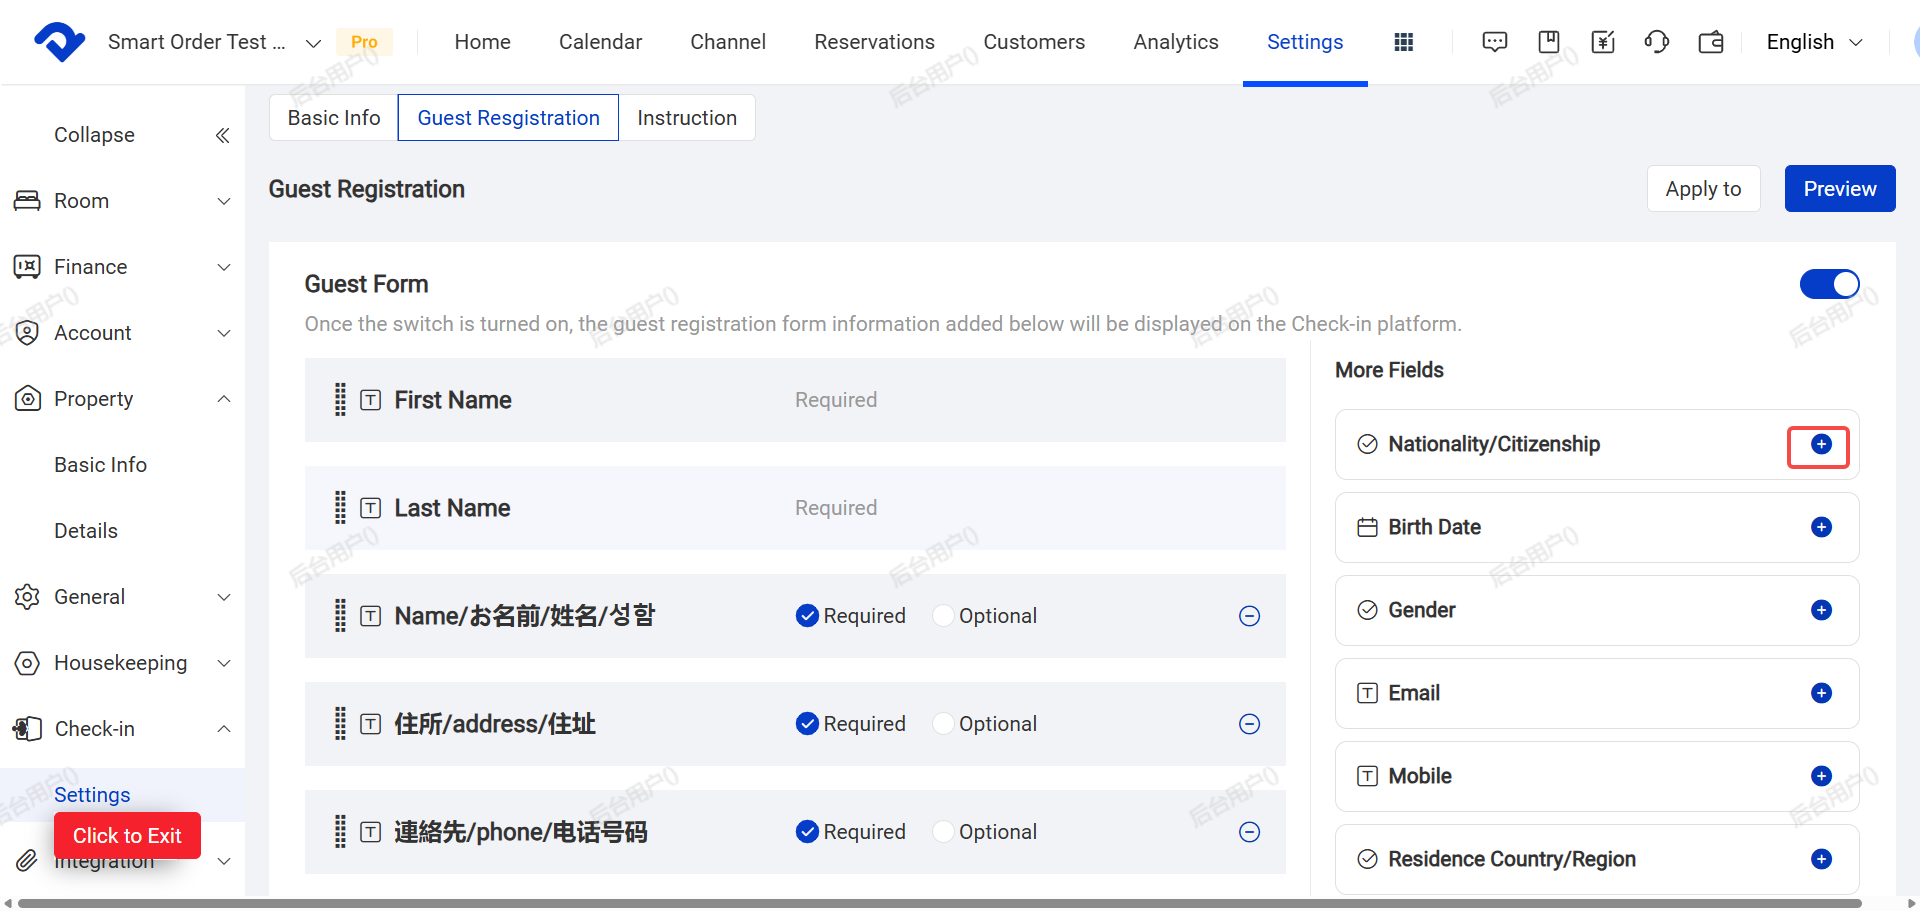
2. Guest Registration Settings
Click on the Guest Registration section to set Guest Form and ID Verification
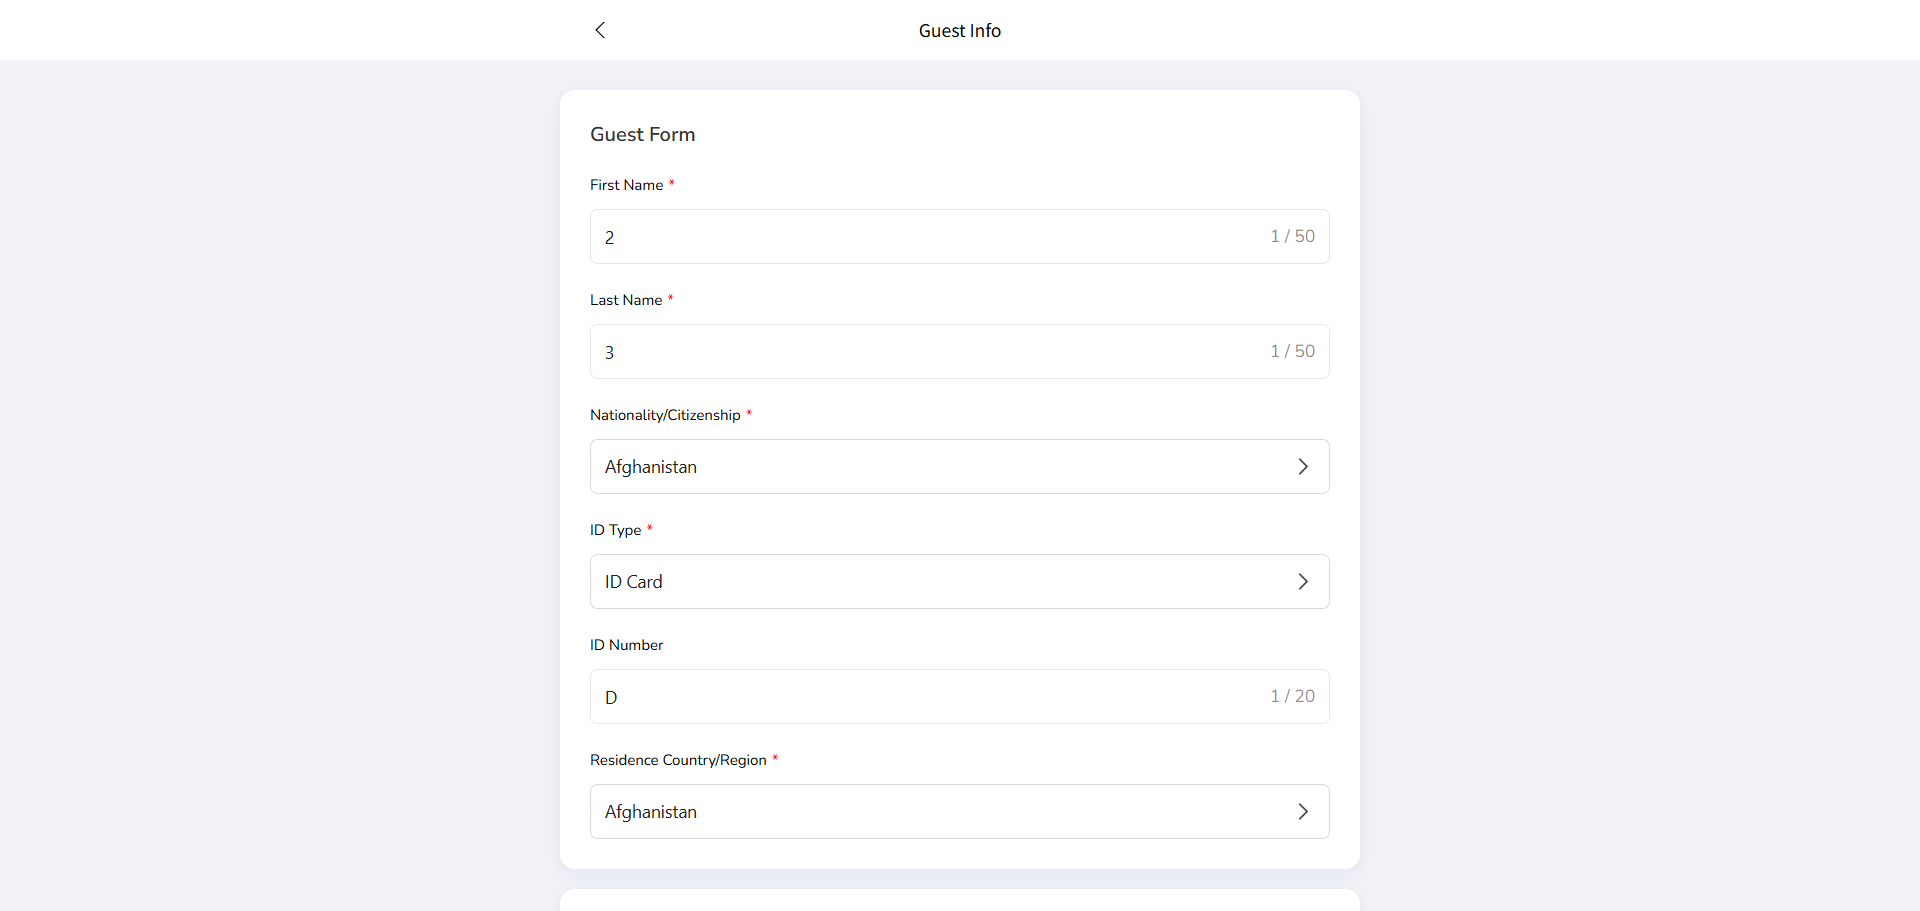
2.1 Guest Form: Turn on this switch if you want guests to fill in multiple pieces of information before check-in. Once enabled, guests must fill and submit the form before check-in.
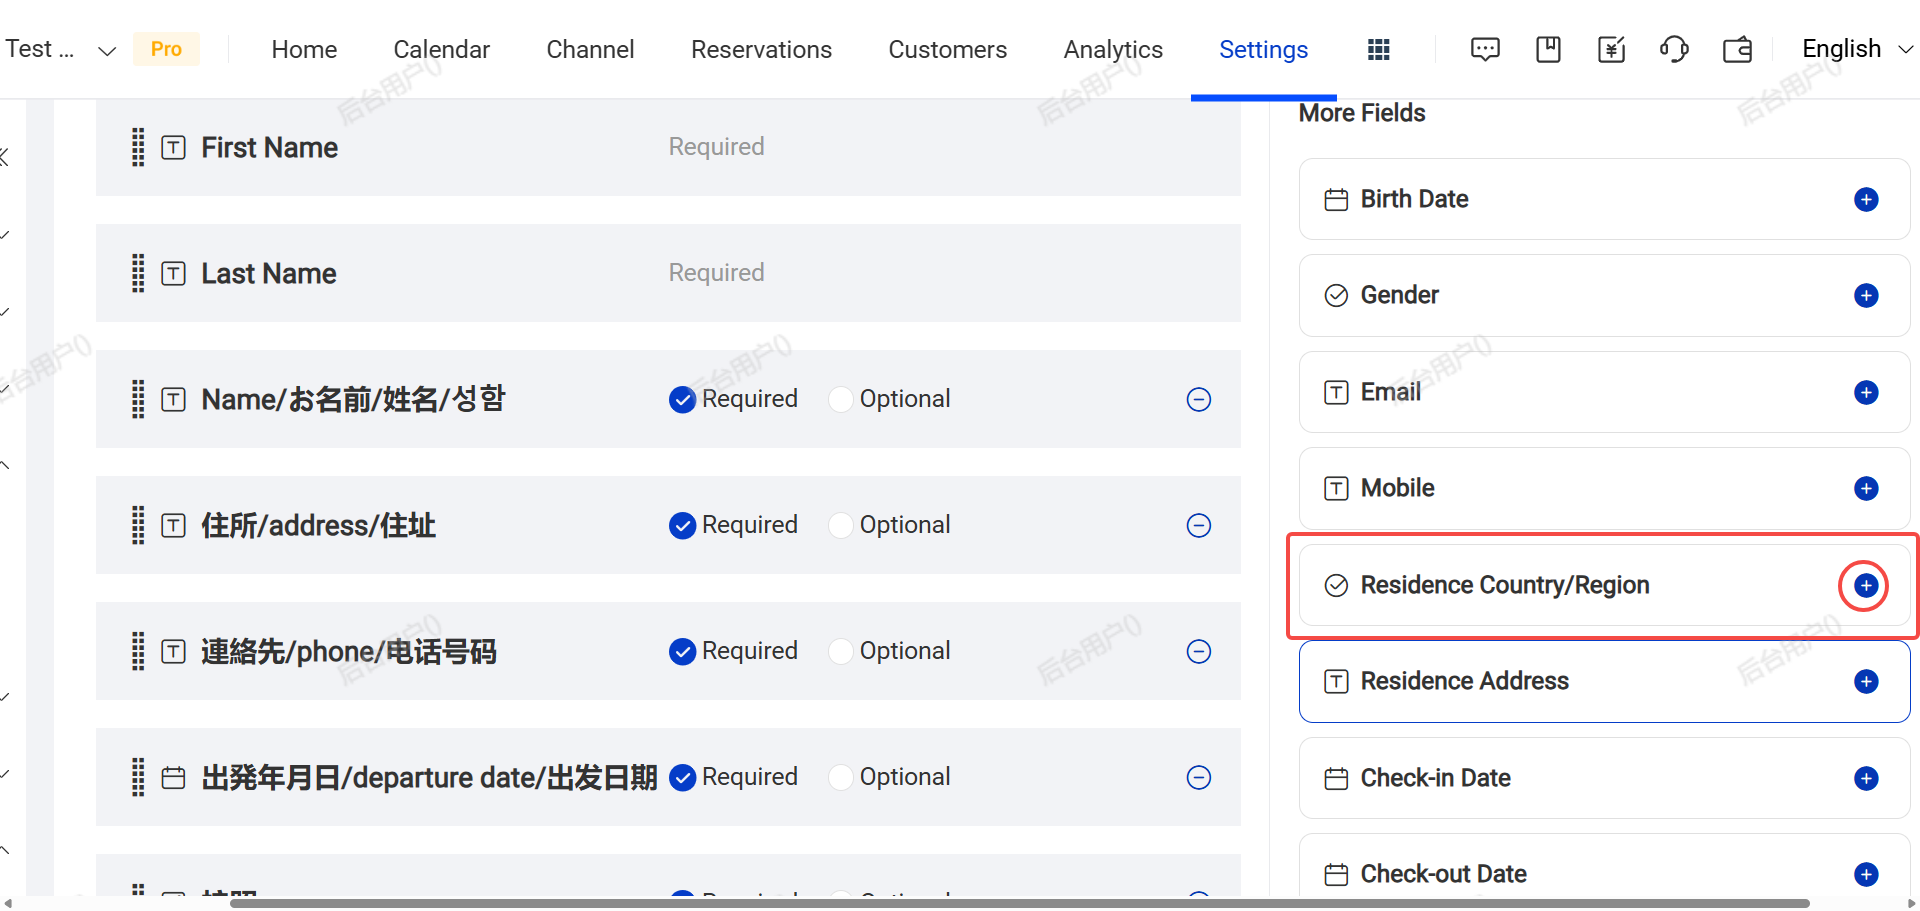
- Click + to add template questions from the right sidebar.
- The first two fields (First Name & Last Name) are mandatory.You can make other questions mandatory or optional.
- Click - to delete a question.
- You can also customize question types
- You can drag questions to change the order.
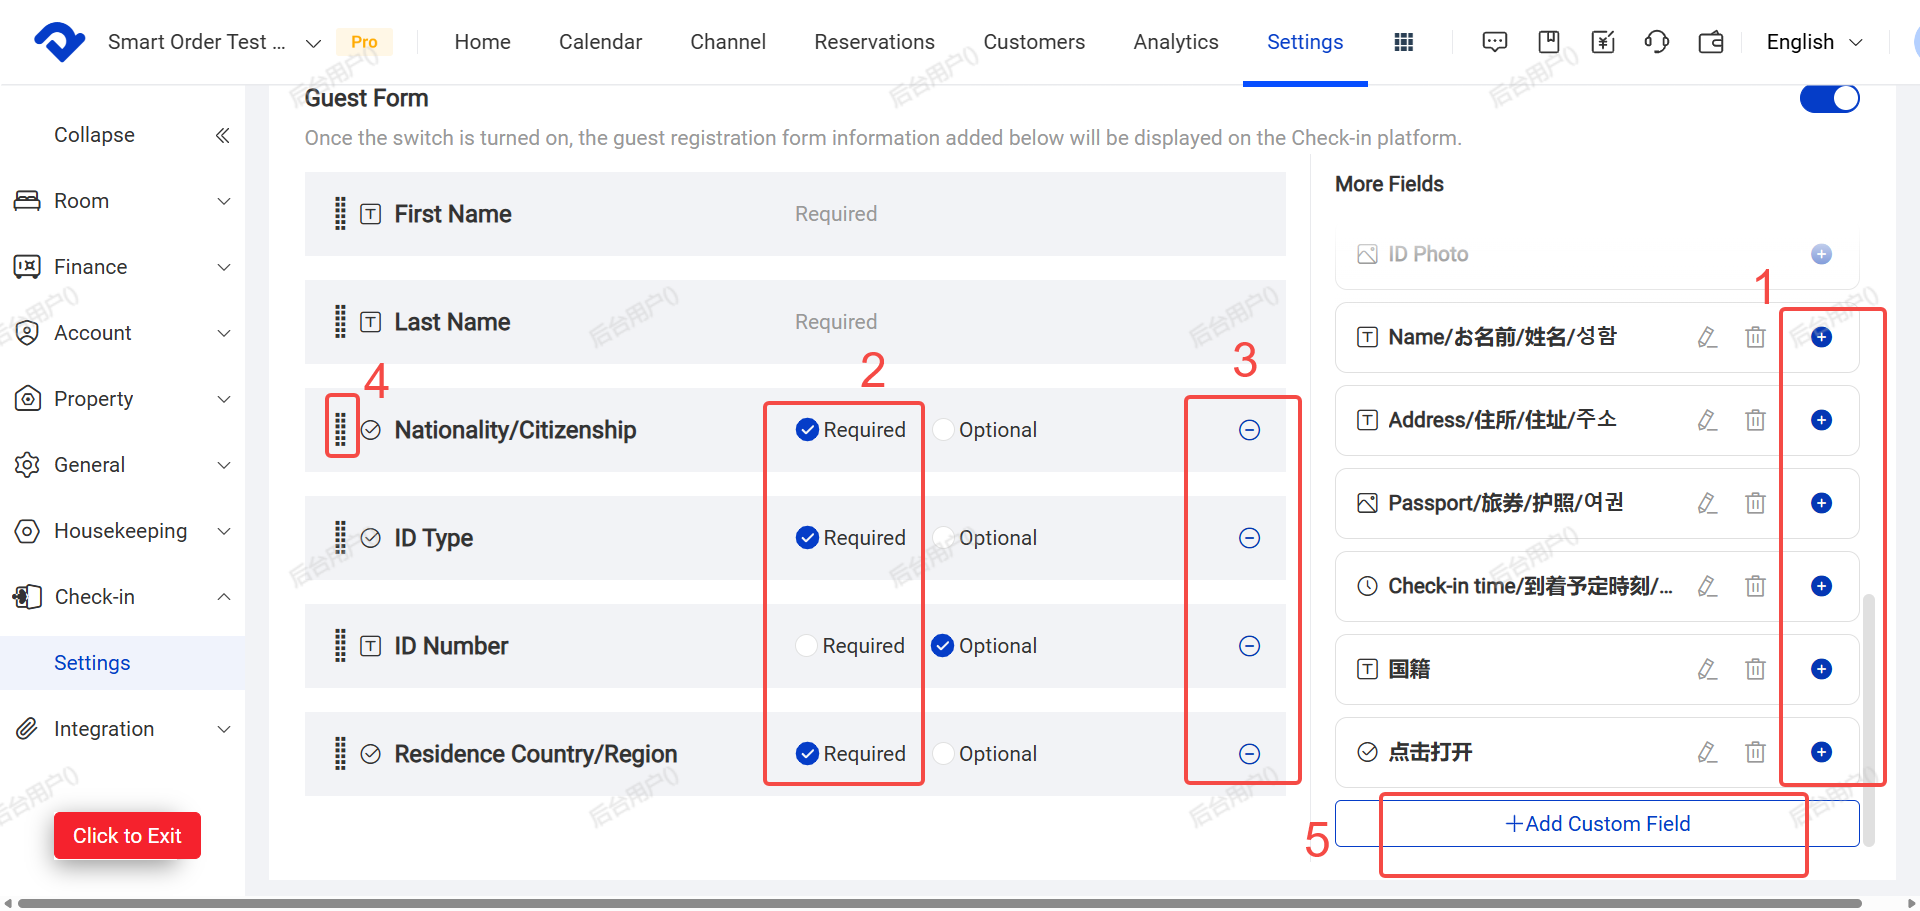
For customize question types:
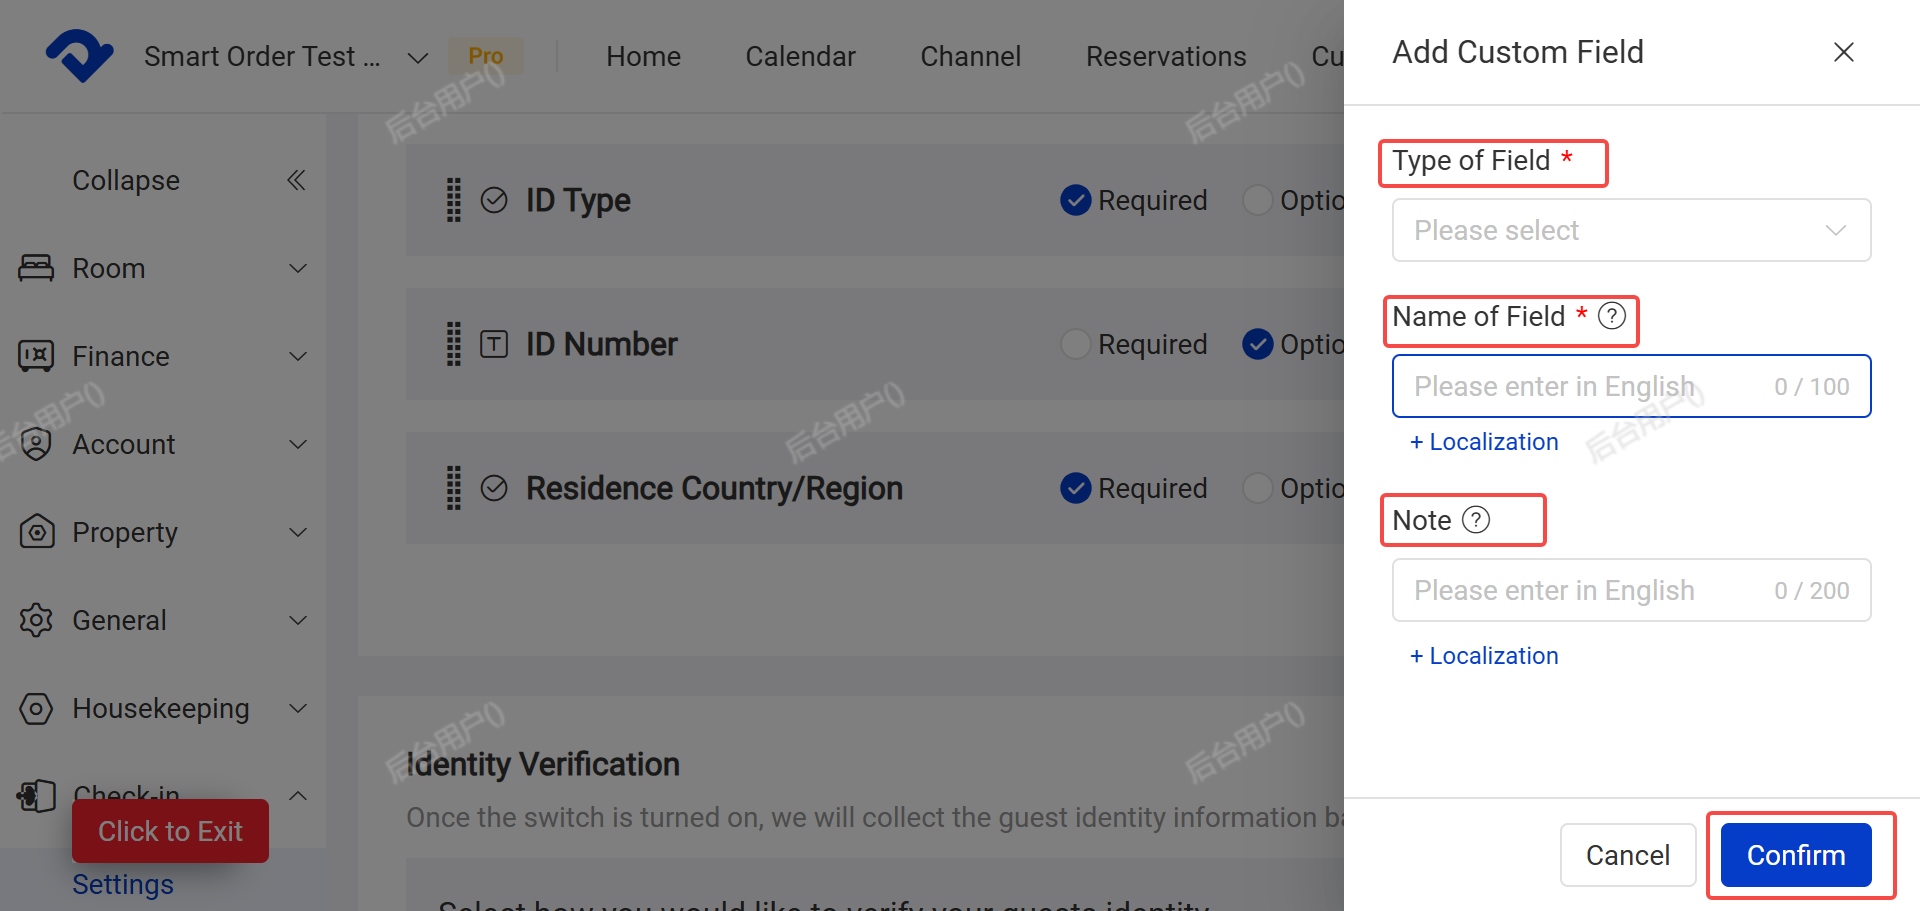
A. Type of Field Support Text, Single Choice, Date,Time,Image.
B. Name of Field (the question title) should be enter in English first. Click Localization to add translations (Chinese, Japanese, Thai, etc.).
C. Remarks: Add multilingual notes for each question.

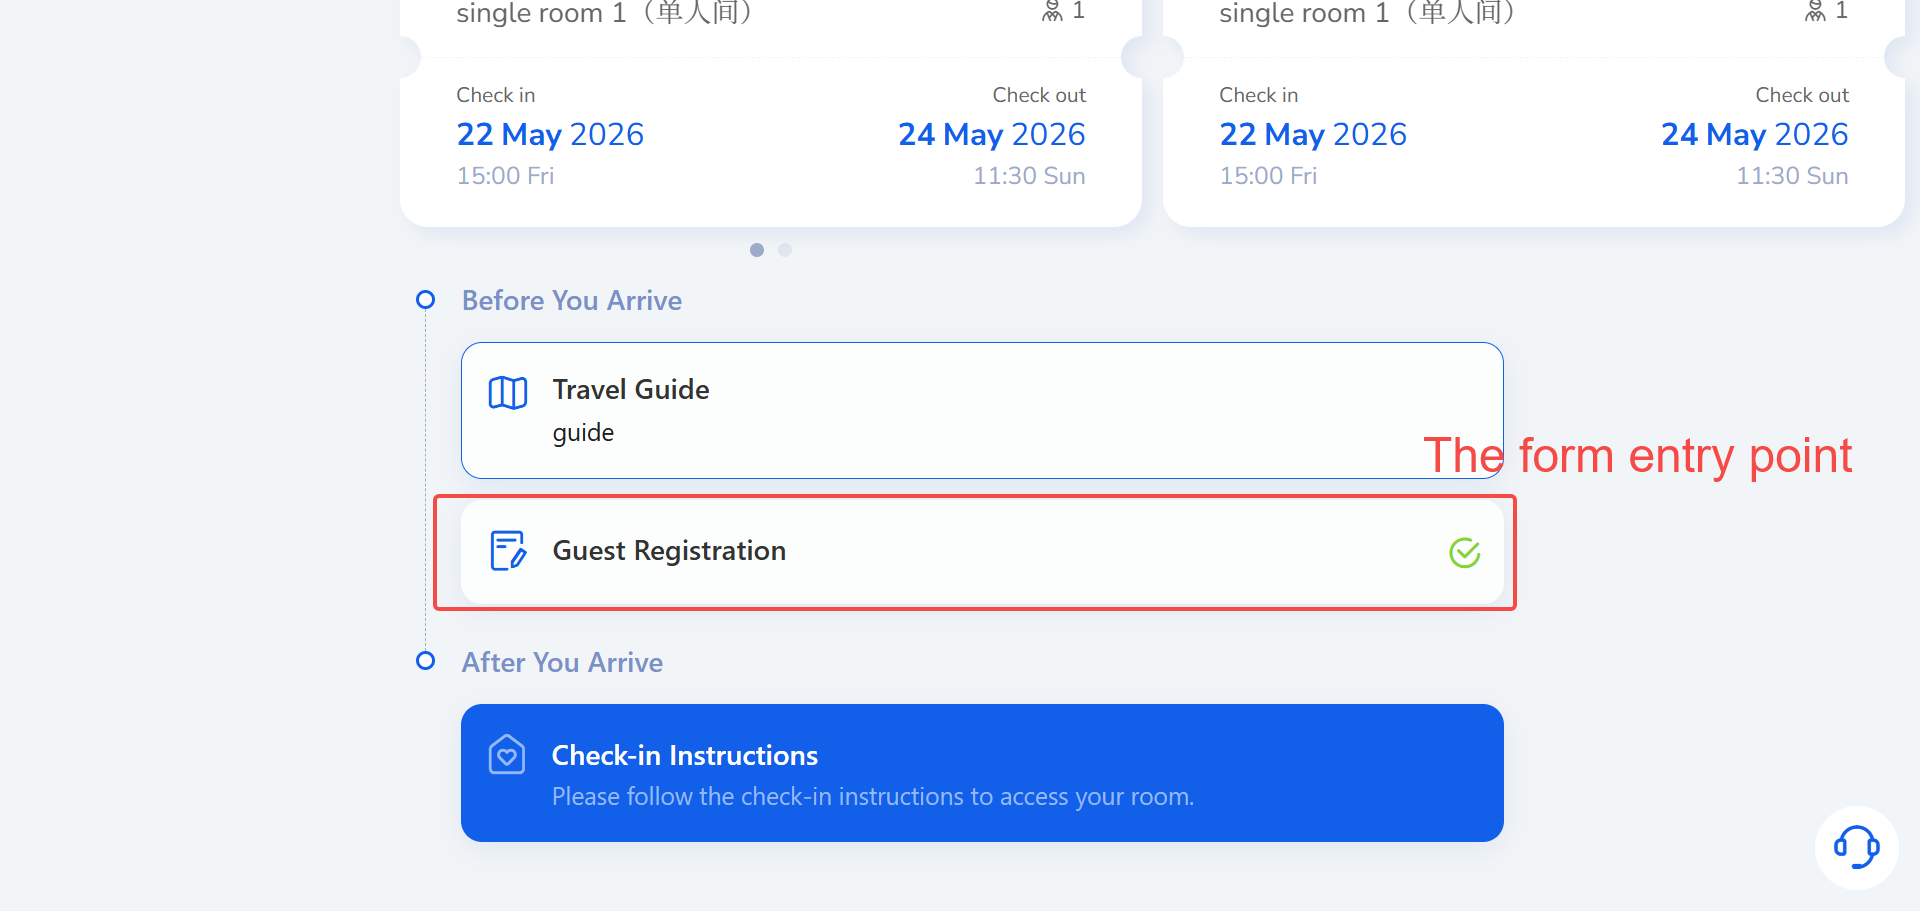
Client-side form display: The form’s entry point and content. The form language will automatically switch to match the guest’s chosen website language.”
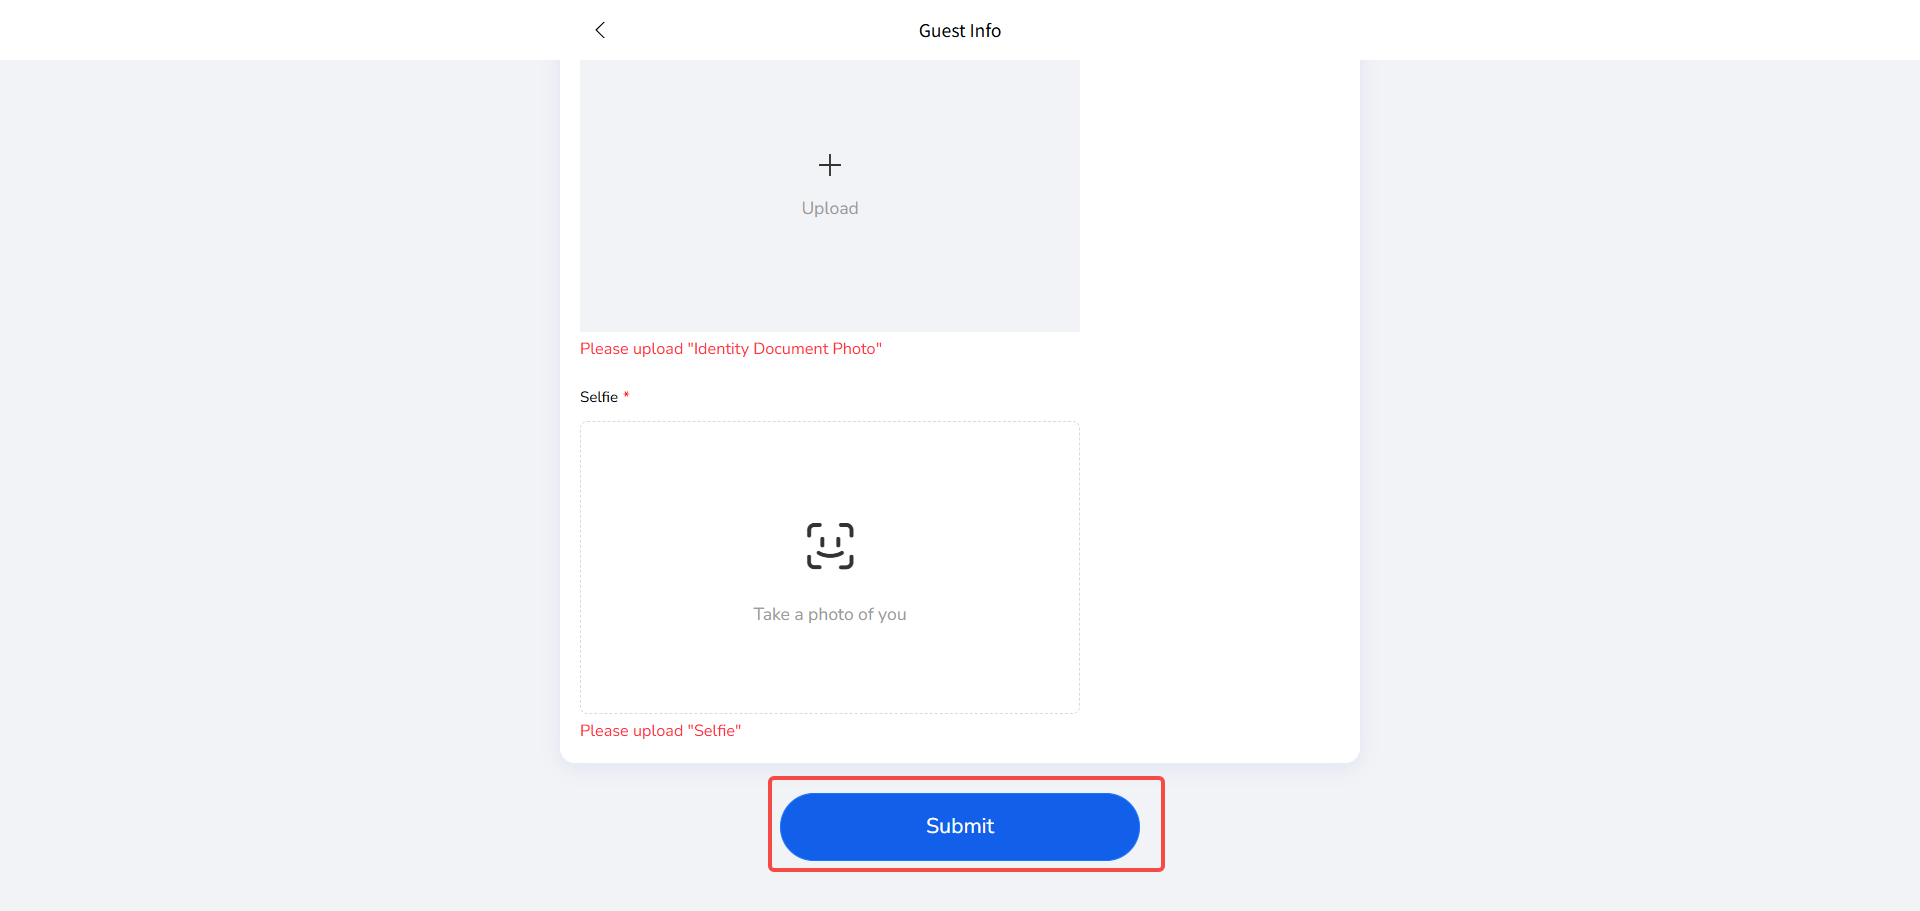
2.2 ID Verification (Optional):
After enabling, the system will collect guest identity information based on your settings. Like guests must upload ID photos or take selfies.
You must select at least one of the following options:
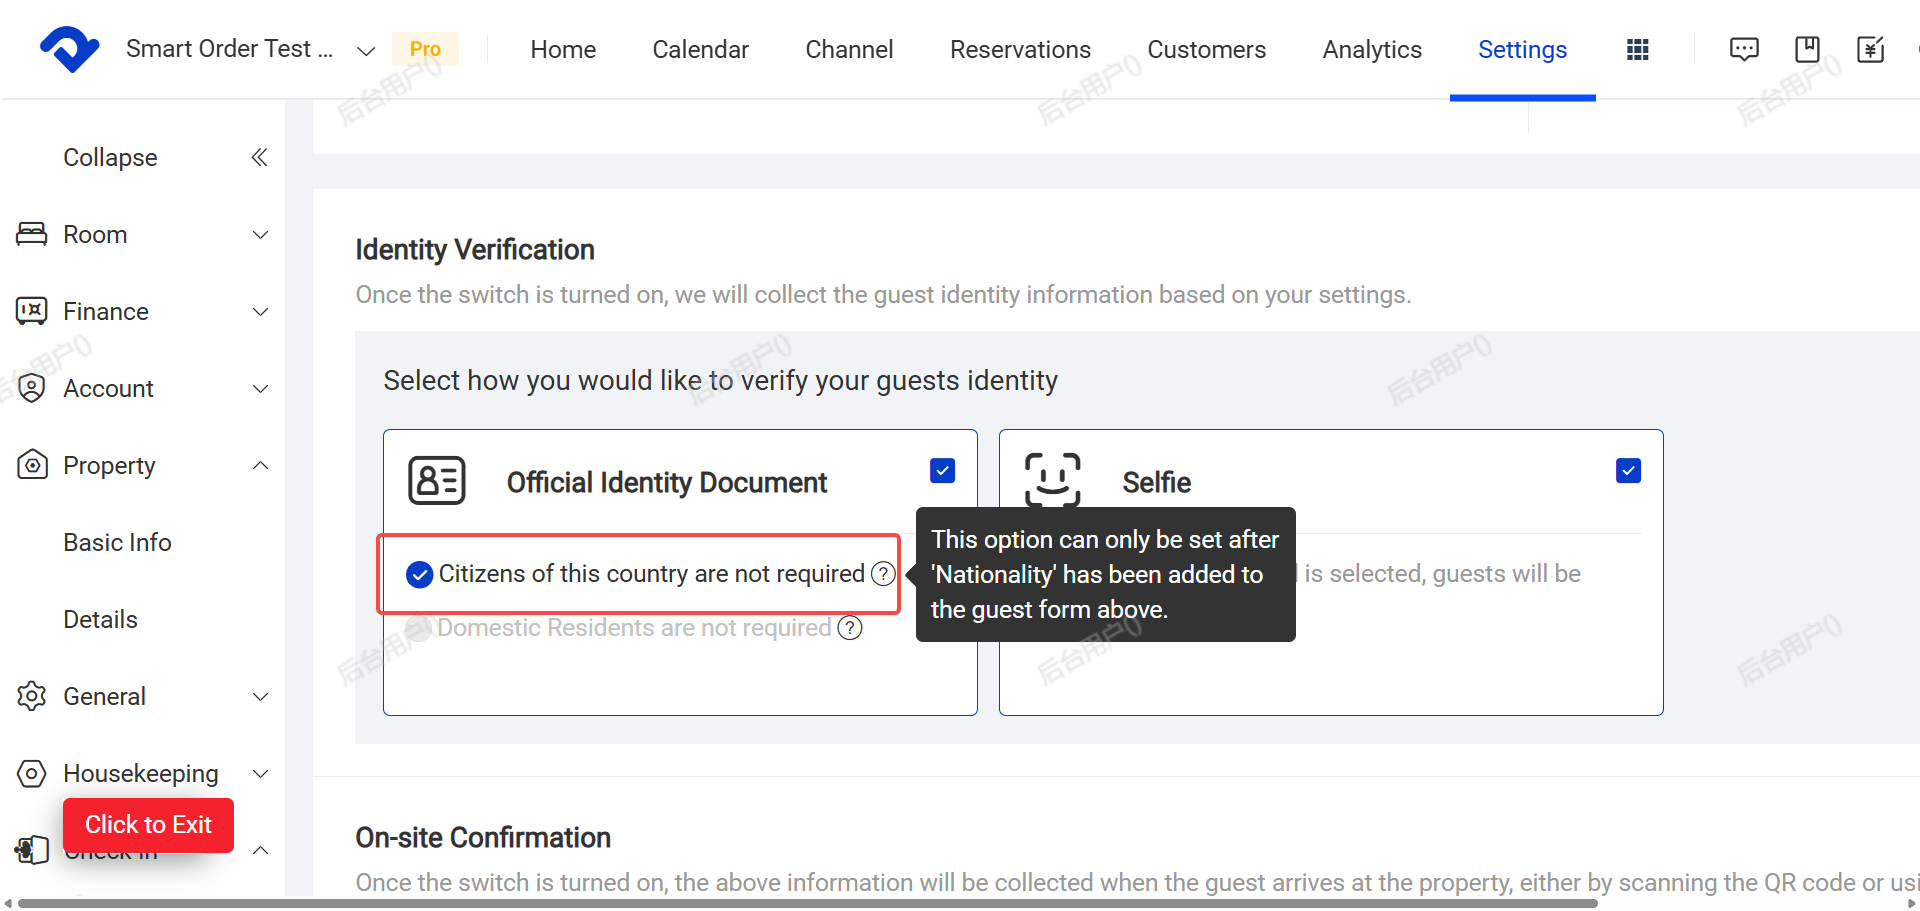
■ Official ID Document
■ Selfie Photo
You can also enable both options at the same time.
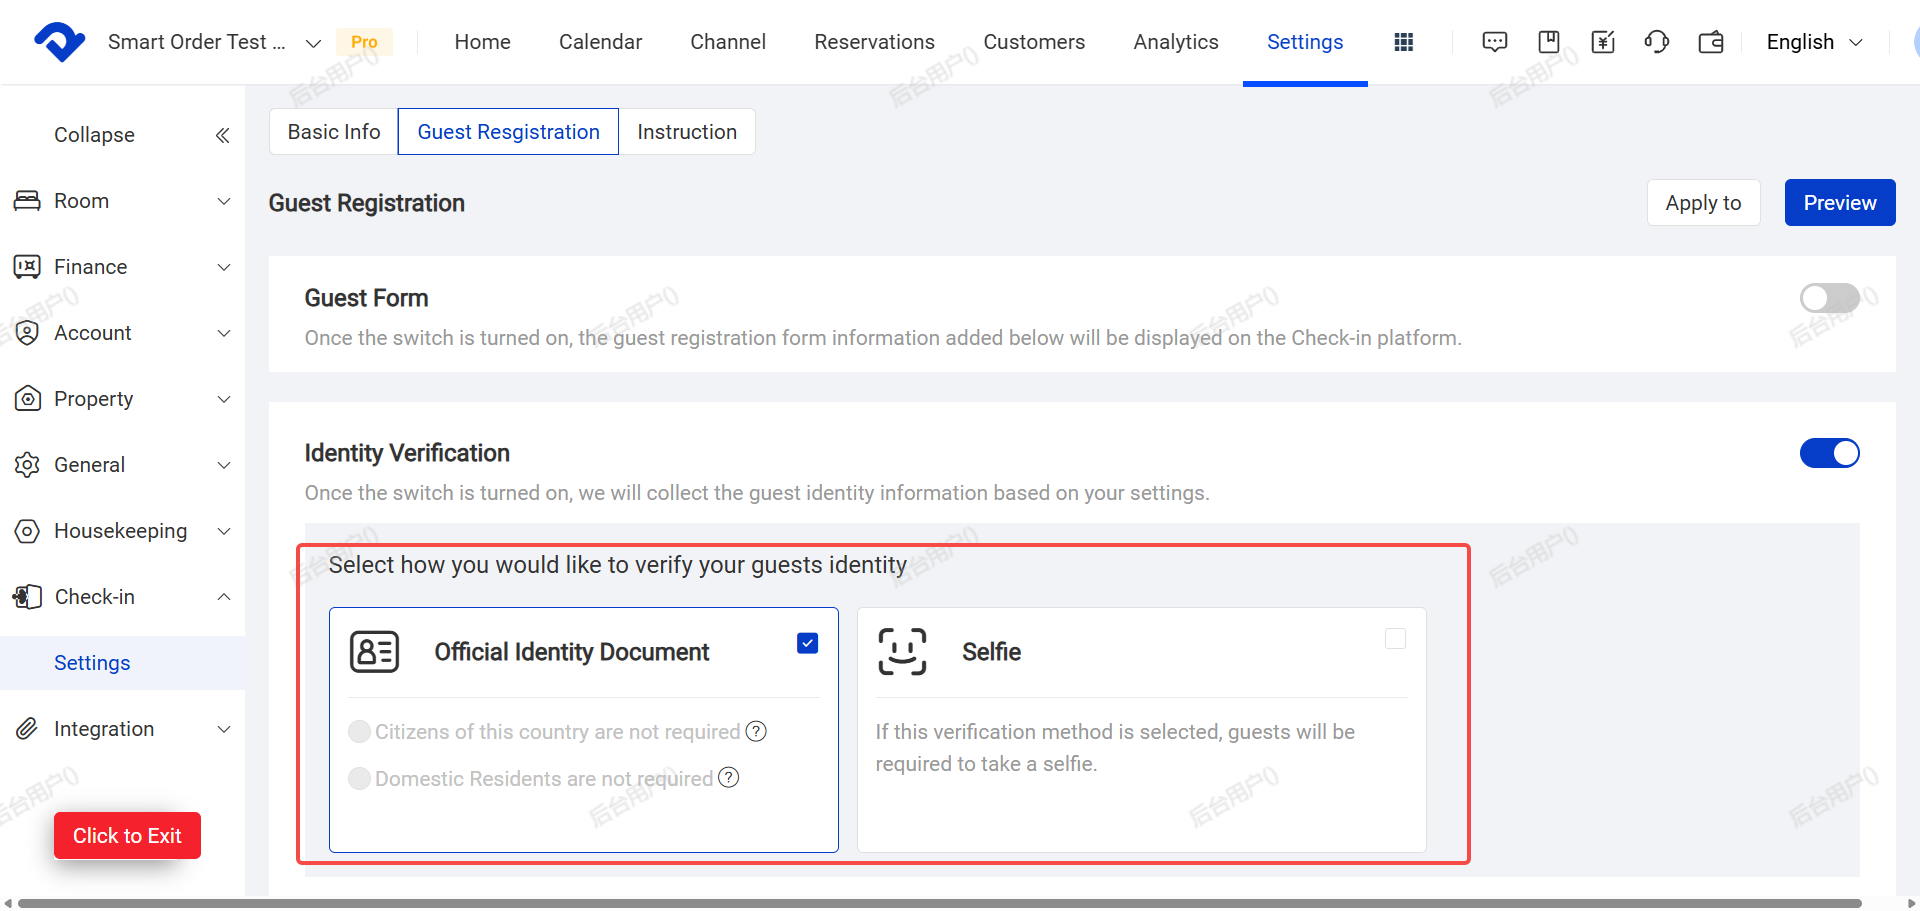
■ Official ID Document
You can set rules to determine when guests are required to submit an official ID document.
a. Domestic citizens: No ID required (based on nationality field).
Guests whose nationality matches your property’s country do not need to submit an ID document.
To use this rule:
You must first add the Nationality field from the template library to your check-in form. This allows the system to automatically check the guest’s nationality.
Judgment Standard:
The system compares the guest’s selected nationality with the Country & Region set in your property’s Settings → Basic Information
b. Domestic residents: No ID required (based on residence field).
Guests residing in your country (regardless of nationality) do not need to submit an official ID document.
To use this rule:
You must first add the Country of Residence field from the template library into your check-in form. This serves as the system’s judgment criterion.
Judgment Standard:
The system automatically compares the guest’s selected country of residence with the Country & Region information set in your property’s Settings → Basic Information.
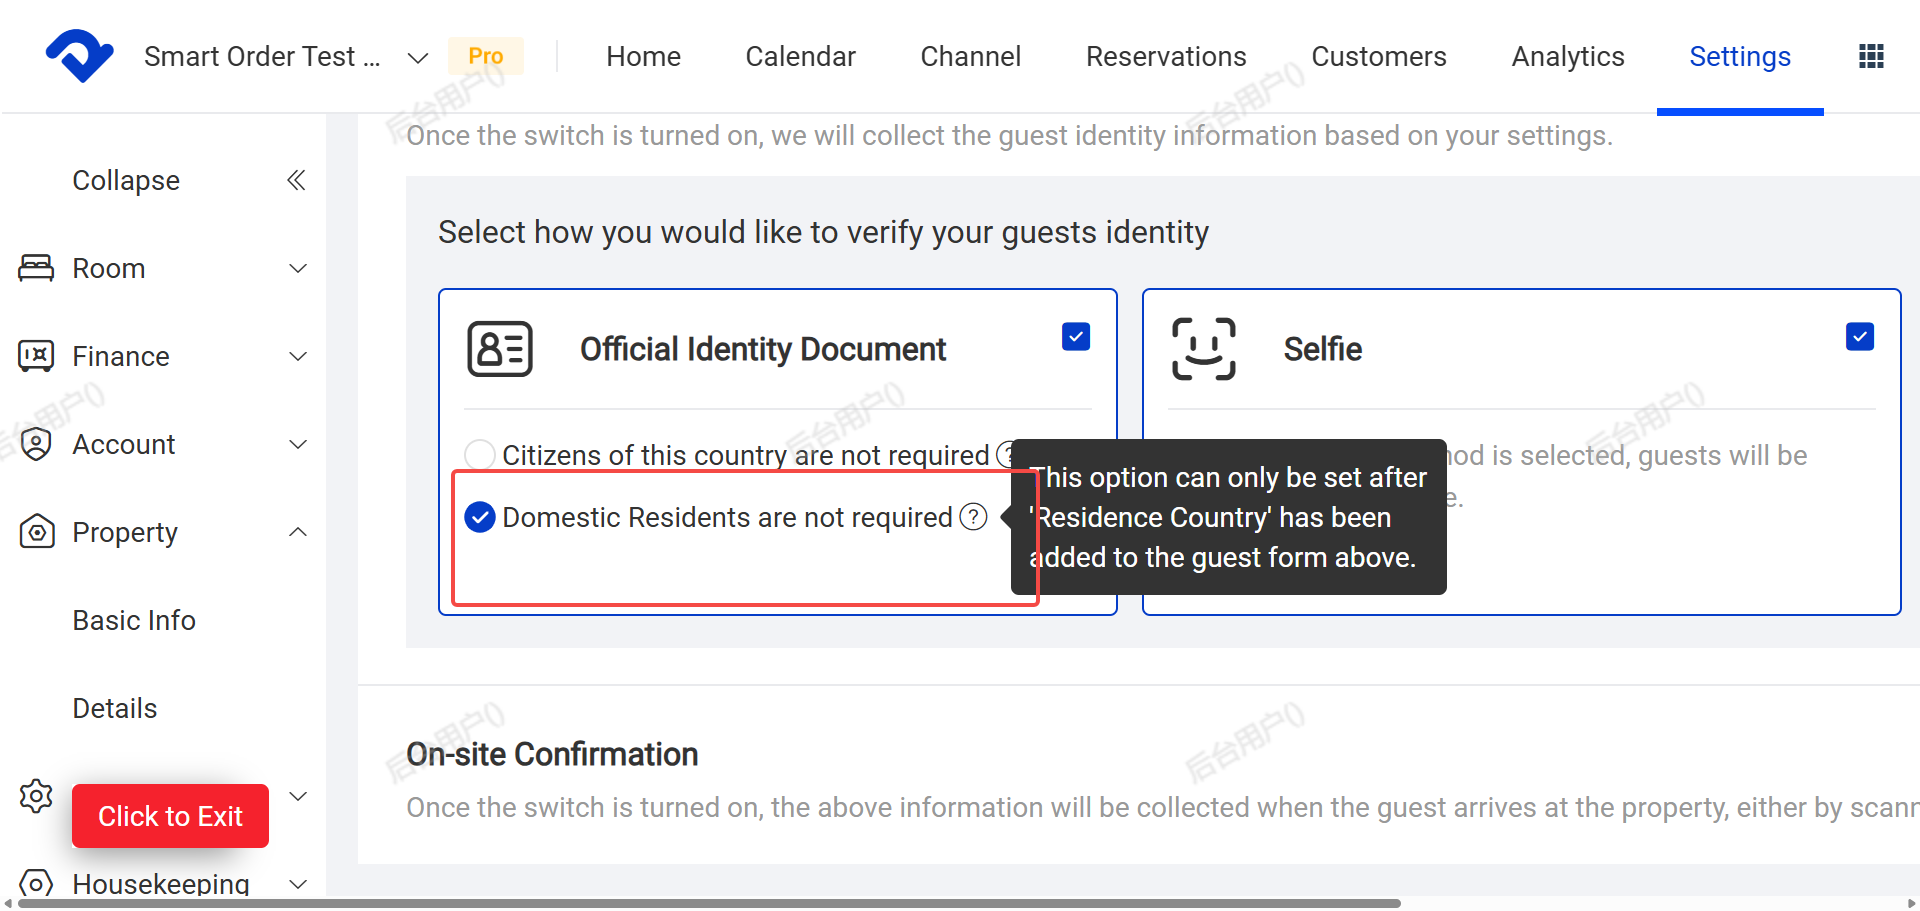
Note: Some options may require adding the Nationality or Country of Residence field in the guest form first.
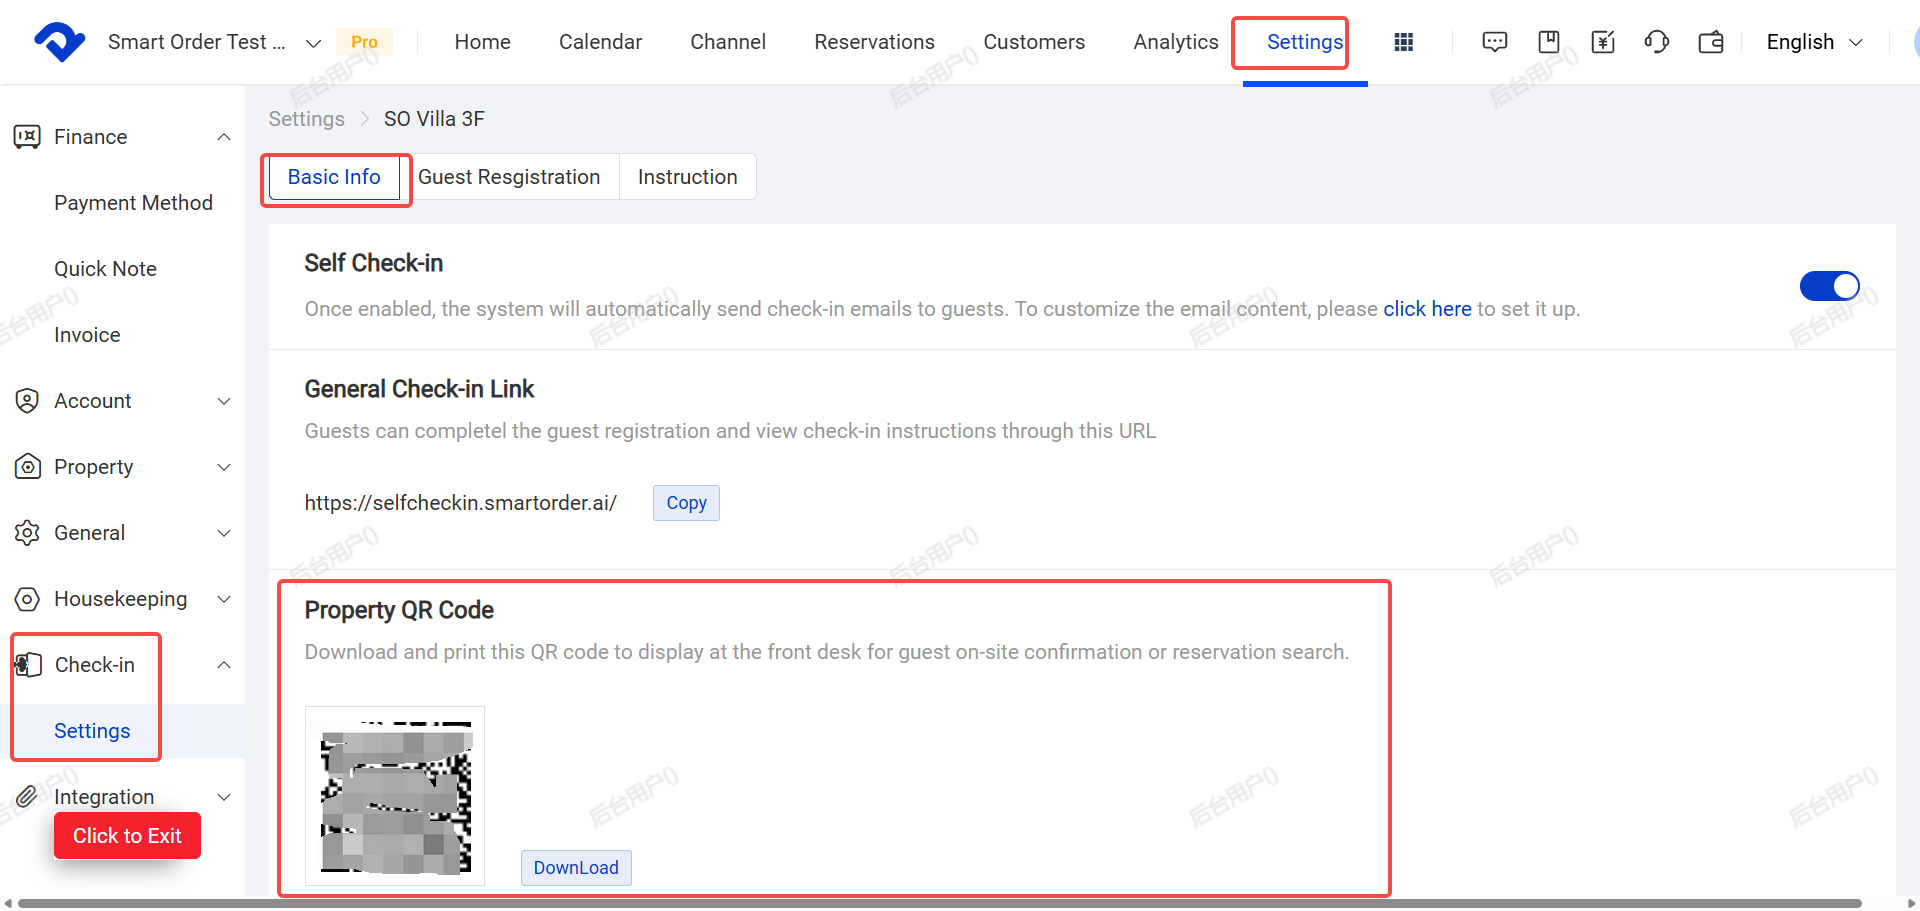
On-site Confirmation(optional)
After enabling ID Verification, you can also turn on On-site Confirmation. Guests will scan a QR code on-site to complete verification.
You can find the QR code in the Basic Information page, download it, print it, and post it in a visible location at your property for guests to scan.
Note: You can enable both at the same time. Guests will need to complete both the form and verification.
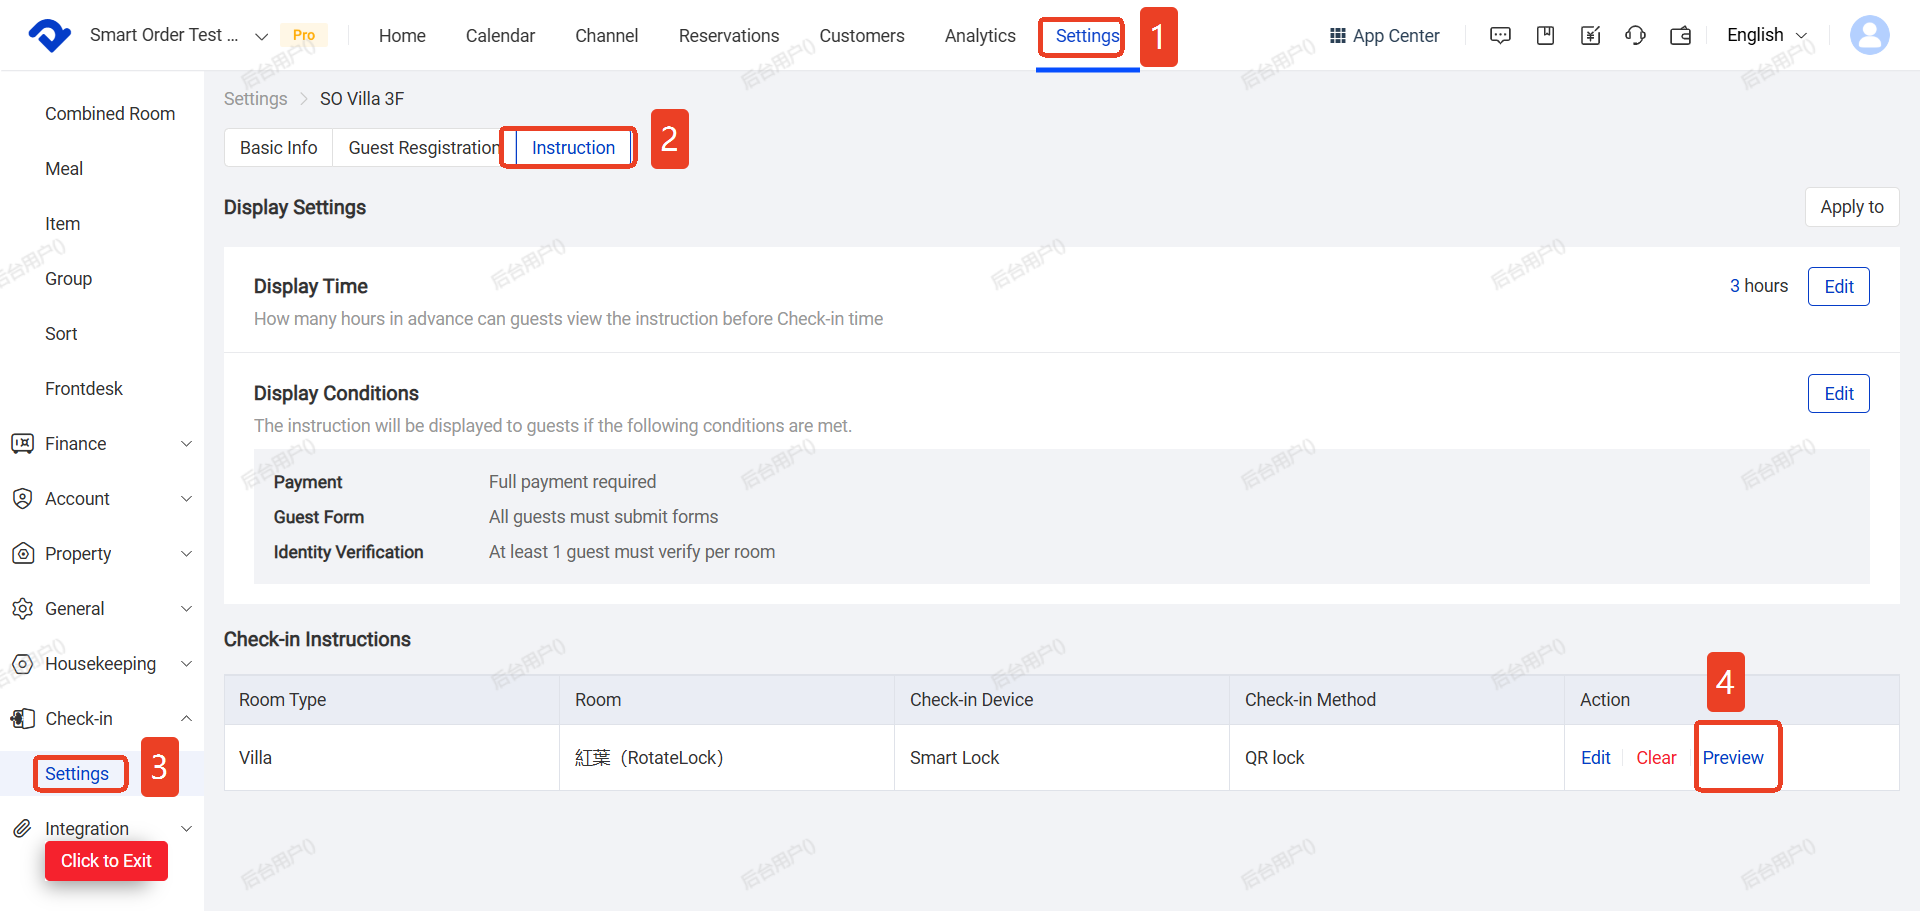
3. Set Up Instructions (Specific Check-in & Access Method)
This section allows you to define the actual check-in guidance guests will see.
(1) Click the Instructions section
(2) Click Edit next to Display Time.
Set how many hours before check-in the guide becomes visible (e.g. 24 hours) and click Save.
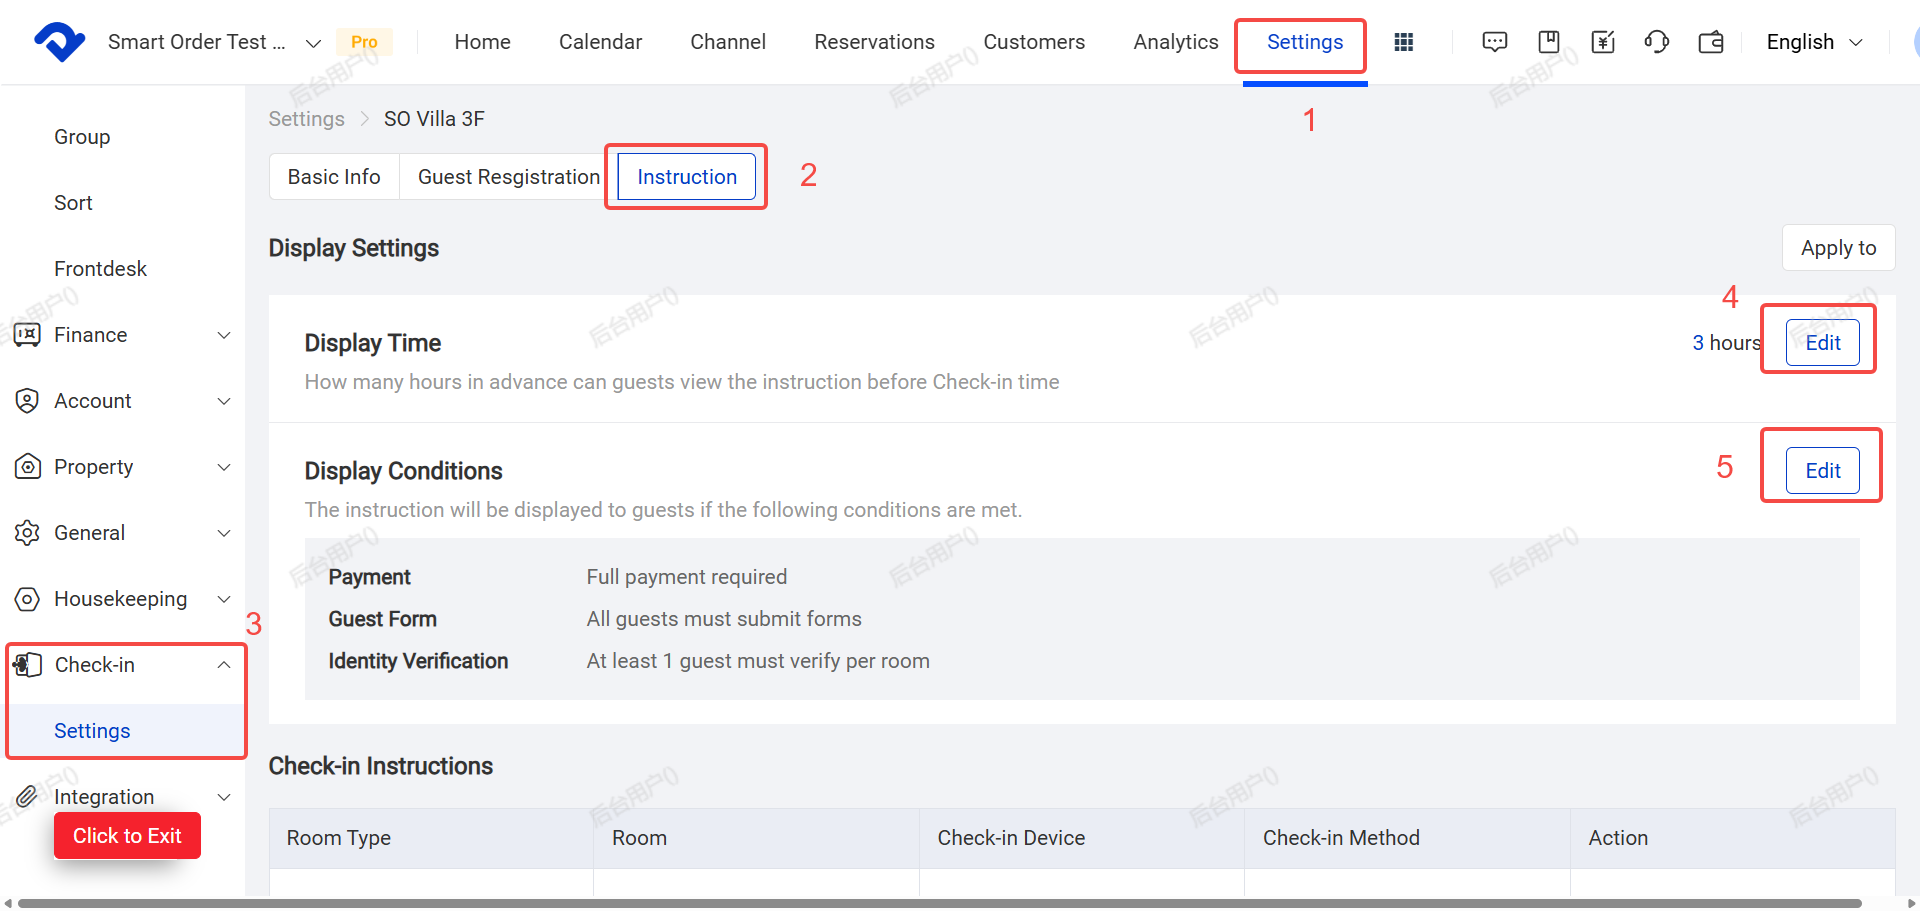
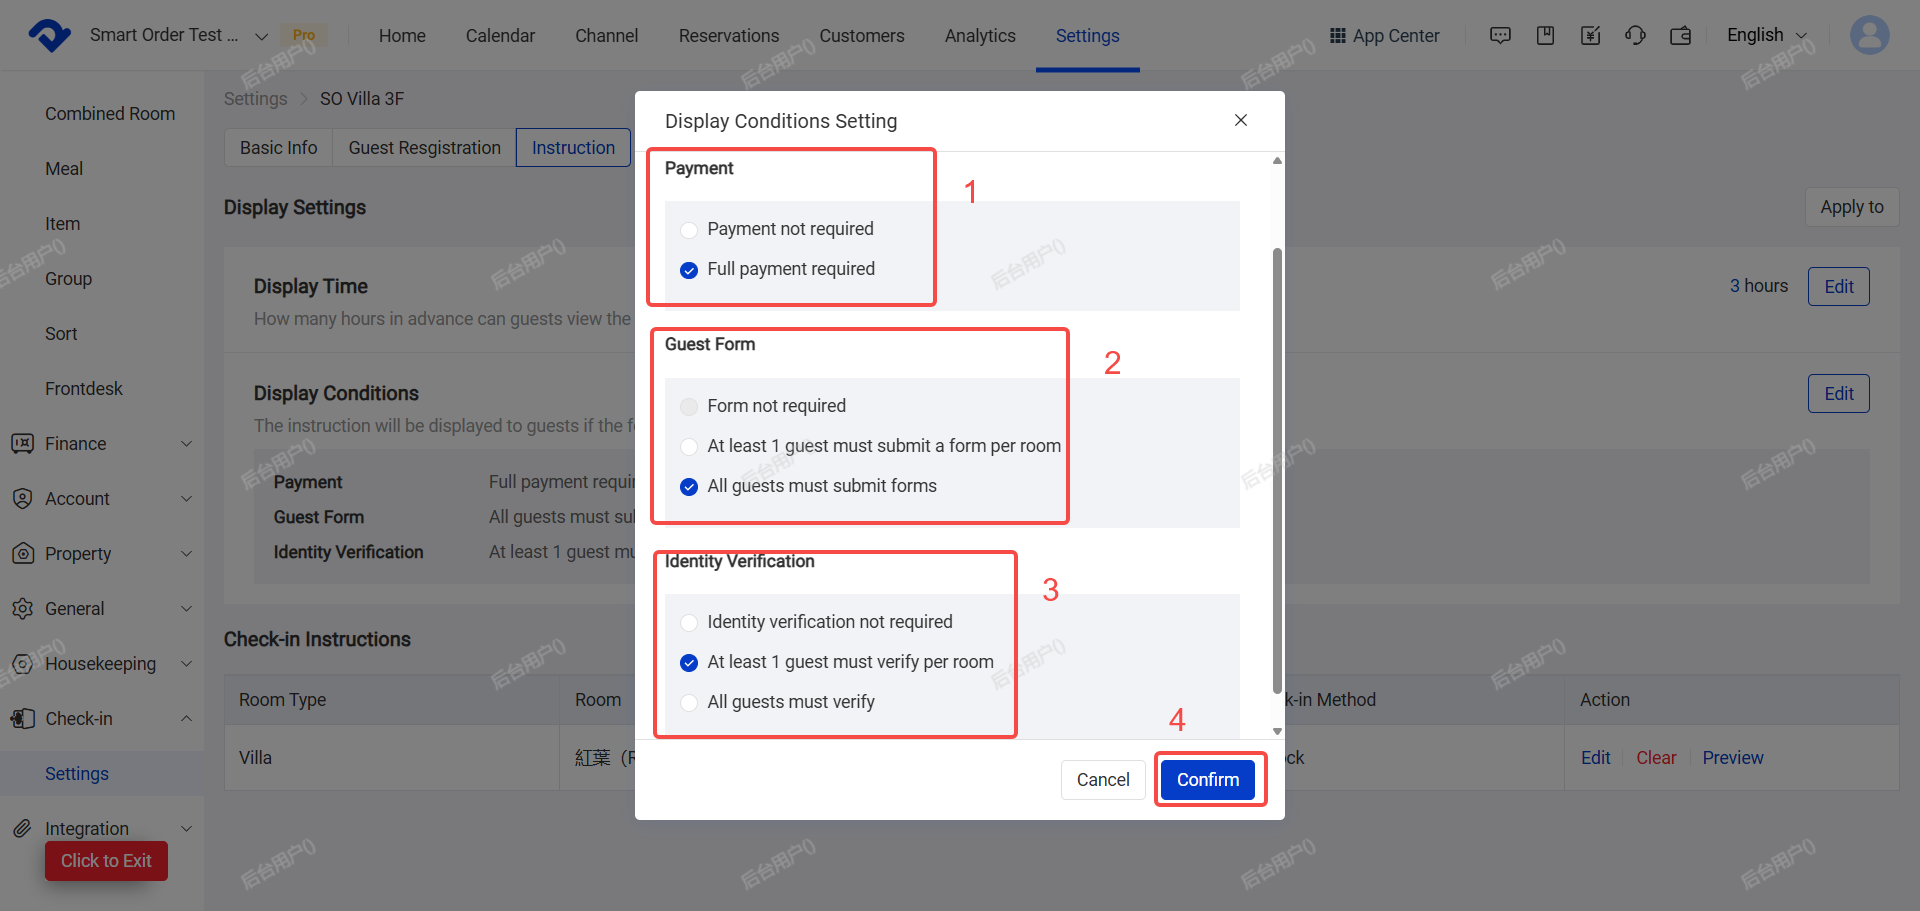
(3) Click Edit next to Display Conditions.
a. Payment Restriction
- No payment required:Guests can view instructions without any payment.
- Full payment required:Guests can only view instructions after paying the full amount. If the booking is not fully paid, you will need to record the payment manually (How to record the payment ,please refer to the Payment/Refund & Checkout guide).
b. ID Verification
- No verification needed
- At least 1 guest per room must verify
- All guests must verify
(4) Click Confirm.
(5) Click Edit under Instructions section to customize:
- Check-in Device: Select door lock or check-in kiosk (or None)
- Check-in Method: e.g. “selfcheckin”, “keybox”, etc.
- Check-in Instructions: Add text, images, and links.
- Click Confirm.
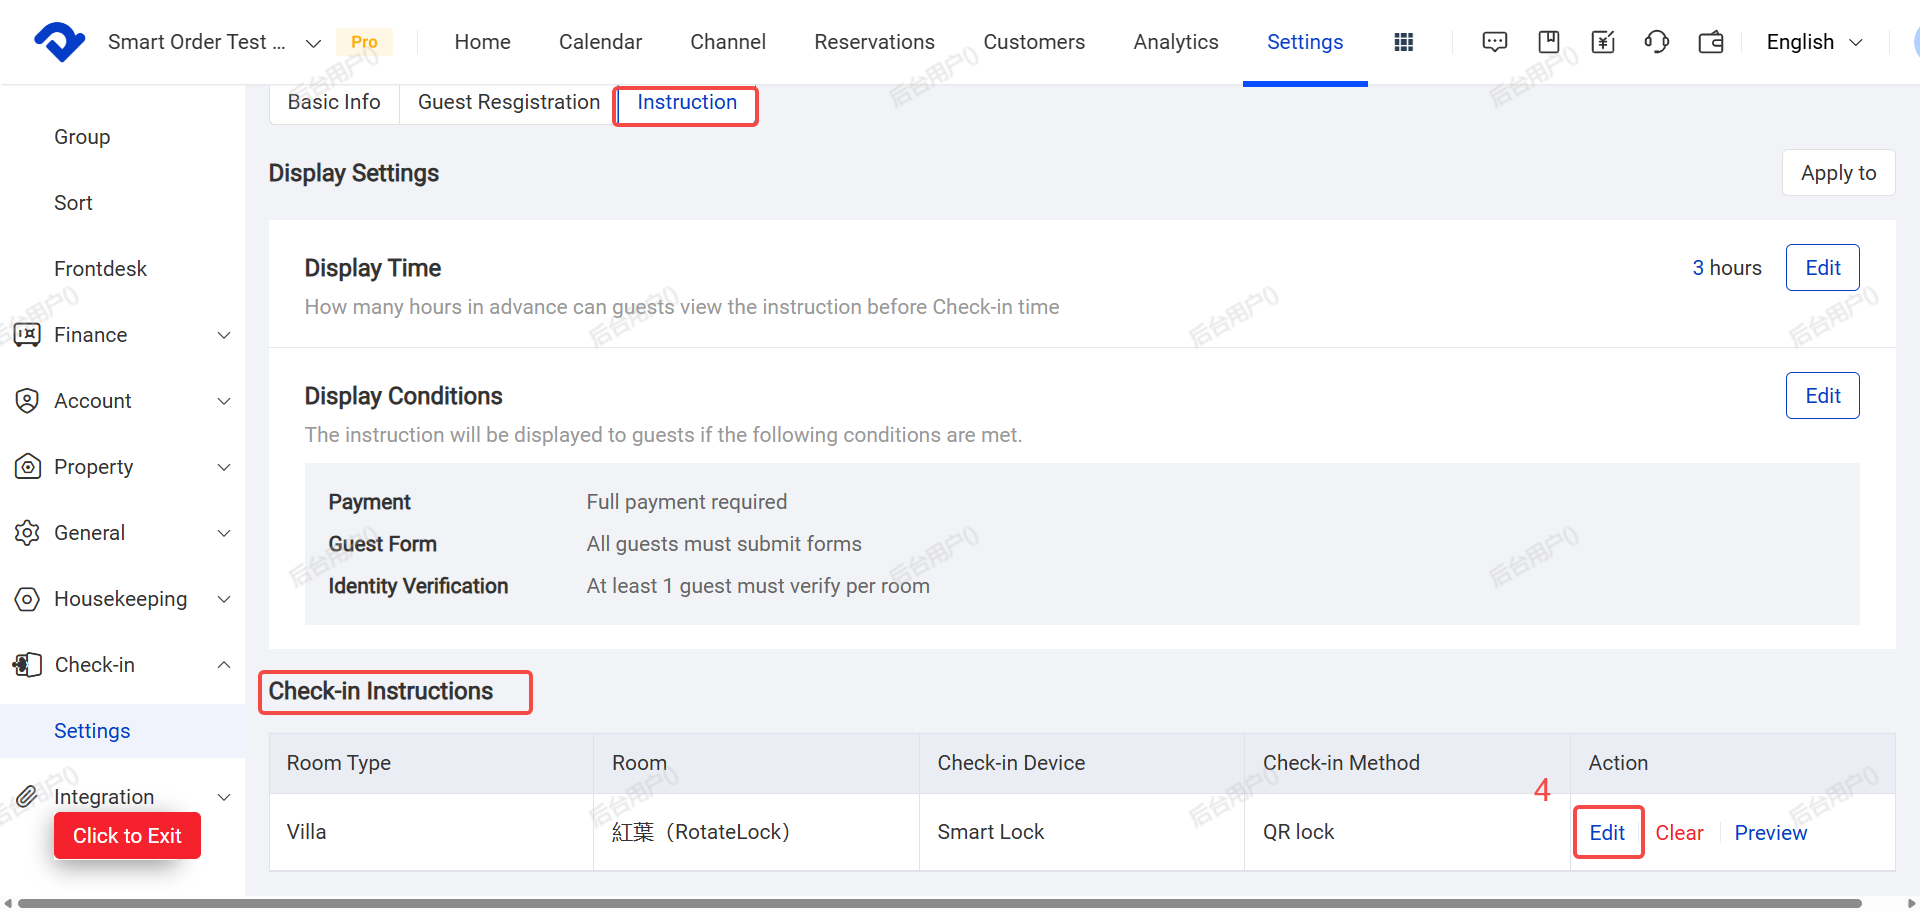

(6) Click Preview to see how it will appear to guests.
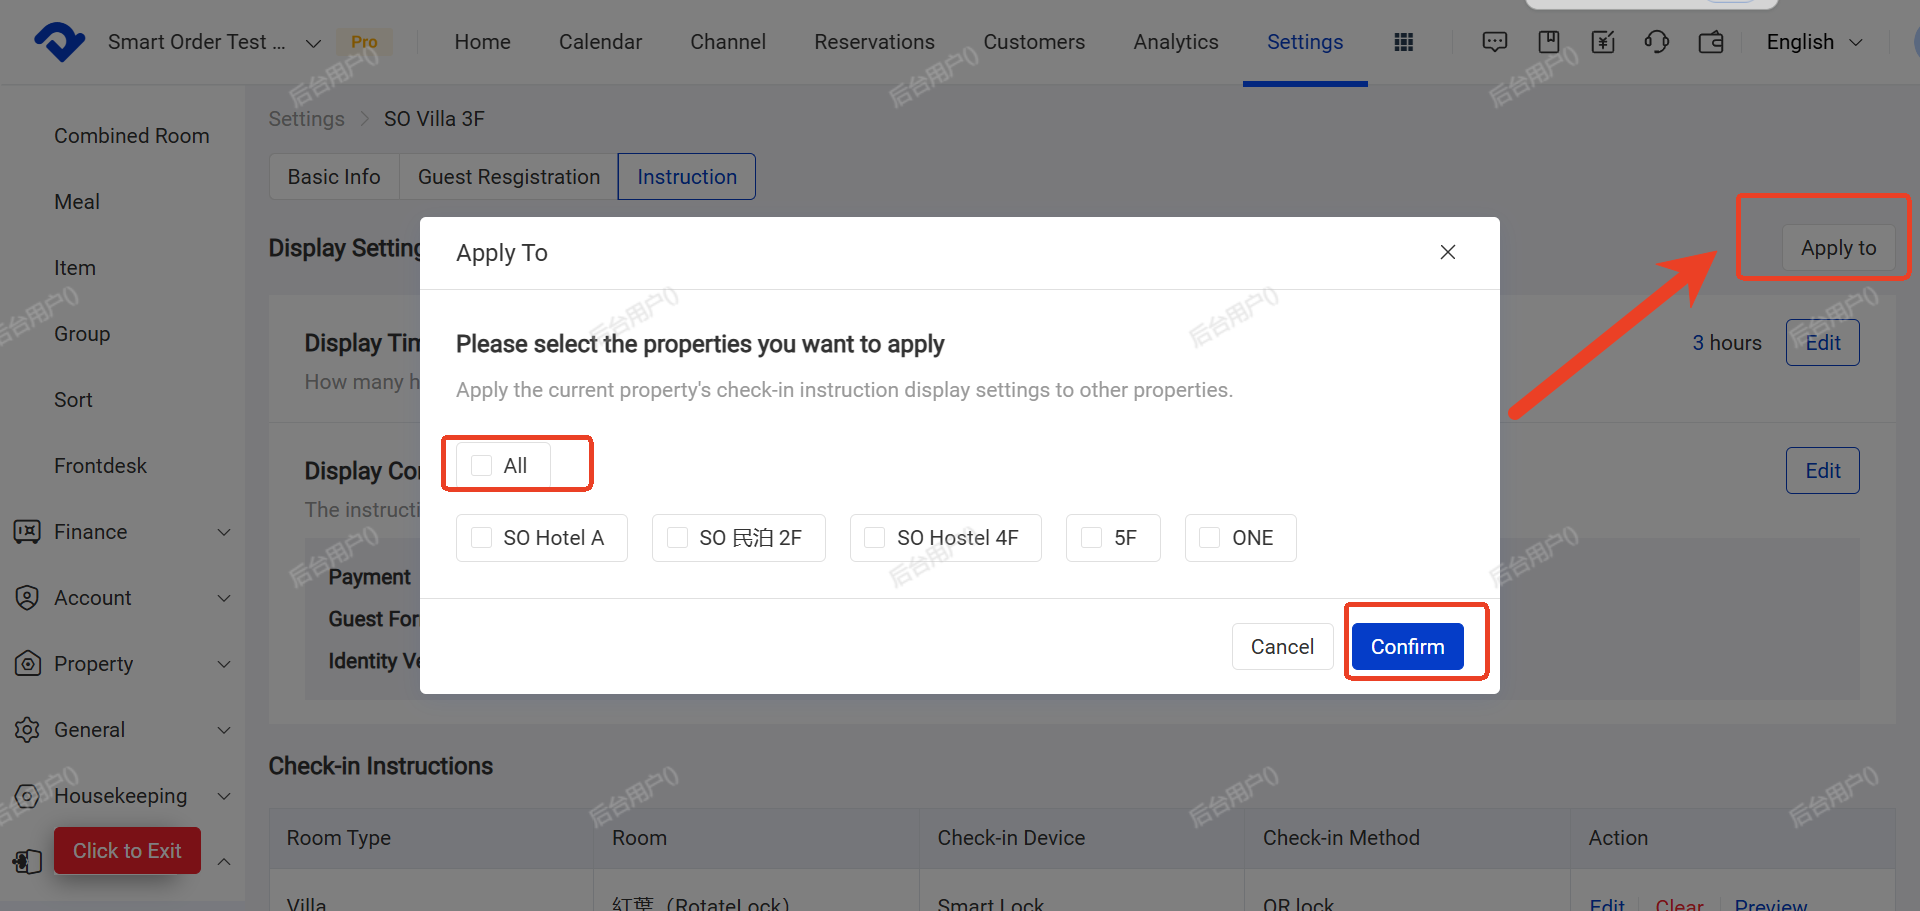
For Multi-Property Groups:
Use the Apply To button in the top right to apply the same settings to other properties.
(7)Enable Self Check-in Function
- Return to the Basic Information page.
- Turn on the Self Check-in switch.
Once enabled, the system will automatically generate check-in codes for new bookings and send automated self check-in messages to guests.

